Arcade Cabinet (bartop, 2-player)

Arcade Cabinet (bartop, 2-player)

Ahhh Christmas break! What a wonderful time of the year – too bad it goes by so quickly… ๐Ÿ™‚

Anyways, to keep my brains occupied during time off from work (and, let’s be honest, have some fun geeking out!), I finally decided to build an arcade cabinet. I know, seems like everyone is building one, but that’s only because they’re so cool!


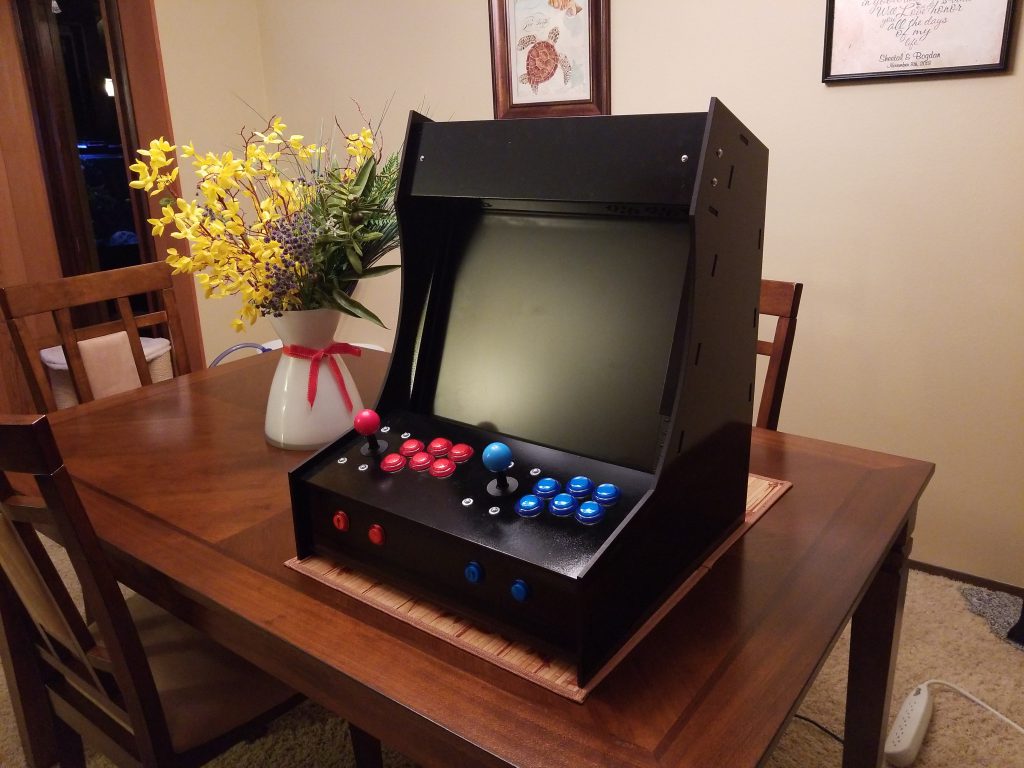
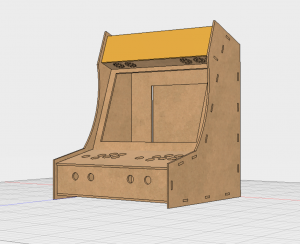
Here’s the final result:


ย 


For anyone visiting from Reddit, I also prepared an Imgur album, in case you may prefer that.

Pleaseย note that the description of the process is different in each case, so for most information I’d recommend reading both this post and the album on Imgur:
https://imgur.com/gallery/JgjLf


I started working on the project, as always, with a research, to look for inspiration, think various aspects through, and decide how I want to design my own cabinet.

But before I dive into details, let’s see what is needed to make one.


Bill of materials

  • 1/4″ MDF sheets
    • I had them cut to 24″ x 18″ as this is the max size I can use in laser cutter, and my design needs 6 sheets total.
    • I was considering plywood, but I was discouraged by how difficult it became to find a straight sheets where I shop…
  • Raspberry Pie 3, case, power supply, SD card
  • 17″ LCD monitor, along withย necessary cables
    • The monitor I used had only DVI and VGA outputs, while Raspberry Pie has HDMI input, so I had to throw in DVI to HDMI adapter.
    • Note that my design was driven by the dimensions of the bed for the laser cutter I have access to, and as such 17″ is the max size I could use. It doesn’t feel small though, given the distance from the screen.
  • Small speakers
    • I used USB-powered speakers, to avoid the need for one more power socket,
  • Arcade joysticks and buttons
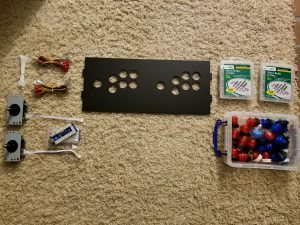
    • Those can be easily purchased in kits, along with USB controller boards, cables with quick connect, etc.
    • Here’s the set for 2 players I used,
  • Extension cord (with 3 sockets),
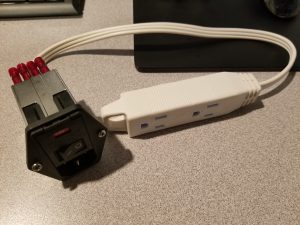
  • “Kettle plug” socket with switch and fuse, along with quick connect plugs (insulated, safety first, especially when we move up from low voltage DC to AC), I picked mine from a local electronic store, but it’s also available on Amazon,
  • Magnetic cabinet door catches
    • I used those (they come with screws, but I ended up using bolts instead)
  • Hinges,
  • Primer, paint, etc. for the finished look you’re after,
  • Various screws/bolts/nuts/washers (note: I used both metric [forย VESA monitor mount] as well as imperial for all other needs and I feel like generally it’s good to have assortment of both handy ๐Ÿ™‚ ),
  • Optional: USB controllers for your favorite gaming system, if you’d like the ability to support more players, or just like their ergonomics ๐Ÿ™‚

I used laser cutter to cut all the body panels, but more conventional tools could also be used instead ๐Ÿ™‚ย (jigsaw, band saw for button cutouts, etc.).


Design

You can find various designs easily online, or even buy pre-cut body panels to assemble your own cabinet (there are plenty to choose from on eBay), and then add hardware inside, but I like to make my own designs – it’s half the fun ๐Ÿ™‚

It also gives you full control of all the aspects of the design, enables to re-iterate quickly to make improvements (i.e. for issues identified on the first fitting/test assembly), you don’t have to settle on compromises made by someone else (which could’ve been more applicable in their case) and in the end it just feels good to know that you made it all…

As always, I jumped into Fusion 360 and started sketching.

For this type of design, where we have side elements keeping all the pieces together (“sandwiched” in between), instead of designing each element separately (with its own “sketch”), I find it significantly more efficient to work off of a single sketch which defines dimensions of all elements and is a go-to place to make changes in sizes, relative positioning, etc. Then you can simply extrude the profiles from the master sketch into their own components.


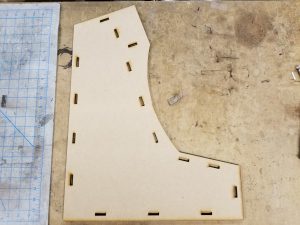
Another decision I made early on was to include the tabs/slots in my design. Not everyone may like this approach (i.e. the side panels have visible tabs and are not a solid piece of wood, which affects aesthetics), but I like the ease of this approach for fitting the parts as well as convenience of final assembly and general sturdiness.

Also, I don’t have access to a bigger working space where I could arrange the elements and clamp them for hours… And with tabs/slots pieces just snap in together ๐Ÿ™‚

Note that I skipped on the classic T-molding present in the original arcade cabinets. Unfortunately, I don’t have router table to accommodate those, and alternative solutions (gluing few panels with different sizes to have slot in the middle required for T-molding) didn’t seem worth it.


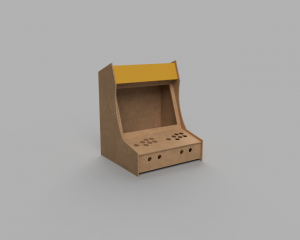
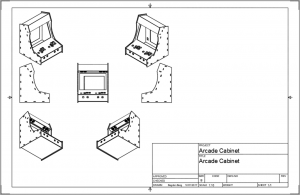
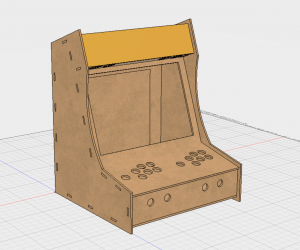
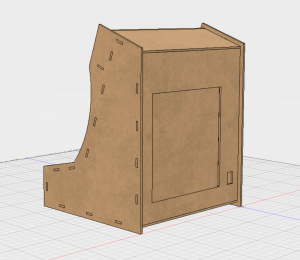
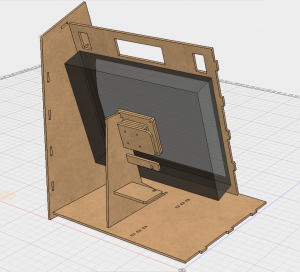
Here is the design I made:

ย 


And a short video showing how the separate elements are organized:


I continued to work on the design throughout, whenever I discovered something that could be improved. The biggestย update was related to the monitor mount. At first I thought of using some kind of brackets to keep monitor in place (a problem I’d solve when I get there, thus not much thought in the initial design), but when doing first test assembly, I decided to also design aย mount for the monitor, which would integrate with the construction and provide more support.

That was something I didn’t plan on doing at first, but now I feel that it made the design feel more complete, and assembly much easier. The cabinet feels very sturdy and I don’t have to worry about monitor shifting around, or becoming loose.


Making the cabinet

All the profiles of body panels were exported from Fusion 360 into .dxf file format and then cut on laser cutterย from Universal Laser Systems.

Before committing to a large laser cutting job, I recommend doing few test cuts. This is especially helpful if you use tabs/slots as it can help you understand the impact of laser kerf and adjust your design dimensions if needed. Just make a small test piece with one tab and one slot and work off of that (to speed up the process and minimize the amount of wasted material). This is even more important when working with a new material.

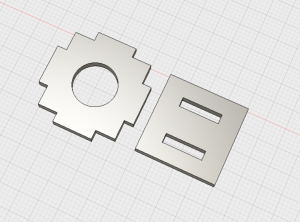
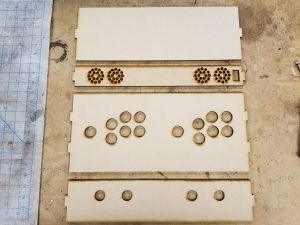
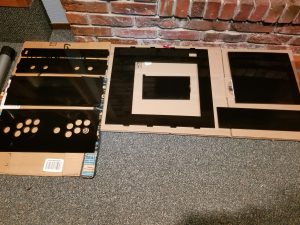
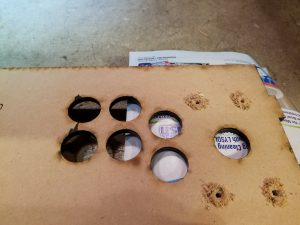
For reference, here are the parts I made for testing the dimensions and fitment of the tabs/slots and buttons (took me a quick 3 cuts to get the dimensions perfectly):

Cutting all the body panels took under 2 hours (this doesn’t include test cuts or iterations on the design, but is simply a total time if I were to go ahead now and cut the panels again in their final form).

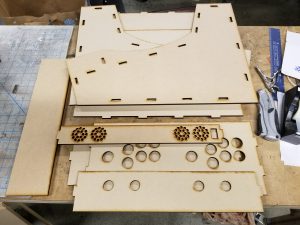
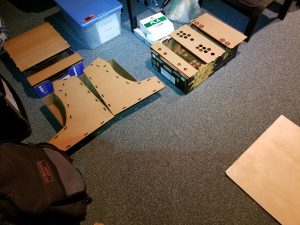
Panels fresh from laser cutter:

ย 

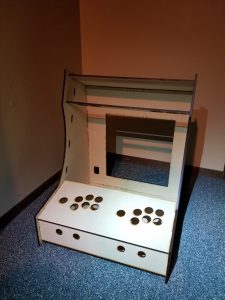
First assembly, to test the fitment of the parts, identify potential issues, etc. It’s better to make sure before we dedicate few hours into finishing the parts ๐Ÿ˜‰


Installing the monitor

At this point I tried fitting monitor, and this is when I decided to do it the right way – design a strong, stable mount, instead of depending on some brackets and other flimsy solutions.

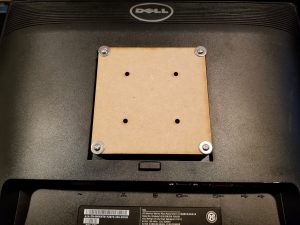
Monitors already come with VESA mounts, so it only seemed natural to take advantage of this fact. And thisย makes it possible to use different brands/models of monitors as well (potentially with some small adjustments, like different cutouts in the body panels to enableย unobstructed access to the monitor’s control buttons).

Note that VESA mount uses metric screws, and the spacing between holes is not in inches (even though it’s very close to 4″, don’t be mislead, it’s actually 10cm – ask me how I learned that… ๐Ÿ˜‰ ).

There’s one interesting property of VESA mount, which I took advantage of – they’re installed parallel to the screen. It means that I could easily define the angle of the mount to make sure that the monitor will be properly aligned with the front frame of the cabinet (since those are same angles).

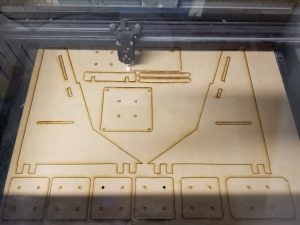
Laser cutter at work:


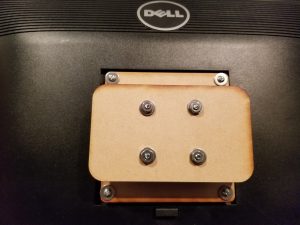
You may see that there are multiple instances ofย the same elements – those are used as spacers to allow me to position the monitor more to the front/back as needed.

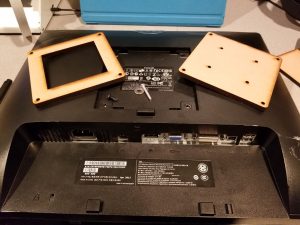
I screwed the pieces onto the VESA, and assembled the “head” of the mount. The “wings” at the end of the mount simply slide into 2 legs that are then attached to the base of the cabinet.

Notice that I’m using washers everywhere – MDF is quite a soft material, so I highly recommend using washers to make sure the connections are stronger.

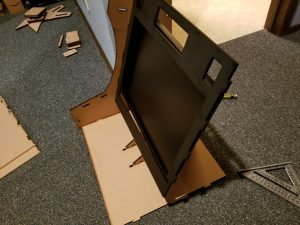
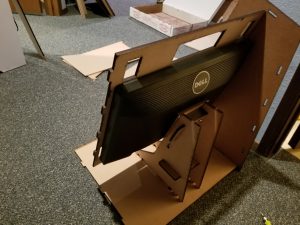
Making sure that the monitor fits nicely in the cabinet:

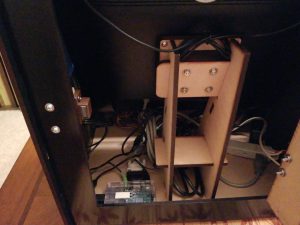
Notice a horizontal “beam” between the legs of the monitor stand. This serves 2 purposes:ย connects and stabilizes the legs for extra sturdiness, as well as serves as a simple shelf, to allow better organization of the internals.


Finishing the body panels

Since the panels were cut out of MDF, there’s one important thing to note: MDF absorbs finishes very quickly. As such, we’d either need to use layer after layer of paint, or first seal it. I decided to seal it with Shellac (following the principle of “Shellac sticks to everything and everything sticks to Shellac”). Two or 3 layers of shellac should seal MDF enough to continue with painting – it works great as a sealer and primer in one. It also dries very quickly.

Then I proceeded with painting the cabinet. I wanted for it to look… classy, nothing too crazy ๐Ÿ™‚ So I went with black spray paint. Again, to be applied in fairly light coats, I ended up with 3 or 4 coats depending on the panel (I was making some adjustment in the design at this stage, thus some panels needed to be re-cut and started fresh).

To seal it off, I used a spray lacquer. I had few cans around so that seemed like a perfect application. I’m sure polyurethane would work just as well, if not better.ย I recommend light sanding between coats to remove all bubbles and uneven surfaces, in order to achieve the desirable mirror-like finish. It can be a scary thing to do (immediately after sanding things look significantly worse, so the first time around you’ll be pretty sure it’s destroyed), but don’t lose hope – it’s expected and it gets better with every next layer ๐Ÿ™‚

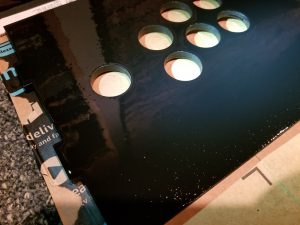
Body panels ready for finishing (first few layers of shellac to seal/prime MDF, then paint, and finally lacquer):

And somewhere in the middle of the process, between layers of lacquer. Notice the small bubbles still visible – those can be removed by sanding between the coats.

ย 

Note that all the panels except the 2 biggest side panels were painted only on 1 side, while the side panels were painted on both (there’s a “lip” sticking out for a 1/2″ from the edge of the side panels to the edge of every other panel attached to the sides, and we need to make sure that this lip also looks finished).

After all was said and done, I used 3 cans of Shellac, 2 cans of spray paint, and 3 cans of lacquer. More than I anticipated, so I’d recommend buying a bit more than you think you may need, to save yourself a shopping trip later on.


Electronics

If you’ve been looking at making an Arcade cabinet yourself before, there will be no surprises in this section for you ๐Ÿ™‚

Firstย task was to install and wire the joysticks and buttons. Do this after the wood has been finished, but before it’s all assembled into a cabinet ๐Ÿ™‚

This is when I realized that I forgot to include screw holes for installation of joysticks, and even though I re-cut few panels previously after making changes in the design, I decided to solve this with a drill. I’ll be using washers here as well, so that gives me a wider margin of error if it so happens that the drill rips a bit of MDF on the finished side.

To minimize the risk of damage to MDF when drilling holes, use a piece of sacrificial wood underneath the MDF board. I used a piece of paper to protect the finished side of MDF from the wood underneath and drilled this way.

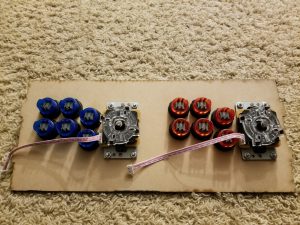
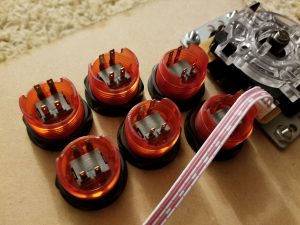
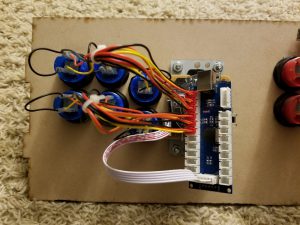
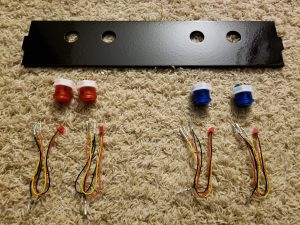
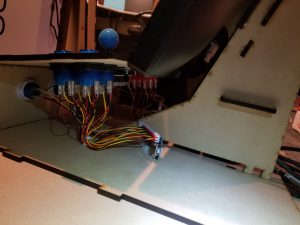
Time to install all the buttons and wires:

To make wiring easier and less error-prone, make sure that all buttons are oriented in the same way. This way it’s easier to keep connecting all wires in the same order.

After connecting buttons on the control panel, it was time for the front panel, with Start and Select buttons:

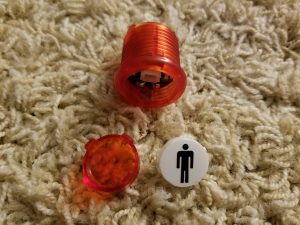
I added labels (P1, P2) to the faces of Start buttons. Those buttons can be disassembled easily by simply pushing in 2 tabs on the sides and pulling the face outwards.

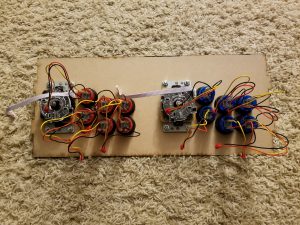
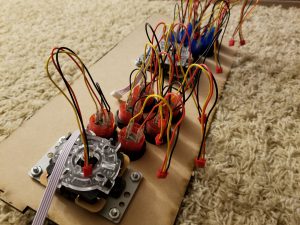
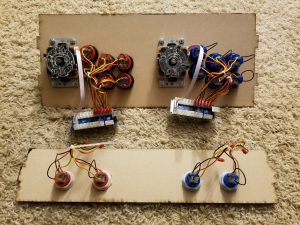
Everything wired and ready for assembly:


Final assembly and miscellaneous hardware

There were few additional pieces required to complete the cabinet.

I started with the kettle plug, along with an extension cord (I used insulated quick connect clamps to connect those 2).

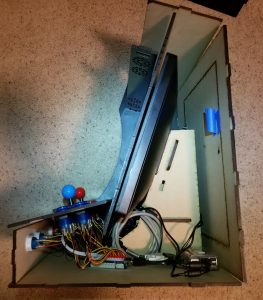
Then I added the heartย of the machine – Raspberry Pi 3, and connected it all (RPi, 2x USB controller boards, power and video to the monitor, speakers):

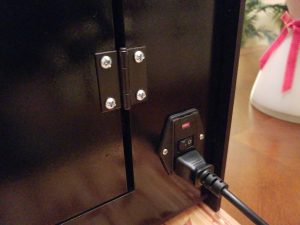
For the door in the back of the cabinet, I used short “piano hinges”, with holes already cut on laser cutter (I updated original design to account for those, to avoid having to do more drilling later on):

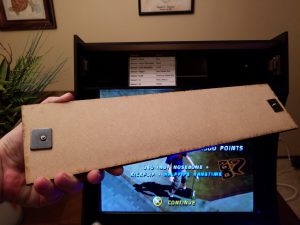
And to keep the door locked, as well as the front piece on the top of the cabinet (“marquee”) in place, I used the magnetic cabinet door catches:

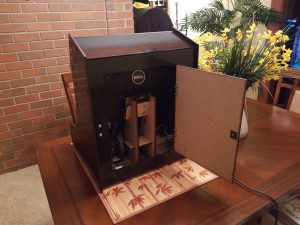
I also hid a cheat-sheet with the global button shortcuts for RetroPie/EmulationStation in that bonus storage area ๐Ÿ™‚


Software

I’m using RetroPie, and everything can be found at: https://retropie.org.uk/

I decided to use the ready image, so the complete setup was a breeze. Then just add roms of your choice (keeping mind the laws – generally it’s allowed to use ROMs of games you own physical copies of), and everything is ready! If you’d like to dive deeper into the configuration, different versions of emulators/BIOS, or customize the looks (splash screens, themes, etc.) the Wiki available on the official website is a great place to start:ย https://retropie.org.uk/docs/

There’s at least one alternative to RetroPie, but I didn’t have a chance to play around with it yet:
http://www.lakka.tv/


Photos of the completed arcade cabinet

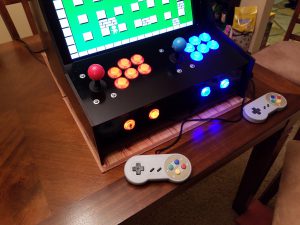
Finished look (along with some cool NES controllers on USB, to allow for up to 4 players!):

ย 

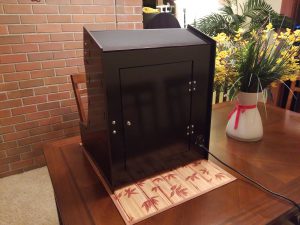
Look at the back:

And inside:

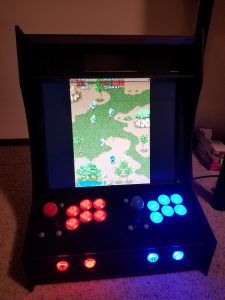
Ready to play!


Videos

Complete project:


First time booting after the assembly:


Special video with a celebrity making an unexpected appearance ๐Ÿ™‚ (our yellow-sided green cheek conure, Bella)


Shared links:

Since I completed this project, it’s been featured on few websites:


Looking for moreย inspiration?

If you’d like to read more on this subject, here are some interesting resources I found while doing my research:


If you build an arcade cabinet yourself, please share! ๐Ÿ™‚

Comments

429 responses to “Arcade Cabinet (bartop, 2-player)”

  1. massimo Avatar
    massimo

    Ciao!
    progetto molto bello e pratico ! Ti dispiacerebbe condividere i tuoi piani? Mi piacerebbe costruirne uno. ho una macchina da taglo gravograph
    Grazie!

    1. Bogdan Avatar

      > Hi!
      > very nice and practical project! Would you mind sharing your plans? I’d like to build one.
      > I have a gravlo taglo machine
      > Thanks!

      Hey Massimo,
      Sure thing – plans sent. Hope it works for the workflow you use with your laser cutter!

  2. TheMan Avatar
    TheMan

    Looks great!, could you send me the plans as well?

    1. Bogdan Avatar

      Hey there! Sure thing – plans have been e-mails, please check your inbox ๐Ÿ˜‰

  3. Myke Kain Avatar

    Hello,
    I love your website and design! I was getting frustrated with creating my own laser cutting files and would (like many others) like to know if I can use your design. I’m also going to do a write up of my project once I’m done. Would you mind being referenced?

    -Myke

    1. Bogdan Avatar

      Hey Myke. I sent you the files. Good luck with the build, and please share once it’s ready, I’d love to see it. And let me know if you decide to post it on your blog! ๐Ÿ™‚

  4. Tommy Avatar
    Tommy

    Wow, it a very good design. Could you please share the dxf file to me?

    1. Bogdan Avatar

      Hi Tommy, thank you for the kind words. I sent you the files, hope they work for your laser workstream!

  5. Bill Scoular Avatar
    Bill Scoular

    Hi, Iโ€™m glad to have stumbled upon your post! I operate two Universal lasers, would love to try out your files if you would be so kind.

    Thanks,
    Bill

    1. Bogdan Avatar

      Hi Bill, I just sent you the plans! I’m sorry for the long wait ๐Ÿ˜‰

  6. dave Avatar

    HI Bogden, Absolutely in awe of what you have made here, I’m not exactly confident i can do this myself but would love to try, Would you mind sharing the files so I can cut the shape from my laser?

    ohh, can i also ask what power laser you used to cut?

    Thanks Again and awesome work!!

    1. Bogdan Avatar

      Hi Dave, I used a 45W laser to cut this design. Since the profiles are made in MDF, you could probably get away with doing couple separate passes on a lower-powered laser as well, just make sure to account for the depth of the first pass when making adjustments for the focus of the laser ๐Ÿ˜‰
      And of course, I emailed you the plans!

  7. Slawek Dymczyk Avatar

    Hi/Czesc!
    Really cool and clean design! I have Openbuilds cnc machine, starting to learn it slowly and eager to try something like this. I’d like to ask for dxf files as well if it is still possible.

    1. Bogdan Avatar

      Czesc Slawek! Milo widziec rodaka ๐Ÿ˜‰ I e-mailed you the plans!

  8. Josh Avatar
    Josh

    This is so cool! I would love to make one of these for my friend for a housewarming gift! Would you be able to share the plans with me? He would lose it if I made him one of these!

    1. Bogdan Avatar

      Hey Josh. That would make for an amazing gift, for sure! ๐Ÿ™‚ I sent the plans to your e-mail. Let me know if you have any questions during the build process!

  9. David Avatar
    David

    Hola muy buen diseรฑo podrรญas compartirme los archivos dxf te lo agradeceria

    1. Bogdan Avatar

      Hola David ๐Ÿ˜‰ Te enviรฉ los archivos por correo electrรณnico.

  10. Jorge Avatar
    Jorge

    Hi Bodgan. Geat job!
    Would you share the plan for laser cut? ๐Ÿ™‚
    Thanks!

    1. Bogdan Avatar

      Hey Jorge, thank you! Files sent ๐Ÿ™‚

  11. Kostas Avatar
    Kostas

    That is a great piece of design and work Bogdan and thanks for sharing with the community!
    I am also interested in designing and building a larger tabletop arcade cabinet. I really like the idea with the protrusions on the side of the panels to bind them tightly (i am also working on Fusion 360!) I would be grateful if you could share the dxf files for your model! Thank you very much!

  12. Bogdan Avatar

    Hey Kostas. The protrusions can be a unique design element – you can decide to paint/finish them in different accent color, or in the same one as the remainder of the side panels (which makes the protrusions almost disappear, yet still provide the structural support).

    I e-mailed you the plans. Good luck with the build!

  13. Jason Avatar
    Jason

    Would you mind sending me a copy of the plans? I have a makerspace and think this would be a good project for the kids.

    Thank you!

    1. Bogdan Avatar

      Hi Jason! I just e-mailed you the plans, let me know if you have any questions. I hope maker space users have lots of fun working on this project! ๐Ÿ™‚

  14. Jordaine Wisdom Avatar
    Jordaine Wisdom

    Hi, This is really impressive and Iโ€™d like to make one to give as gift for Christmas. Would you mind sending the file for the laser cutting?

    Thank you,
    Jordaine.

    1. Bogdan Avatar

      Hi Jordaine, this project would make for an amazing gift (I wouldn’t mind to get one more like that either! ๐Ÿ™‚ ).I sent you the plans along with some information to help with the project. Hope that helps!

  15. Dimitrios Panagakos Avatar
    Dimitrios Panagakos

    Wow this looks like such a fun project, id love to get this laser cut myself, are you sharing or selling your design anywhere?

    thank you!

    1. Bogdan Avatar

      Hey Dimitrios! I’m happy to share the design with others – e-mailed you the plans just now. Good luck with the build! ๐Ÿ™‚

  16. Gary Conway Avatar

    Bogdan,
    well done this is great design. I have almost all parts required to make a bartop arcade machine. I’m planning on building it over Christmas with my son.
    I do have access to a laser cutter at my work place so I am reluctant to buy a pre-made cabinet from ebay as I prefer to do everything myself. I can use autocad too which i would need to do as I have an old 19 inch 5:4 monitor which I plan to use but most cabinets will struggle to fit this in nicely.
    We have everything now other than the power switch (love your idea) and a cabinet, I’m sourcing the rest quickly to ensure I have everything we need to build our project over the christmas break.
    We would be very appreciative if you could share your dxfs for me as inspiration or to modify and tweak to suit what we want.
    Regards,
    Gary & Aaron Conway

    1. Bogdan Avatar

      Hi Gary and Aaron! Thank you so much for the kind words. I e-mailed you the files with some additional information, I hope it helps make this project a reality! Good luck and please don’t hesitate to reach out if you have any questions on the build.

  17. Gille Avatar
    Gille

    Hello,

    This looks like a really neat design and I would like to give at try so that I would have my first arcade. Would you mind sharing the laser cutter files?

    Best Regards,
    Gille

    1. Bogdan Avatar

      Hi Gille! Thank you for the kind words ๐Ÿ™‚ I e-mailed you the files. Please refer to the information I shared along with them (e.g. around the thickness of the material my design is made for as well as the minimum laser bed size to accommodate the design). Good luck with the build! ๐Ÿ™‚

  18. Tim Avatar

    Hi Bogdan,

    i really like your bartop design and i am looking for a nice arcade cabinet for our MakerSpace. Would you mind sending me the lasercut files?
    ๐Ÿ™‚ thanks in advance
    Tim

    1. Bogdan Avatar

      Hey Tim! I shared the files with you just now – if you build a cabinet for your Makerspace, please share a photo – I’d love to see it! ๐Ÿ™‚

  19. Chad Avatar
    Chad

    Hello Bogdan.

    Great project, it looks amazing. I have a hobby laser cutter of my own and would love to give your design a try. Would you be willing to share the files with me?

    Thank you,
    Chad

    1. Bogdan Avatar

      Hi Chad! Sure thing, just sent you the files ๐Ÿ™‚ Hope it turns out great!

  20. Ramon Avatar
    Ramon

    Hey Bogdan,

    I really like your arcade cabin project ๐Ÿ™‚
    I am looking for a DIY project so I have something fun to do while being in lockdown (here in The Netherlands) Is it possible for you to share the plan with me?

    Kind regards,
    Ramon

    1. Bogdan Avatar

      Hi Ramon, this is definitely a great project to take on during lockdown! I know some Maker Spaces are now offering limited services, but as long as you can access a laser cutter, nothing should stop you from building one ๐Ÿ™‚ Plans sent. Good luck!

  21. aaron Avatar
    aaron

    Great project may i have the files? thanks

    1. Bogdan Avatar

      Sure thing, Aaron. Sent ๐Ÿ™‚

  22. Gunner Avatar
    Gunner

    Awesome build I’ve been wanting to build something like this for awhile. Could i get a copy of the files? It would give me a big jump start.

    1. Bogdan Avatar

      I e-mailed you the plans, along with some instructions. Good luck with the project!

  23. Bill Avatar
    Bill

    Hello, this came out great. I wish I knew how to design these with those programs. I have a buddy with a cnc router im not sure if this would work but I would love to make one for me and my family. Is there anyway to get the plans? Thank In Advanced!

    1. Bogdan Avatar

      Hey Bill, I’d recommend checking out some online tutorials for Fusion 360 – it looks a bit intimidating at first, but the learning curve isn’t all that steep. And being able to make your own designs is really empowering ๐Ÿ™‚

      I just e-mailed you the plans. I hope they work for the CNC router. Good luck with the build!

  24. Matthew Boyd Avatar
    Matthew Boyd

    Hi there Bogdan,

    I have been admiring your design and was also wondering if you would be so kind as to share the .DXF / laser cutter files with me? Iโ€™m looking a project to do over this lockdown and would really enjoy this.

    Many thanks,
    Matthew

    1. Bogdan Avatar

      Hi Matthew. Apologies for the delay in replying, I just sent you the plans. Hope they work for you!

  25. Brian Avatar
    Brian

    Can I please get the SVG file I just got a Glow Forge
    Thank you

    1. Bogdan Avatar

      Hi Brian. I just e-mailed you the plans, but I haven’t used Glowforge myself, so there could be some changes needed to use the files with your laser cutter… Please share if you decide to build it ๐Ÿ™‚ Good luck!

  26. frank Avatar
    frank

    that looks fantastic and its what ive been looking for to make for the grand kids

    any chance of the dxf files would be very appreciated

    cheers

    666

    1. Bogdan Avatar

      Hi Frank. That would be an amazing project for grandkids… ๐Ÿ™‚ E-mailed you the files just now.

  27. Antonio Avatar
    Antonio

    Hi Bogdan, is so impressive your arcade can you be kind to share your laser cut file please, I will love to create one for sure and remember my childhood.

    Thanks You in Advance

    1. Bogdan Avatar

      Hey Antonio. This is such a blast from the past – playing games I used to spend my pocket money on in the Arcades, from the comfort of my living room (well, more of a rec room, I moved the cabinet around ๐Ÿ˜‰ ).

      I sent you the files, good luck with the build!

  28. yaลŸar Avatar
    yaลŸar

    Hi, This is really impressive .Would you mind sending the file for the laser cutting?

    Thank you,

    1. Bogdan Avatar

      Thank you for the kind words, YaลŸar. I sent you the plans!

  29. Gerardo Avatar
    Gerardo

    Hello Bogdan, this is amazing I just got the electronics and Iโ€™m going to try it out, itโ€™s my first time doing something like this, could you please share your files with me? Congratulations on your project

    1. Bogdan Avatar

      Thank you, Gerardo. That’s a high bar for a first project, I like the ambition! I sent you the files. You can definitely build it, good luck! And please share a photo once it’s done ๐Ÿ™‚

  30. Late Avatar
    Late

    This is so awesome! I love arcade stuff, but I don’t have proper woodworking tools, but a friend of mine owns a laser cutter so i was looking up plans for a laser cut arcade cabinet and yours was exactly what I was looking for! Could you send me the files? I would be really happy about it!

    1. Bogdan Avatar

      Friends with laser cutters are like friends with trucks… we should treat them well ๐Ÿ˜‰

      I sent you the files, good luck!

  31. shaun Avatar
    shaun

    oh wow! please can i request the files to try this out?

    1. Bogdan Avatar

      Sure thing, I e-mailed you the plans, Shaun.

  32. Brent Avatar
    Brent

    Hey,
    Your project looks amazing and exactly what I’ve been looking for, is there any way you can send through the plans please?
    Thanks heaps in advance,
    Brent

    1. Bogdan Avatar

      Thank you for the kind words, Brent. I just send the plans your way. Apologies for the delay! Hope you find them helpful.

  33. Shoaib Avatar
    Shoaib

    Hi, really impressive. If you won’t mind sending the file for the laser cutting?
    Thank you,

    1. Bogdan Avatar

      Hey Shoaib! The plans were sent to your e-mail! Good luck with the build ๐Ÿ™‚

  34. BEGUE Frรฉdรฉric Avatar
    BEGUE Frรฉdรฉric

    Hi Bogdan,
    your job is amazing.
    I would try to make the same bartop with my childs to play with them.
    Do you think you could send your files (step and/or dxf).

    Thanks a lot to your partage.

    Fred.

    1. Bogdan Avatar

      Thank you for the kind words, Frรฉdรฉric! I sent you the plans. Hope the build goes smoothly, good luck and have fun! ๐Ÿ™‚

  35. Andrew Avatar
    Andrew

    Hi – this is a very impressive build and seems to be far superior and more flexible than the one produced by boxes.py! I’ve been wanting to build a tabletop cabinet with my son. As many have asked before I – may I please have a copy of the files for laser-cutting? Thank you in advance!

    1. Bogdan Avatar

      Hey Andrew! I e-mailed you the plans and some additional information. Please share a photo if you build one! ๐Ÿ™‚

  36. Efe Avatar
    Efe

    It look super cool!
    I would like to make one for reminding my childhood, can you share the dxf files?

    1. Bogdan Avatar

      Thank you, Efe! I sent you the files.

  37. Stefano Avatar
    Stefano

    Hi Bogdan,

    I love you project. Can you share the files also with me ?

    Thank you very much,
    Stefano

    1. Bogdan Avatar

      Hey Stefano, appreciate the kind words ๐Ÿ™‚ I e-mailed you my plans.

  38. Tomasz Avatar

    Dzieล„ dobry . Jestem z Polski. ( Europa ) Prosze udostฤ™pnij plany chcฤ™. Uwaลผam ลผe sฤ… bardzo mile zaprojektowane i proste w budowie. Pozdrawiam TOmek.

    Good day . I’m from Poland. (Europe) Please share the plans I want. I believe they are very pleasantly designed and simple to build. Greetings Tomek.

    1. Bogdan Avatar

      Czesc Tomasz! Przepraszam za opoznienie z odpowiedzia, duzo sie dzieje i nigdy na wszystko czasu nie starcza ๐Ÿ™‚ Wyslalem plany na maila, daj znac jesli masz jakies pytania, i powodzenia z budowaniem!

  39. Stewart Avatar
    Stewart

    Could I get the plans for the arcade bartop with the laser cut tabs exactly what we are looking for our work smoko room have 3 laser cutters. Looks great finished.

    1. Bogdan Avatar

      Hi Stewart, I just sent you the plans, along with some more information. Hope that helps!

  40. Mattias Avatar
    Mattias

    Hi Bogdan!
    Impressive build! Looking to do something similar. Do you mind sharing the plans/dxf?
    All the best, Mattias

    1. Bogdan Avatar

      Hey Mattias, I emailed you the plans just now. Please feel free to customize further to suit your needs ๐Ÿ˜‰

  41. Samuel Avatar
    Samuel

    Hey Bogdan, very nice build and excellent work! I am looking to do something similar, any chance you are willing to share the DXF files? My workplace has a similar laser cutter, it has a 50w C02 laser. Do you happen to know the power of yours? I think it should be able to manage 1/4″ MDF.

    1. Bogdan Avatar

      Hey Samuel, unfortunately I don’t have access to the laser cutter at this time (because of COVID), but it was either a 60W or a 80W unit. I’m sure your 50W laser will be able to cut 1/4″ MDF though, you should be able to adjust the speed and power accordingly to find best setting ๐Ÿ™‚

      And I just sent you the plans. Good luck!

  42. Said Abassi Avatar
    Said Abassi

    Hello Andrew. Here from Holland I’am interested in your plans. Can you send them to me, please? Thanks a lot.

    1. Bogdan Avatar

      Hi Said, I emailed you the plans just now. I hope they fit your workflow! Good luck with the build ๐Ÿ™‚

  43. Carl Avatar

    Can you please send my the plans too. I really like your design and want to make the bartop for my self.

    Thank you

    1. Bogdan Avatar

      Hey Carl! I just emailed you the plans, alongside some more information and details. Hope this helps and good luck with your build! ๐Ÿ™‚

  44. Martin Avatar
    Martin

    Hi Bogdan, this looks great! Well explained too. I think I will get access to a laser cutter, so if you could send the plans I would be really grateful. I would love to build this! Thanks!

    1. Bogdan Avatar

      Thank you for the kind words, Martin. I just sent you the files – hope they fit your needs and workflow with the laser cutter you have access to!

  45. Mark Avatar
    Mark

    Hi Bogdan,
    This is fantastic!
    I am looking at completing a similar project with my highschool students. We have a game theory class where students design and create games. It would be great if they worked towards making their own custom cabinets to play their games!! Are you willing to share these design files? It would be a great case study to help them through the design and manufacturing process.
    Thanks, Mark

    1. Bogdan Avatar

      Hi Mark! That sounds like an amazing class, wish I had opportunity to participate in such classes… ๐Ÿ˜‰ I e-mailed you the plans. Good luck to you and your students!

  46. Geoff Avatar
    Geoff

    Hi Bogdan, not sure if you still email out the files but I would appreciate a copy of them as well. It sure would save me some time!

    Cheers!

    1. Bogdan Avatar

      Hi Geoff! Sure thing, I just sent the files to your e-mail. Good luck with your build! ๐Ÿ™‚

  47. Ruslan Sharipov Avatar
    Ruslan Sharipov

    This is a fantastic work! Could you please share the files?

    1. Bogdan Avatar

      Thank you, Ruslan! I just e-mailed you the plans ๐Ÿ™‚

  48. Ben C Avatar
    Ben C

    You did a remarkable job on this project, would love to make one for the kids for christmas! Are these files available anywhere for the laser cutting?

    1. Ben C Avatar
      Ben C

      Realized the date of this, Assume files aren’t available lol. Shame this is a really nice build! good luck with everything else

      1. Bogdan Avatar

        Hi Ben! Apologies for the delayed response, things tend to get rather busy at work and I then get behind on replies on the blog… Files are very much still available! Please check your inbox ๐Ÿ™‚

  49. Marval112 Avatar
    Marval112

    Hi Bogdan, this looks amazing !! It will a present for my kids !!

    Could send the plans please ?

    I would be really grateful.

    Thanks!

    1. Bogdan Avatar

      Hey Marval, I sent the files! That could make for a wonderful gift, please let me know if you have any questions with the build. Good luck!

Leave a Reply

Your email address will not be published. Required fields are marked *