
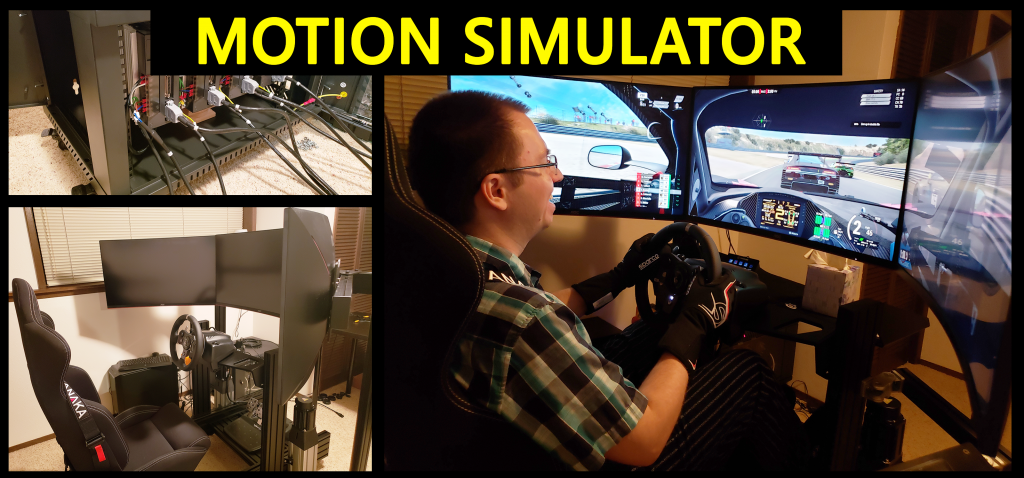
DIY Motion Simulator
- Part 1 – Project overview – What is it and what is it so much fun? 😉
- Introduction, what is this about?
- Showcase of the completed project (including video!)
- The “SFX-100” project
- Bill of materials and cost breakdown
- 3D printed parts
- Competitive landscape and price comparison
- Manuals for motors and controllers (download links)
- Part 2 – Electronics
- Part 3 – Linear actuators
- Part 4 – The rig
Part 1 – Project overview
What’s this about? 😉
As you may have seen from some of my other posts on this blog, motorsports and cars in general are one of my passions. I try to attend at least couple track days in a season, and enjoy circuit racing greatly. However, costs can add up quickly, and living in Seattle leaves us with a lot of rainy days through fall/winter/spring, somewhat limiting the time window for optimal conditions on the track. Although racing in rain as an art in itself… 😉
With the quality of current simulations – mostly on PC, but I’m by no means bashing on console offerings, as I’ve put my share of hours into both Gran Turismo and Forza, and had a great time while at it – building a rig dedicated to sim racing is a very tempting option. If available space, free time, and financial situation permits.
Getting a rig is one thing, adding motion on top of that is generally a really expensive option. Luckily, there have been great developments in open source designs for actuators great for such application. I researched the most popular one (SFX-100), and decided to build it.
Keep on reading below and join me on this journey!
I’m hoping this series of articles could serve as a comprehensive build log, answer many common questions, call out interesting alternatives and decisions to be made in the process, and make it all seem less daunting. It’s a great project to take on, and while at times may seem a bit challenging, there isn’t anything that complicated to hamper the progress for more than few minutes. And the end result is certainly worth it.
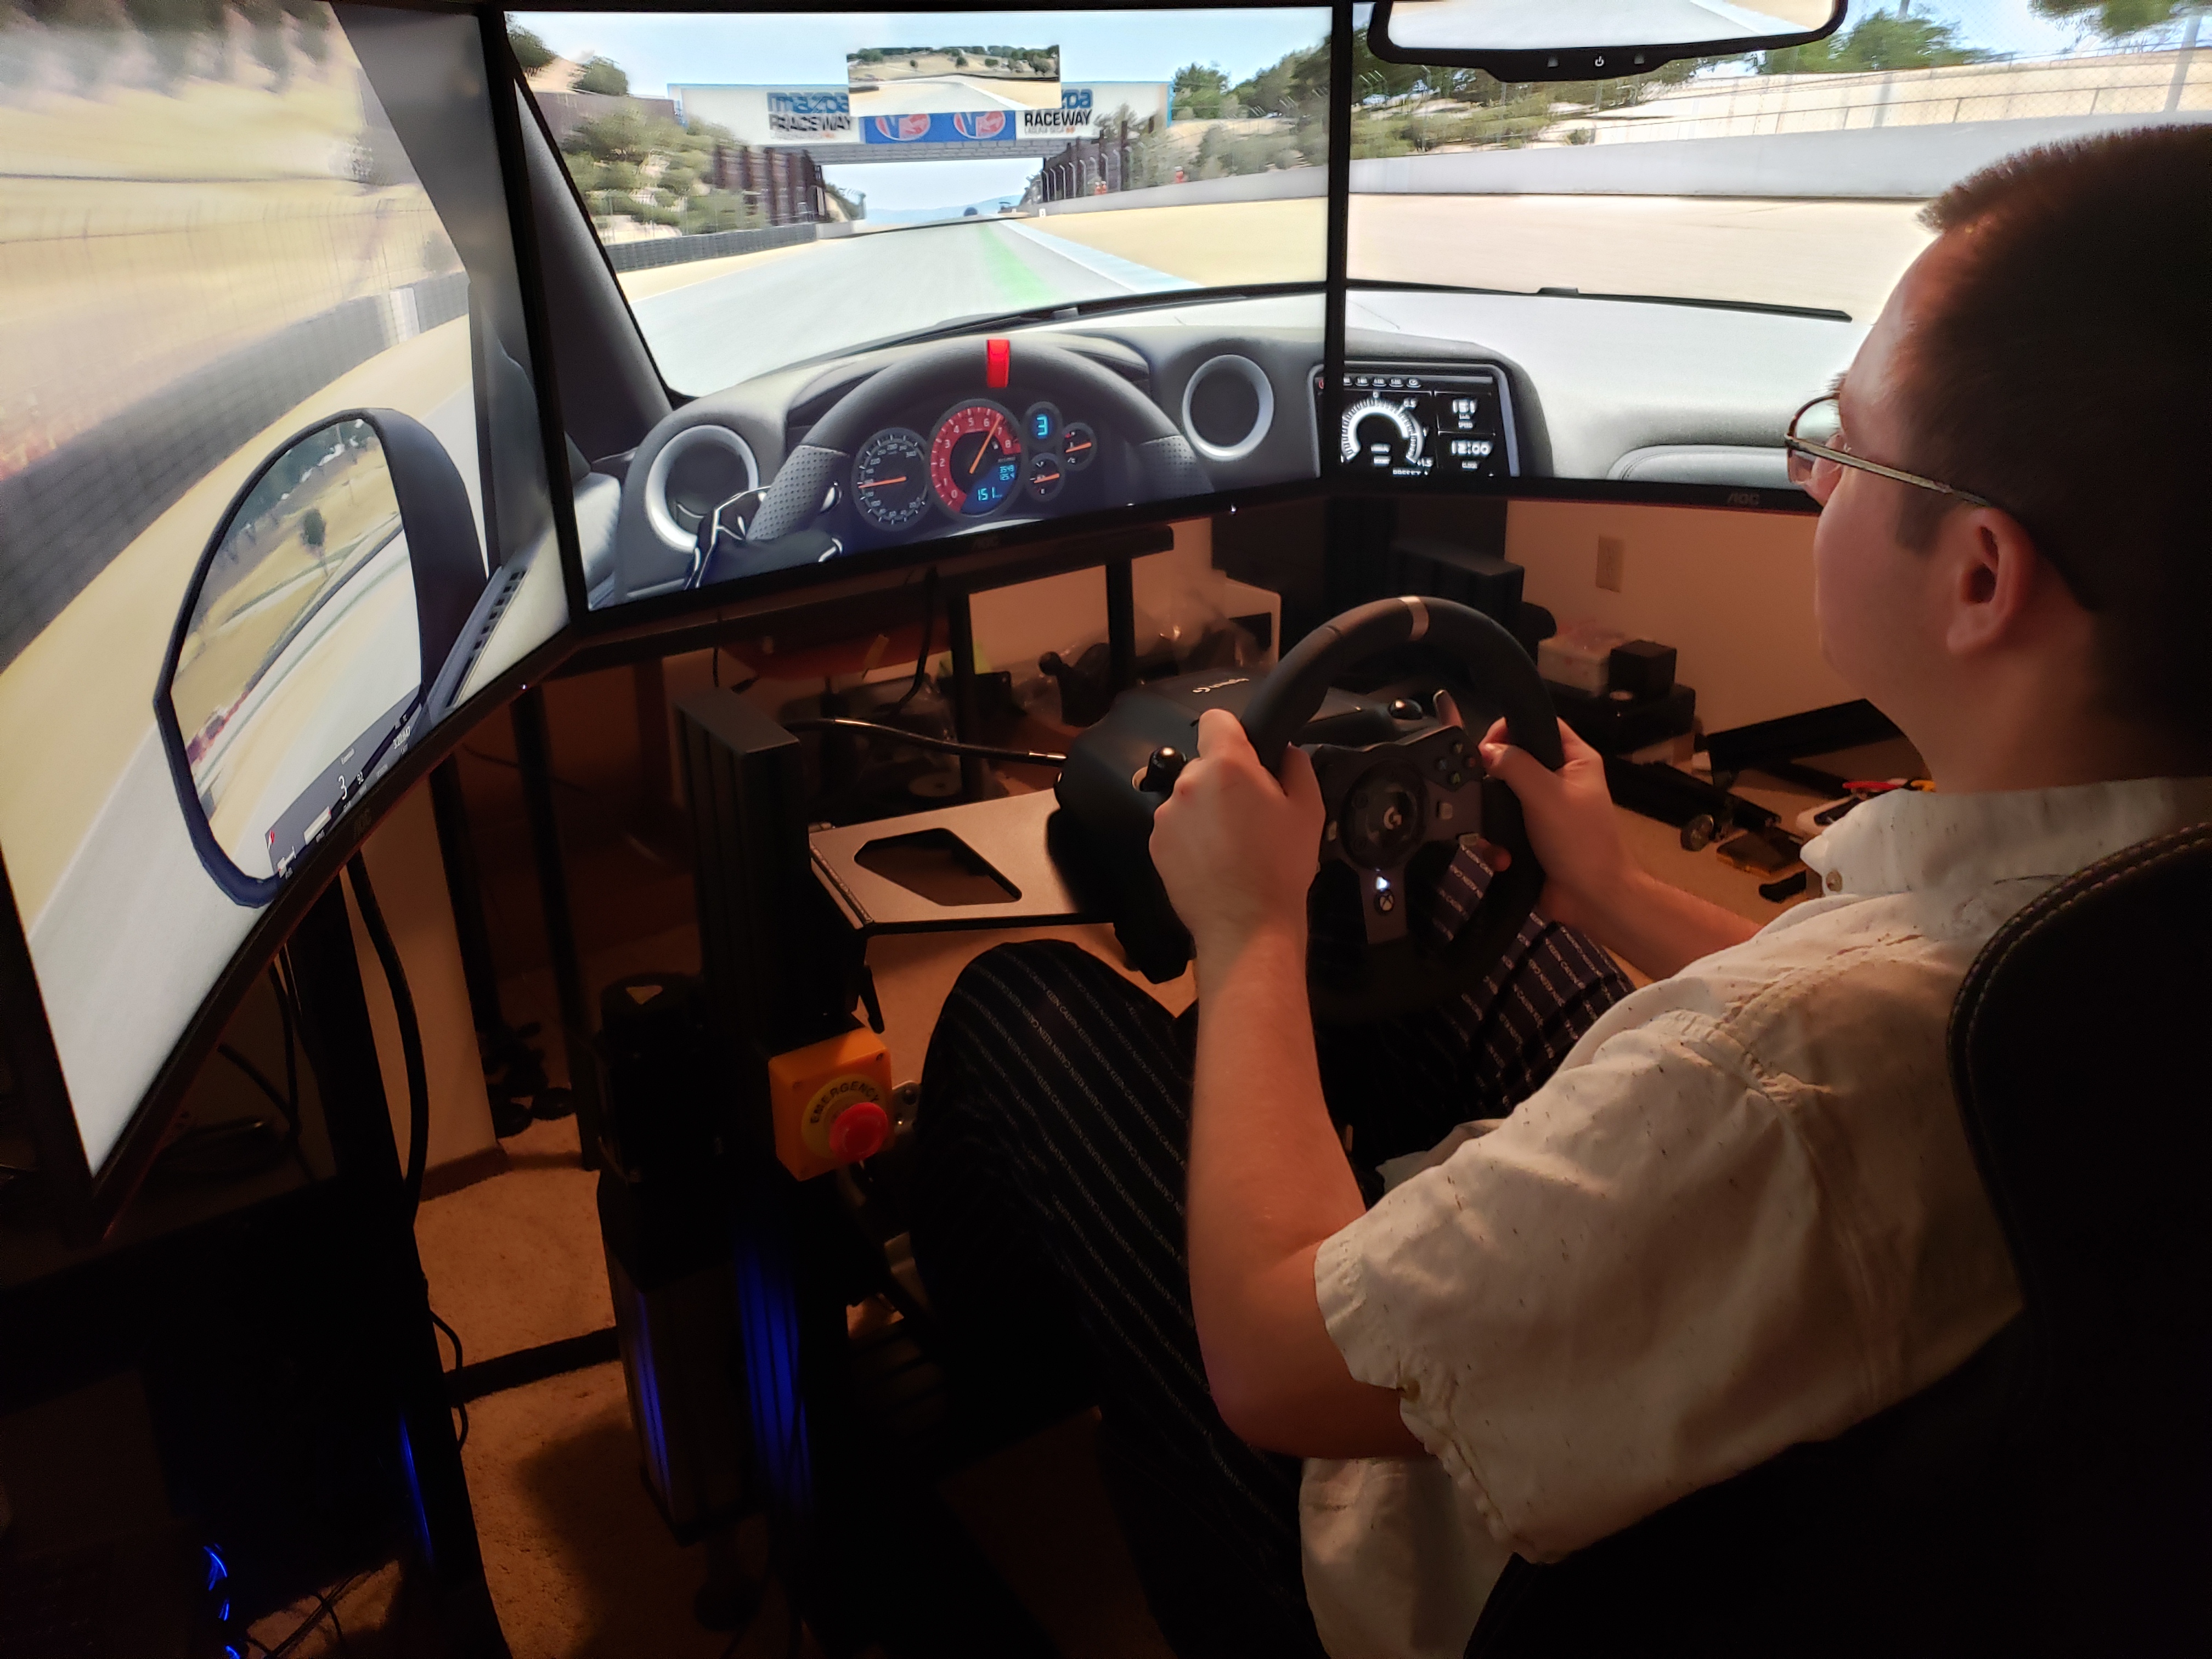
Showcase of the completed project
Before I ask you to invest some time into reviewing the contents of this article, what better way to convince you than show the final result?
Video
Here’s a video of the completed project!
For more, visit my YouTube channel – you’ll find various videos I took while working on this project, as well as videos from my other projects.
And here are couple quick captures I took as early tests:
- Test in rally cars – highlights the motion range and rapid response
- Test in a GT car, shows the details that can be felt even if the range of motion is not as large
Both those videos were taken before the build was complete, which is why there’s a single monitor on a desk in the middle of the room. I just couldn’t wait to give it a go! 😉
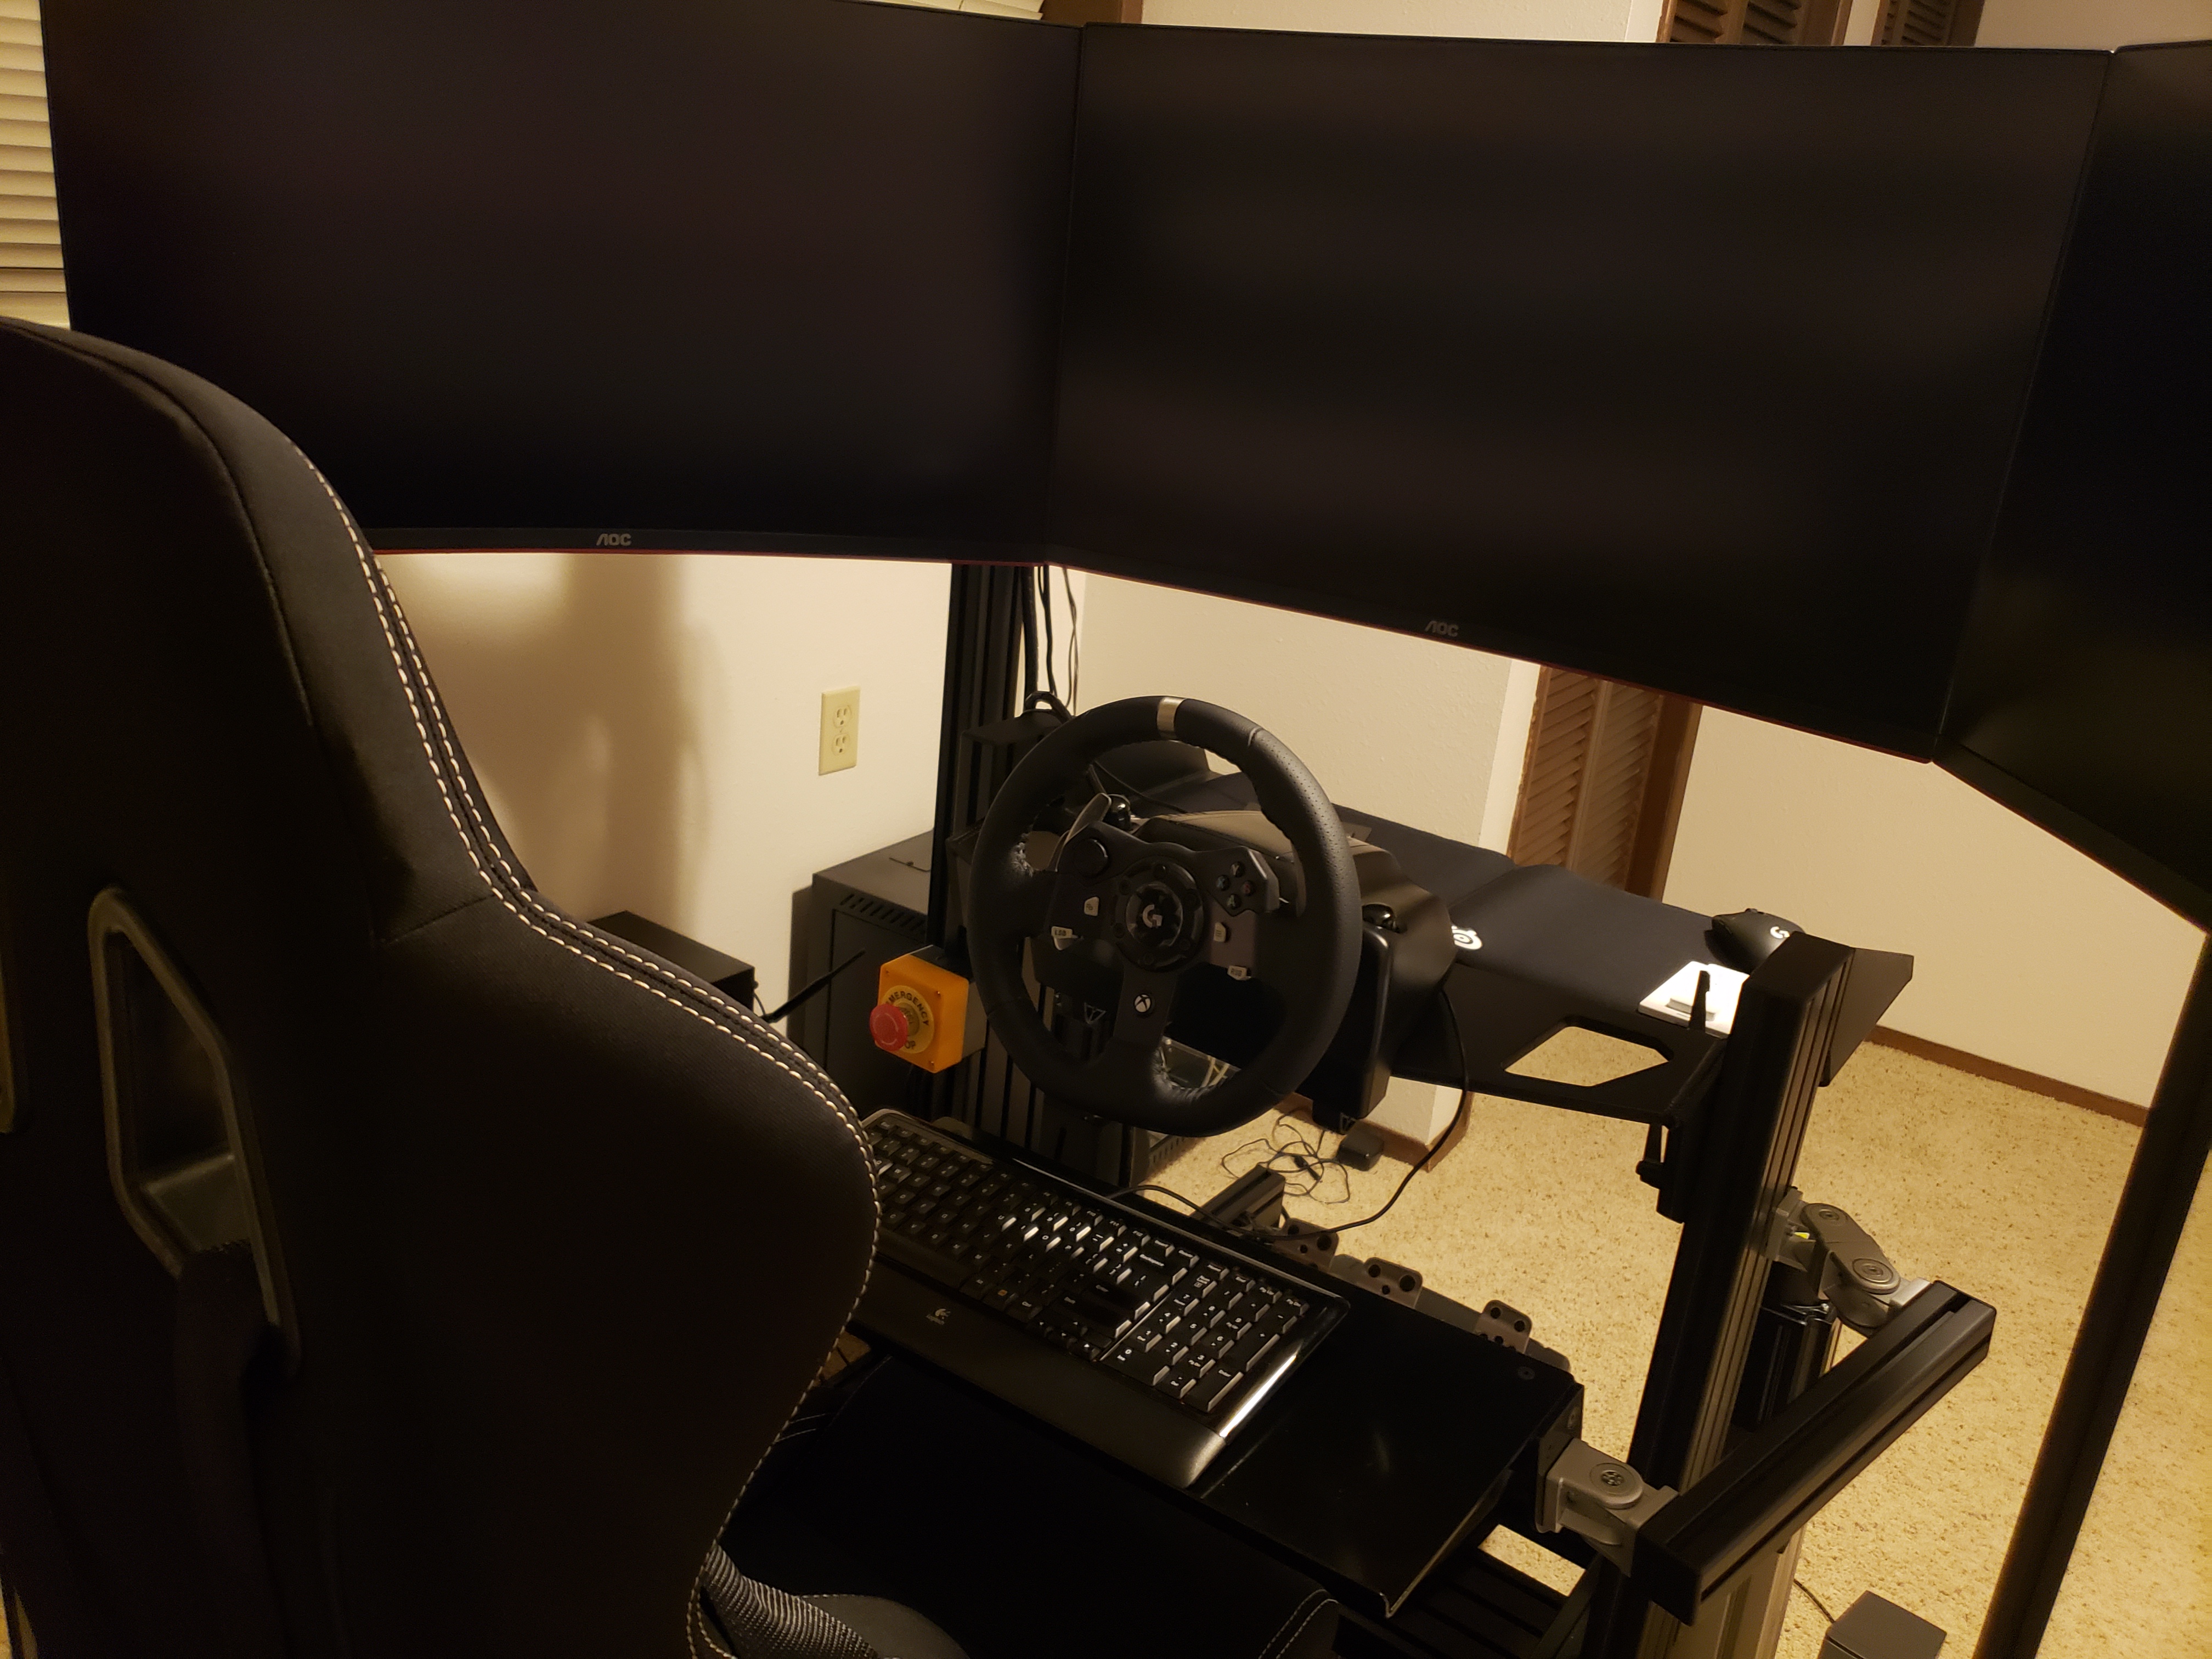
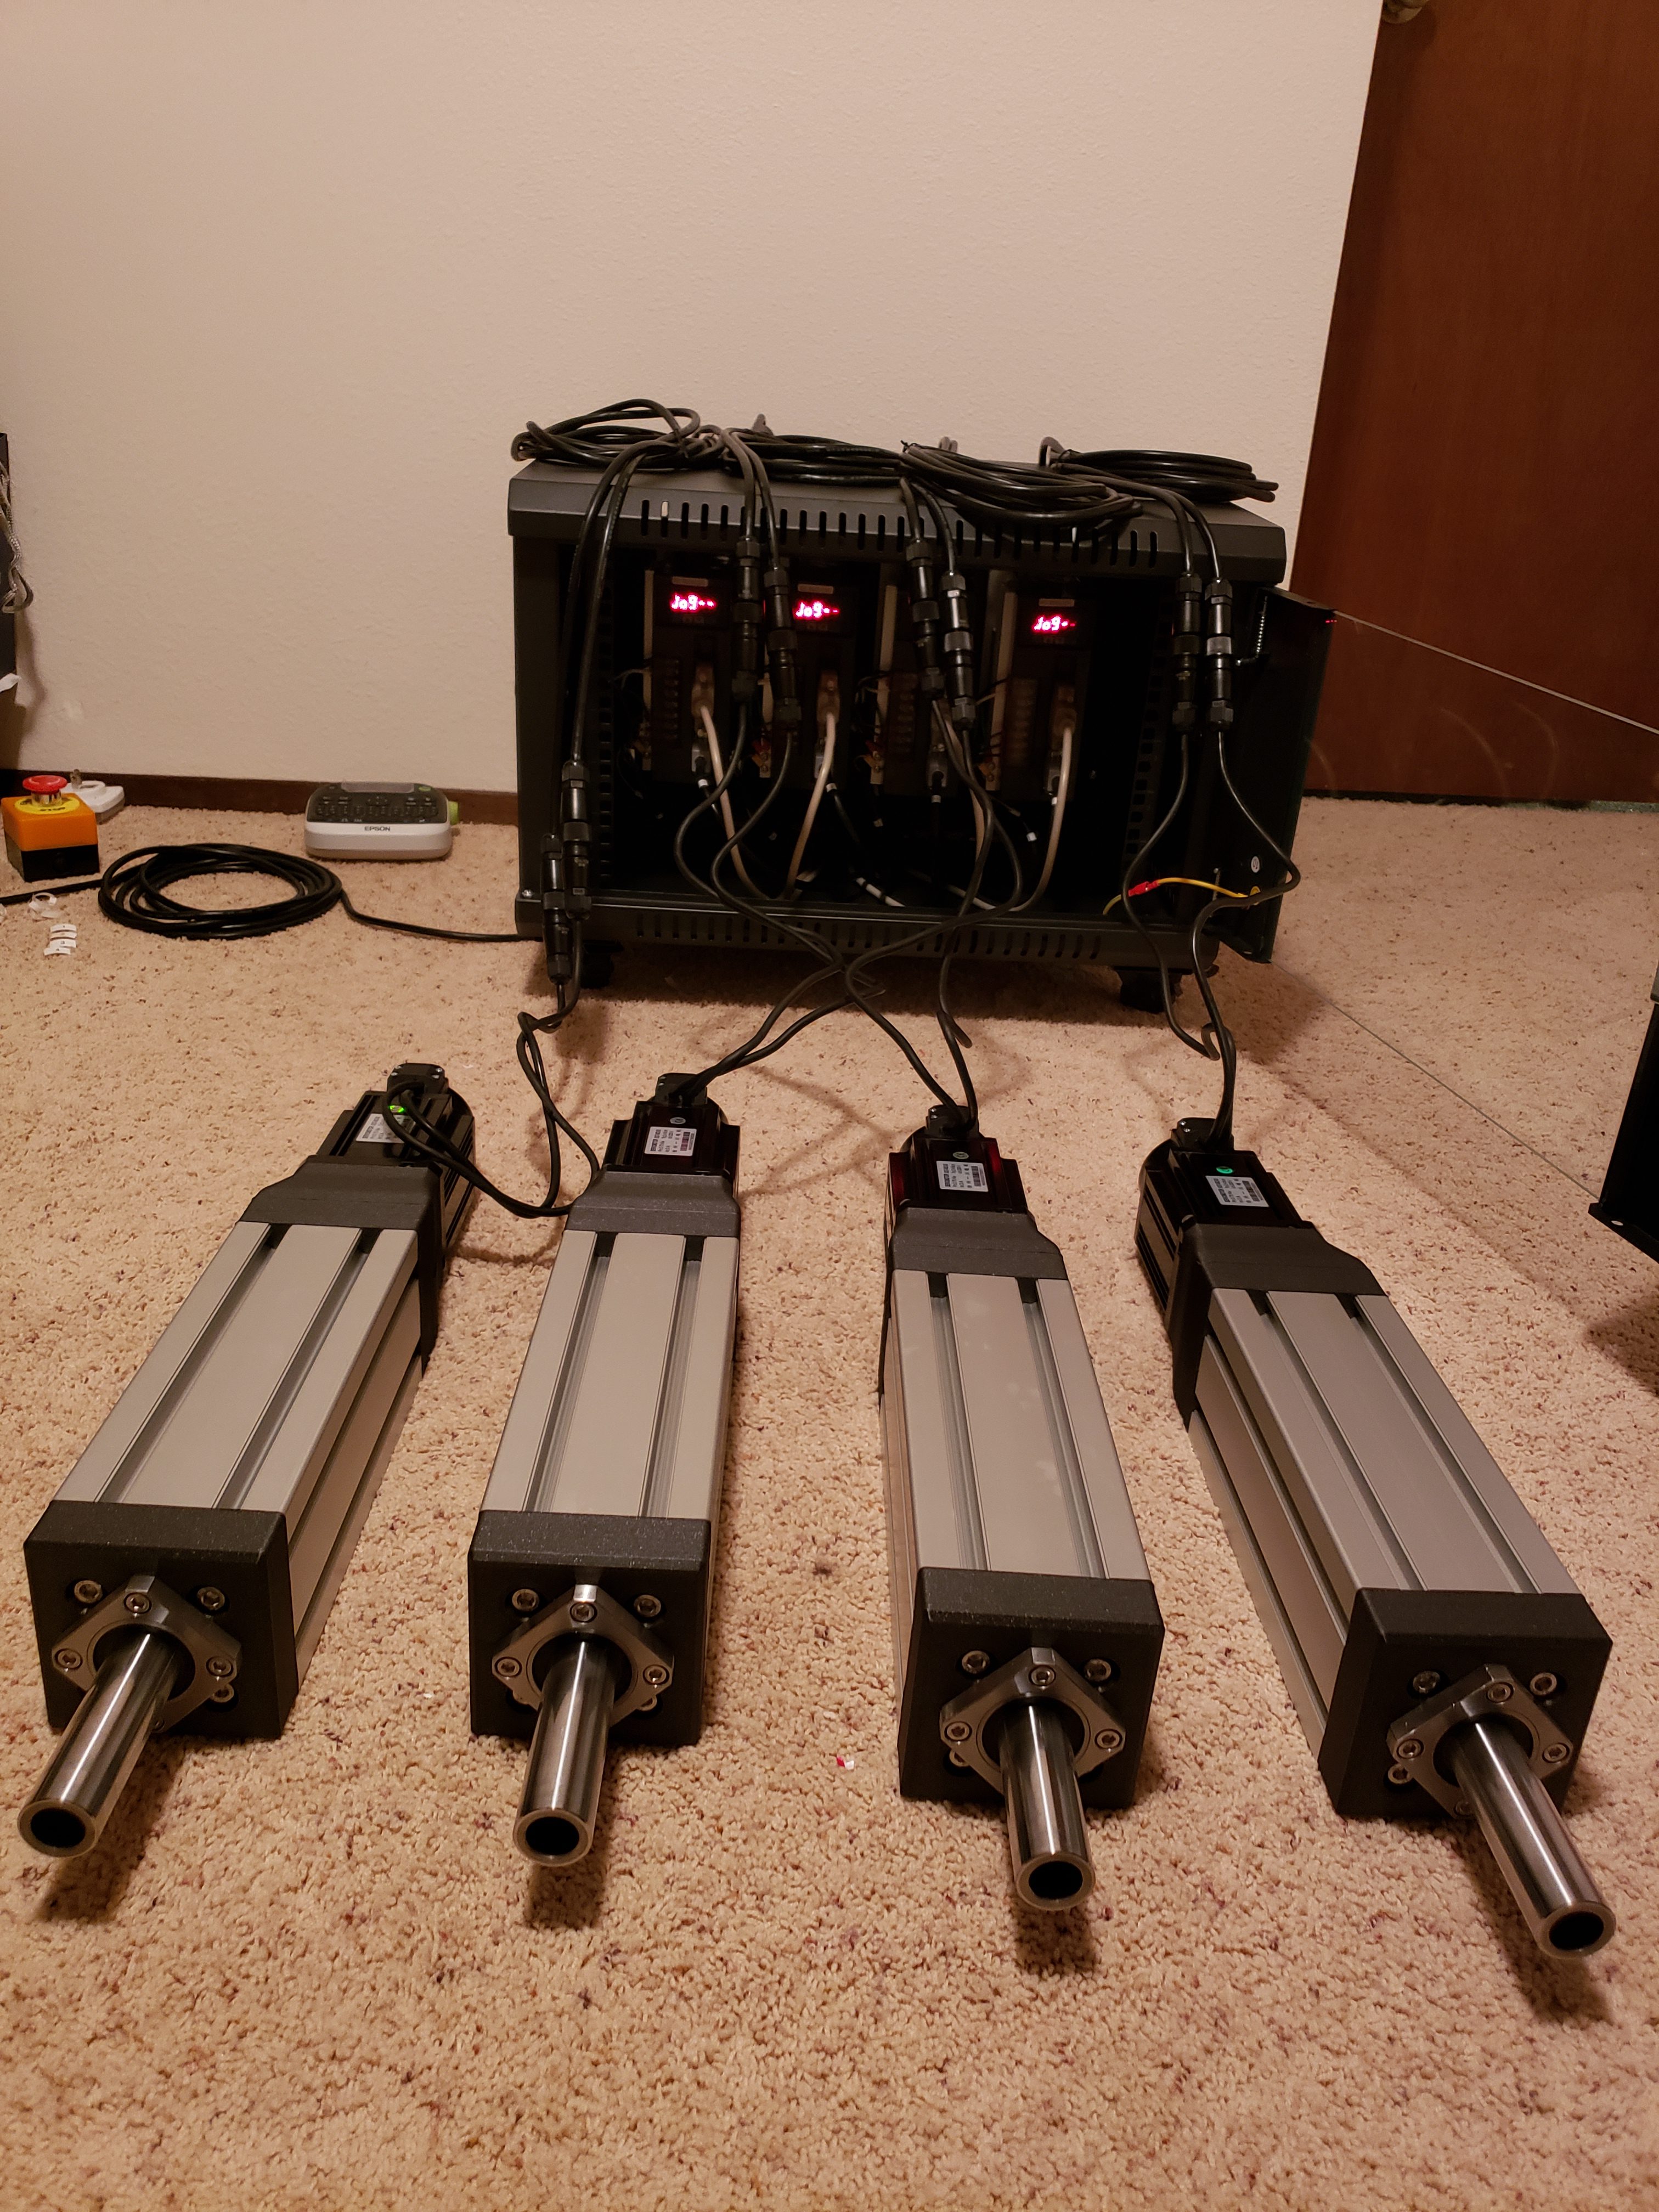
Gallery
Here’s a selection of few photos, showing various milestones from the build, and serving as a sneak peek of what’s to come from the following articles!


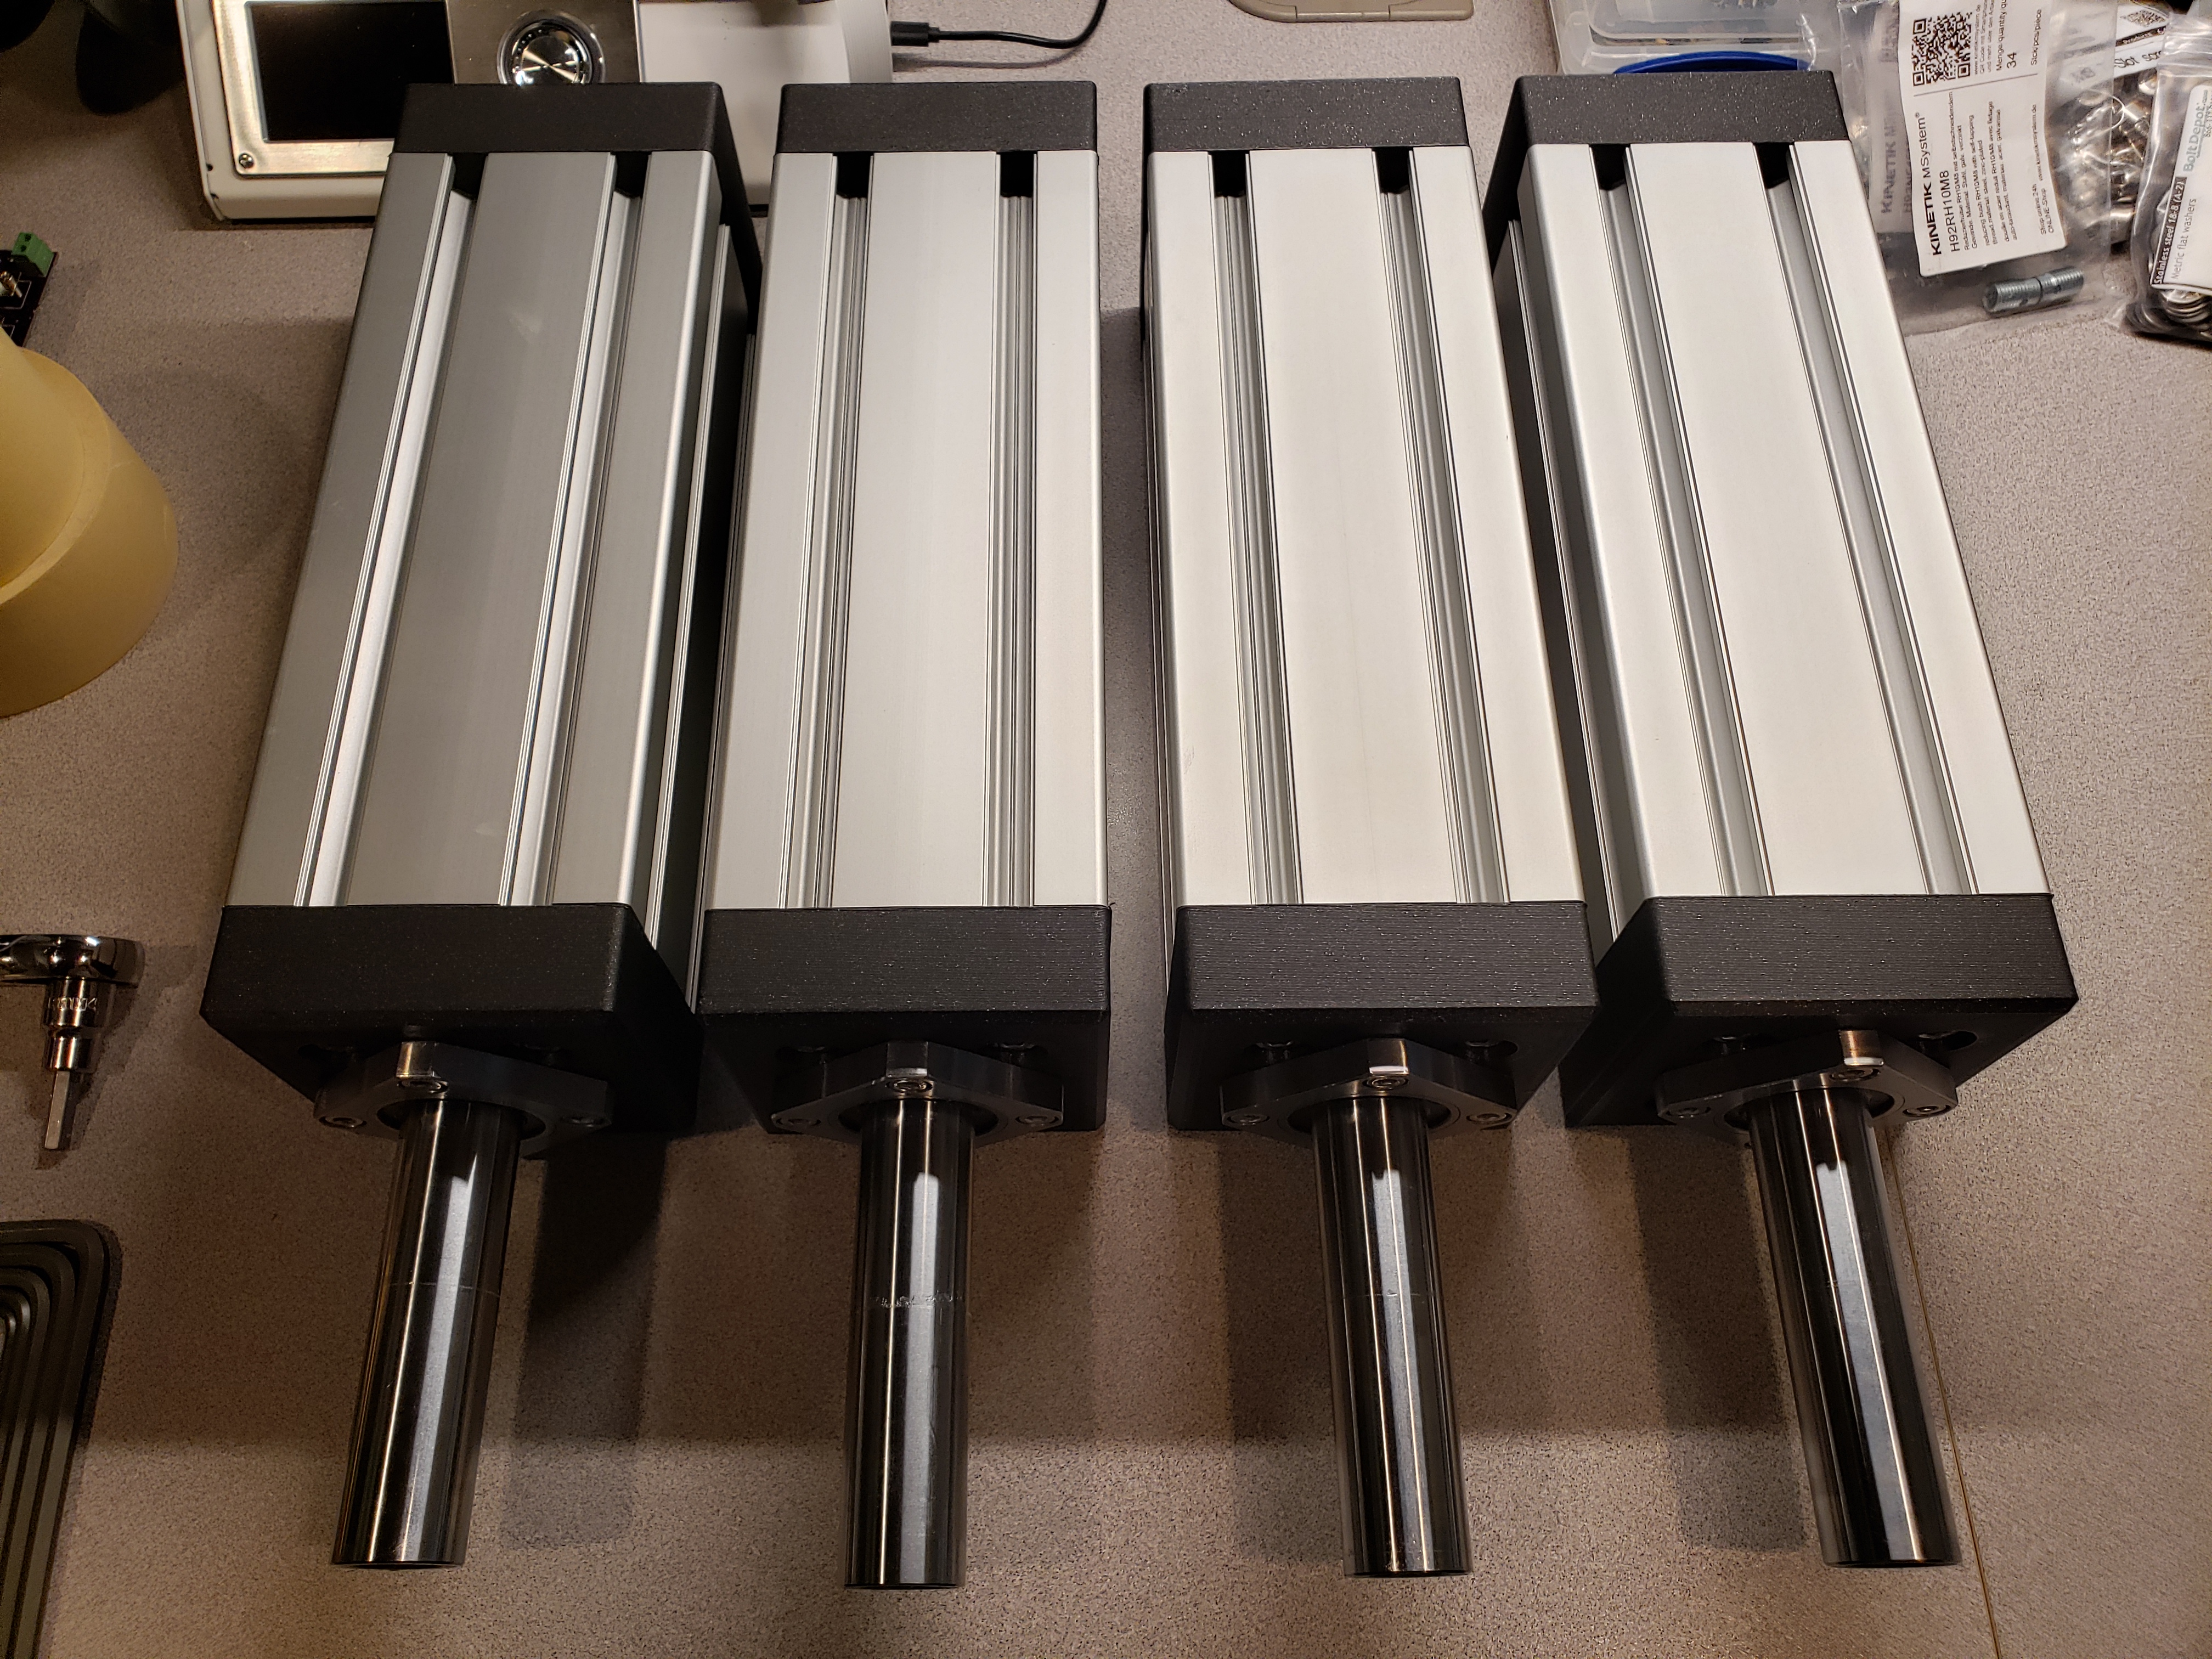

The “SFX-100” project
This cool name describes the open source design of the 4 linear actuators. It makes use of 4 strong yet reasonably priced servo motors, various fairly easily available components, some less-commonly produced ones (custom extrusions available from 2 companies worldwide) and custom designed 3D printed parts.
When put together and attached to your rig… it made me fall in love with sim racing even more 🙂 Now I really understand the importance of “laser scanned” tracks. Racing without motion now feels incomplete.
Here’s the official site of the project:
https://opensfx.com/
You’ll find lots of great resources there. Big thank you to Saxxon, RowanHick, HoiHman and many others who contributed to this project. Without their work, motion would still be out of reach for a lot of us sim racers!
[back to index]
Parts – Bill of Materials & Cost Breakdown
Official parts list for the build of SFX-100 actuators is available here:
https://opensfx.com/shopping-list-and-sourcing-parts/#shopping
A great reference for sourcing parts in the US has been posted on the RaceDepartment forums:
https://www.racedepartment.com/threads/the-simfeedback-ac-diy-motion-simulator-thread.159524/page-98#post-2899157
For all that and everything else I used, please see below – I’m hoping to collect a comprehensive list of everything needed to create same rig from scratch. I’ll be leaving out only things like PC configuration and the sim racing hardware (steering wheel base, wheels, pedals, shifters, handbrakes, button boxes, etc.).
| Product | Price | Purchase link | Description |
|---|---|---|---|
| SFX-100 – parts from Kinetik | Total cost: $265 (with shipping) Note: the prices itemized below do not include shipping. |
||
| Profile K50 (N10) | $100 (4x $25) |
Buy from Kinetik | Product number: H950N1010z, 250mm length. |
| Reducing sleeves | $27 (32x $0.85) |
Buy from Kinetik | Product number: H92RH10M8 I recommend picking up couple spare ones just in case. |
| T-nuts K50 (N10) | $10 (16x $0.60) |
Buy from Kinetik | Product number: H93NF45M8. Be sure to pick T-nuts appropriate to the profile size directly from Kinetik, to save some headache trying to find matching ones later on. |
| SFX-100 – parts from Bolt Depot | Total cost: $100 (with shipping) Note: the quantities indicate required counts. I recommend picking few extra of each (except for the bagged items which already include more than needed). |
||
| Metric socket cap, Stainless steel 18-8 (A-2), 4mm x 0.7mm x 25mm | $2 (16x $0.12) |
#6399 | Required count: 16 |
| Metric socket cap, Stainless steel 18-8 (A-2), 5mm x 0.8mm x 20mm | $4 (24x $0.15) |
#6410 | Required count: 24 |
| Metric socket cap, Stainless steel 18-8 (A-2), 6mm x 1.0mm x 25mm | 4$ (16x $0.23) |
#6420 | Required count: 16 |
| Metric socket cap, Stainless steel 18-8 (A-2), 6mm x 1.0mm x 90mm | $12 (16x $0.79) |
#6459 | Required count: 16 |
| Metric socket cap, Stainless steel 18-8 (A-2), 8mm x 1.25mm x 16mm | $15 | #6433 | Bag of 50 |
| Metric socket cap, Stainless steel 18-8 (A-2), 8mm x 1.25mm x 40mm | $26 | #6438 | Bag of 50 |
| Metric flat washers, Stainless steel 18-8 (A-2), 6mm | $3 | #4516 | Bag of 100 |
| Metric flat washers, Stainless steel 18-8 (A-2), 8mm | $4 | #4518 | Bag of 100 |
| SFX-100 – parts from AliExpress | Total cost: $1,475 (with shipping) Note: the prices itemized below do not include shipping from AliExpress, as those costs can vary greatly. |
||
| Ball screw, 1605, 250mm | $80 (4x $20) |
Buy on AliExpress | |
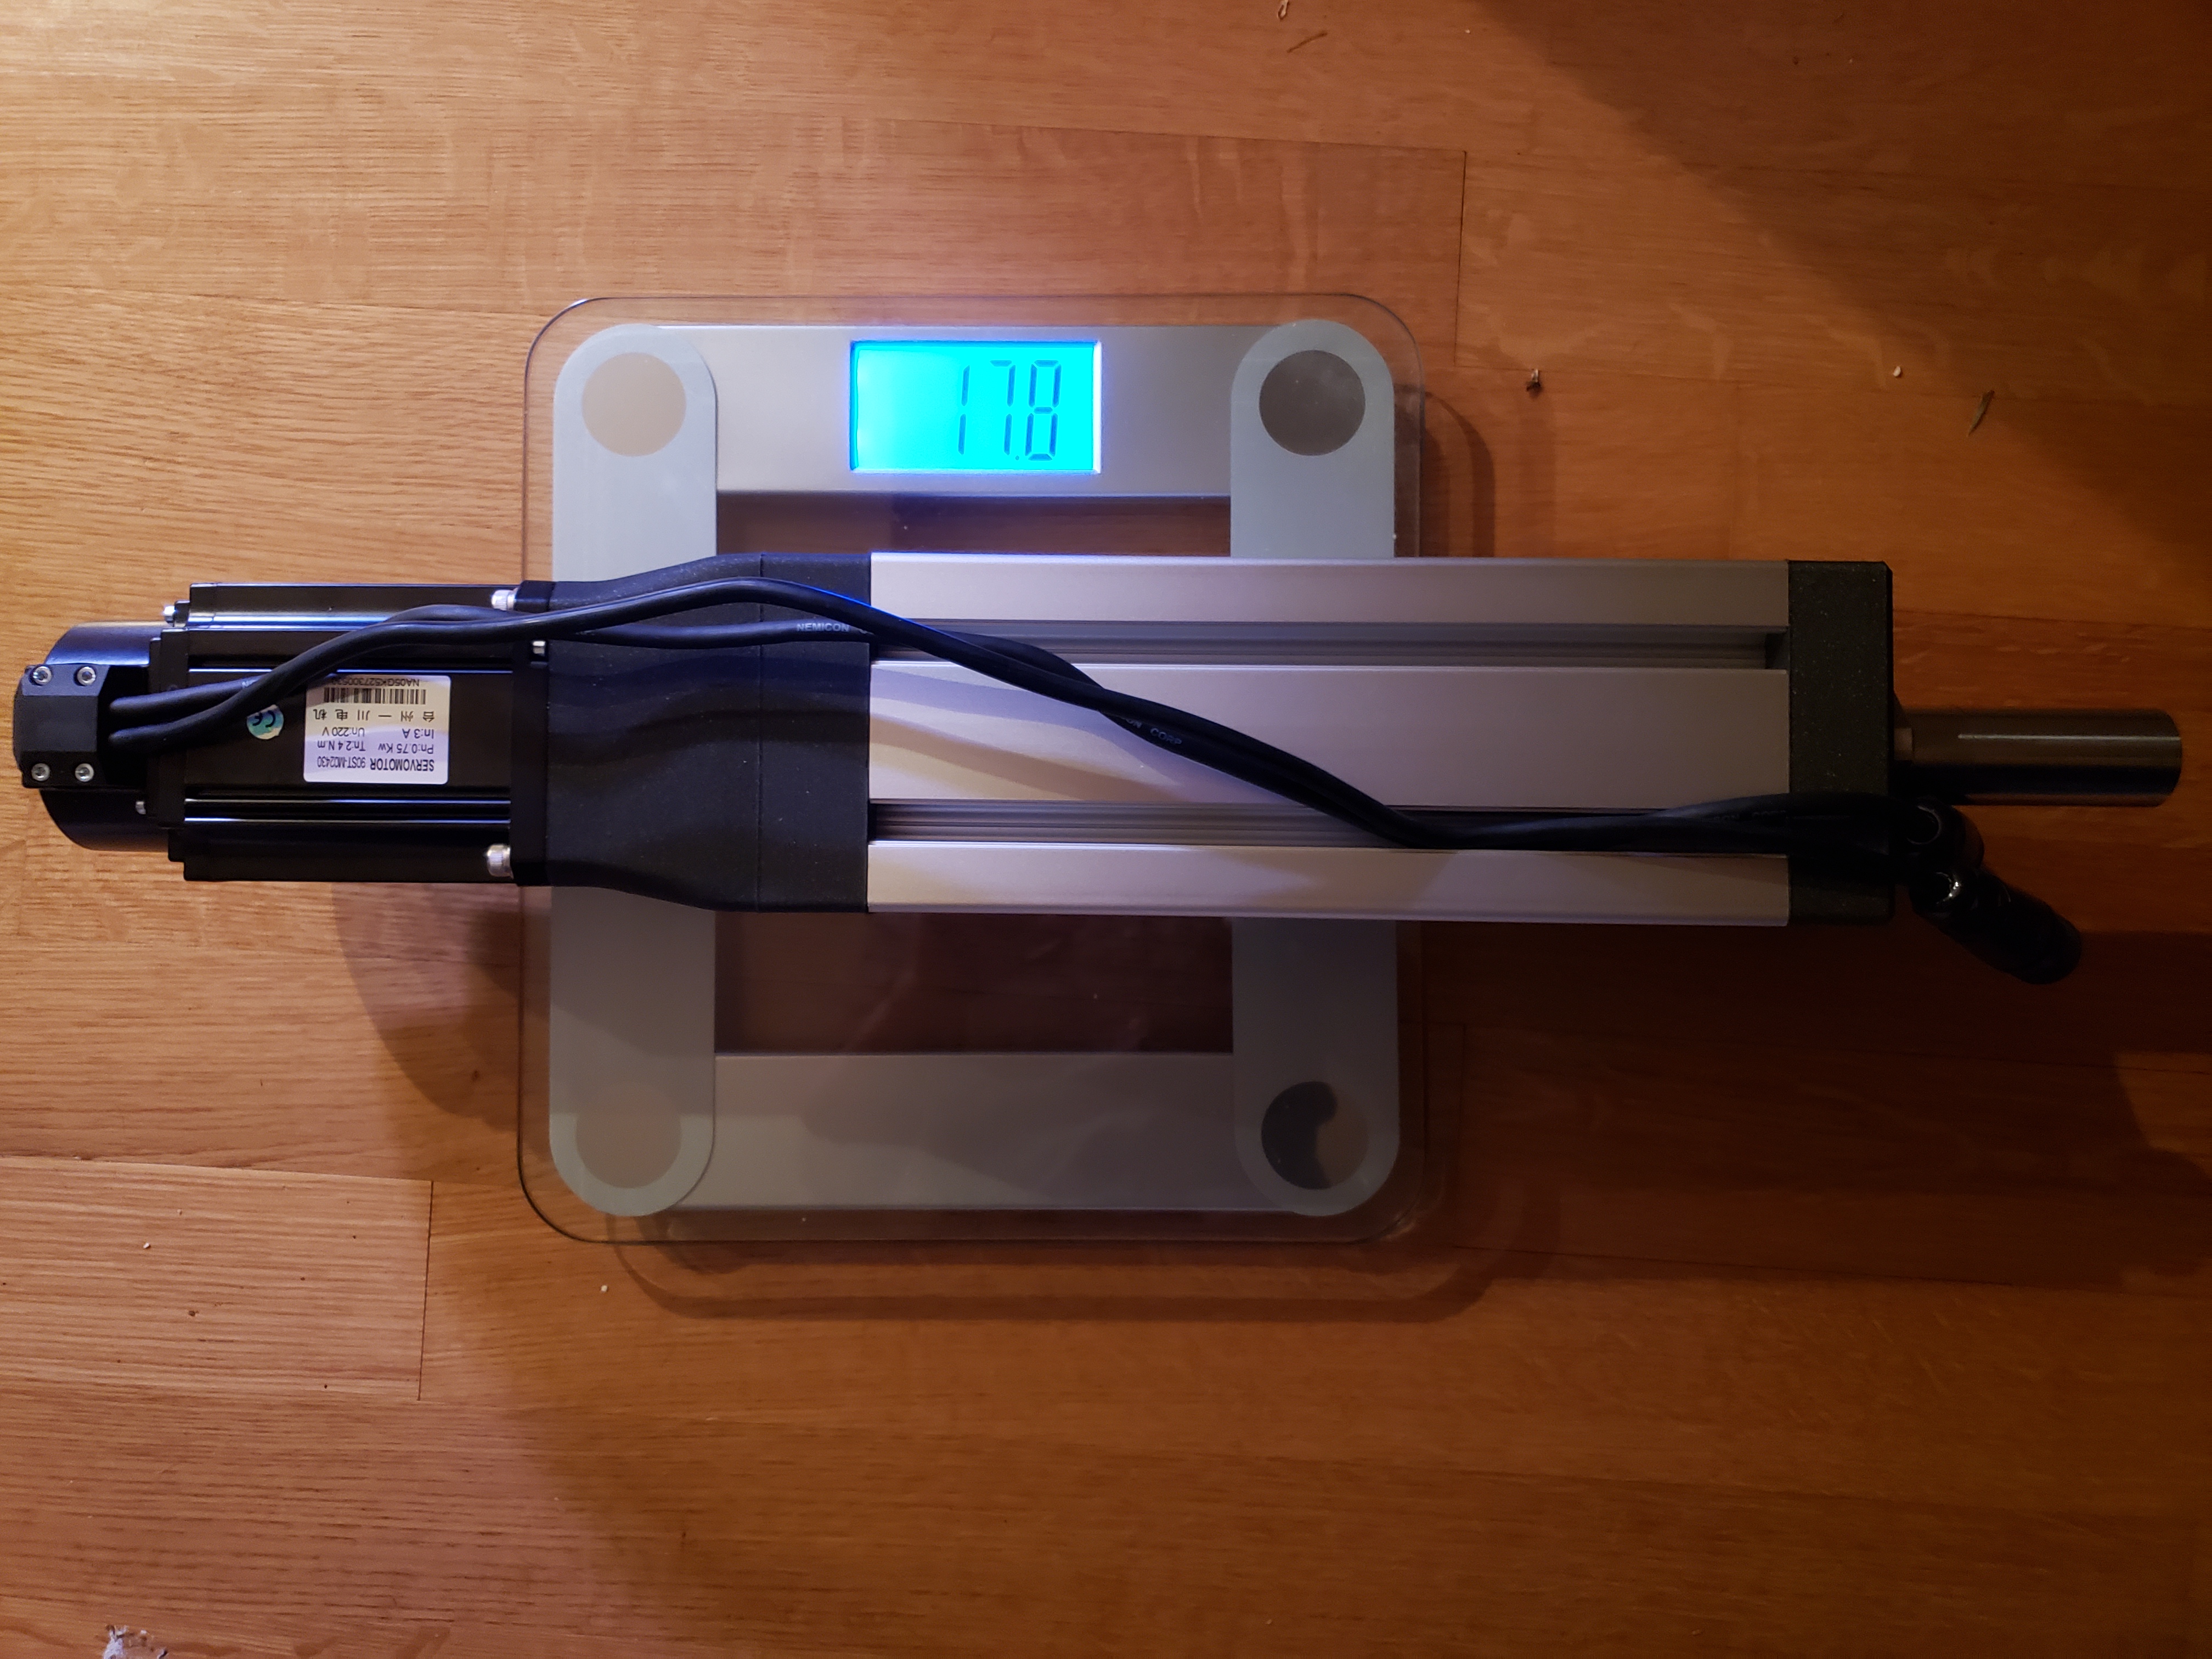
| Motors with controllers (90ST-M02430) |
$800 (4x $200) |
Buy on AliExpress | Choose option B if you’re planning to replace the cables with shielded ones. I went with option A as it provides a bit cleaner look. |
| Fixed bearing FK12 | $32 (4x $8) |
Buy on AliExpress | |
| Linear bearing LMEK30UU | $36 (2x $18) |
Buy on AliExpress | Sold in pack of 2. But 2 packs, as we need 4 total. |
| Shaft coupling, 10×16 | $28 (4x $7) |
Buy on AliExpress | |
| Hollow shaft | $85 | Buy on AliExpress | Already sold in a pack of 4. |
| Rig and monitor stand – parts from Sim-Lab | Total cost: $1,150 + ~$350 shipping | ||
| P1-X chassis | $650 | Buy – Sim-Lab | I purchased wheeldeck version. Black anodized. |
| Keyboard tray | $65 | Buy – Sim-Lab | |
| Mousepad | $18 | Buy – Sim-Lab | |
| Seat slider | $36 | Buy – Sim-Lab | |
| Extra mounting point, large | $54 | Buy – Sim-Lab | Note that P1-X already comes with mounting point. I ordered the additional one for extra profiles (and used it to make a trolley to move the assembled rig when needed 😉 ). |
| Caster wheels | $16 | Buy – Sim-Lab | |
| Triple monitor mount (heavy) | $280 | Buy – Sim-Lab | 100mm/200mm version, to support 32: monitors. Black anodized. |
| Cup holder | $11 | Buy – Sim-Lab | |
| Headphones holder | $8.50 | Buy – Sim-Lab | |
| Joint, 40mm slot 8 | $11 | Buy – Sim-Lab | |
| Miscellaneous | |||
| Fabricating PCB | $57 (for 3 boards) |
OSHPark.com | Download Gerber or Eagle files from Pyronious’ repository, then submit them for fabrication. Depending where you get them made, if you have to order e.g. in a batch of 3, you can always sell the remaining 2 and recoup some costs. |
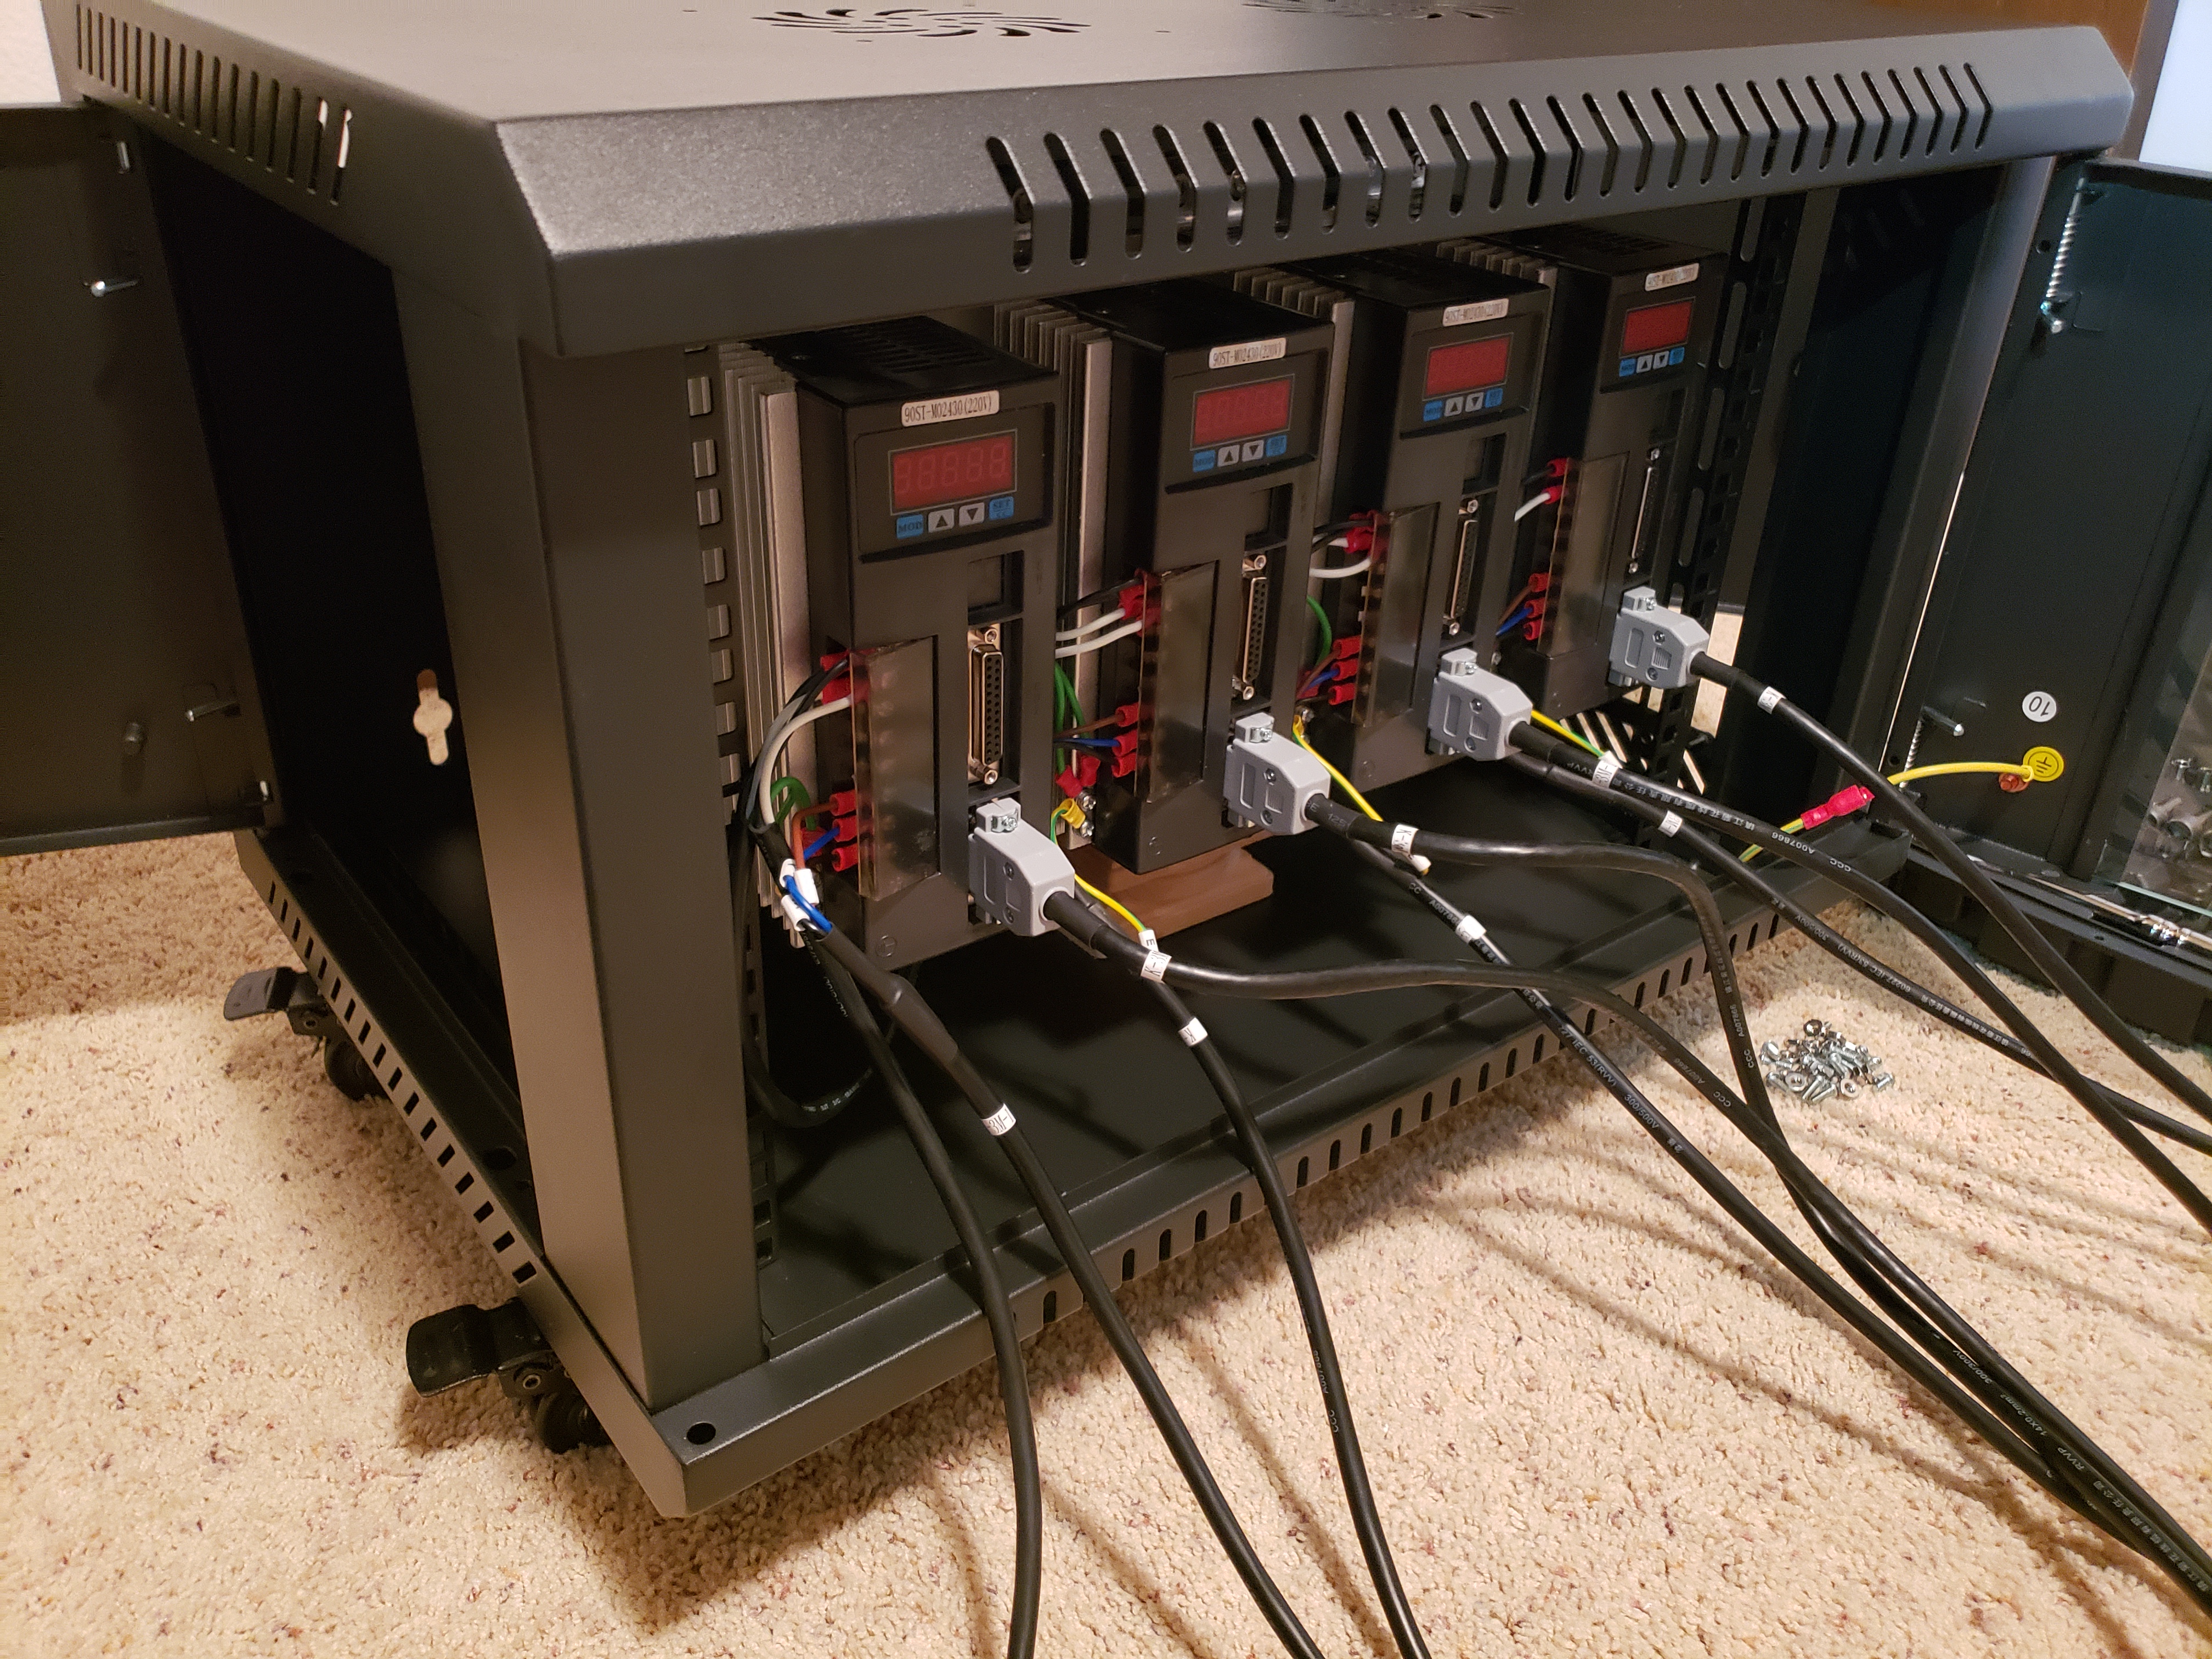
| 6U Server cabinet | $105 | Buy on Amazon | I chose the one with glass window. The controllers don’t generate much heat, and I wanted to avoid dust inside. |
| 5U server mounting plate | $25 | Buy on Amazon | Perfect height for the motor controllers to be installed side-by-side in vertical orientation. Fits into 6U cabinet leaving sufficient room for easy wire routing. |
| Power cord | $8 | Buy on Amazon | Used for daisy-chaining the motor controllers. I purchased 10ft, which left me with sufficient length after cutting the pieces for daisy chaining to attach to the first controller. |
| Casters for server cabinet | $20 | Buy on Amazon | If you choose different cabinet, it may come with casters. Optional, but makes moving the cabinet easier, and allows for tucking in some extra cables underneath so they’re out of sight. |
| Arduino Leonardo | $20 | Buy on Amazon | Make sure to purchase Leonardo specifically. SFX-100 doesn’t work with Arduino Uno. Don’t worry about power supply – it will be powered from PCs USB port. |
| Edge protection strip | $28 | Buy on Amazon | Used to wrap around the edges of the server cabinet, to ensure that the wires won’t be damaged on the sharp edges of the wire openings. I had some left-over from previous project, but those can be handy. |
| 3D printer | vary | (various sources) | Optional – purchase if you’re planning on printing the parts yourself, and don’t have a printer already, clearly 😉 |
| Filament (PLA) | $92 (4x $23) |
Buy on Amazon | Again, only if printing the parts by yourself. I’m a big fan of Hatchbox filament and have used it extensively. You’ll need 3 or 4 rolls to print the complete set of parts. |
| Extra corner brackets (8020) | $48 ($12 x 4) |
Buy on Amazon | Used to attach the actuators to the rig. Each pack has 8, I recommend grabbing at least 4 packs to have some extras. We use those to attach actuators to the rig. |
| Ratchet lever M8 | $16 (2x $8) |
Buy on Amazon | For easy adjustability of the wheel column, if you’re going to be sharing the rig with others. Make sure to purchase M8 x 20mm, or M8 x 32mm. We need 4 of them total, thus buy 2x 2-pack. |
| Grease gun | $12 | Buy on Amazon | Comes with a cartridge with grease. Used to lubricate ball screws. |
| Grease fittings | $5 | Buy on Amazon | Fitting are to be left attached to the ball screws when assembling. Pack of 10. |
| 8-32 hex nuts | $9 | Buy on Amazon | Used to attach motor controllers to the 5U plate. Pack of 100. |
| 8-32 x 3/4″ screws | $9 | Buy on Amazon | Used to attach motor controllers to the 5U plate. Pack of 100. 1/2″ length works as well. |
| Monitor x3 | $900 (3x $300) |
Buy on Amazon | Monitors for triple setup. AOC 32″, 1440p, 144Hz. Good quality and value. |
| Display Port cables (longer) | $39 ($17 + $21 + $21) |
Buy on Amazon: – 1x 10ft – 2x 13ft |
I purchased 1x 10ft long and 2x 13 ft long. Use shortest for center monitor. This way their lengths meet at the PC and allow for easy cable management. |
| Cable management sleeves | $36 ($13 + $14 + $9) |
Buy on Amazon: – small – large – 10mm spiral |
I purchased those 3 sizes and they worked great for organizing all cables (motor power + data from the rig using combination of small and large size, then spiral for USB cables for wheel, shifter, etc., as well as spiral for all DisplayPort. I also used spiral to reinforce motor cables when routing them across the rig. And with any left-overs, you can clean up remaining cables in the house 😉 |
| 8020 cable tie mounting blocks | $35 | Buy on Amazon | Pack of 25. Makes wire routing a breeze, but can be a bit tricky to attach to the rig (tight fit, I used a spanner). |
| Zip ties | $13 | Buy on Amazon | I suggest getting black ones if your rig is anodized black. Comes in a pack with various length ties, good for multiple things. |
| Velcro cable ties, 50-pack | $13 | Buy on Amazon | For cable management. Re-usable and easy to make changes, since they’re velcro. |
| Power strips | $25 | Buy on Amazon | I recommend installing one on the back of monitor stand for clean wire management. Plus one on the ground for PC, wheel, speakers, etc. Pack of 2. |
| Ferrite rings, assortment | $20 | Buy on Amazon | To be added to motor data cables, as well as all USB cables in vicinity. Helps deal with EMI produced by the motor controllers. If you’re randomly losing connection to your USB devices – you need it. |
| Speakers | ~$100 | (various options) | I had an extra set of 2-channel speakers which I used for the rig. |
| Electrical crimp connectors | $18 | Buy on Amazon | Used to crimp onto the power wires when daisy-chaining power to the motor controllers. |
| Wire stripping tool | $22 | Buy on Amazon | Helpful in stripping wires before crimping. |
| Mouse | $50 | Buy on Amazon | I’ve been using this mouse before, so decided to pick another one of those for the rig. Long battery life. |
| Keyboard | $60 | Buy on Amazon | This is the keyboard I’m using. Wireless, backlit (handy when I’m in the rig with lights off), long battery life. |
| Mouse pads | $7 | Buy on Amazon | Classic Steelseries mousepad. |
| Elgato Stream Deck | $130 | Buy on Amazon | I picked the 15-button version. It allows for creating folders, thus this number of keys seemed optimal. Makes for a very modern-looking and easy to configure button box (you set icons to be displayed on buttons, instead of having to print stickers, very easily customizable per game). |
| Racing harness | $43 | Buy on Amazon | Having harness when racing with motion adds to the overall experience 🙂 |
| 2-conductor wire for emergency stop switch | $9 | Buy on Amazon | This is an example wire that I used. Any 2-conductor wire will work. I recommend around 15 feet for flexibility in mounting and routing the wire on the rig. |
| Racing seat | $250 | Buy on Amazon | I like Sparco, so I went with the Sparco R100 seat. It reclines, for extra comfort 😉 |
| Seat slider | $80 | Buy on Amazon | Optional, but a great addition – allows for easily changing the position to accommodate different heights. A must-have if you’re planning to demo the rig to others or share it with someone of a different height. |
| DB25 connectors for soldering | $3 (4x $0.75) |
Buy from Phoenix Enterprises | Product number: HWS5190 Notice that the version for soldering onto PCB is different than the one to solder wires to. If you get the wrong one, it won’t fit onto PCB (slightly different pitch). |
| DB25 wires for controllers | $14 (4x $3.25) |
Buy on Monoprice | 3 ft length is optimal, we just need enough to connect controllers to the Arduino shield. |
| Emergency stop switch | $9 | Buy on Amazon | Just in case, for peace of mind 🙂 |
| Rubber floor feet | $5 | Buy on Amazon | To protect the floors and quiet down some of the thumps during more aggressive motion. |
| O-rings | $13 | Buy on Amazon | Used as a bump stop in the actuator. |
| Dry PTFE lube | $5 | Buy on Amazon | Used to lubricate the sliders. |
| USB hub | $17 | Buy on Amazon | Handy especially if you want to use the same beefy gaming PC for rig and another location (I do that sometimes). This way you minimize the number of things to plug in, by routing them through powered USB hub. It’s important that it’s has external power source. |
| Thanos controller | $280 | Buy on Tindie | Optional – not part of the official SFX-100 project. Provides additional configuration options as well as support by Simtools (SFX-100 works with SimFeedback). |
| USB-mini cable | $8 | Buy on Amazon | Long enough to connect the Arduino to your PC. 10ft, pack of 2. |
| 15A circuit breaker | $9 | Buy on Amazon | Optional – can be added to the daisy chained power circuit for motor controllers. |
| Set of hex keys | $31 | Buy on Amazon | Various sizes needed, used for assembling the actuators, rig and more. We need metric sizes. |
| Nitrile gloves | $18 | Buy on Amazon | Good to have a box handy. I recommend using them especially when greasing the ball screws, makes cleanup much easier. |
All links and prices are up-to-date as of January/February 2020.
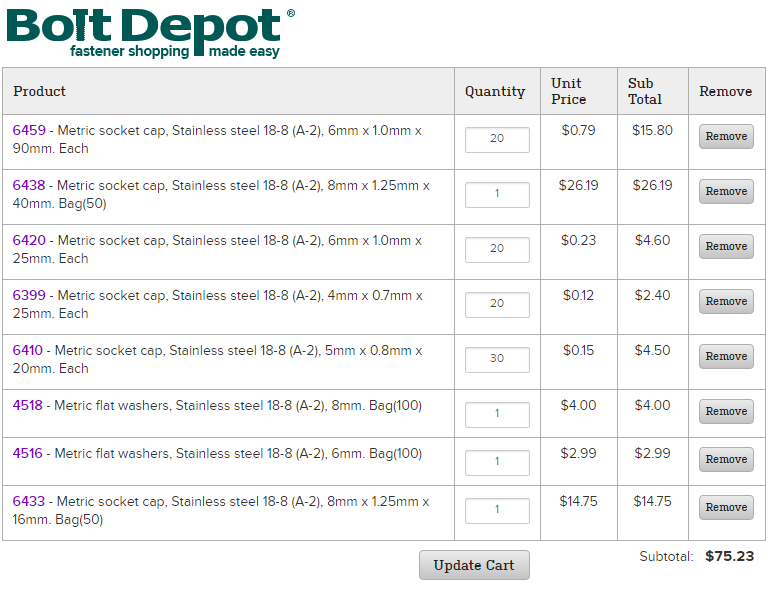
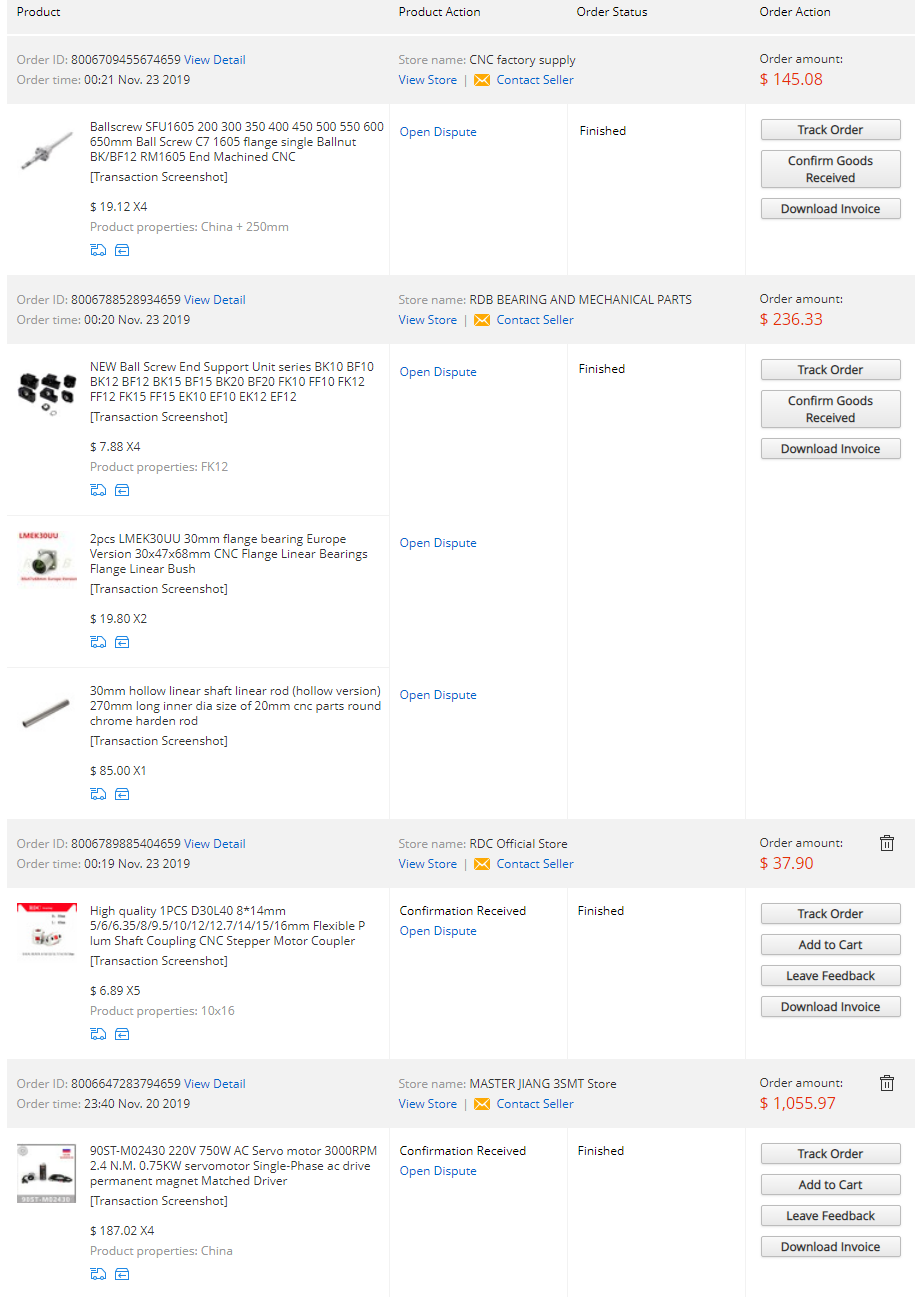
If you’d like to double-check your orders for parts required specifically for the actuators, below please find screenshots of the orders I’ve placed.
Kinetik:

Bolt Depot:
AliExpress – please pay attention to the gray text “product options” as it specifies the exact dimensions/specifications for some of the products:
Note: you may have noticed that number of things called out in the official SFX-100 resources are not present on my shopping list above (few examples: WAGO connectors, breadboard, breadboard cables, etc.). This is because I’m using the PCB by Pyronious and didn’t need those. I highly recommend choosing this approach – easier, less error-prone, neater and more compact solution.
Few words on shipping and delivery times
This project requires sourcing parts from many different companies, across few countries. Furthermore, some of those companies are Business-to-Business oriented and handle large volume orders. In those cases (e.g. Kinetic), it can feel like we’re being ignored (blame high standards set by Amazon Prime, but be patient and the package will arrive at your doorstep eventually. If you’re planning to build this project though, I highly recommend ordering all parts as early as possible to avoid further delays.
| Product or Company | Ordered date | Delivered date | Comments |
|---|---|---|---|
| Kinetic (Germany) | 11/19/2019 | 12/15/2019 | No communication throughout, except for e-mail with invoice to which I responded with printout from PayPal as a proof of payment. They’re notoriously unresponsive for any questions regarding orders, but orders do eventually arrive… |
| AliExpress | 11/23/2019 | 12/3/2019, 12/30/2019 | Ordered from multiple vendors, thus various delivery dates. Please note that a shipping option of “EMS Package” is by far the slowest. There’s no tracking provided (outside of shipped/delivered dates) and in my case it took 5 weeks to deliver. |
| BoltDepot | 11/21/2019 | 11/27/2019 | Reasonable shipping time, shipped the day after I placed order. |
| Monoprice | 11/19/2019 | 11/21/2019 | Very fast, I like Monoprice, especially their 3D printers (I’ve been using Monoprice Select Mini for couple of years). |
| OSHPark (PCB fabrication) | 11/19/2019 | 11/27/2019 | I placed order on 11/19, it’s been assigned to panel and sent to fabrication 2 days later, then shipped on 11/25 and arrived 2 days after that. I always had good results with this company, which helps with prototyping/iterating on PCBs. |
3D printed parts
In addition to the somewhat lengthy list, there’s also need to print (or purchase, more about that option in a second) custom parts. If you’re printing them by yourself, make sure to:
- follow the recommended print settings, found on the SFX-100 site,
- calibrate your printer to ensure high dimensional accuracy,
- when printing the sliders, make a test print (cancel it after reaching height of maybe an inch) and check the fitting inside of the aluminum profile. They should slide freely, but not have too much “wiggle” – it’s important to get the size of those parts just right.
Just to re-iterate the importance of print settings – those parts are critical for the durability of the build. Make sure to follow the official recommendations, and ensure that if you’r outsourcing the printing – they’re being followed. Check out here how much difference the settings make, and see here for some extra tips to optimize the printing.
Now, considering the total time to print a full set of parts on a single printer (around 220h, depending on the printer and settings), I decided to find someone who has has already went through the process of perfecting the printing for this project 😉 I found a fellow passionate sim racer who offered his help – diablo2112. To keep it fair in spirit of open source project, he was accepting donations to cover the material cost, very respectable approach. And he turned out to be a great person to work with throughout (the UPS truck that was delivering the parts got into an accident, I was informed that all merchandise was destroyed, but that didn’t set us back much – another set was printed and en route in 2 days!).
If you’d like to contact him, you can find his posting offering the 3D printed parts here:
https://www.racedepartment.com/threads/the-simfeedback-ac-diy-motion-simulator-thread.159524/post-3048621
Feel free to mention that Bogdan sent you 😉
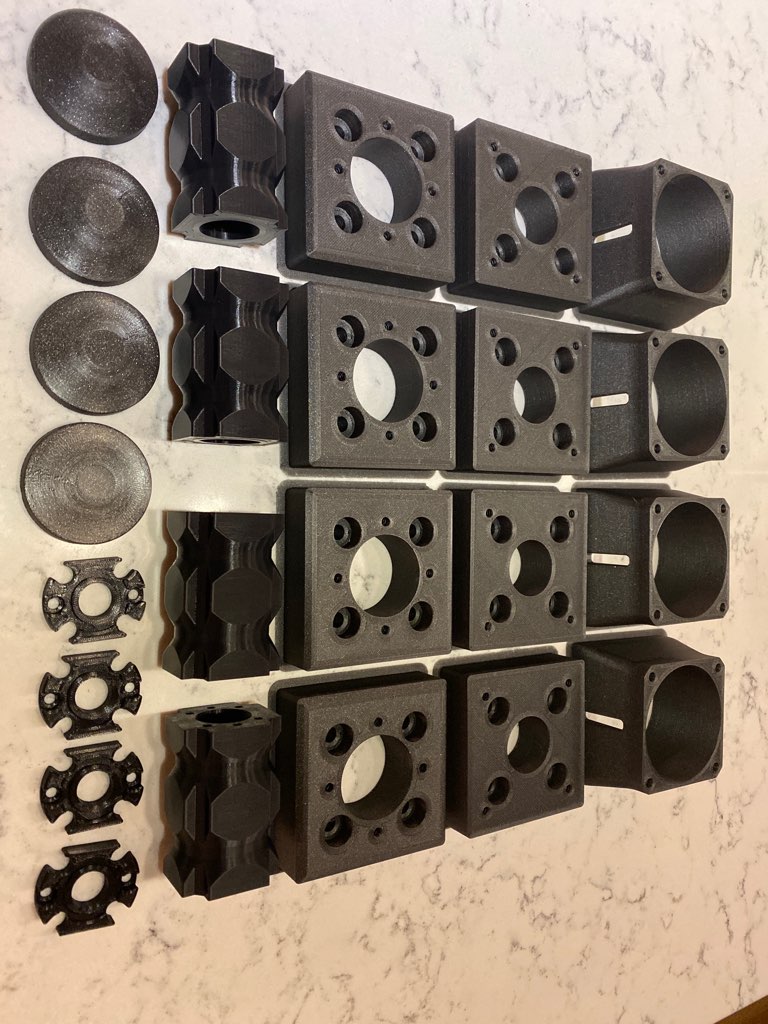
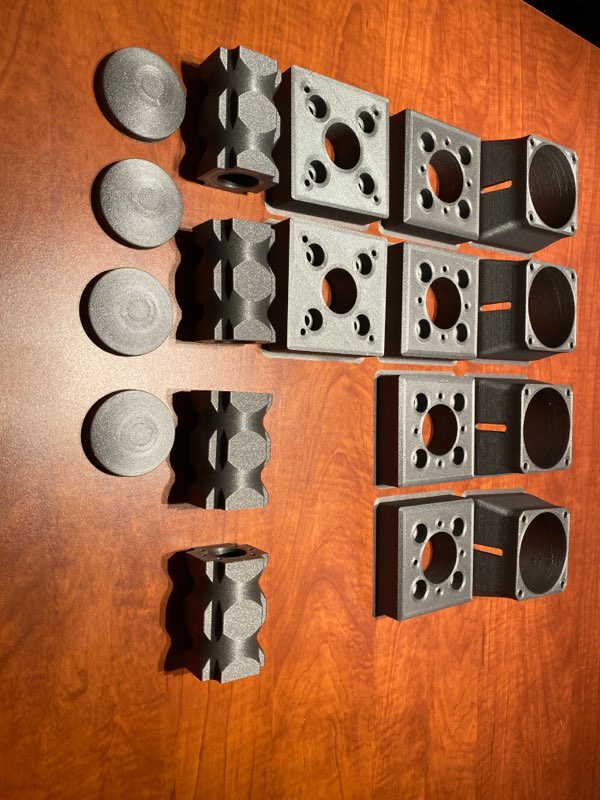
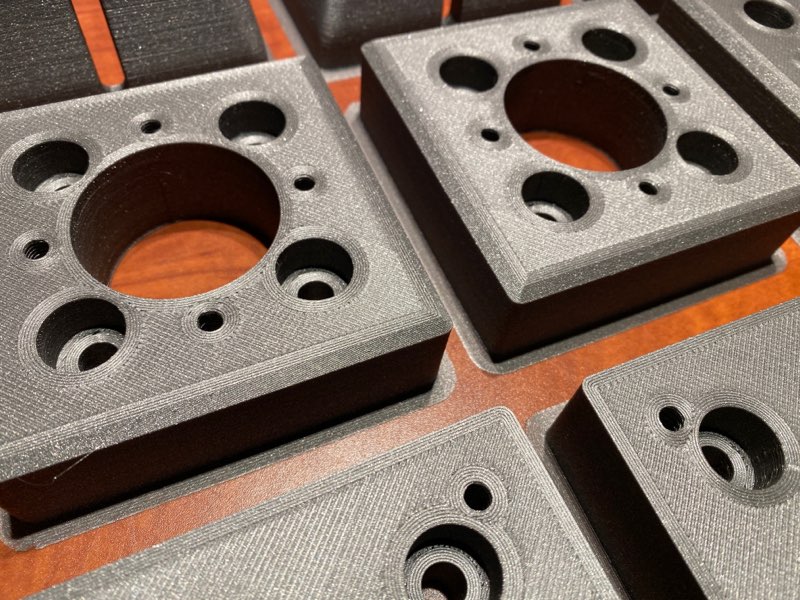
Here’s few photos of my 3D printed parts:

And a quick video showing 3D printing in progress:
Having few printers, calibrated and proven in printing the set of parts we need, speeds up the turnaround time tremendously.
In addition to the parts critical in building the actuators, we can also 3D print the enclosure for electronics (Arduino Leonardo with the DB25 connectors shield by Pyronious):
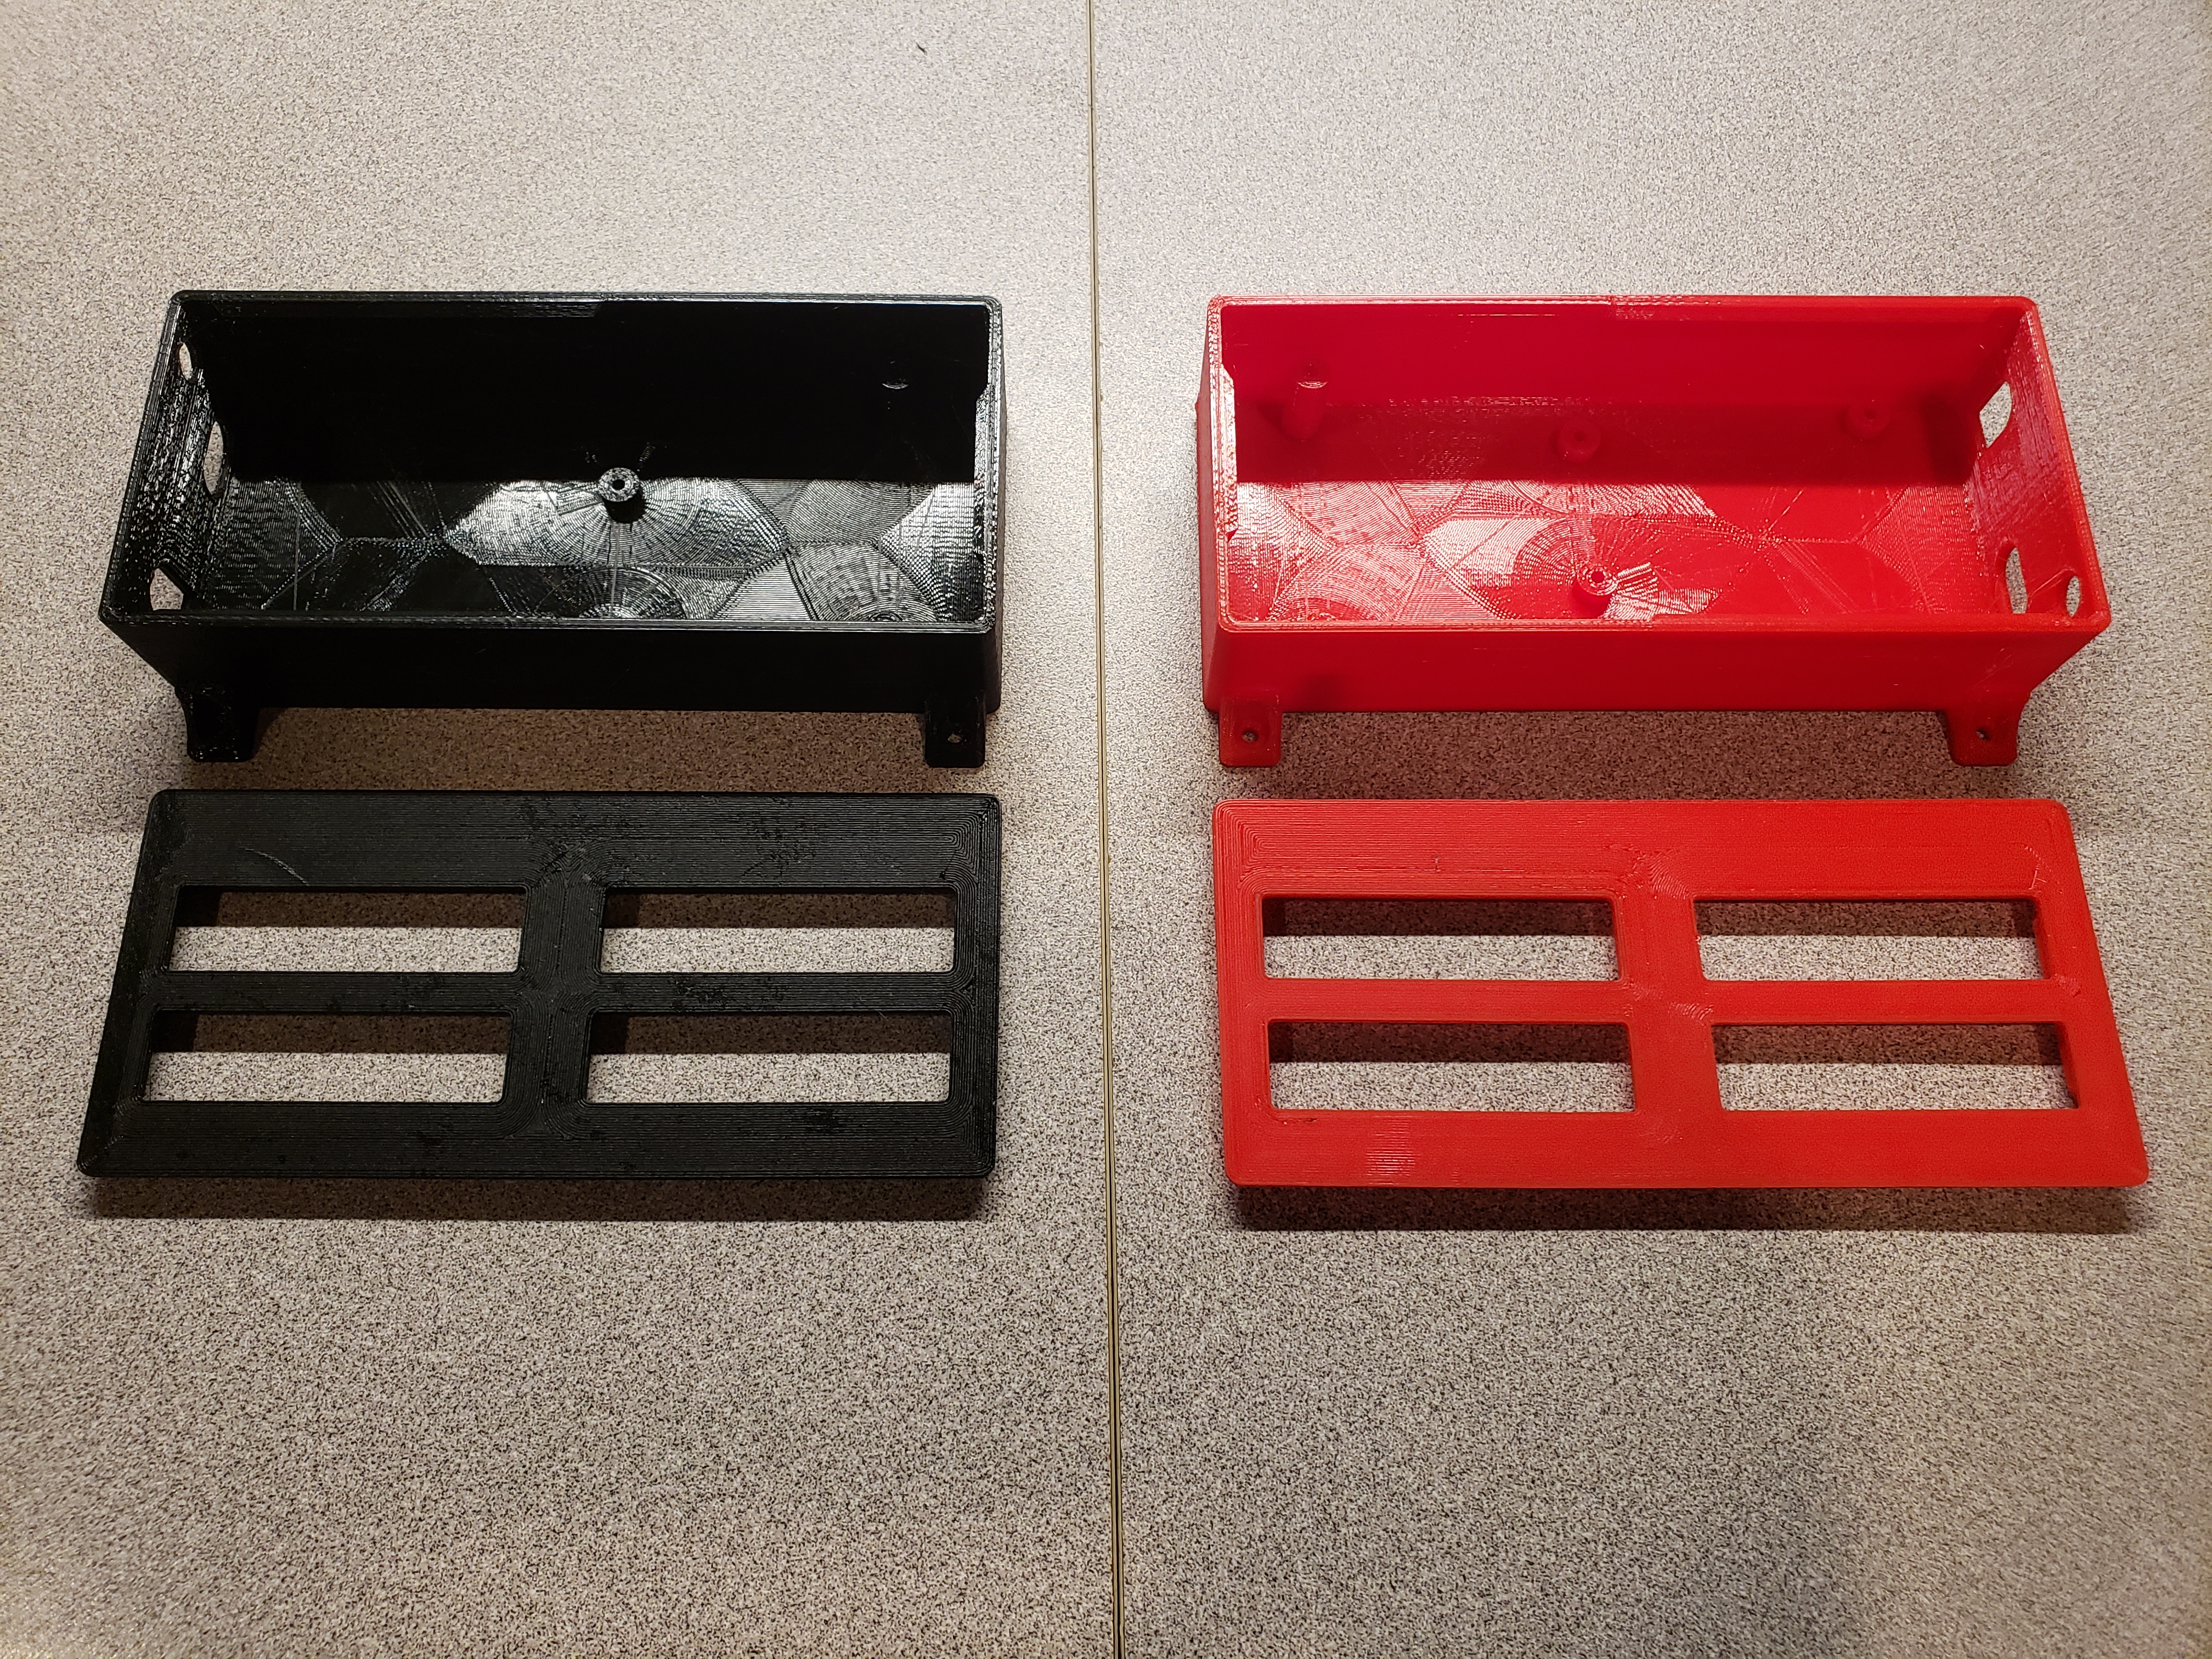

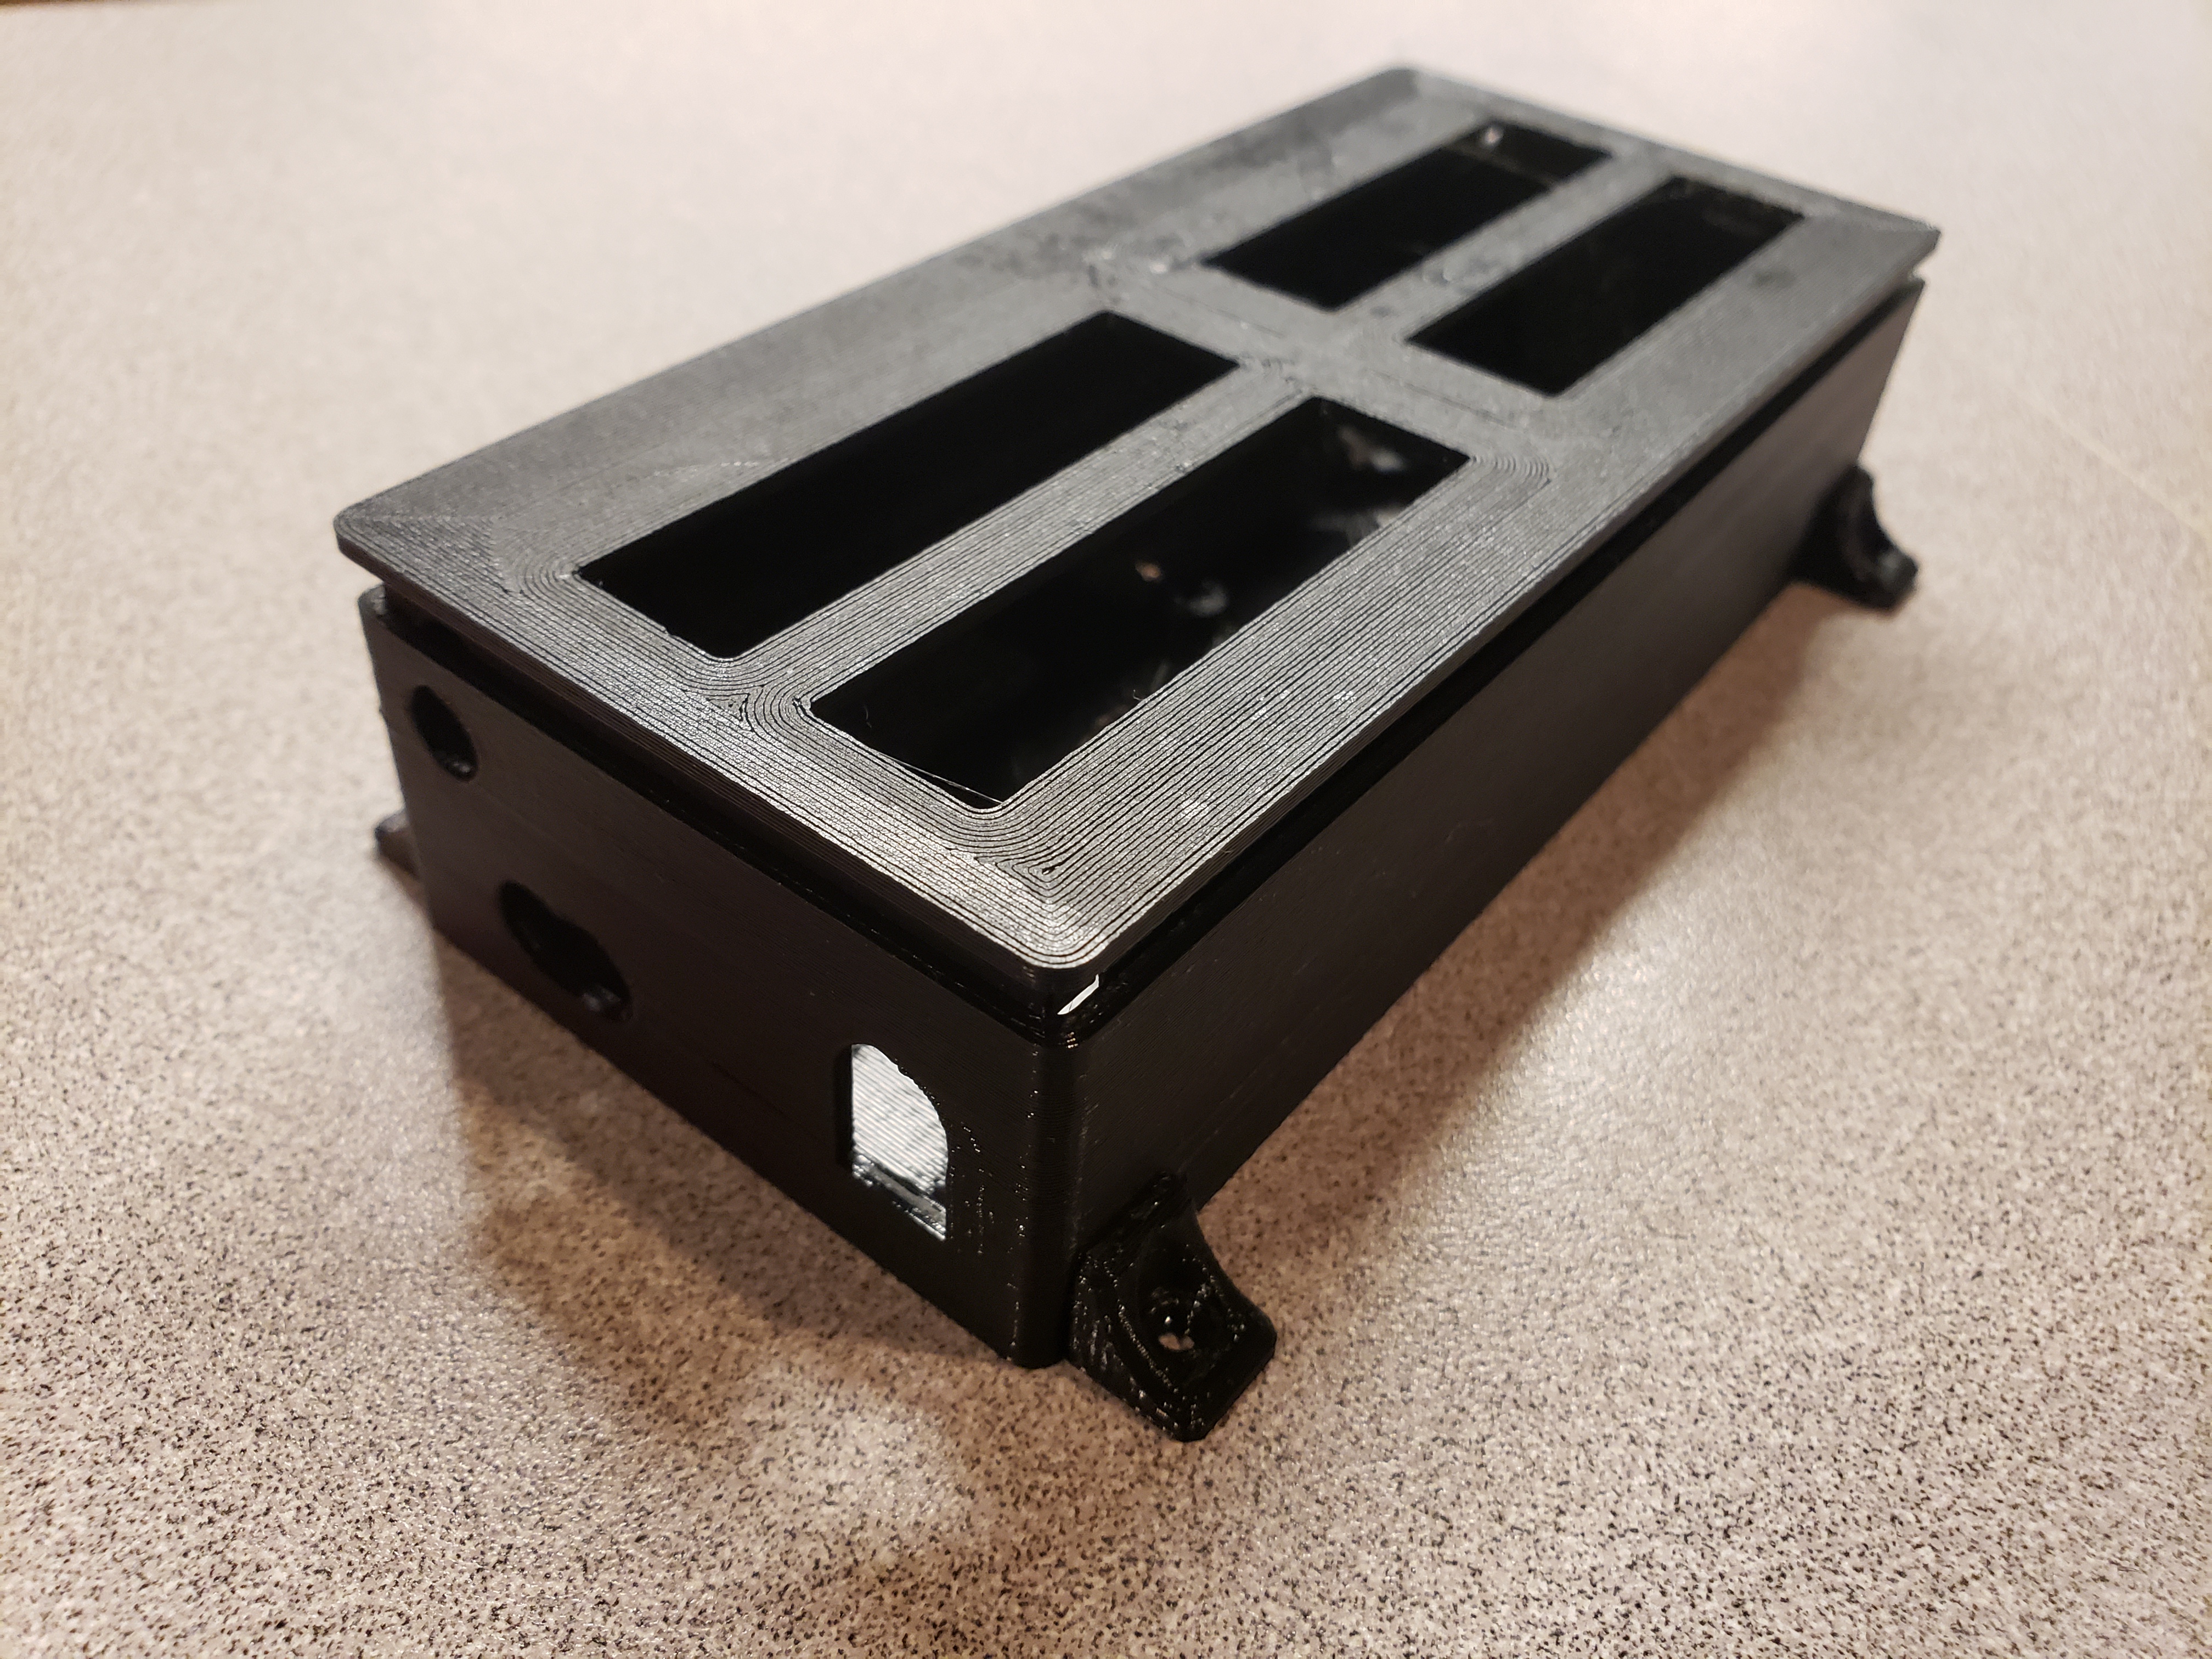
Those files are available on Pyronious’ site:
https://github.com/Pyronious/SFX-100-Breakout-Board/tree/master/Group%20Buy%20Edition/Enclosure
Read more about the electronics below to find out why is the board by Pyronious such a great improvement.
Competitive landscape and pricing
I mentioned that purchasing a commercial offered motion solutions is very expensive. How expensive? Let’s take a look at a quick comparison. This doesn’t represent the market exhaustively, but includes some of the popular options.
| Product | Price range | Description |
|---|---|---|
| DOFReality | From $899 for 2DOF seat mover, to $5,299 for 6DOF. Option comparable to SFX-100 (H3 or P3) retails for $1,949 – $2,699. | Most affordable ready-ro-run solution. Reviews indicate somewhat common issues with motors in the consumer line of products (Hx) and flex in the construction. |
| DBox (example re-seller) |
$7,500 for 2 actuator system with 1.5″, $15,000 for 4 actuators with 1.5″. More for systems with 3″ of travel. | Most well known offering in the world of motion. Offered by many different companies combined with their rigs (including Sim-Lab). Various options for number of actuators and motion range. Expensive. |
| PT Actuators | $5,199 for 4 actuator set | Solution similar to SFX-100, but provided as a commercial project. It’s using Thanos’ controller, which can also be used with SFX-100 actuators. |
| Vesaro | Starting at around $20,000, up to $60,000+ | This is an offering you can often find at various events. Uses DBox actuators. Note that this is a complete system, including PC and Monitors, not just the actuators. |
| CXC Simulations | Starting at $57,000, quickly gets into 6 digits | Similarly to Vesaro, this is a complete offering (with all the necessary hardware). In my opinion, absolutely overpriced – just browsing the option list (casters for $1,200, VR headset [not called out which one] option for $3,700) gives some ideas. Note that this is still their product range for “home use”. And from the looks of it, only the seat moves (wheel column and pedals do not). |
As we can see, building your own motion rig can yield great savings, without sacrificing the performance. It also caries number of other benefits, like: extensibility (you can always add more dimensions later, maybe traction loss, or belt tensioner?), easy servicing (if you build it once, you’re able to diagnose and repair it later on), scalability (you can start smaller, and then expand, e.g. by updating the rig to a sturdier option a bit later to spread the costs over time), and more. Oh and there’s always satisfaction from saying: “I built it” 😉
Now consider that SFX-100 actuators can be built for around $2,500, depending on the equipment you already have (3D printer) and few choices made along the way. And it offers very comparable performance (sometimes even outperforming the above solutions, e.g. considering the travel of 4″ [100mm]).
Manuals for motors and controllers
If you’re looking for technical specification, in-detail description of available functions, or even technical drawings for the servo controllers as well as motors, manuals are a great source of knowledge. This is where I found information about clearing the alarms and much more.
Here are the manuals I’ve been using:
- SFX-100 – AASD servo drive manual (recommended)
- SFX-100 – ST series servo motor manual
- SFX-100 – AASD servo manual, Chineese and English, v3
- SFX-100 – AASD servo manual, Chinese and English, v6.3
Let’s build this thing! Next is:


Leave a Reply to Roman Gavrishov Cancel reply