

Many cars come with built-in cameras. Most commonly a rear camera, enabled when you put your car in reverse. Front-facing cameras are more of a rarity (can be found on some exotics, to assist with parking with low ground-clearance), with 360 degree cameras being the newest fashion. All of them help in positioning the car when maneuvering, and avoiding scratches/accidents, but only during specific conditions (most commonly – transmission needs to be in reverse for the cameras to be activated) and when the car is running (meaning – no monitoring when parked).
But what if we want to further protect the vehicle, either while driving to have a leverage against those incapable drivers doing weird things on the roads every day (I mean, especially in Seattle – don’t even get me started… 😉 ), or have a piece of mind when leaving the car parked? Install a dashcam! Or better yet, two: front and back.
The installation is quite simple, even though it will vary between vehicles. Generally, the same body panels can be easily removed across pretty much the whole lineup of vehicles, even if there are some small differences in how they’re mounted. Even if you haven’t done anything similar before, if you’re wiling to put 2-3 hours of time, you can do it with just basic tools.
Before we jump into the installation, let me address one more thought…
Why won’t car manufacturers just offer dashcams as options?
I’ve been wondering why won’t car manufacturers broadly adopt approach of using the existing cameras as dashcams (where applicable – if the cars are already equipped with cameras), or adding dedicated dashcams altogether… I can see few reasons:
- the purpose between a backup camera and a dashcam is different – one should help us easily glance at the surroundings, show where the car will end up if the trajectory is maintained, avoid hitting stationary obstacles; while a dashcam is helpful mostly in an unlucky situations, to deal with people behaving unreasonably in intense-stress situations (straight out lying, denying responsibility, etc.). This dictates different requirements (larger resolution, higher framerate/less motion blur and better night-time visibility for dashcams), which would then drive the cost up
- aftermarket parts can be developed and re-iterated on more quickly, they can also be swapped when desired – being stuck with a 720p dashcams from manufacturer for next 5 years doesn’t really sound that tempting, considering the progress that is still being made in this area,
- it may be similar to navigation systems – the ones built-in are expensive and can get outdated quickly, while 3rd party devices need to continue competing in the market, driving their quality higher. All that was a bit more applicable before smartphones taking over though 🙂
- liability – if the dashcam were to fail to record an accident, I can imagine car manufacturers wouldn’t want to take responsibility for that on themselves. I’m sure this could be somehow mitigated (lawyers have their ways 🙂 ), but at the same time – I don’t think it’s an easy task to confront a Chineese manufacturer if one of dashcams sourced from there were to fail,
I think this may change in future – as cars become smarter, the need for high quality cameras is increasing, and they should naturally become more multi-purpose.
Alright, let’s install the dashcams!
Installation
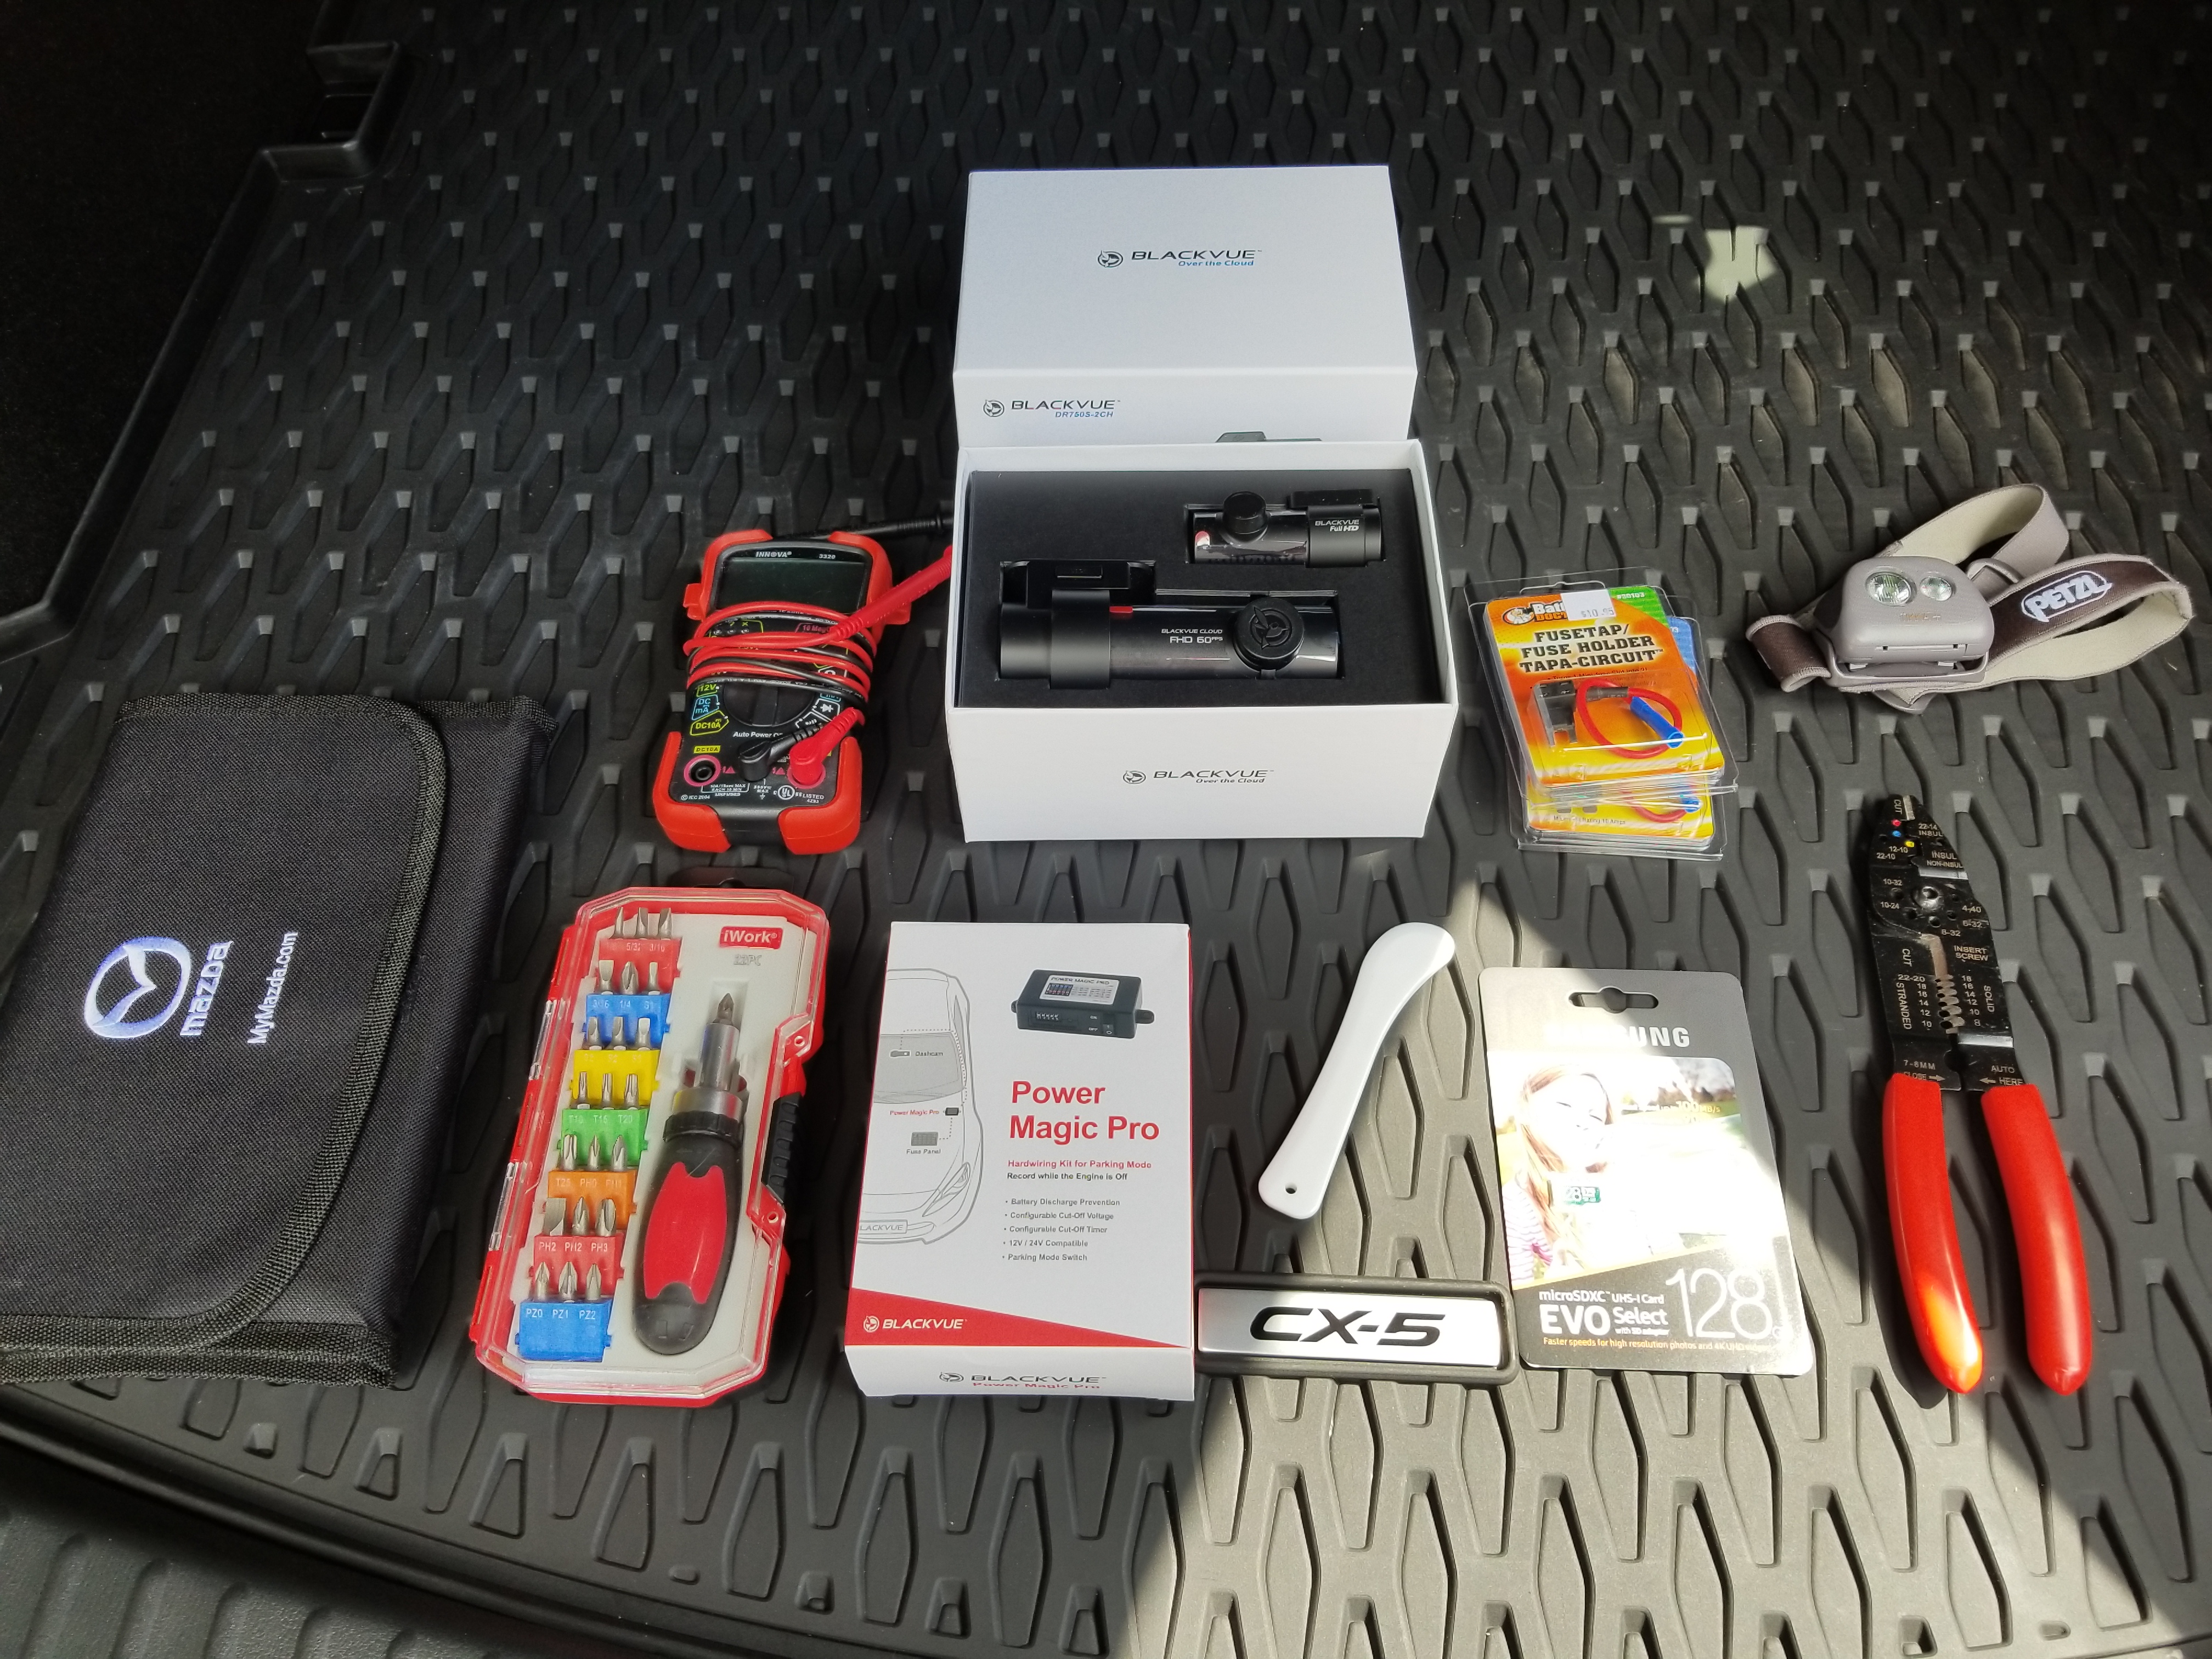
What you’ll need:
- Car: Mazda CX-5 in this case
- We’re using 2018 model, but it doesn’t really matter – the steps are same for all model years.
- Dashcam: Blackvue DR750S-2CH With Power Magic Pro – https://amzn.to/2JiwpwZ
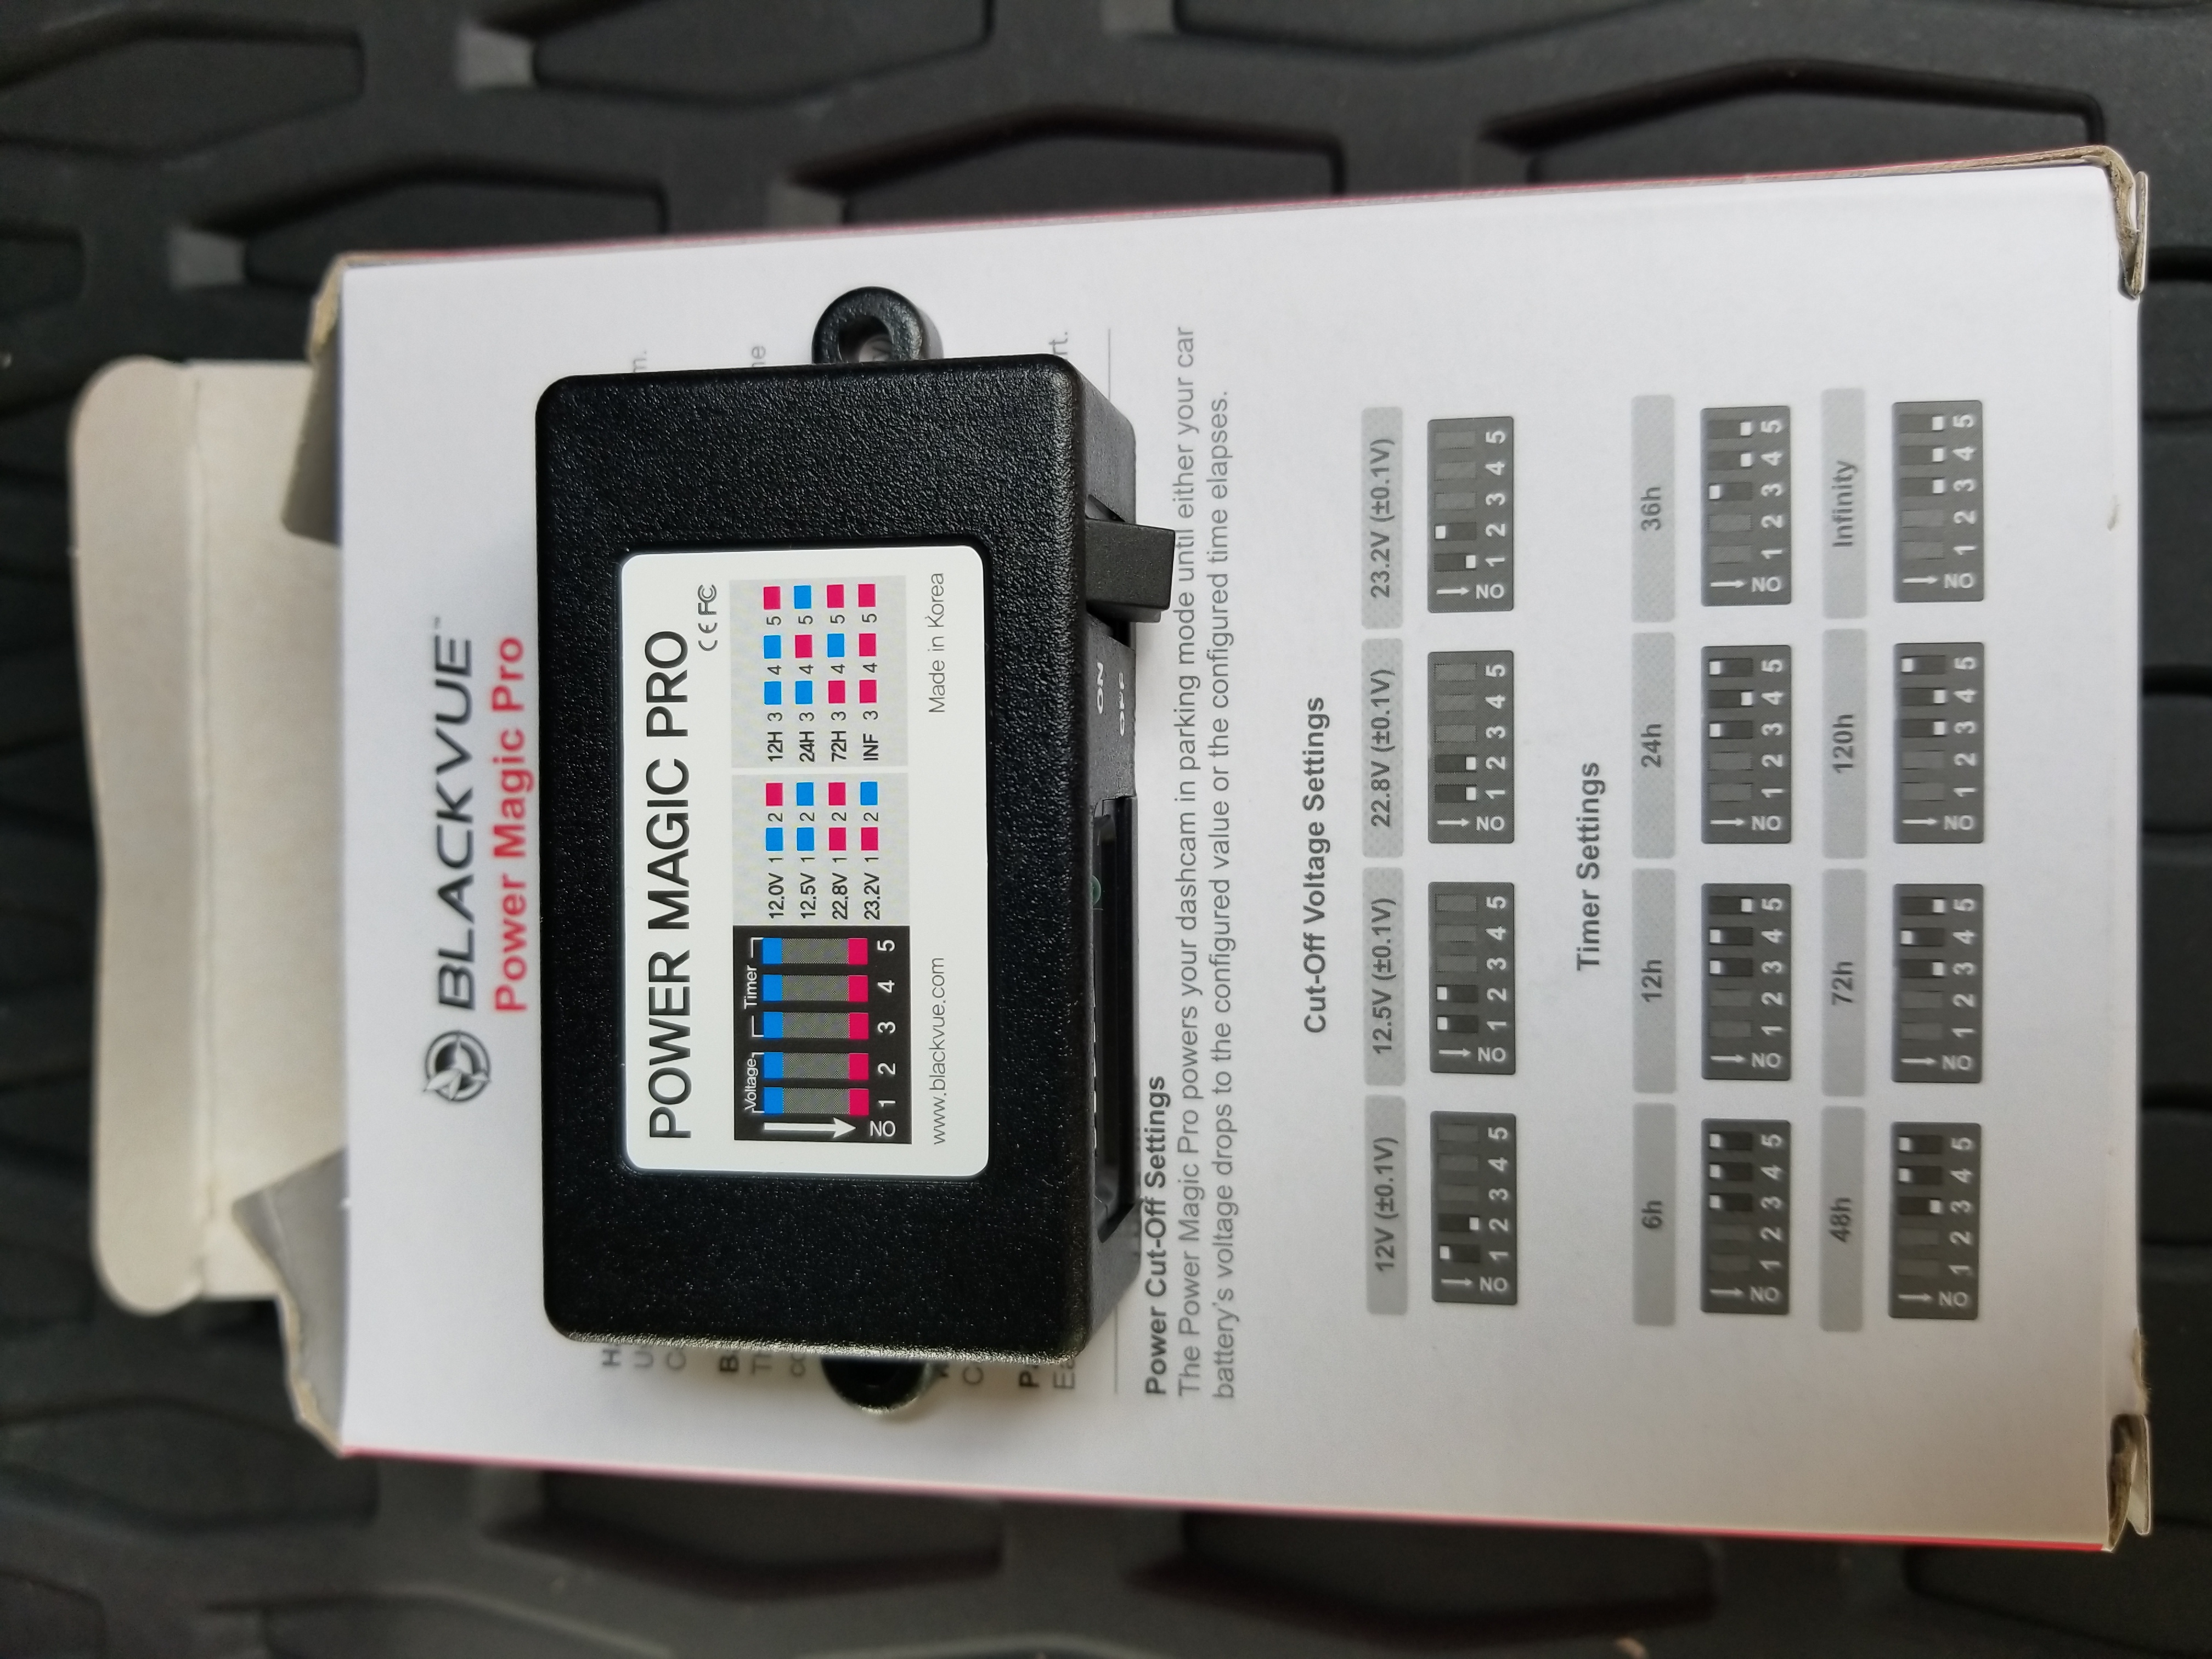
- You can use other dashcam, obviously, but I found Blackvue cameras to be reliable, good quality, and also notice that this set includes front and back cameras, as well as a “Power Magic Pro” which is a small additional circuit that enables the cameras to record in parking mode (in case someone bumps your car while it’s parked) and protects your car’s battery from discharging below safe level.
- Since I bought mine, Blackvue has released newer model: DR950S-2CH, which brings better resolution and low-light performance – https://amzn.to/2BE4Snh
- 12V Car Add-a-circuit Fuse TAP Adapter Mini – https://amzn.to/2HlUpOS
- You may be able to get away with wrapping the wires around the legs of the fuses, but that seems messy, risky and I highly recommend picking those add-a-circuit up. Most of modern vehicles use the “mini” fuse size, and Mazda CX-5 is one of them.
- Samsung 128GB 100MB/s (U3) MicroSD EVO Select Memory Card with Adapter – https://amzn.to/2F84Pjt
- I found those SD cards to work reliably, but if you don’t mind spending a bit more, look at a line of products specifically dedicated to use with cameras (they’re supposed to be better at continues write and many write cycles) – here’s an example: https://amzn.to/2MTvm7T
- Auto-Ranging Digital Multimeter – https://amzn.to/2vAbNhJ
- Optional, you can follow the instructions below and use exactly same fuses as I did for great results. But if for any reason you’d like to use different fuses (or in a different vehicle), you’ll need multimeter to confirm which ones get power only when ignition is on vs. always.
- Pliers
- Clear microfiber cloth and a glass cleaner (be sure to use ammonia free cleaner if you have tint – Invisible Glass works well) to clean the glass before sticking the cameras
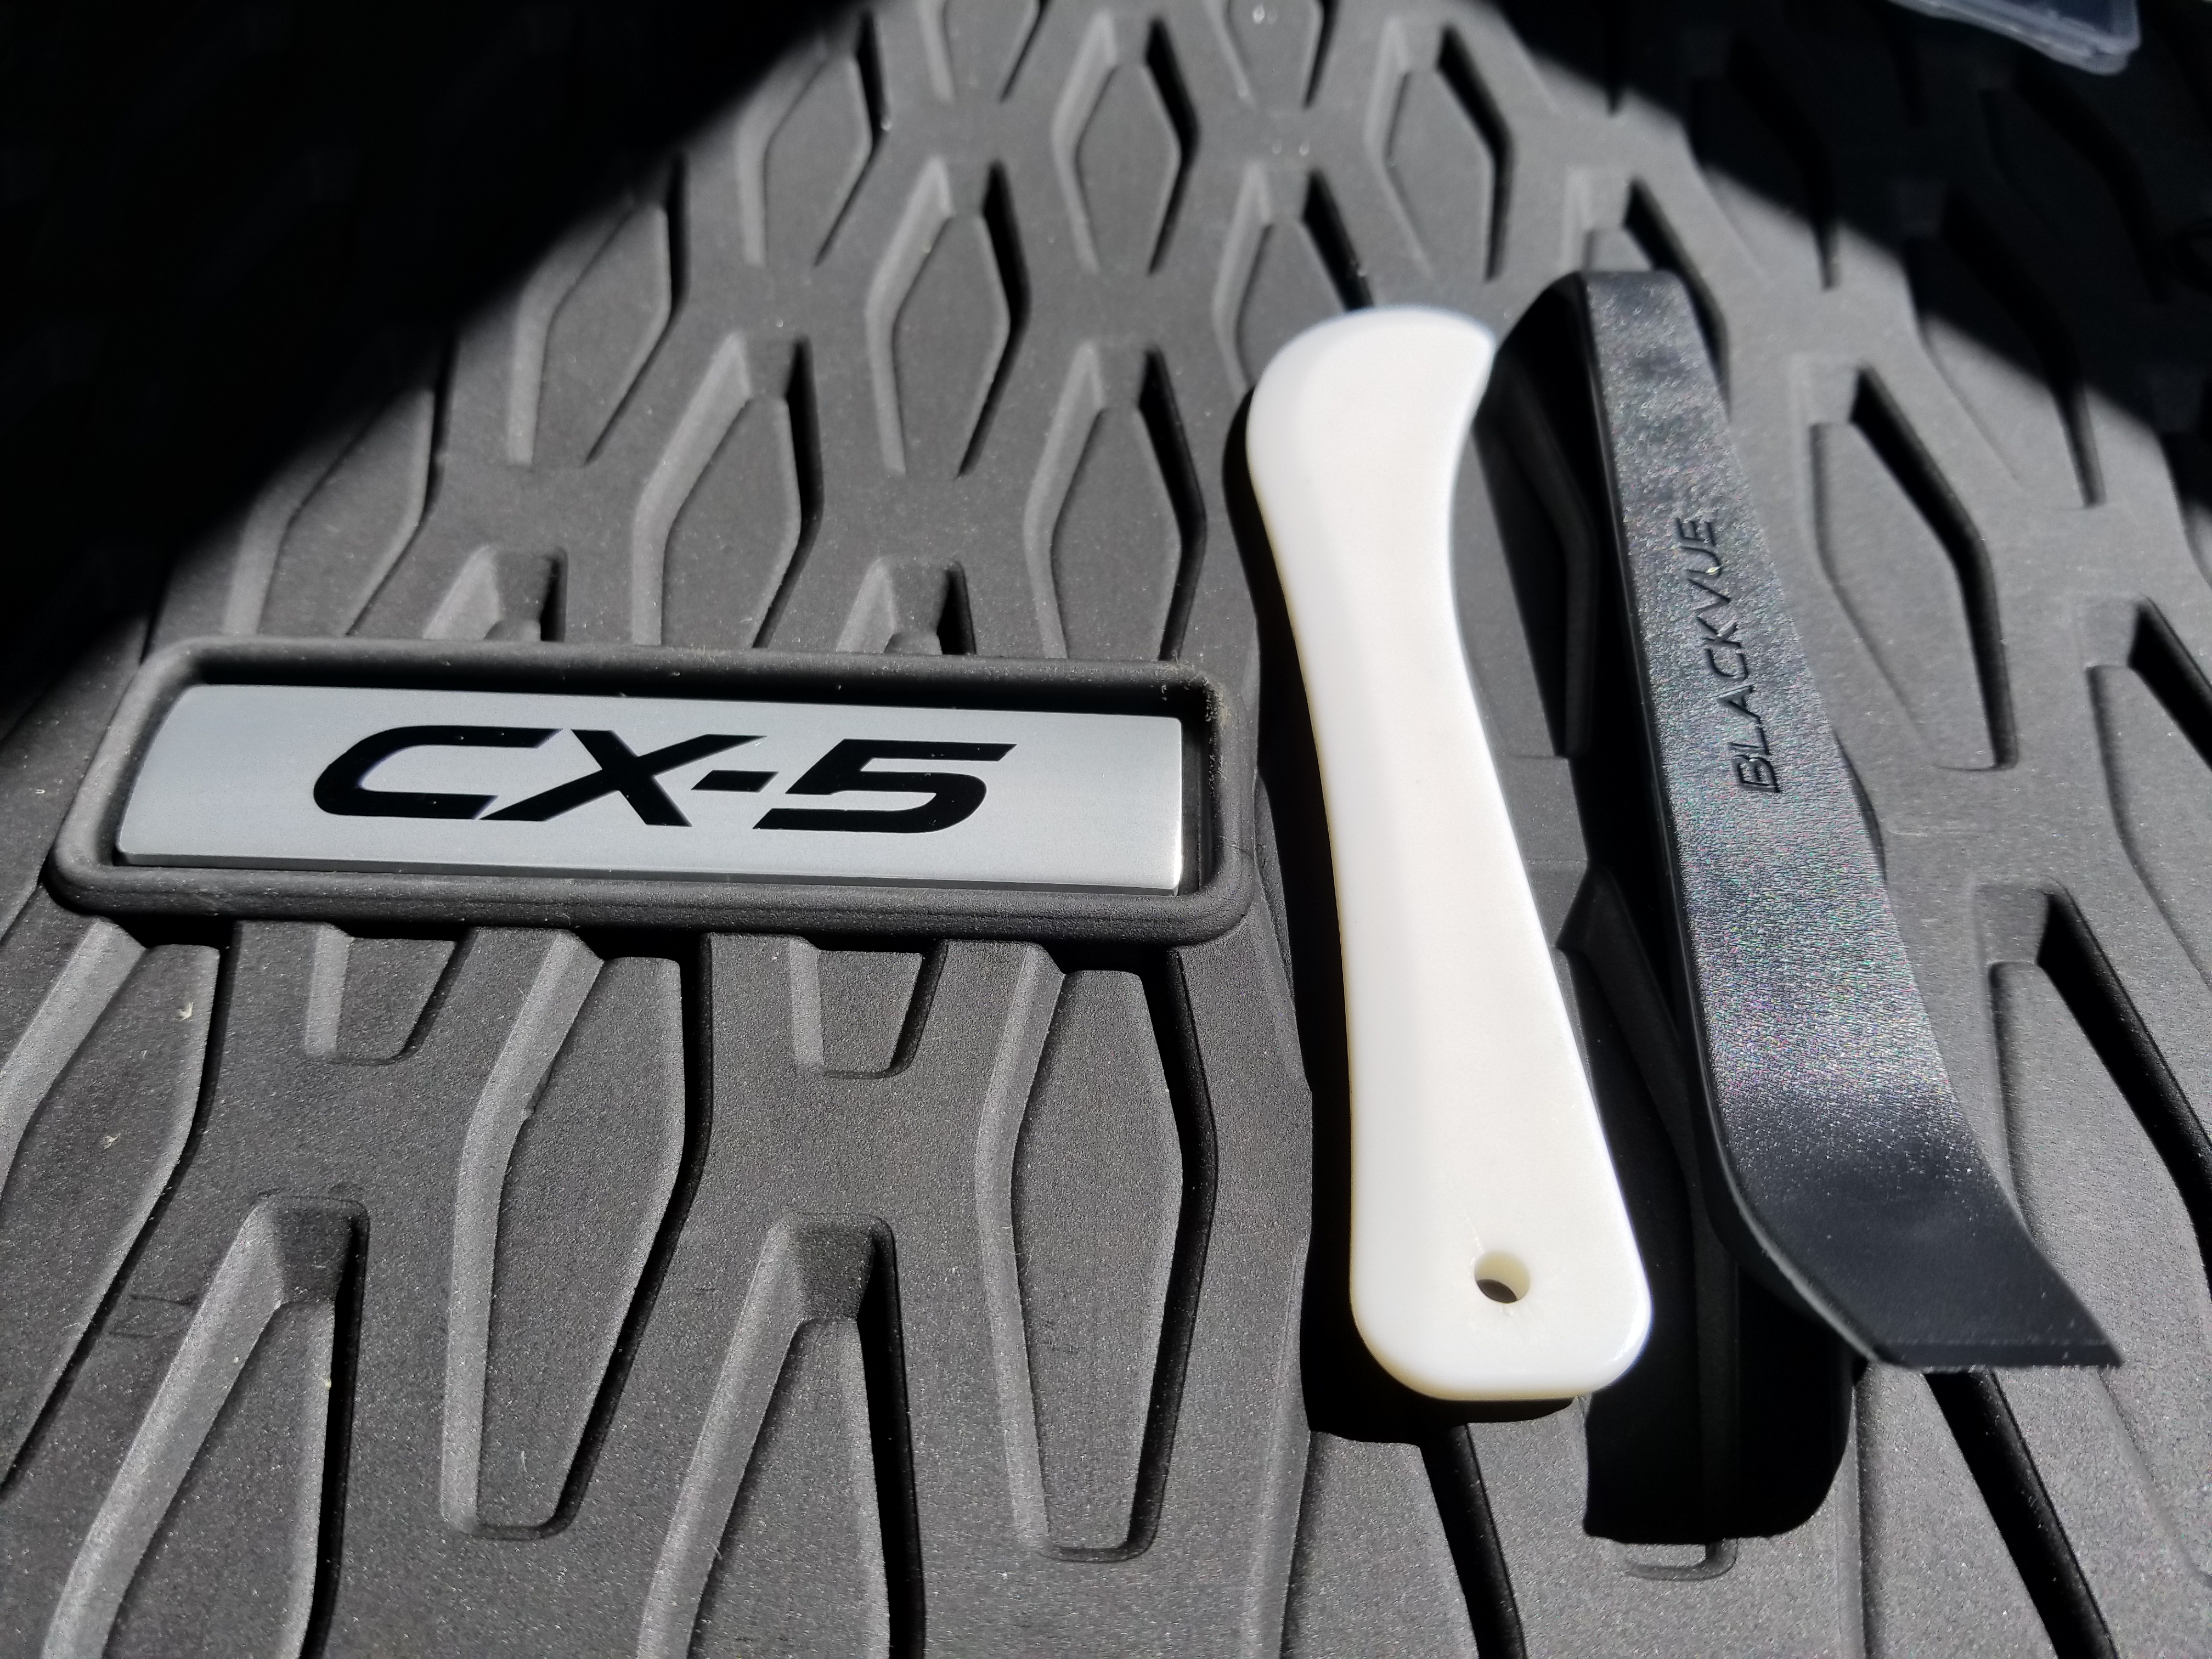
- Bone tool
- Helps in tucking in the wired under trim elements. Note that it comes in the set with Blackvue (but you may need to buy it separately if you decide to go with a different camera).
- Car manual
- For description of fuses (which one is which). See photo below in the instructions for Mazda CX-5, but if you have different vehicle, refer to its manual or find it online.
- Android or iOS device
- To connect to the cameras before sticking them to the window, to make sure they’re properly positioned (centered, pointing at the right angle, etc.).
- Zip ties
- Optional, but make one installation step easier (routing wires to the lift gate), https://amzn.to/2QM9thF
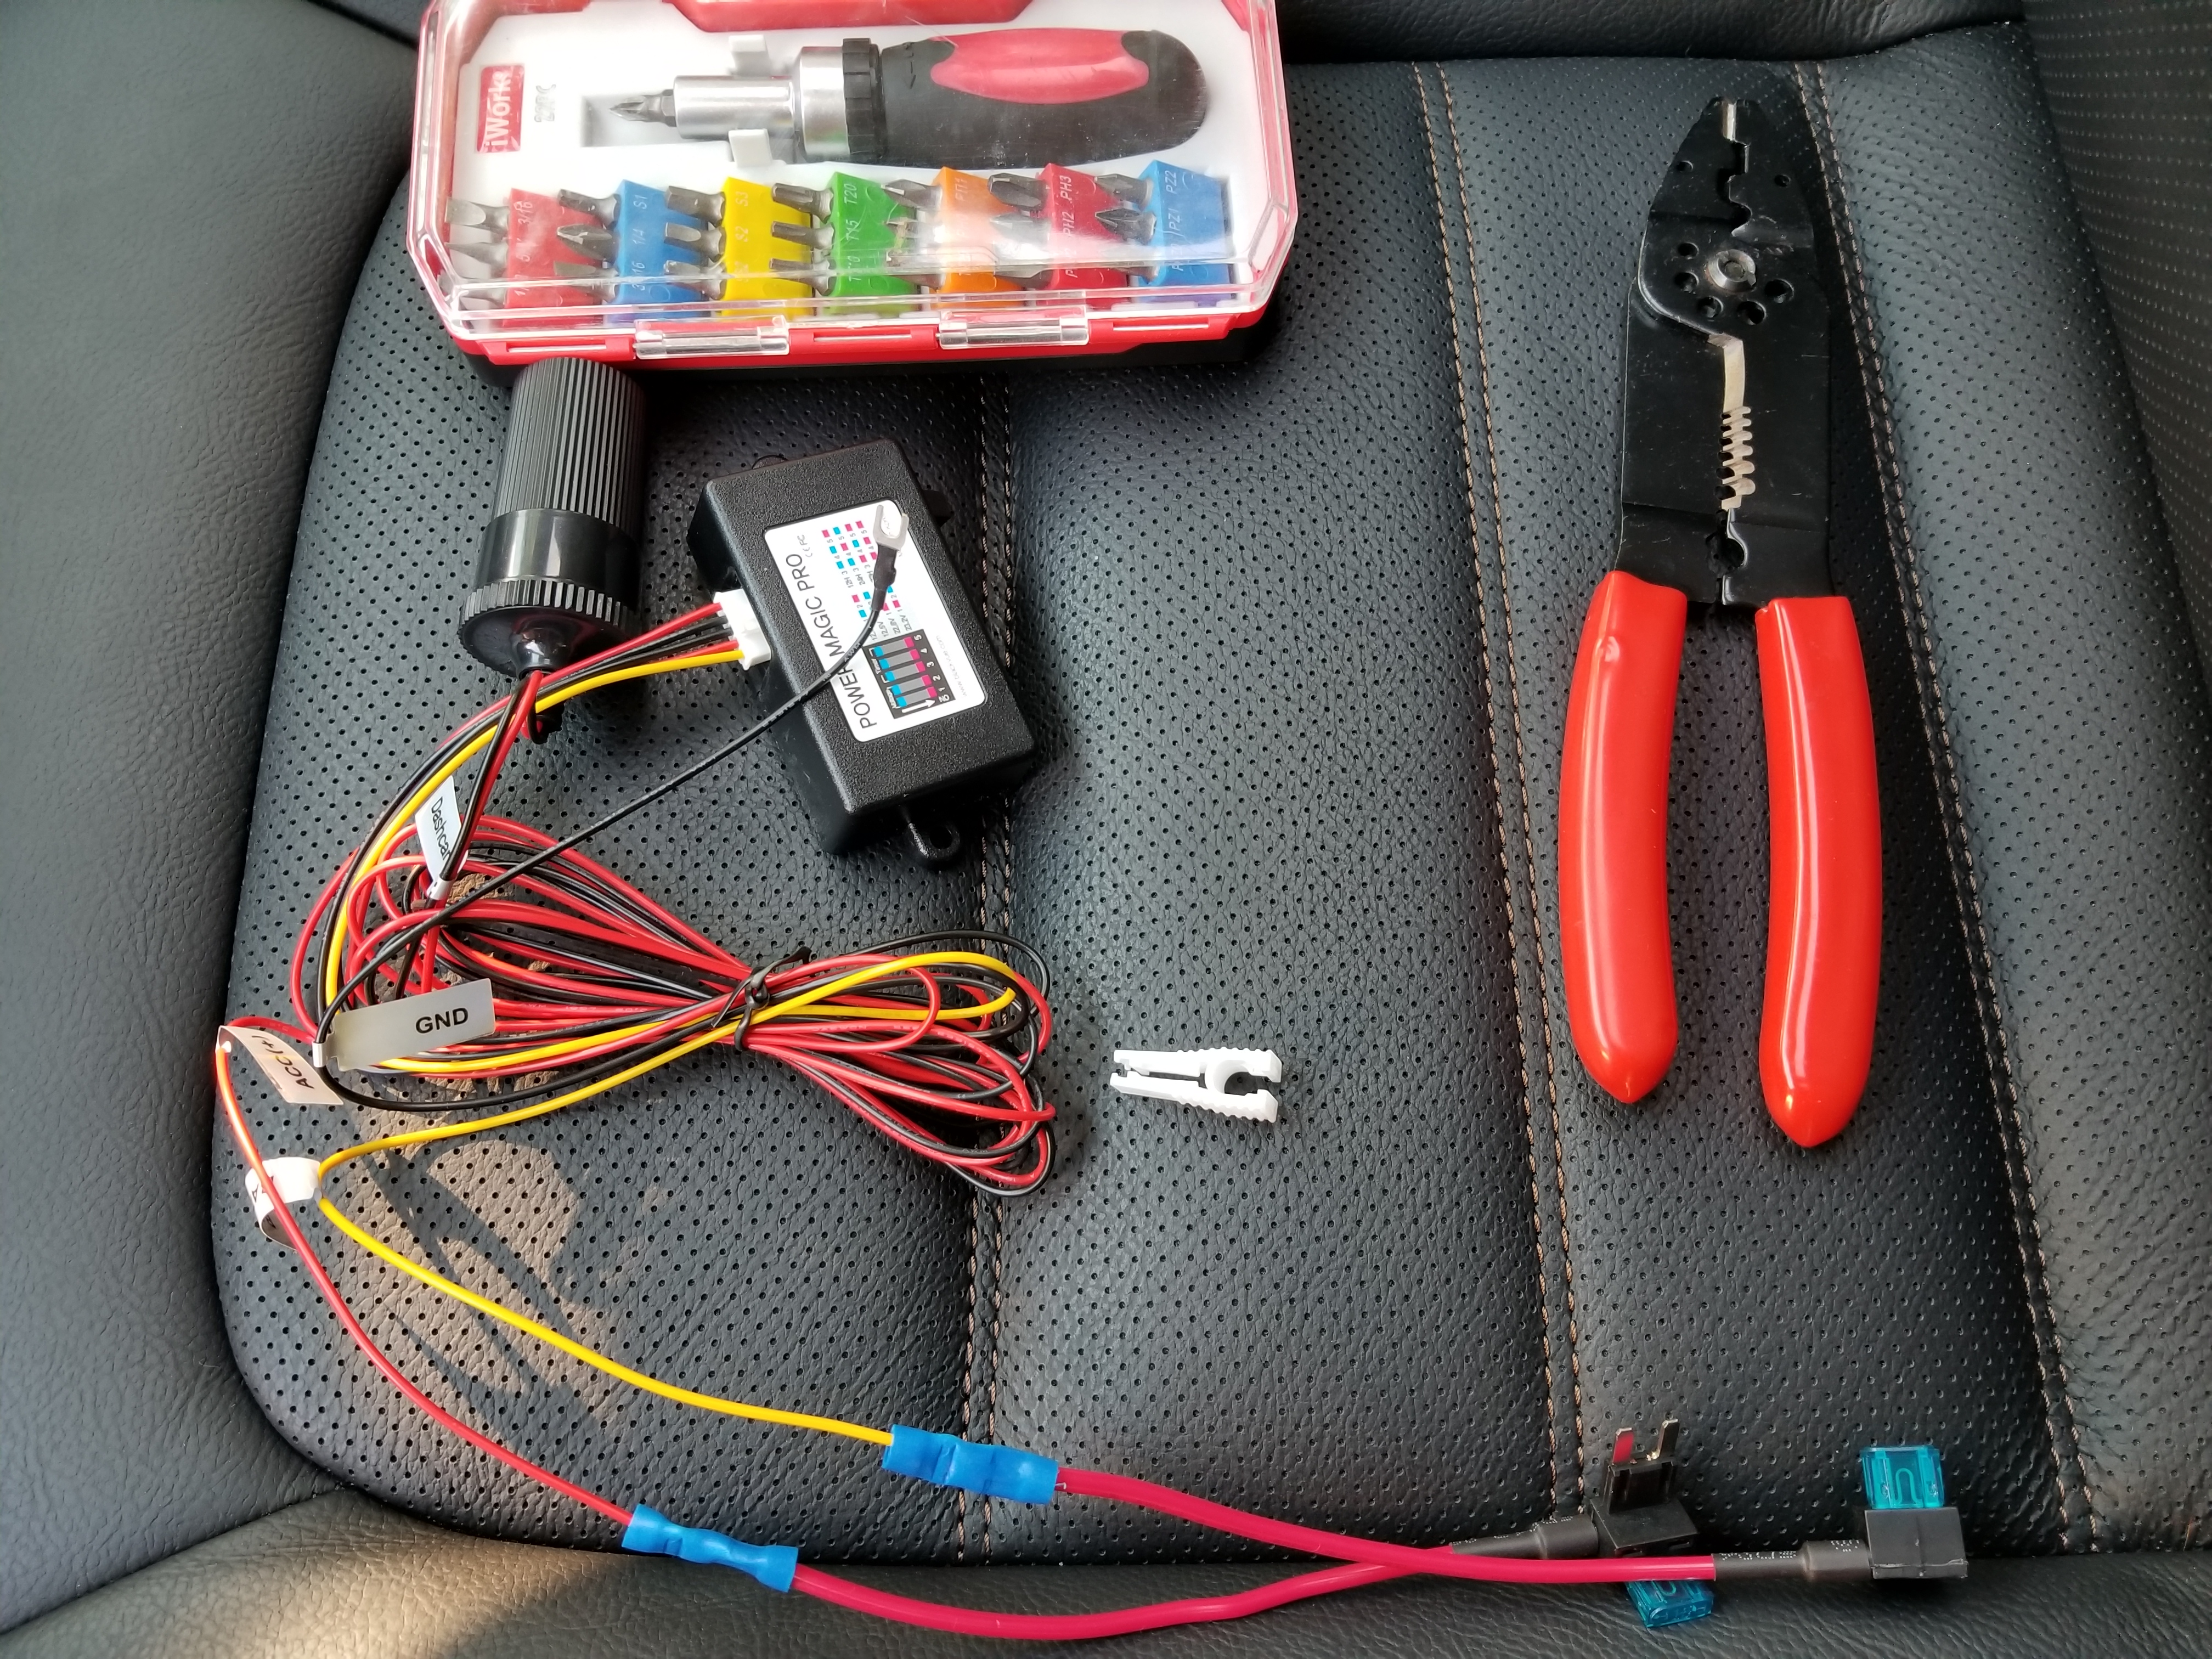
Here’s a look at all the accessories and tools:
Power Magic Pro is a small box that allows us to keep the cameras running even if the car is turned off – it will protect the battery from discharging below a safe level, so you can be sure the car will start next time.
Bone tool is optional (helps in separating plastic interior panels and tucking in the cables), but it actually comes with new Blackvue camera sets, so you don’t even need to buy it separately.
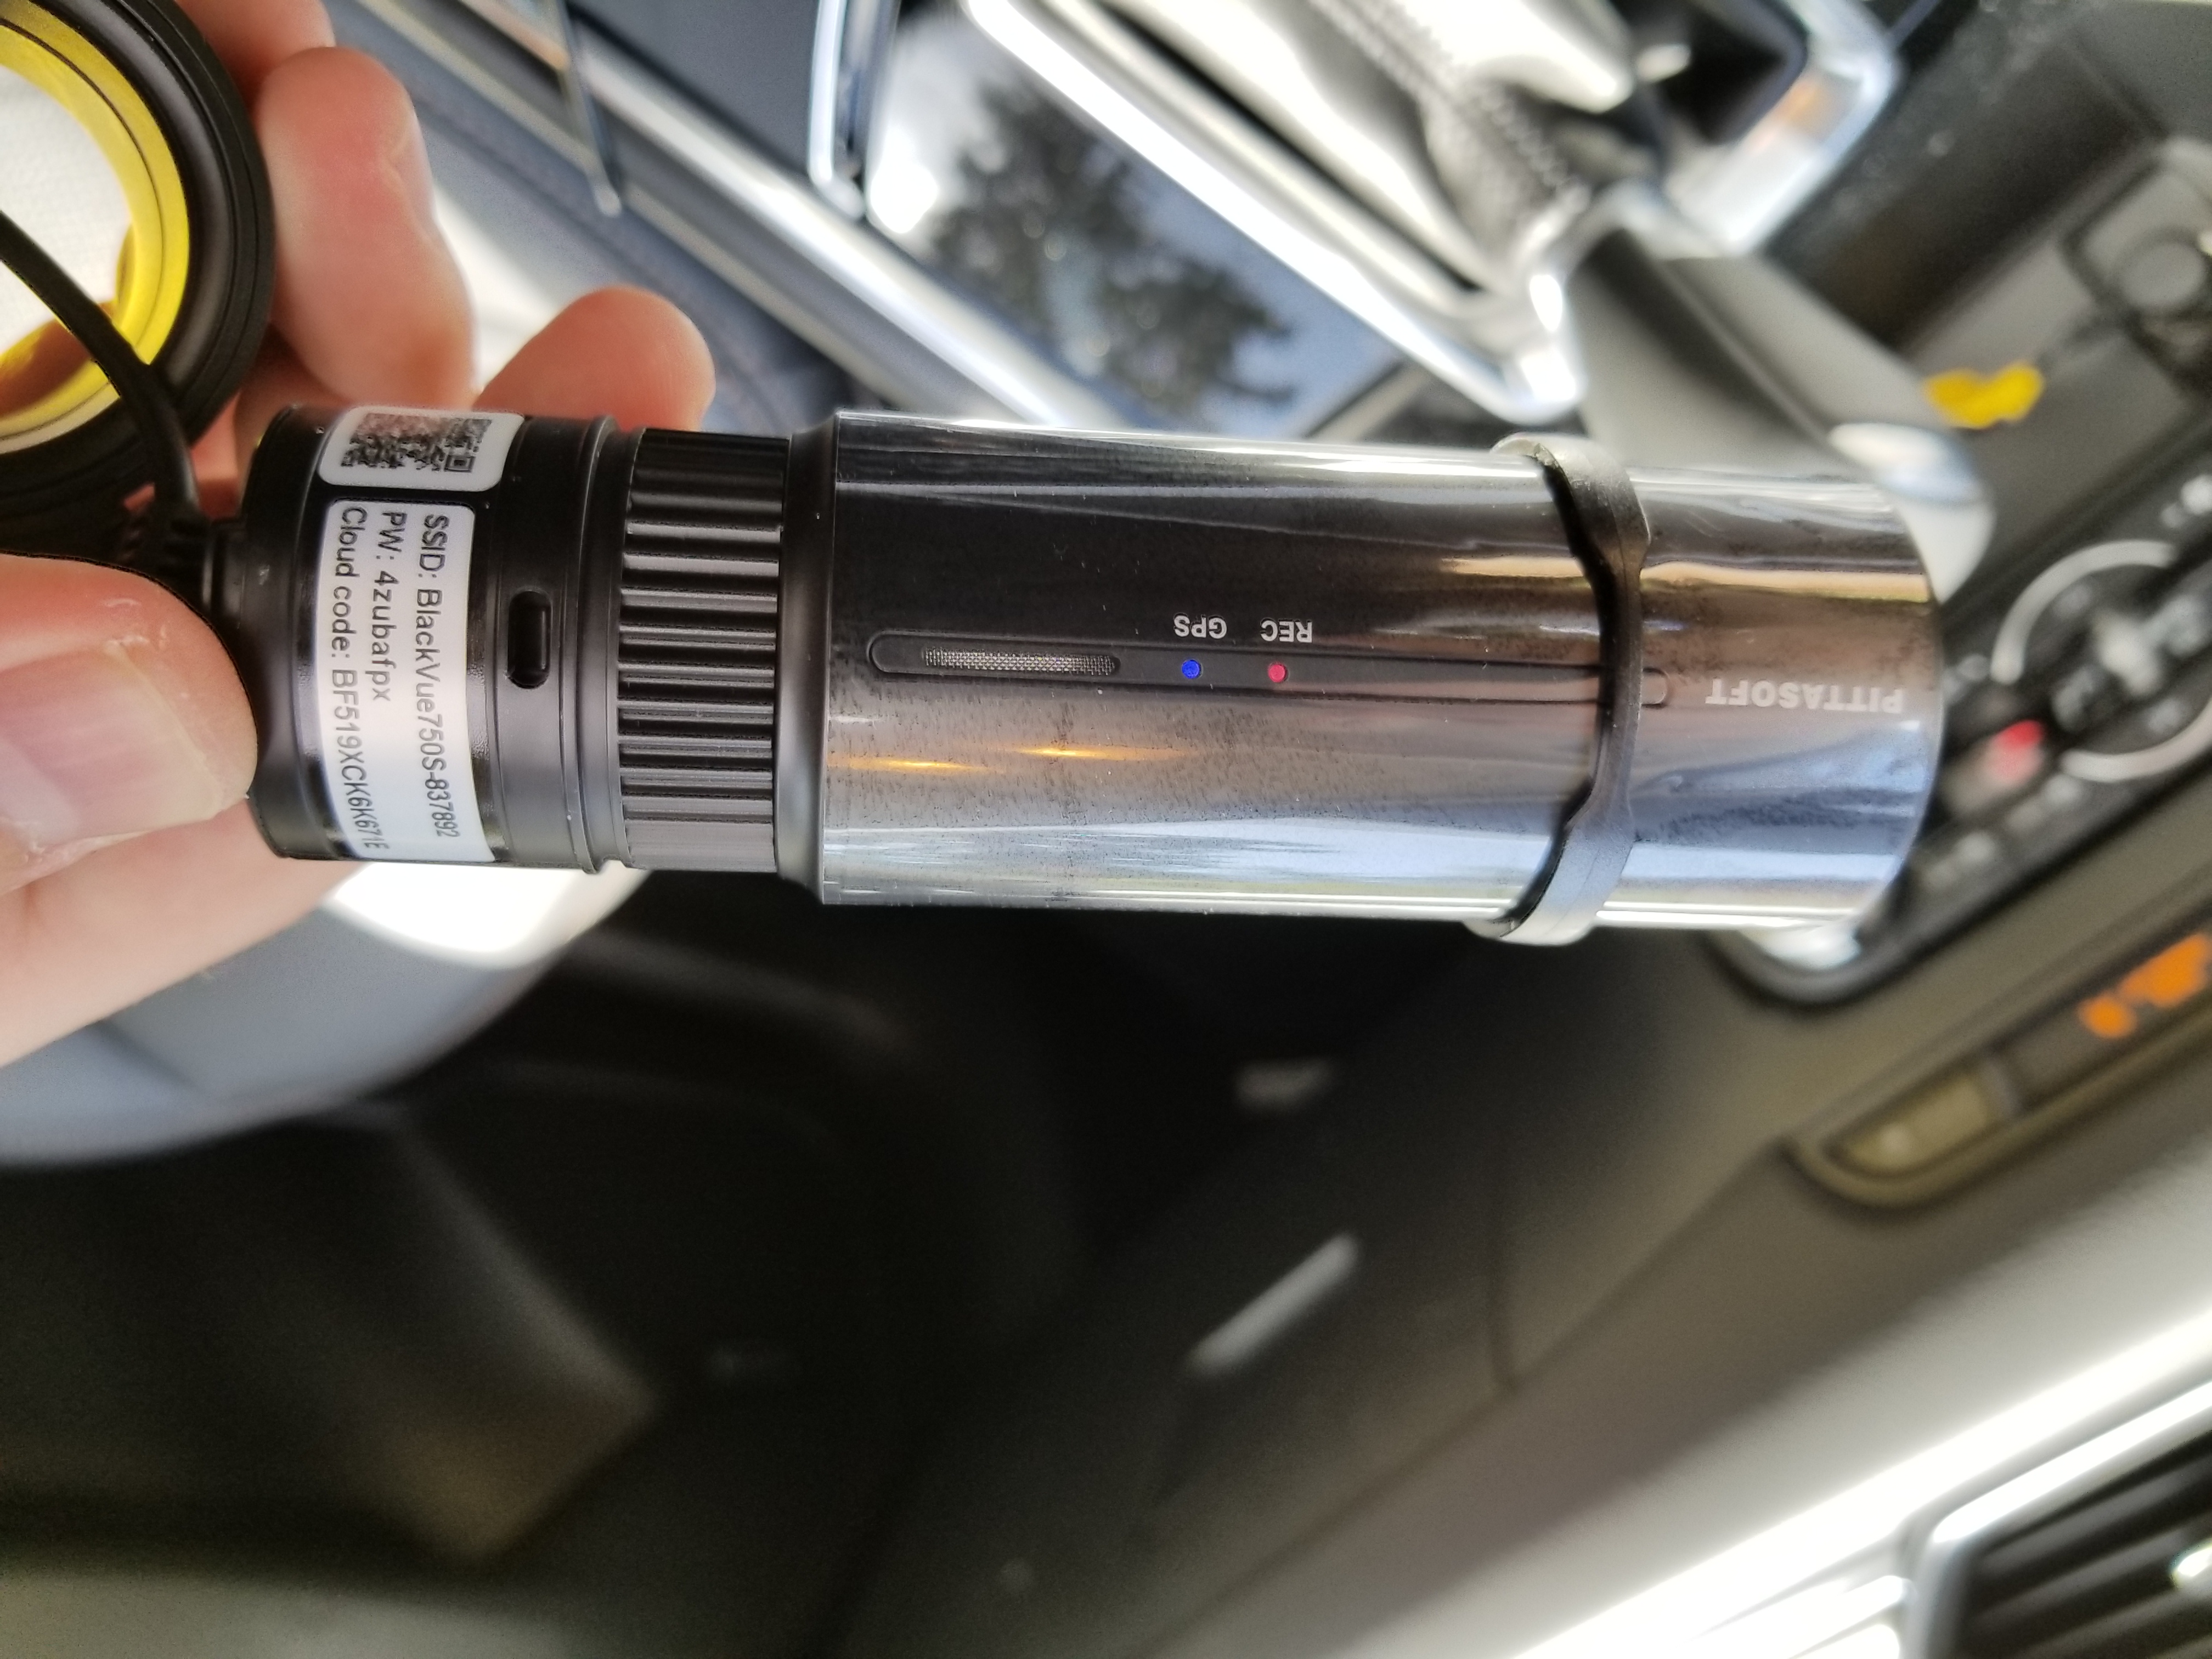
I’d recommend snapping a quick photo of your camera, before you install it, so you can easily get the WiFi password for initial setup (it’s on the front camera), and then obviously change the settings to whatever you prefer:
With everything unpacked, I’d recommend quickly connecting it using the cigar socket (I’m not 100% sure this is the official name, but I’m sure you know what I mean 🙂 ), and making sure everything works, before we go further with the installation.
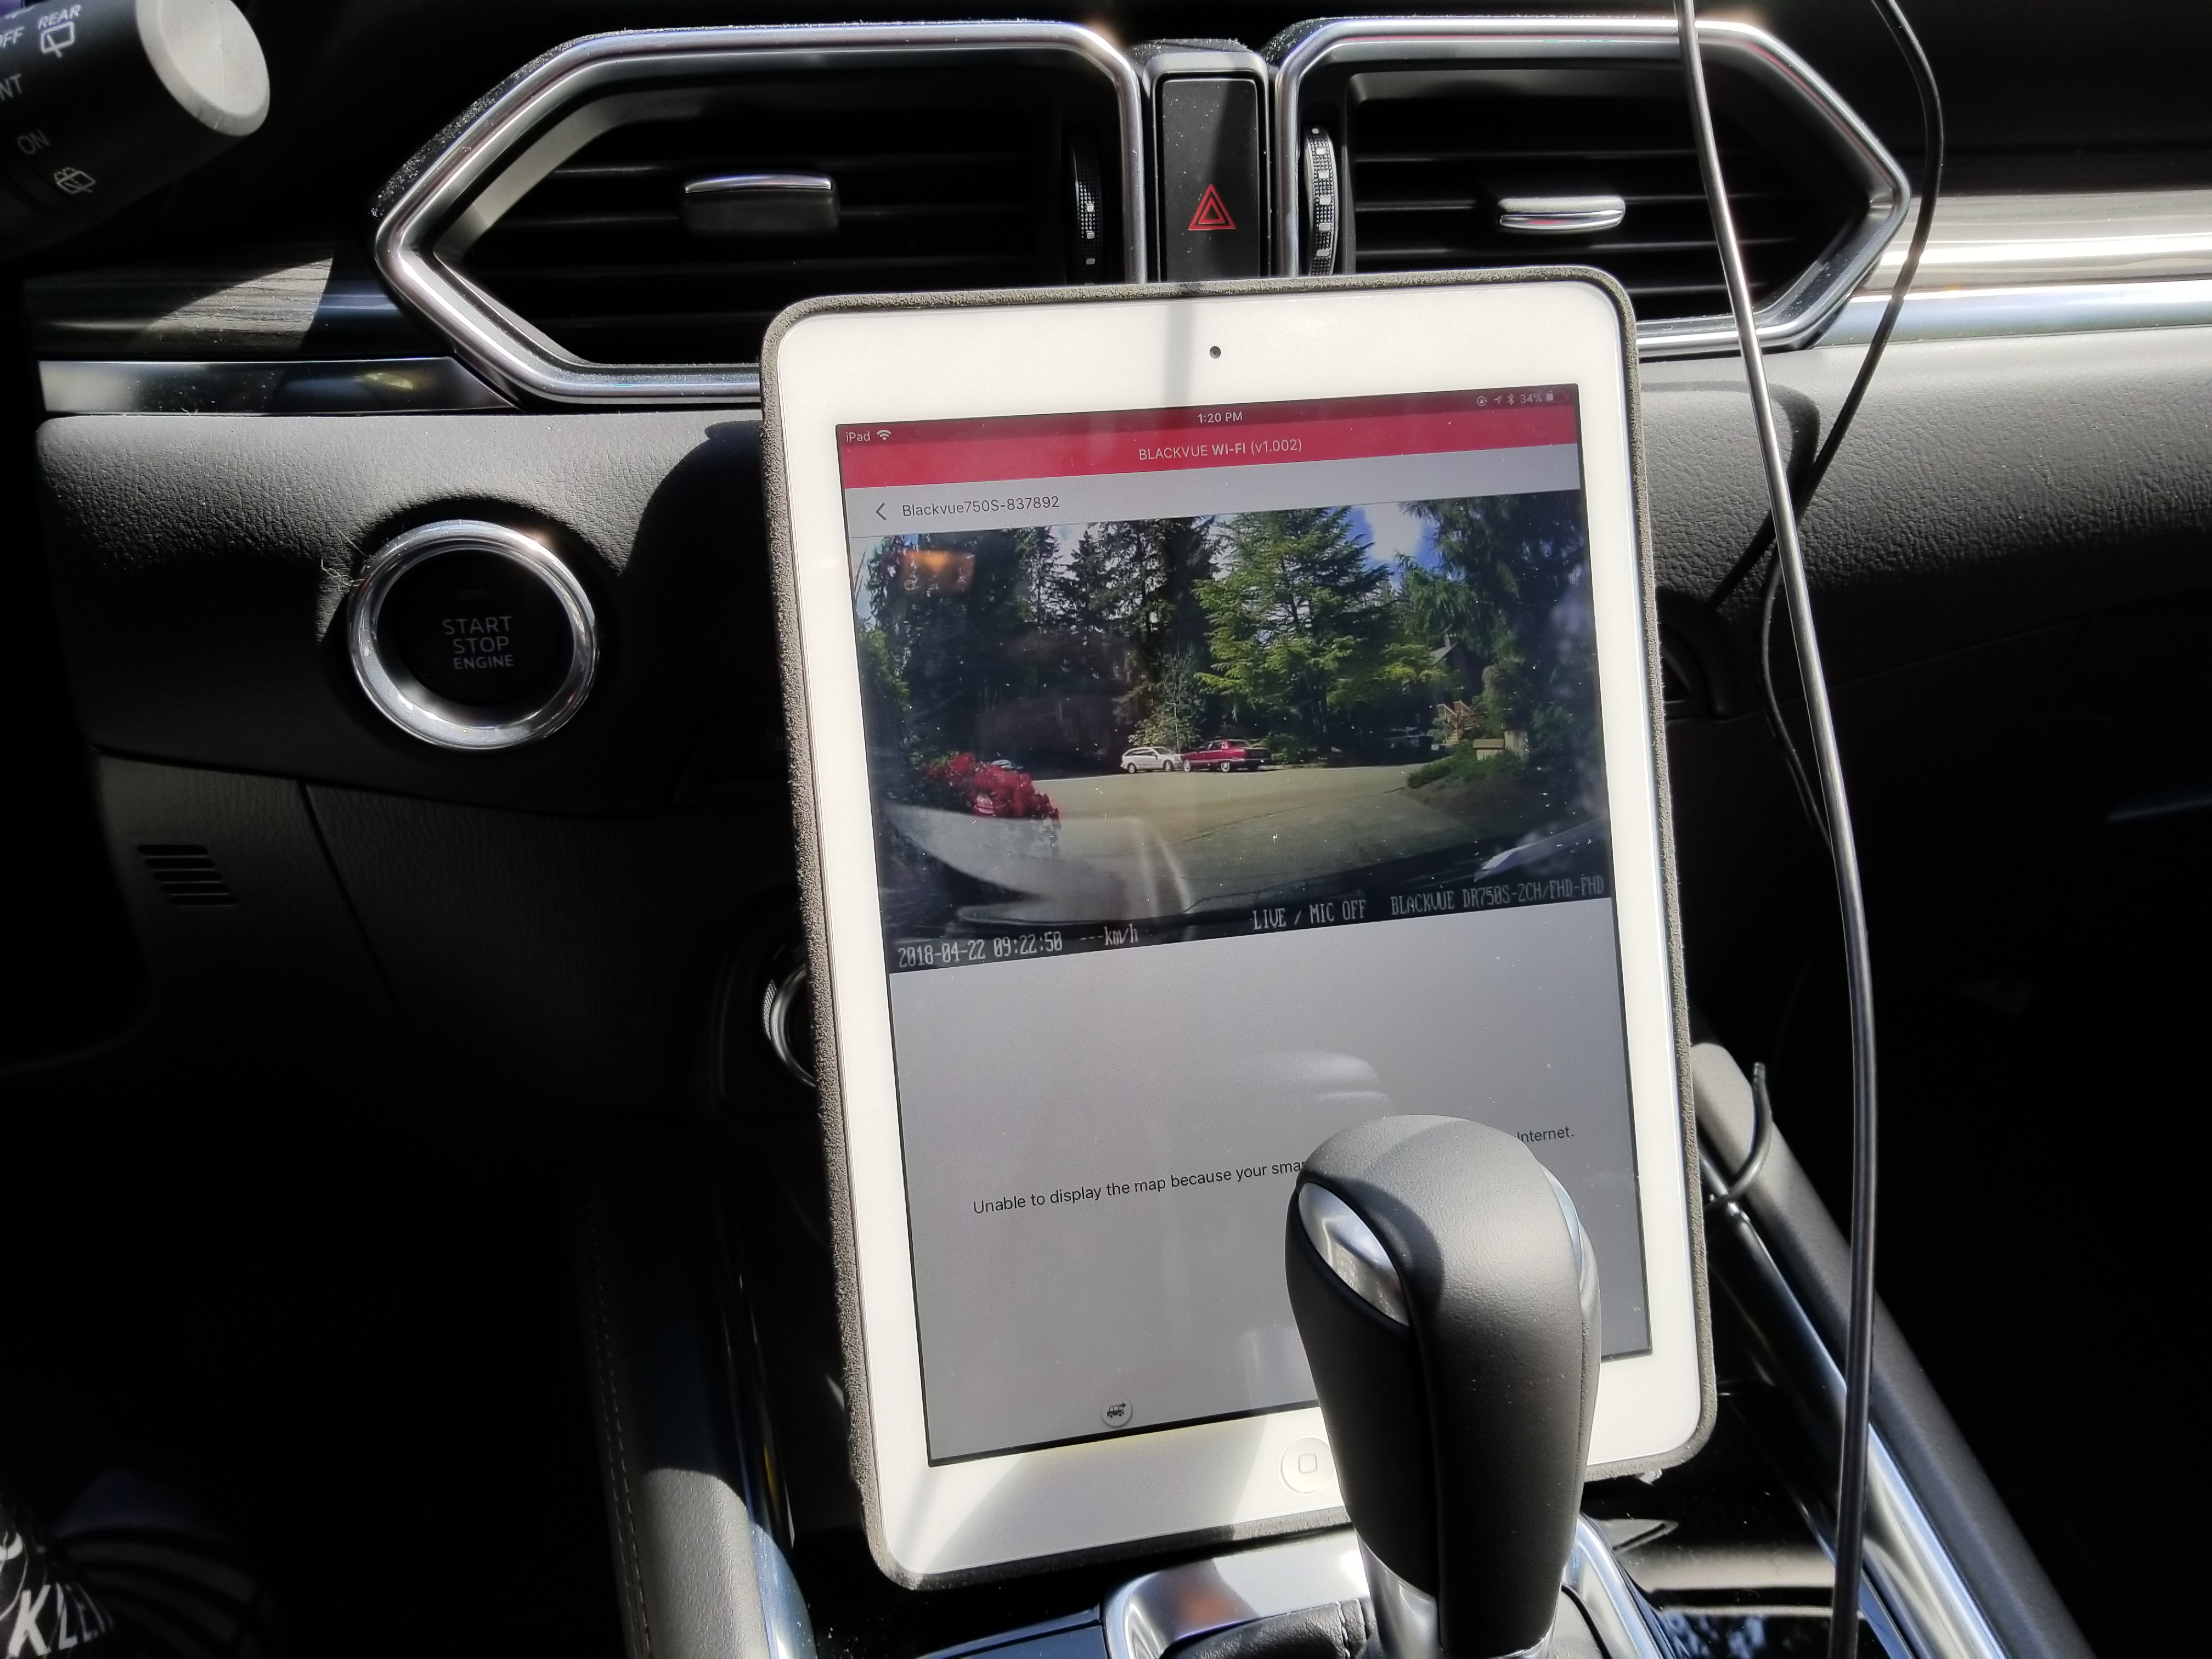
Now, knowing that cameras work, it’s time to attach them. Having a device (smartphone, iPad, etc.) helps in proper alignment, and we can easily ensure that cameras are pointing straight.
Clean the glass, then stick the front camera underneath the rear-view mirror assembly, as seen here:

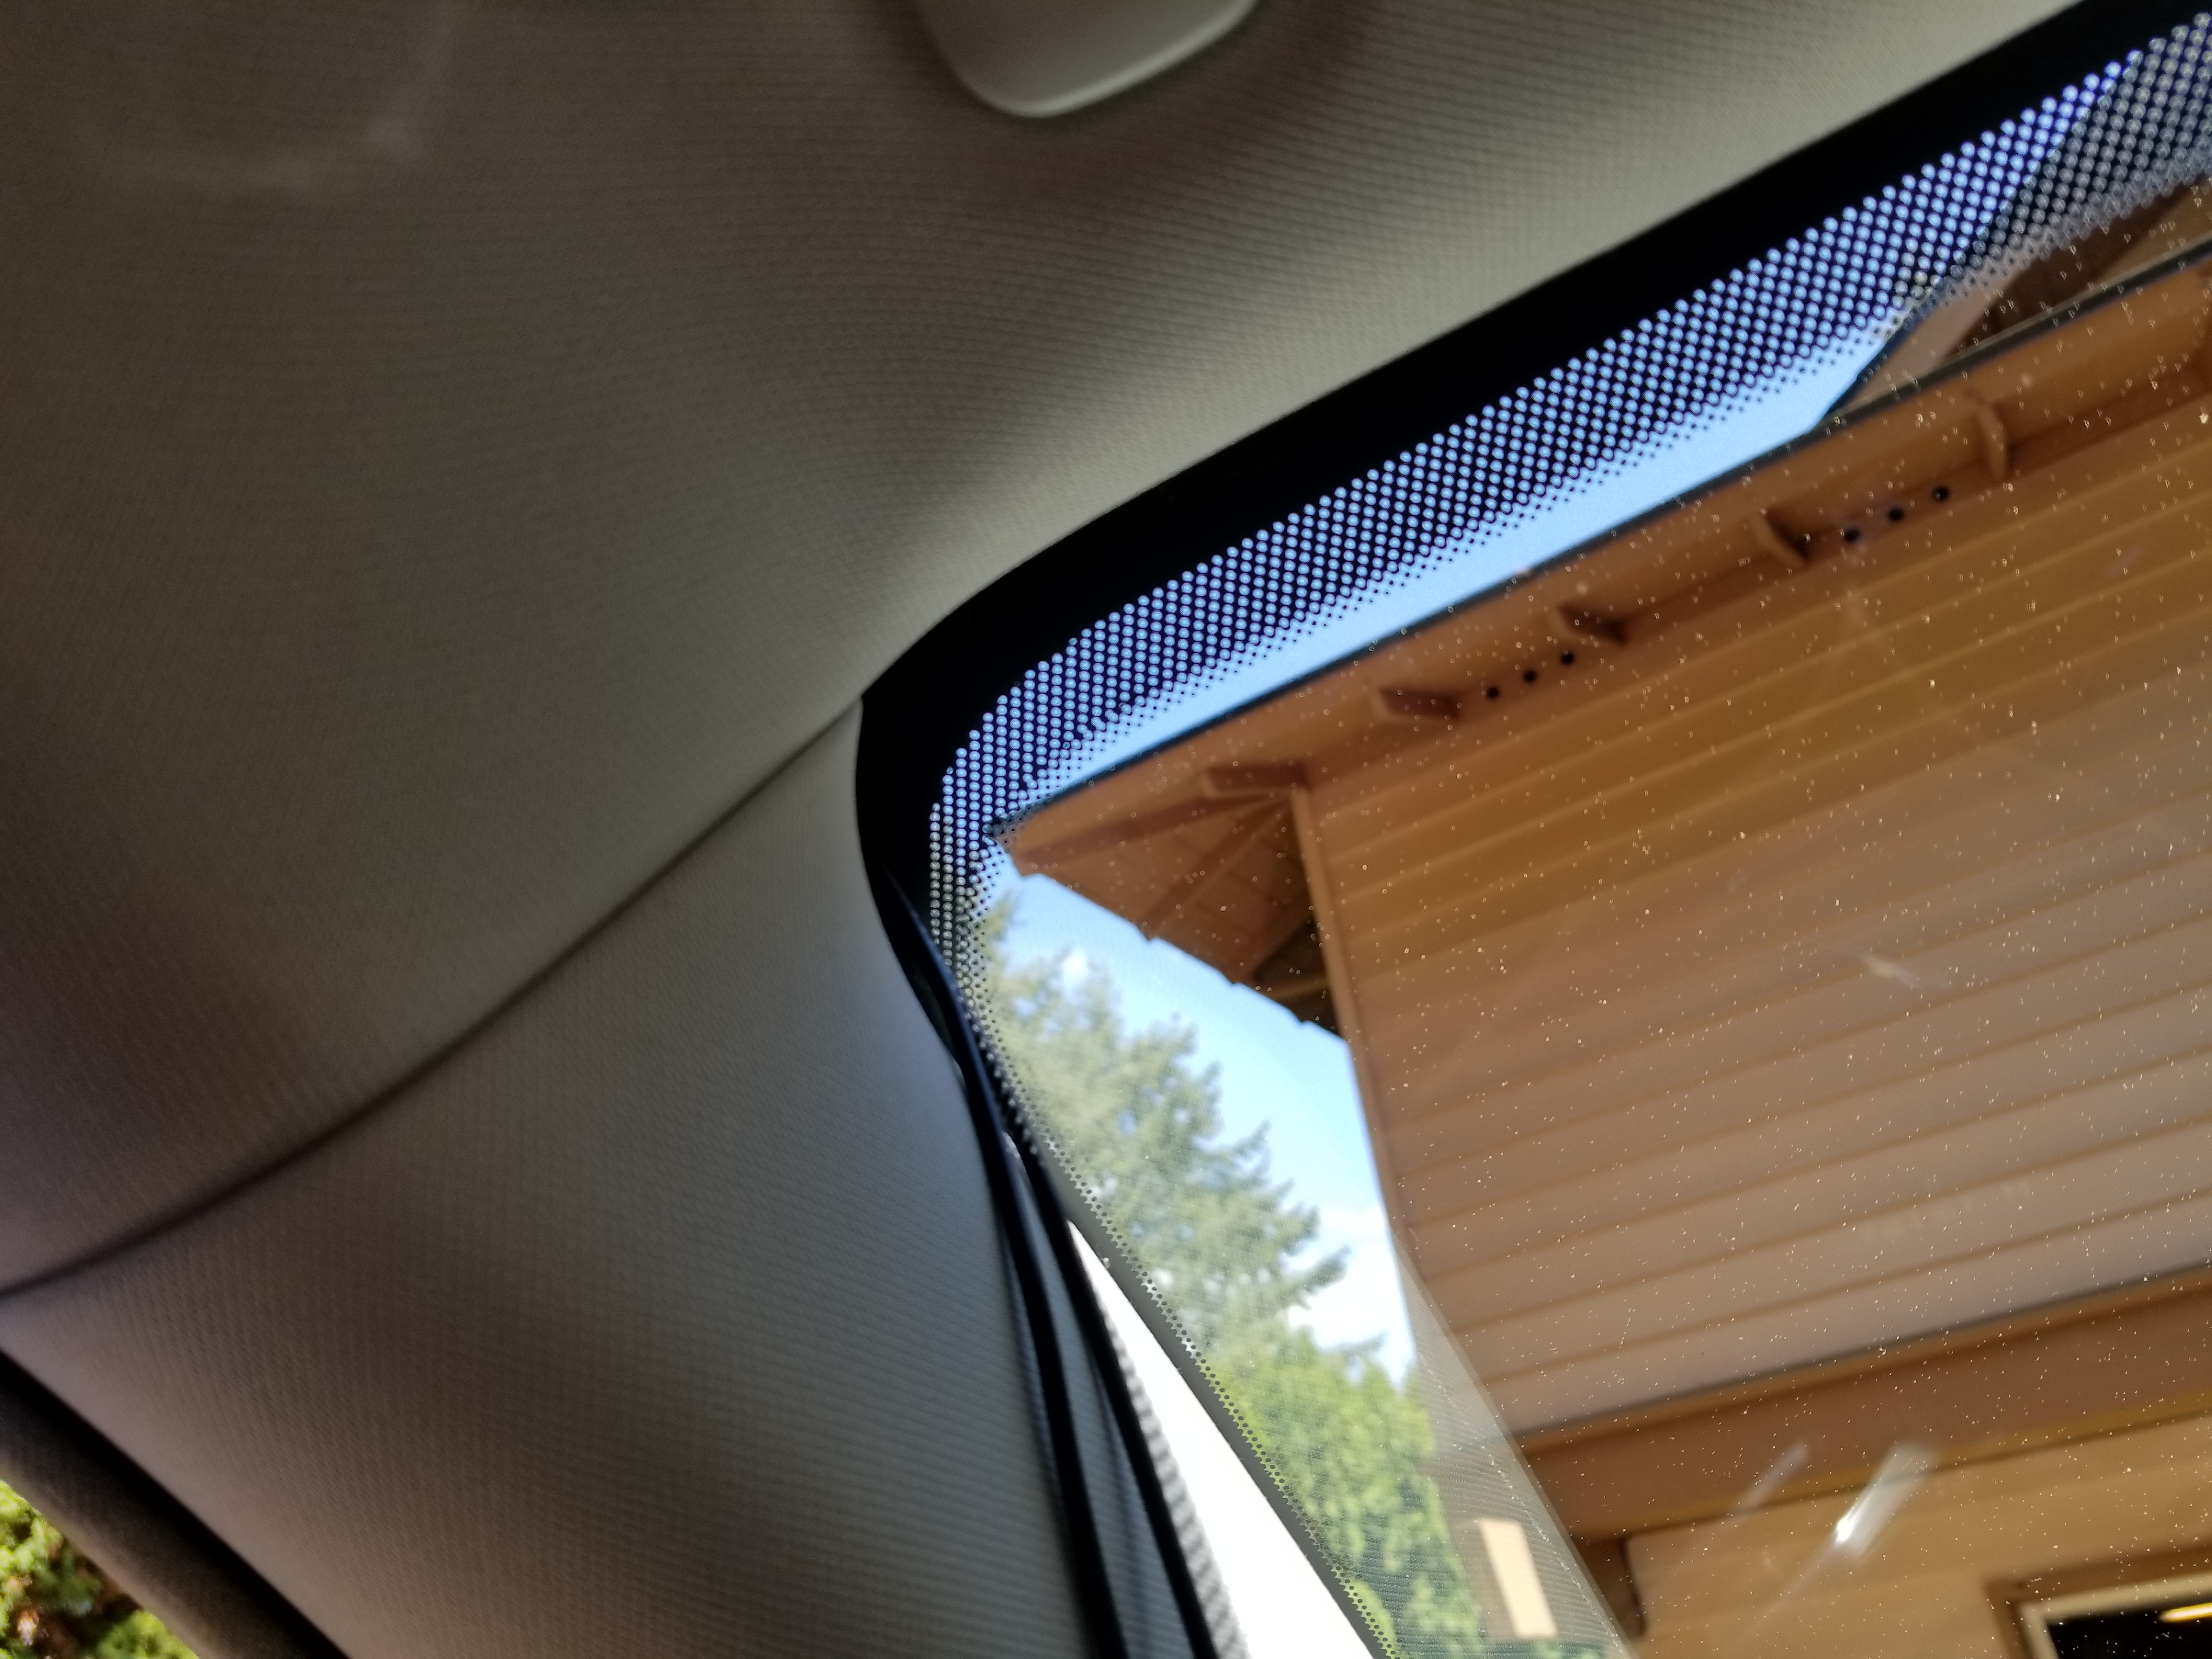
Then clean the rear window, and stick the rear-facing camera, in the middle, close to the top edge:

Note that if you stick the rear one by mistake upside down, you can easily flip the image in software, so no harm done.
Both cameras can be adjusted vertically, by rotating in the case, to adjust the viewed area (to point lower/higher).
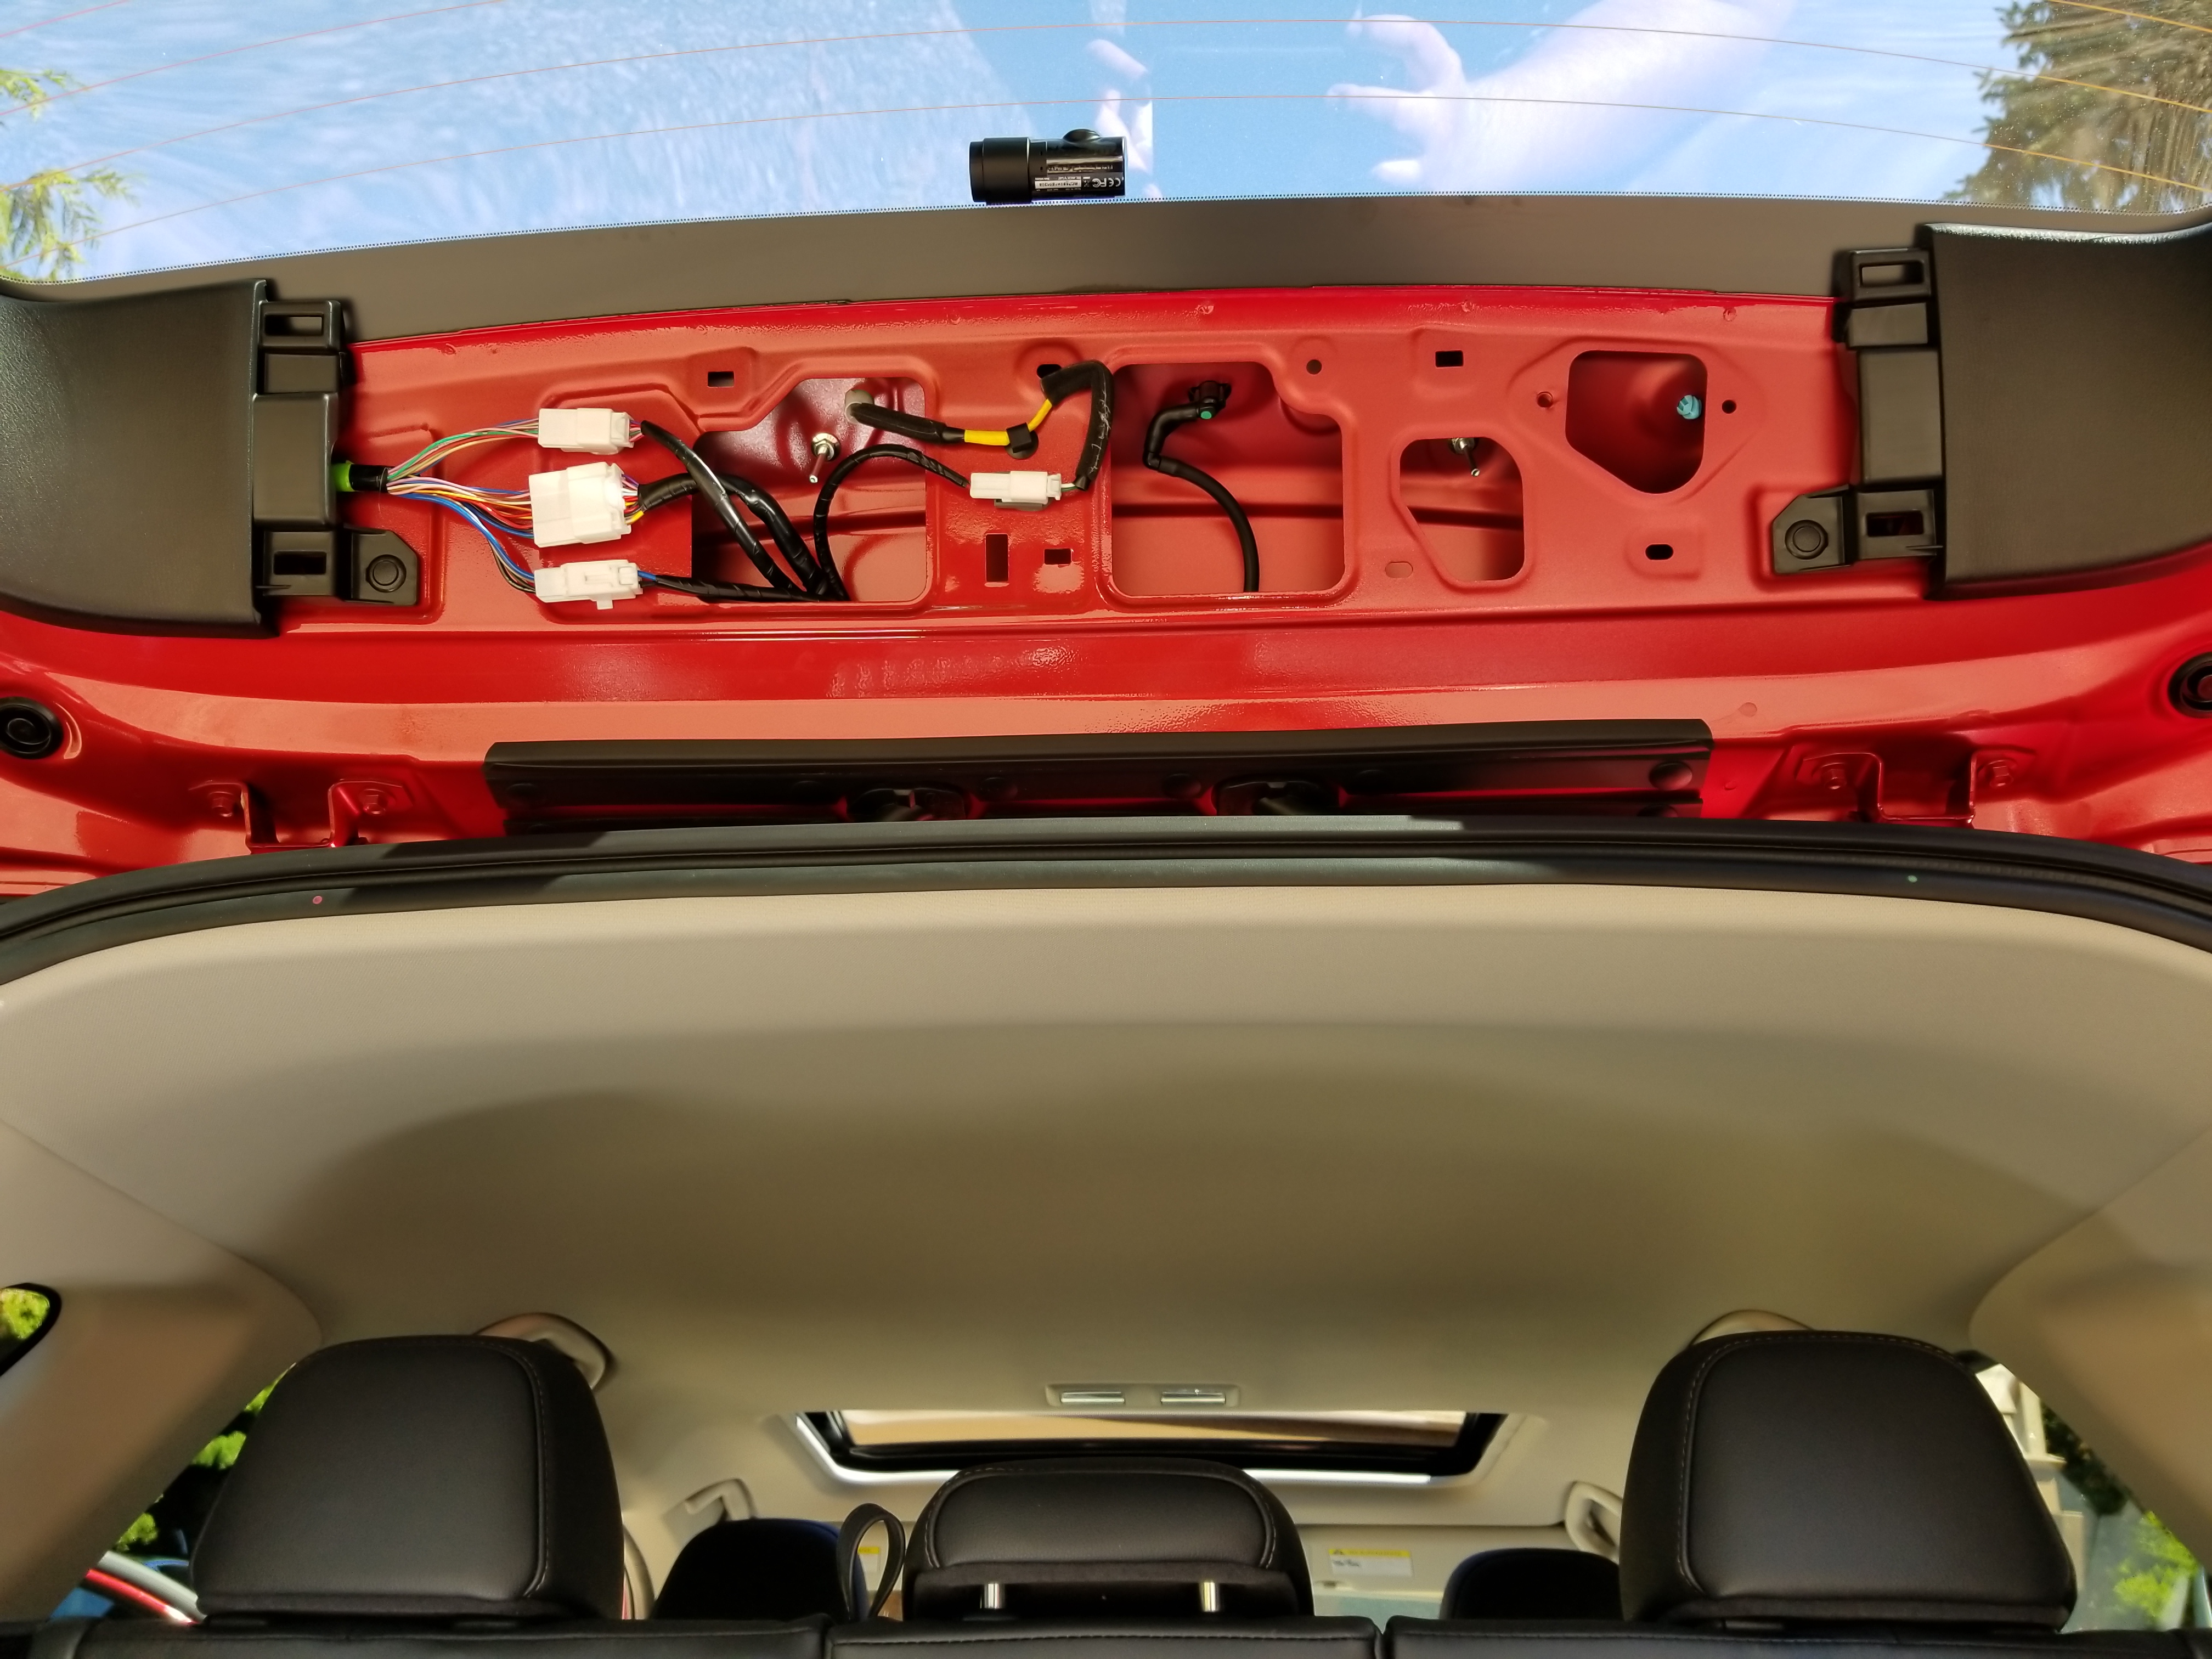
Alright, cameras are in place. Time to start cleaning up the wires, and then connecting it for good. Unplug the cable from rear camera..Front camera should have 2 wires coming out – power, and a cable connecting it with the rear camera. We’ll be working with both wires together right now.
Starting from the front camera – pull the case of the rear-view mirror assembly to the side, as visible below, to split it into 2 pieces:

Route the cables inside that assembly, towards the head liner. From there, tuck them into the edge between the liner and windshield, towards driver’s side.
You’ll soon reach the A-pillar. The wires will now go towards the driver’s door, in the tight gap between head liner and A-pillar cover (and not continue further by the glass).
To make things easier, remove the rubber seal around the front of the driver’s door. This seal just comes off, very easily, no need for more force. It also slides right back into place, so don’t worry about making irreversible changes 🙂
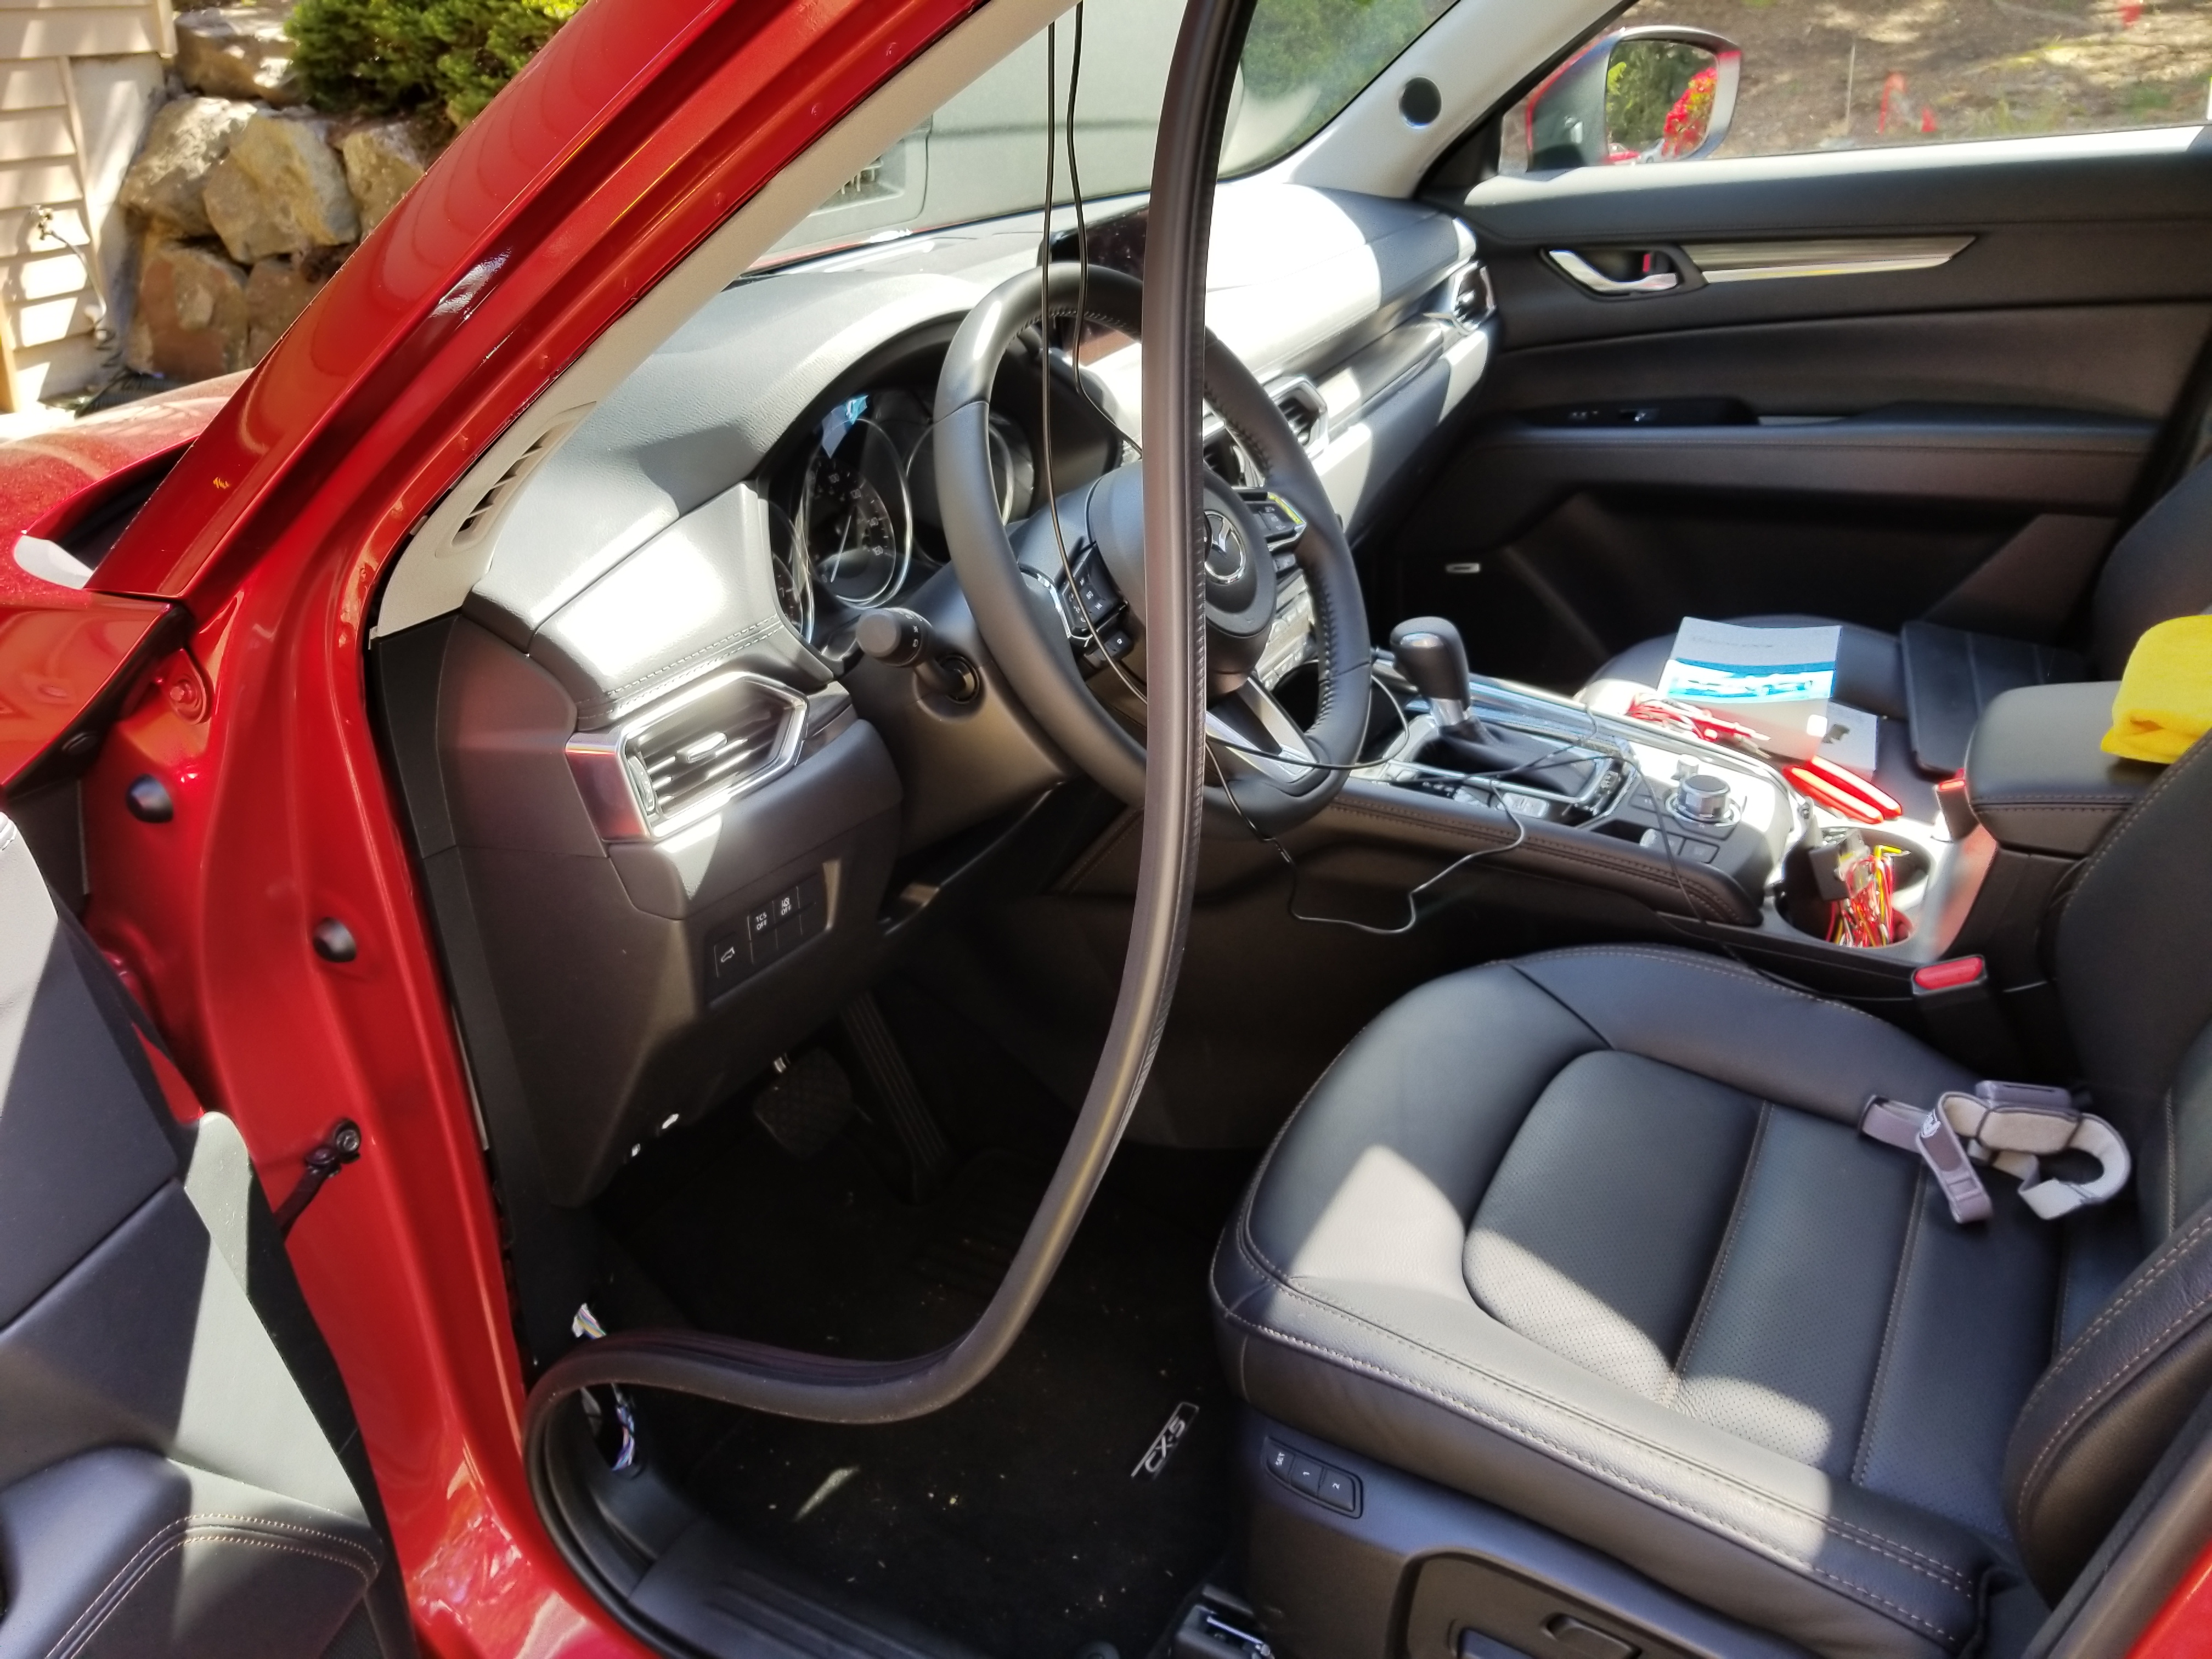
Route both wires all the way till the floor.
Now this is a place where they will split. Power cable will stay in the fuse box, while the cable to rear camera will be routed further:

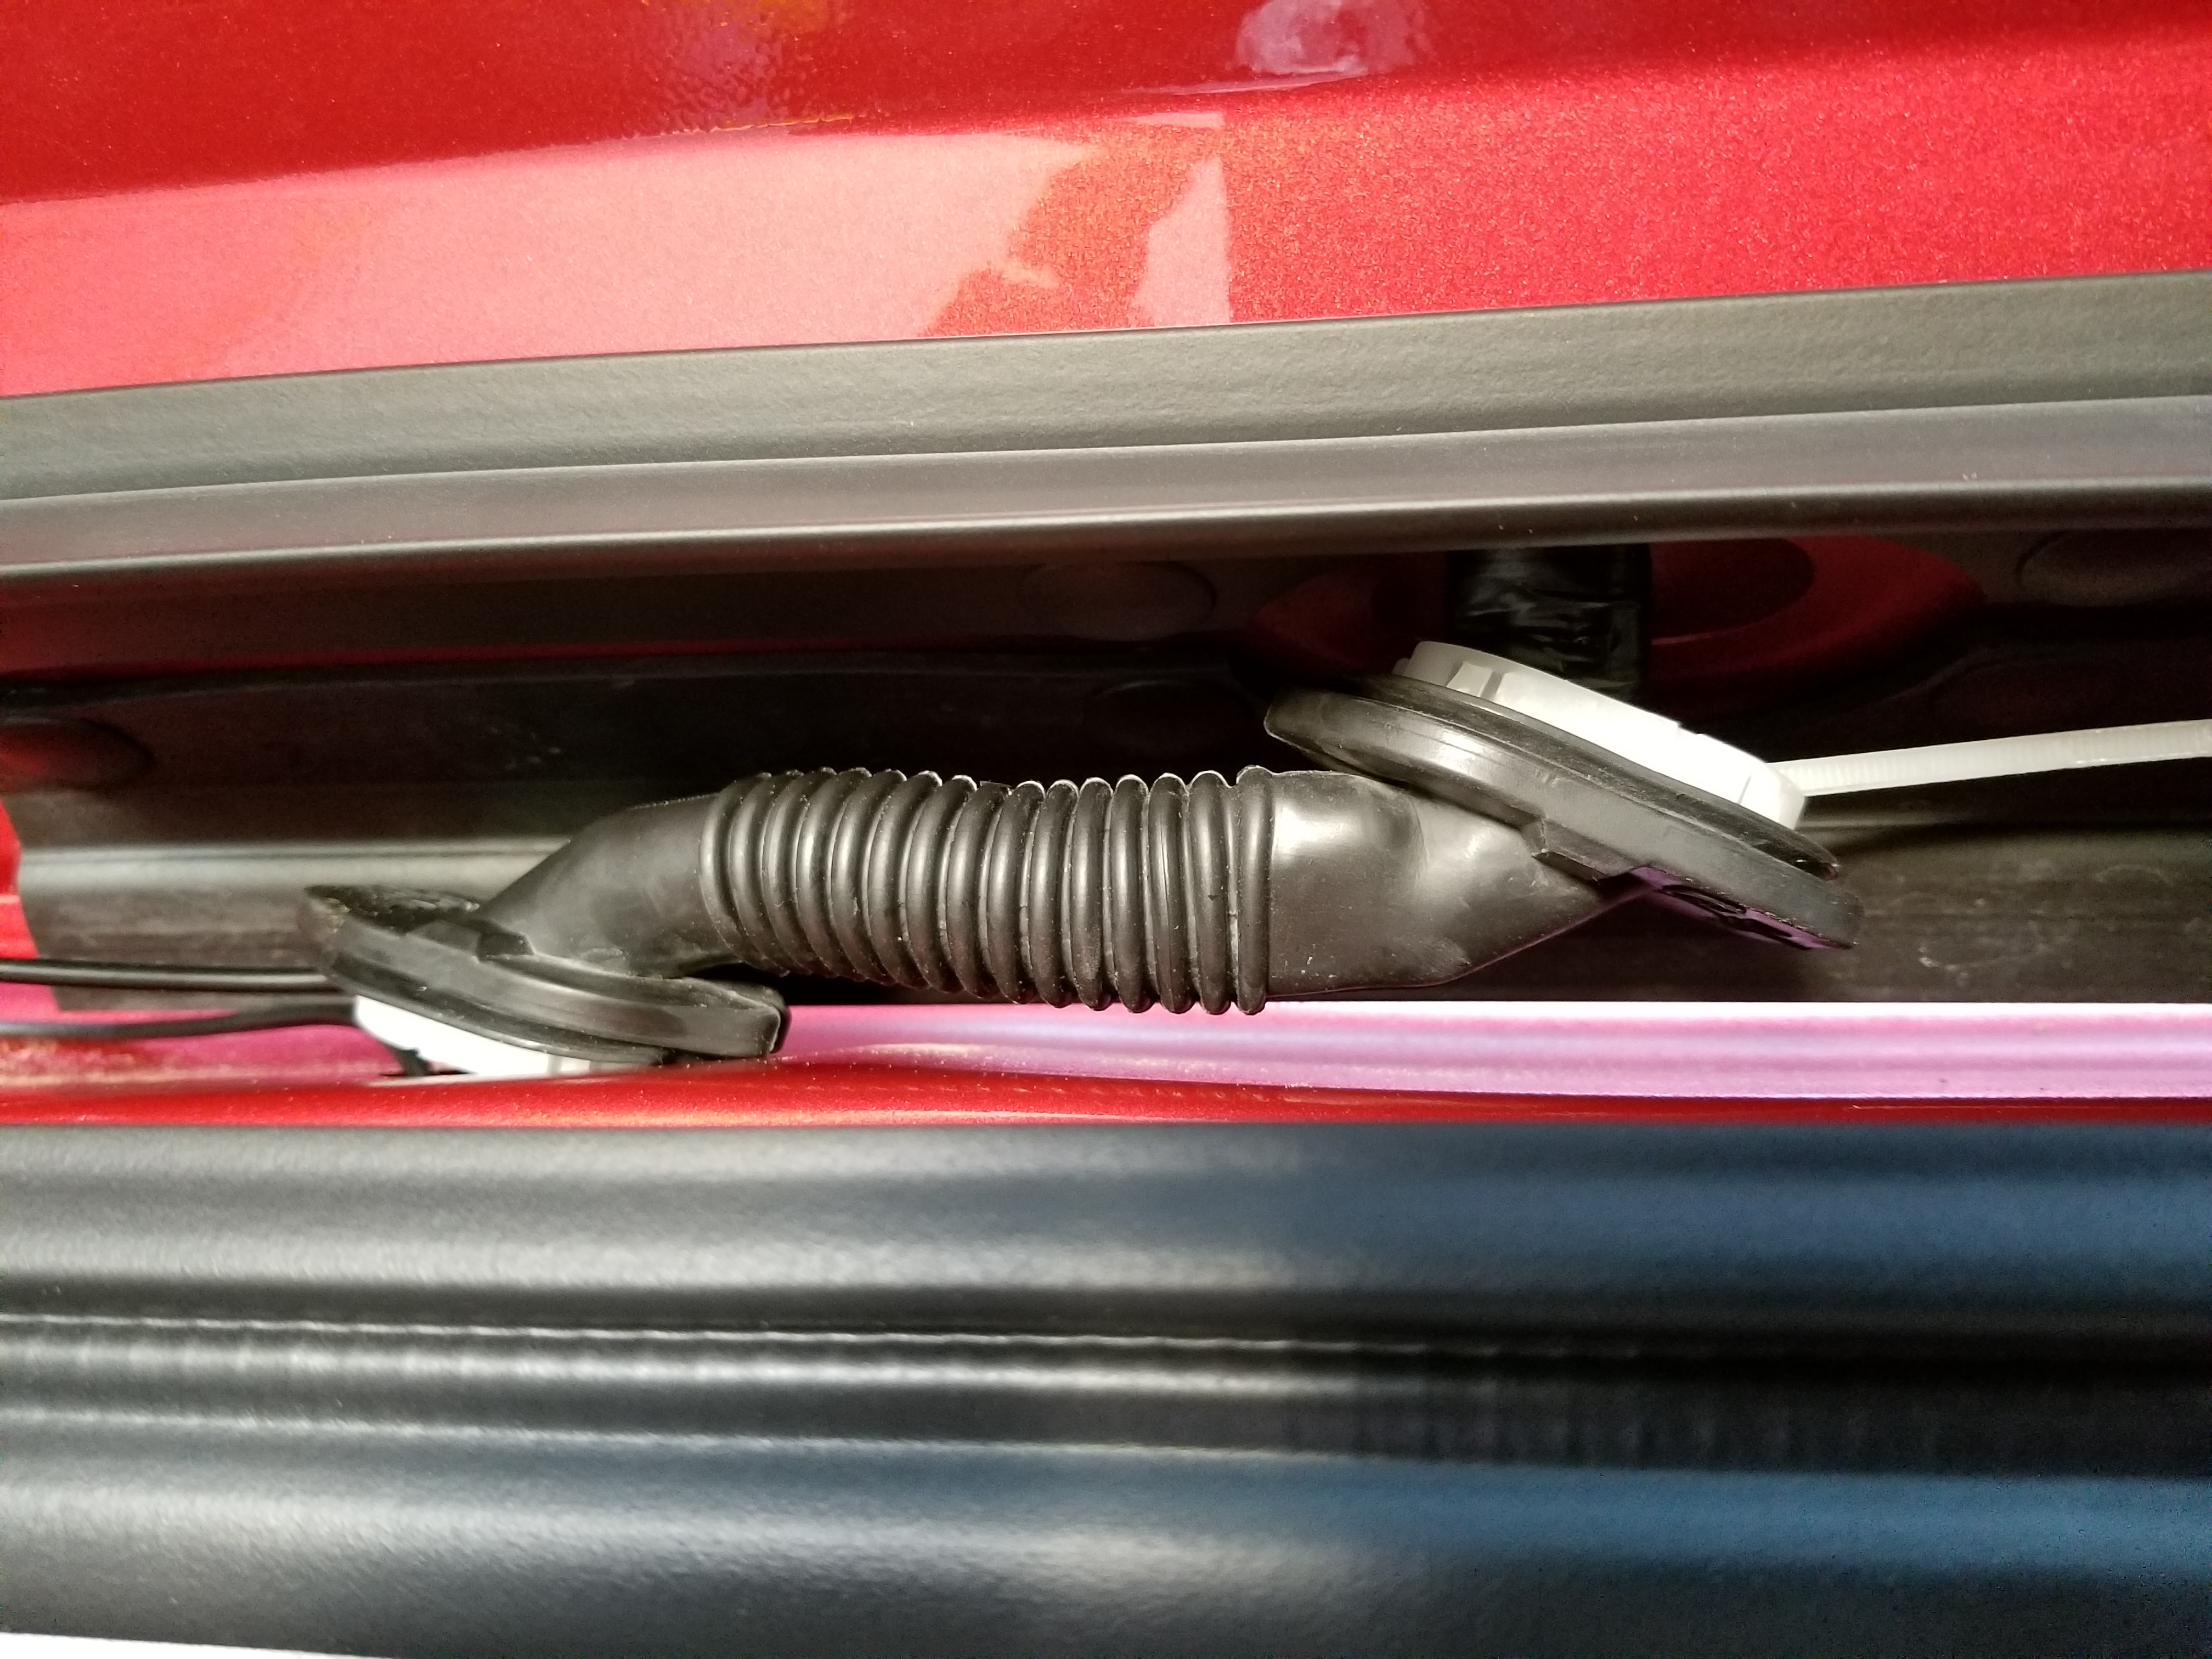
We’ll now focus on the rear camera cable. Using bone tool, gently – but firmly – apply pressure to the door sill plate. Please refer to the below image to see where are the clips – by sliding bone tool in their vicinity, you can make them pop out of place:
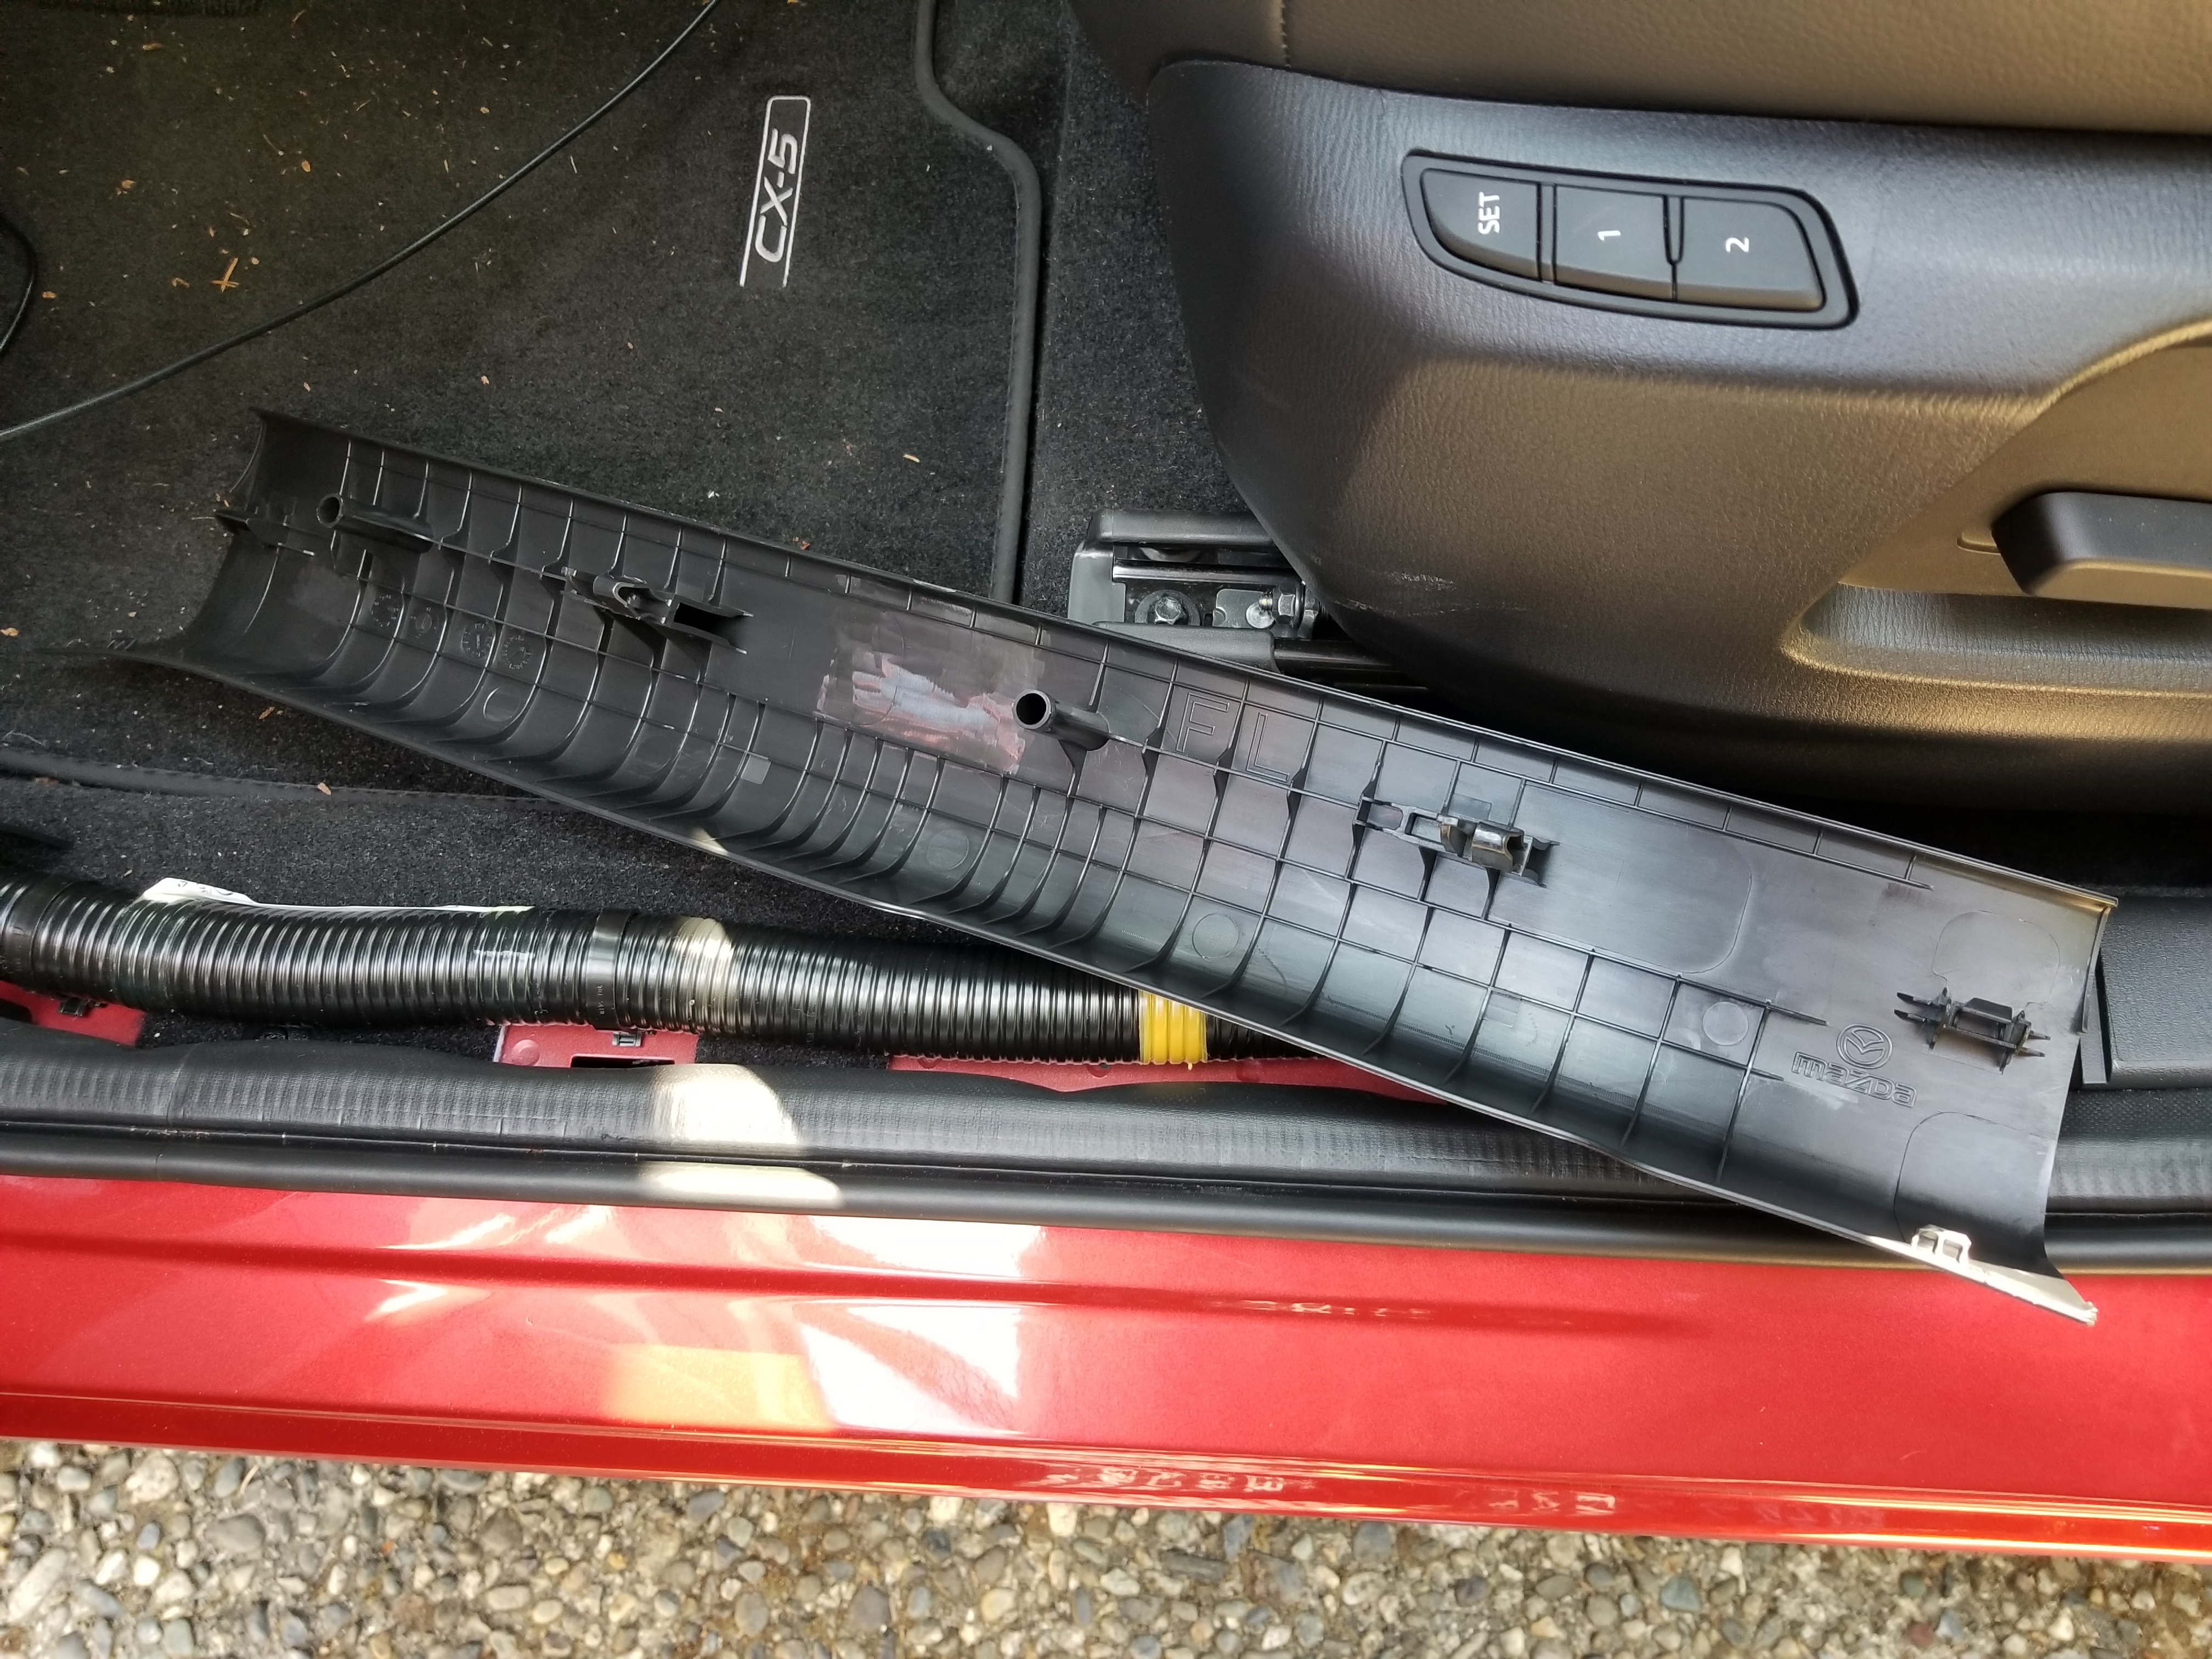
This opens a lot of space for wiring. Use same approach for the door sill plate for the passenger door behind the driver:

And a bit of a door rubber seal needs to be pulled back as well – just as we did before for the driver’s door:

Don’t put the door sills back just yet – keep them on the side in case we need to do some adjustments to the rear camera cable (hide some excess wire – although from my experience there wasn’t really much left-over at all).
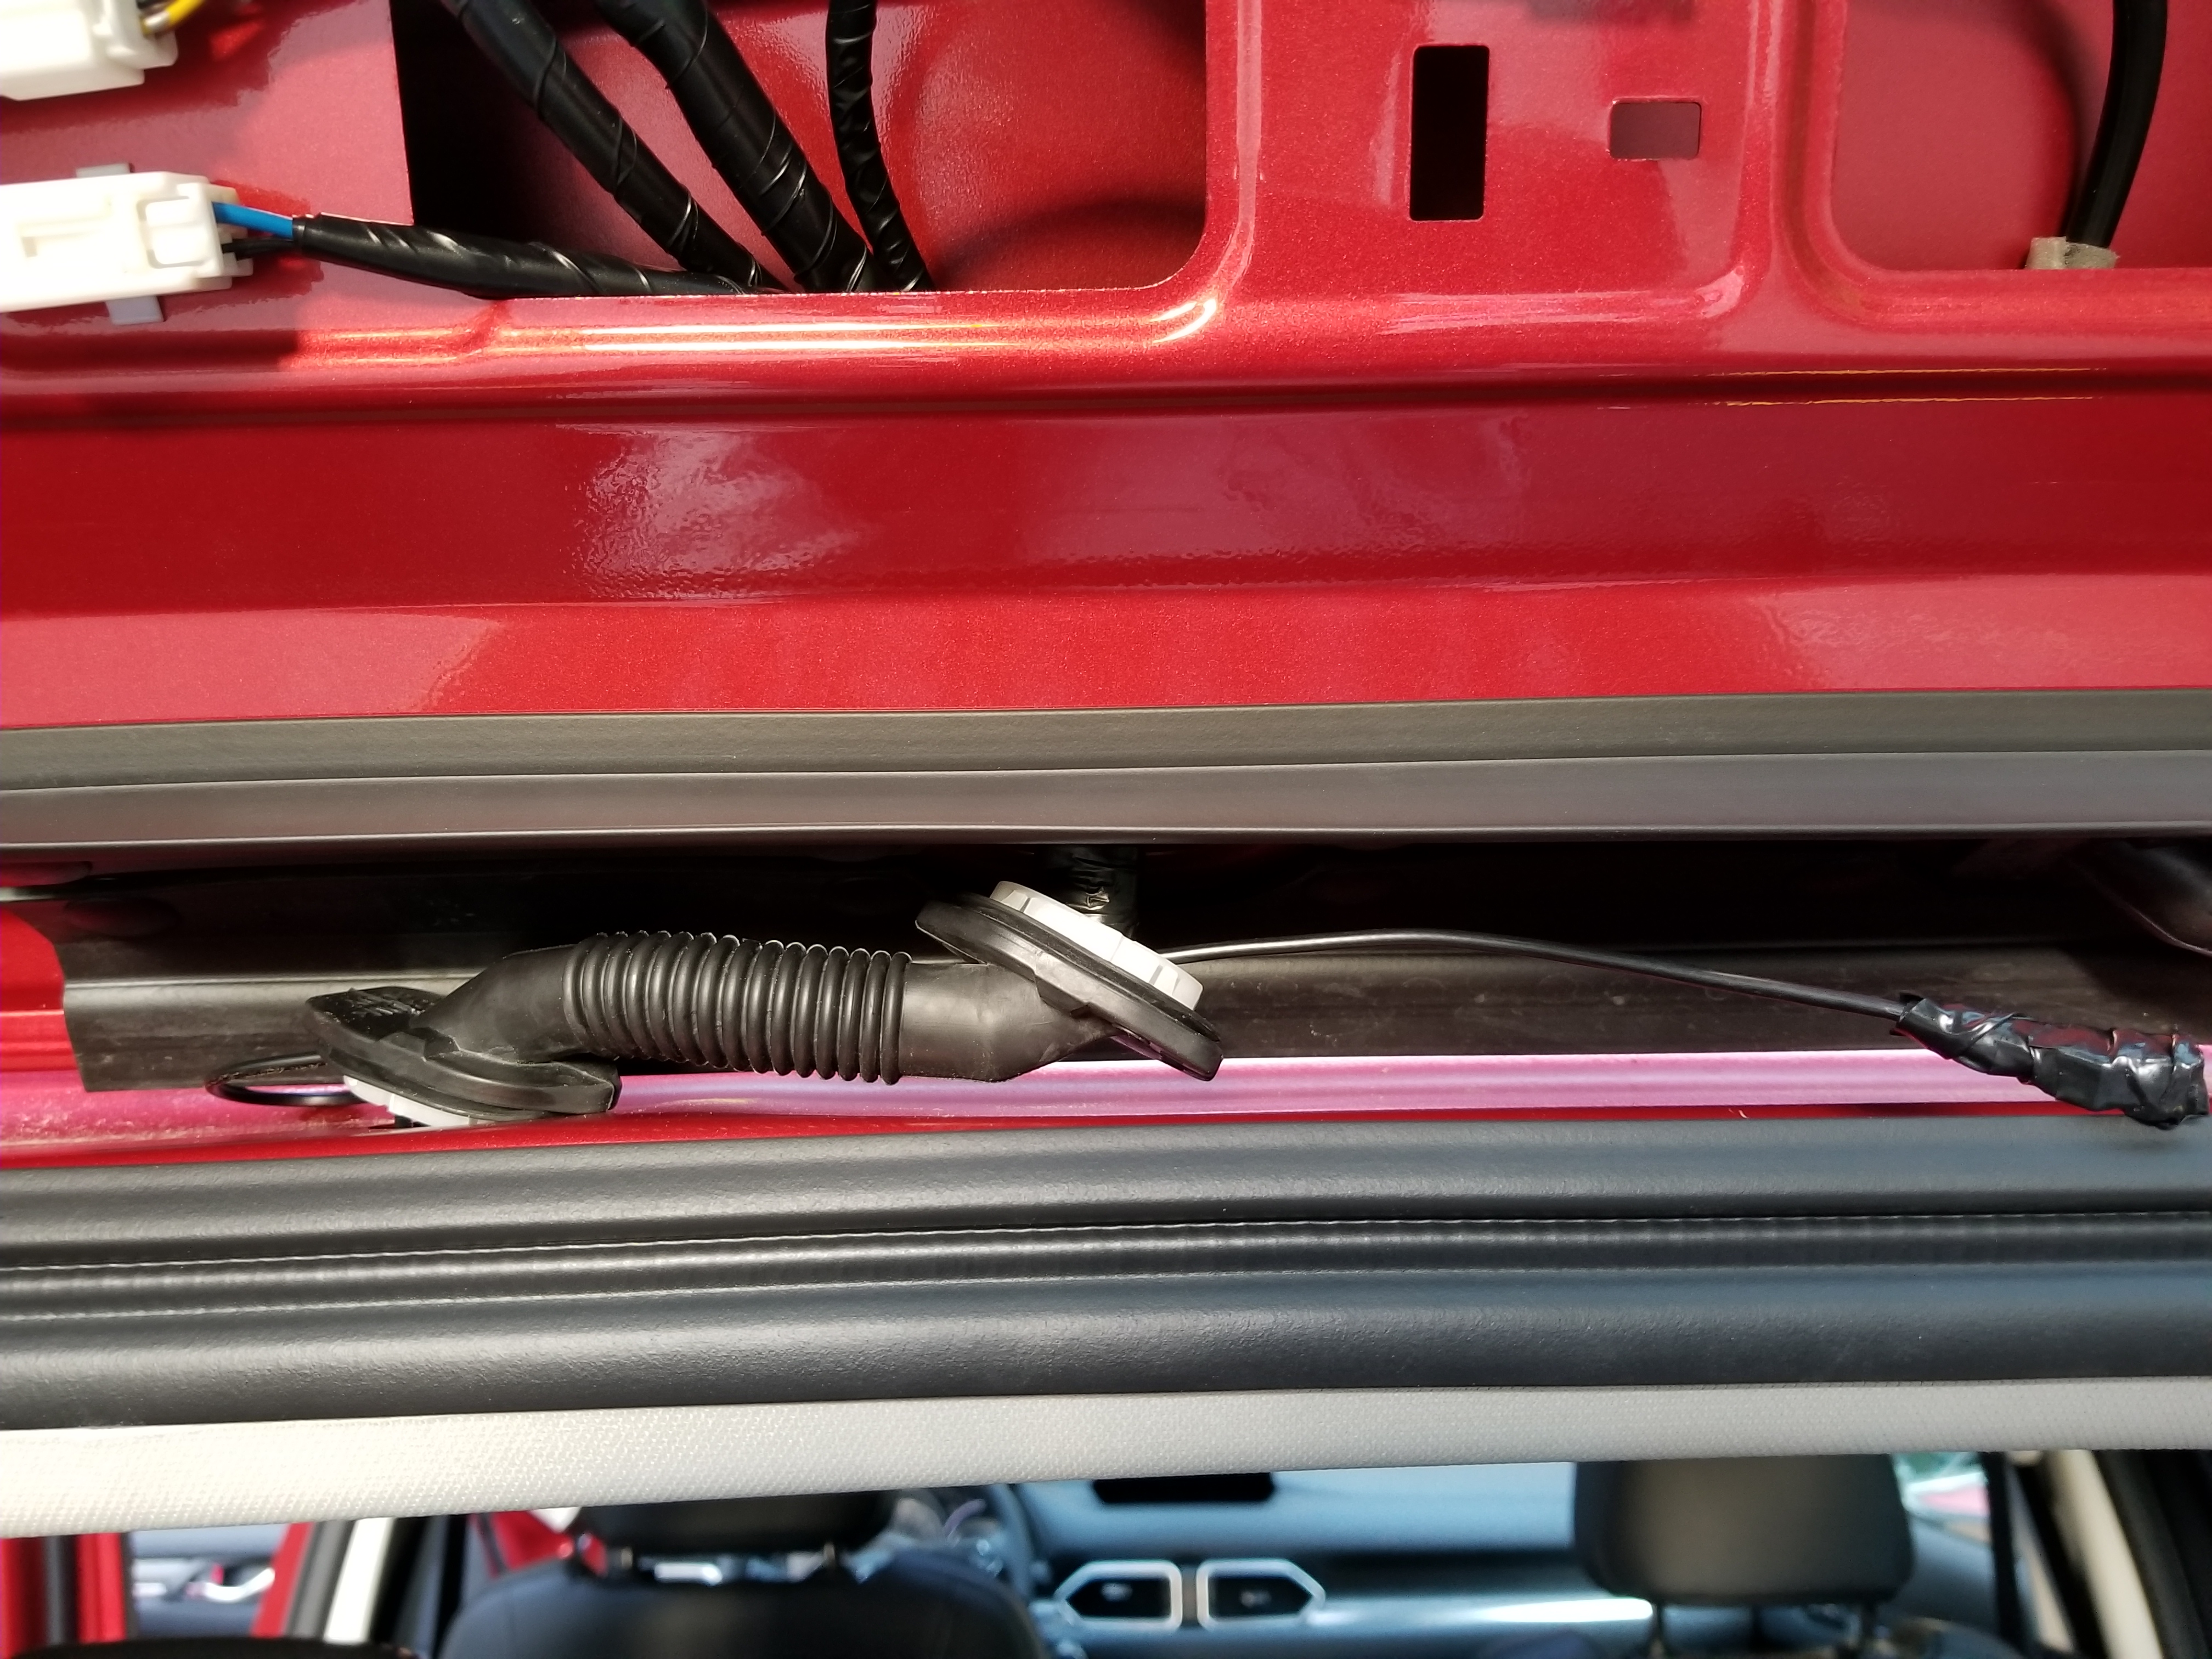
From here continue tucking the cable upwards, by the head liner, all the way towards the back, by the lift gate.
Warning: the following is the most time consuming step 🙂 Be patient, and with enough willpower you’ll get it done… This itself took me about 30 minutes of fiddling.
Routing the wire to the rear camera and making it look like from factory (meaning, no visible wires dangling in the interior) is a bit challenging. We need to use the original rubber wire loom connecting the wires to the lift gate (brake light, etc.). It’s very tight, thus adding a new cable takes some effort.
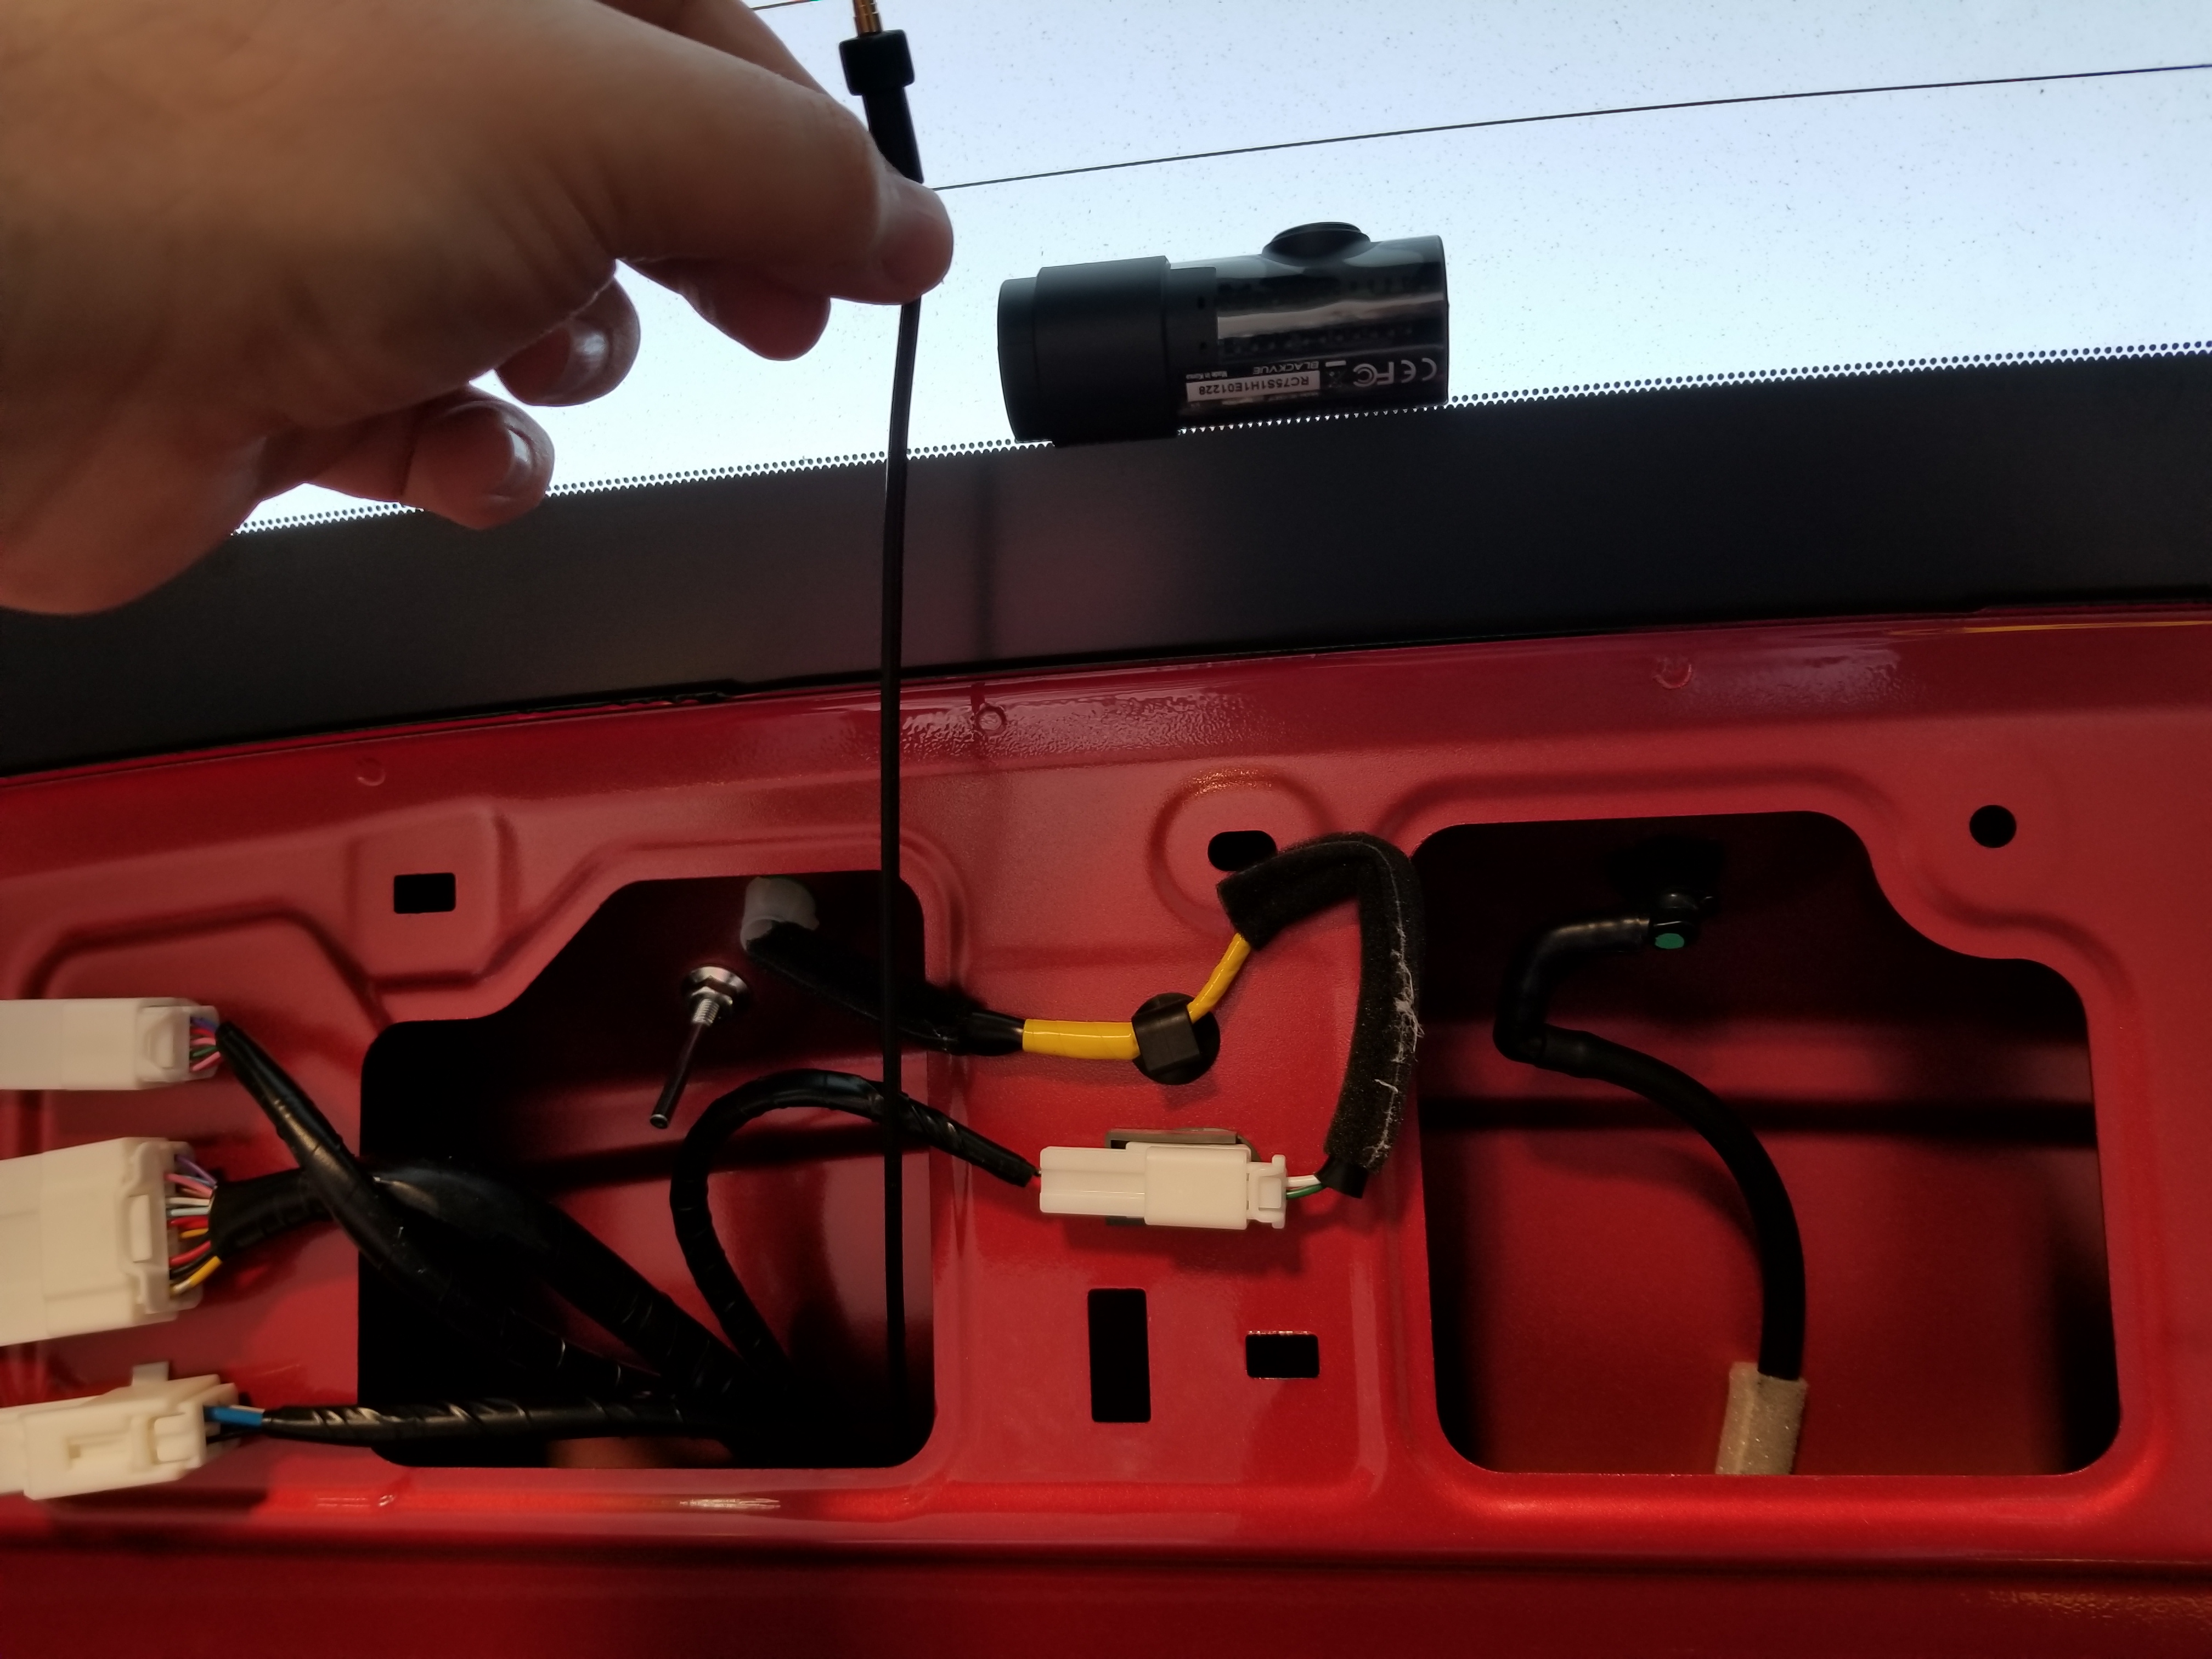
First we need to remove the plastic panel on the lift gate – again, just pull, no screws or anything like that. It will pop out:
Next, pull down the head liner – it’s being kept on couple clips:
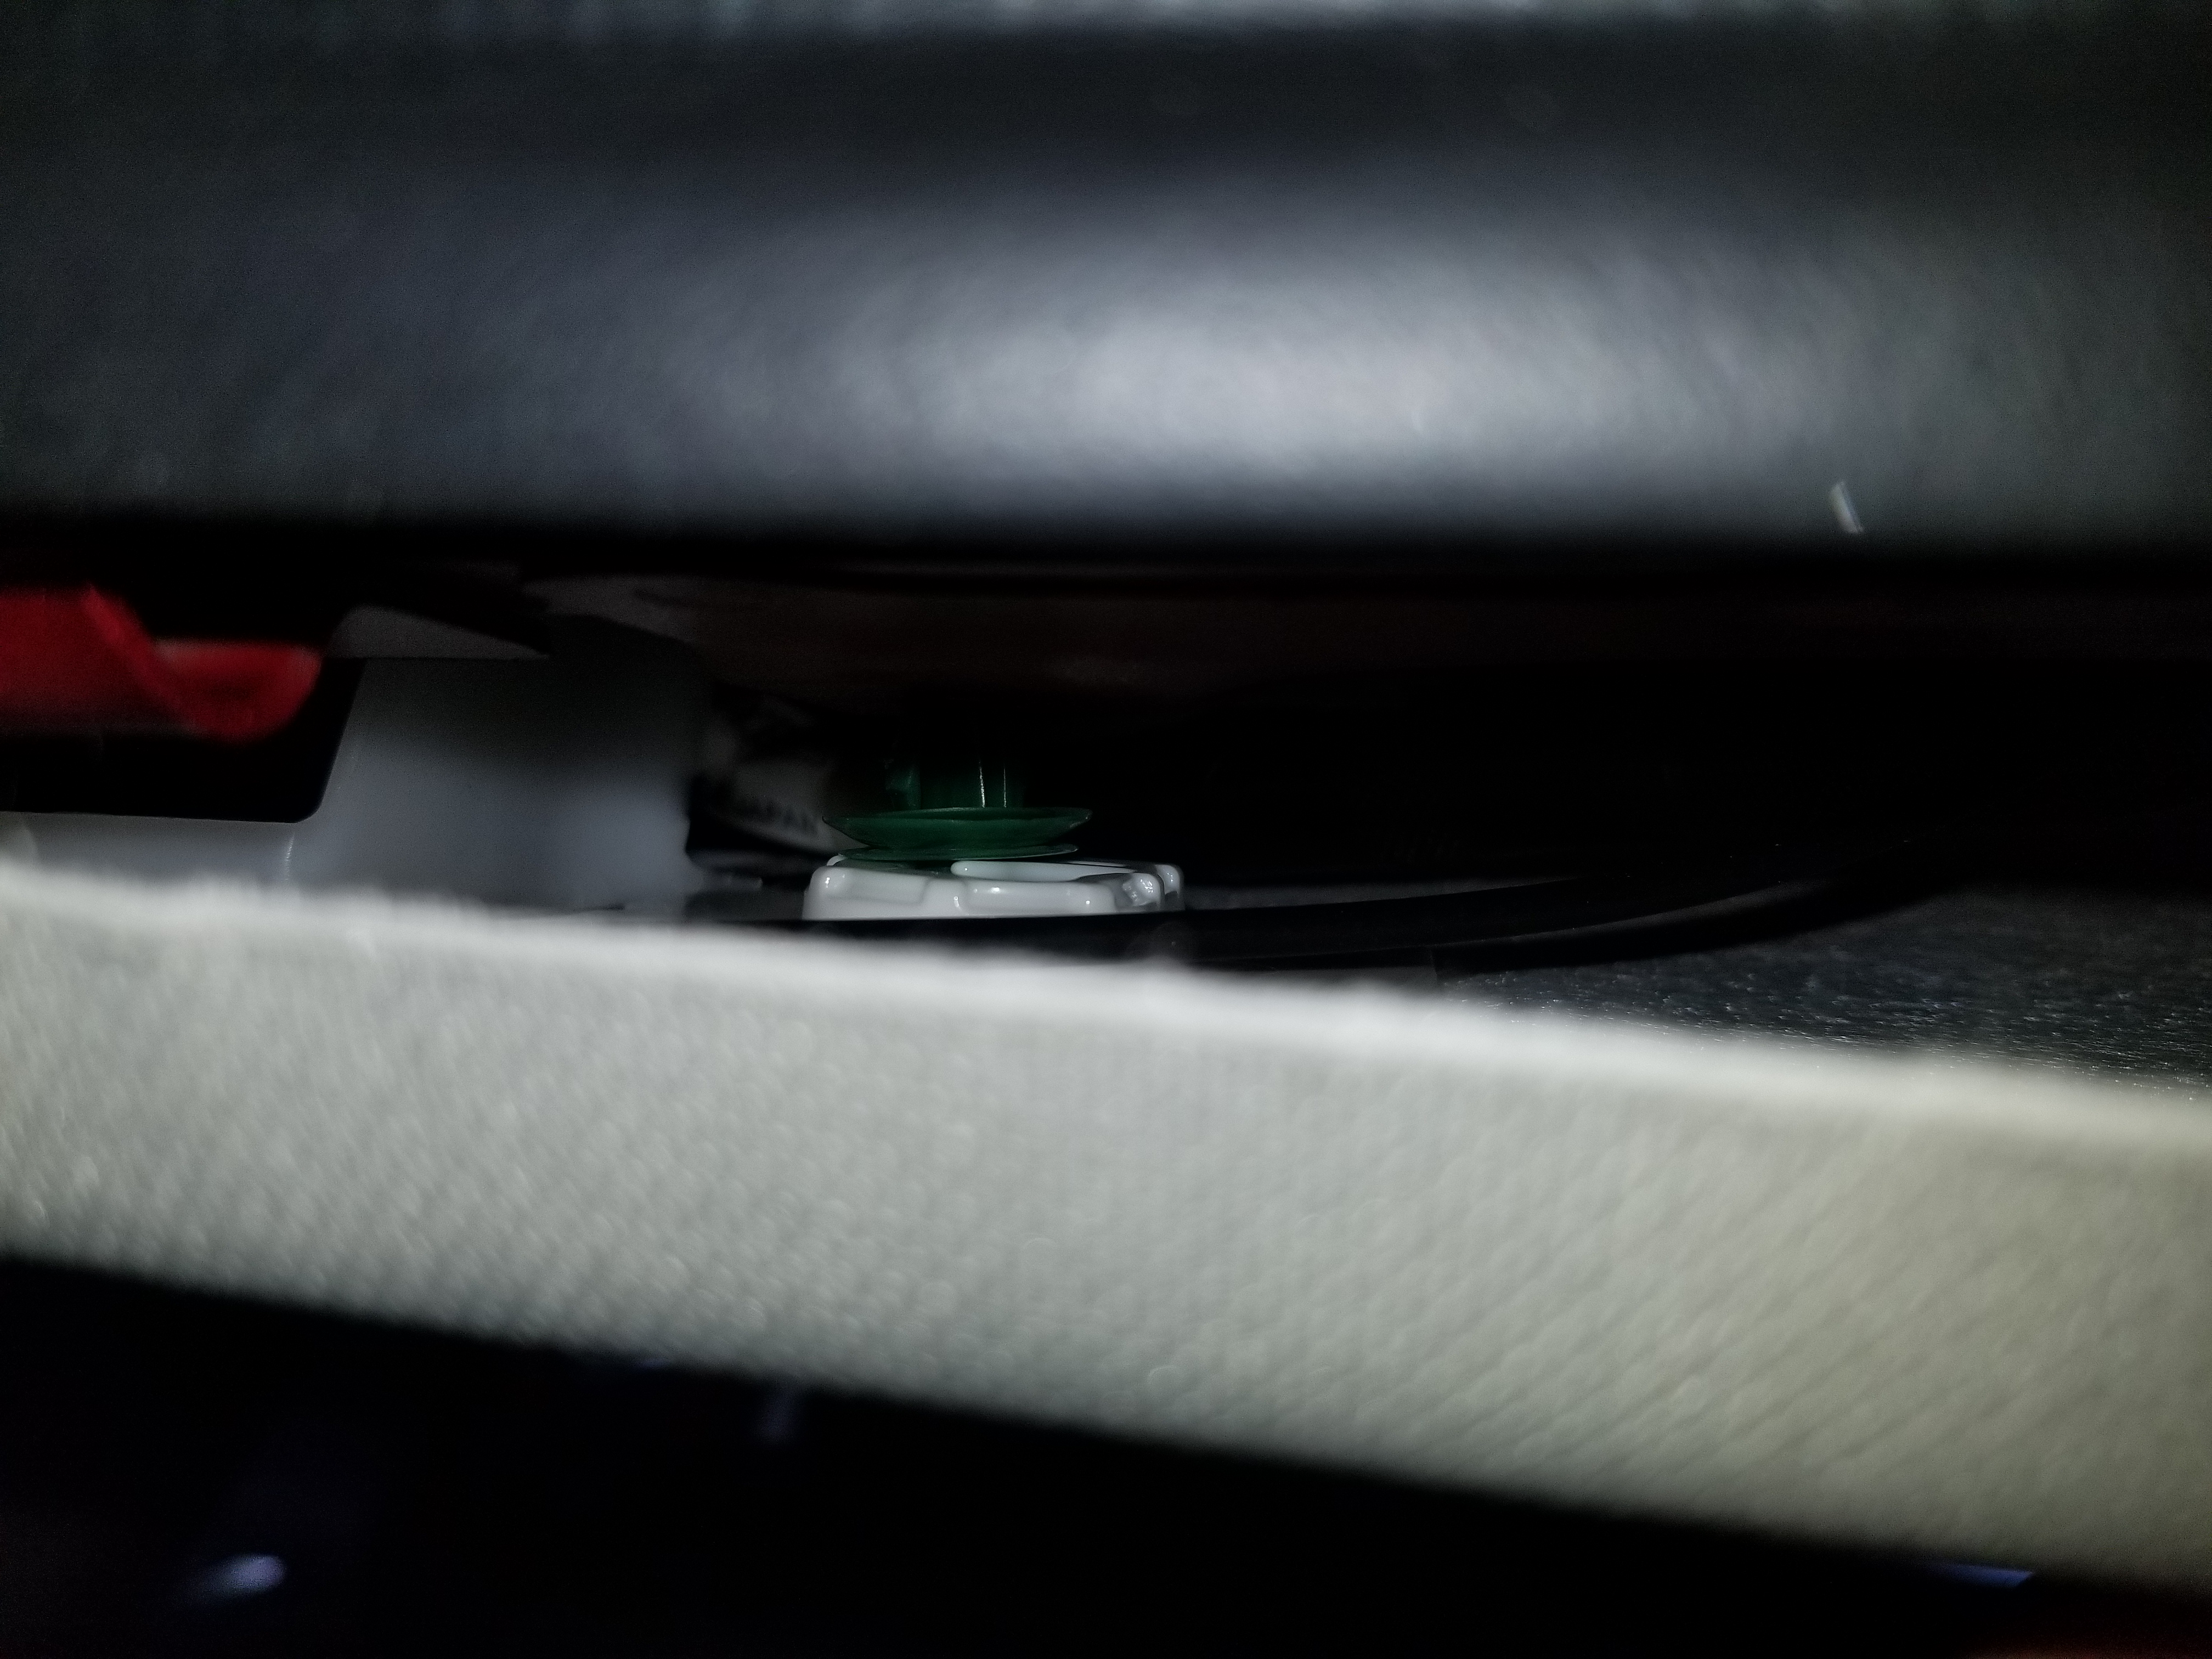
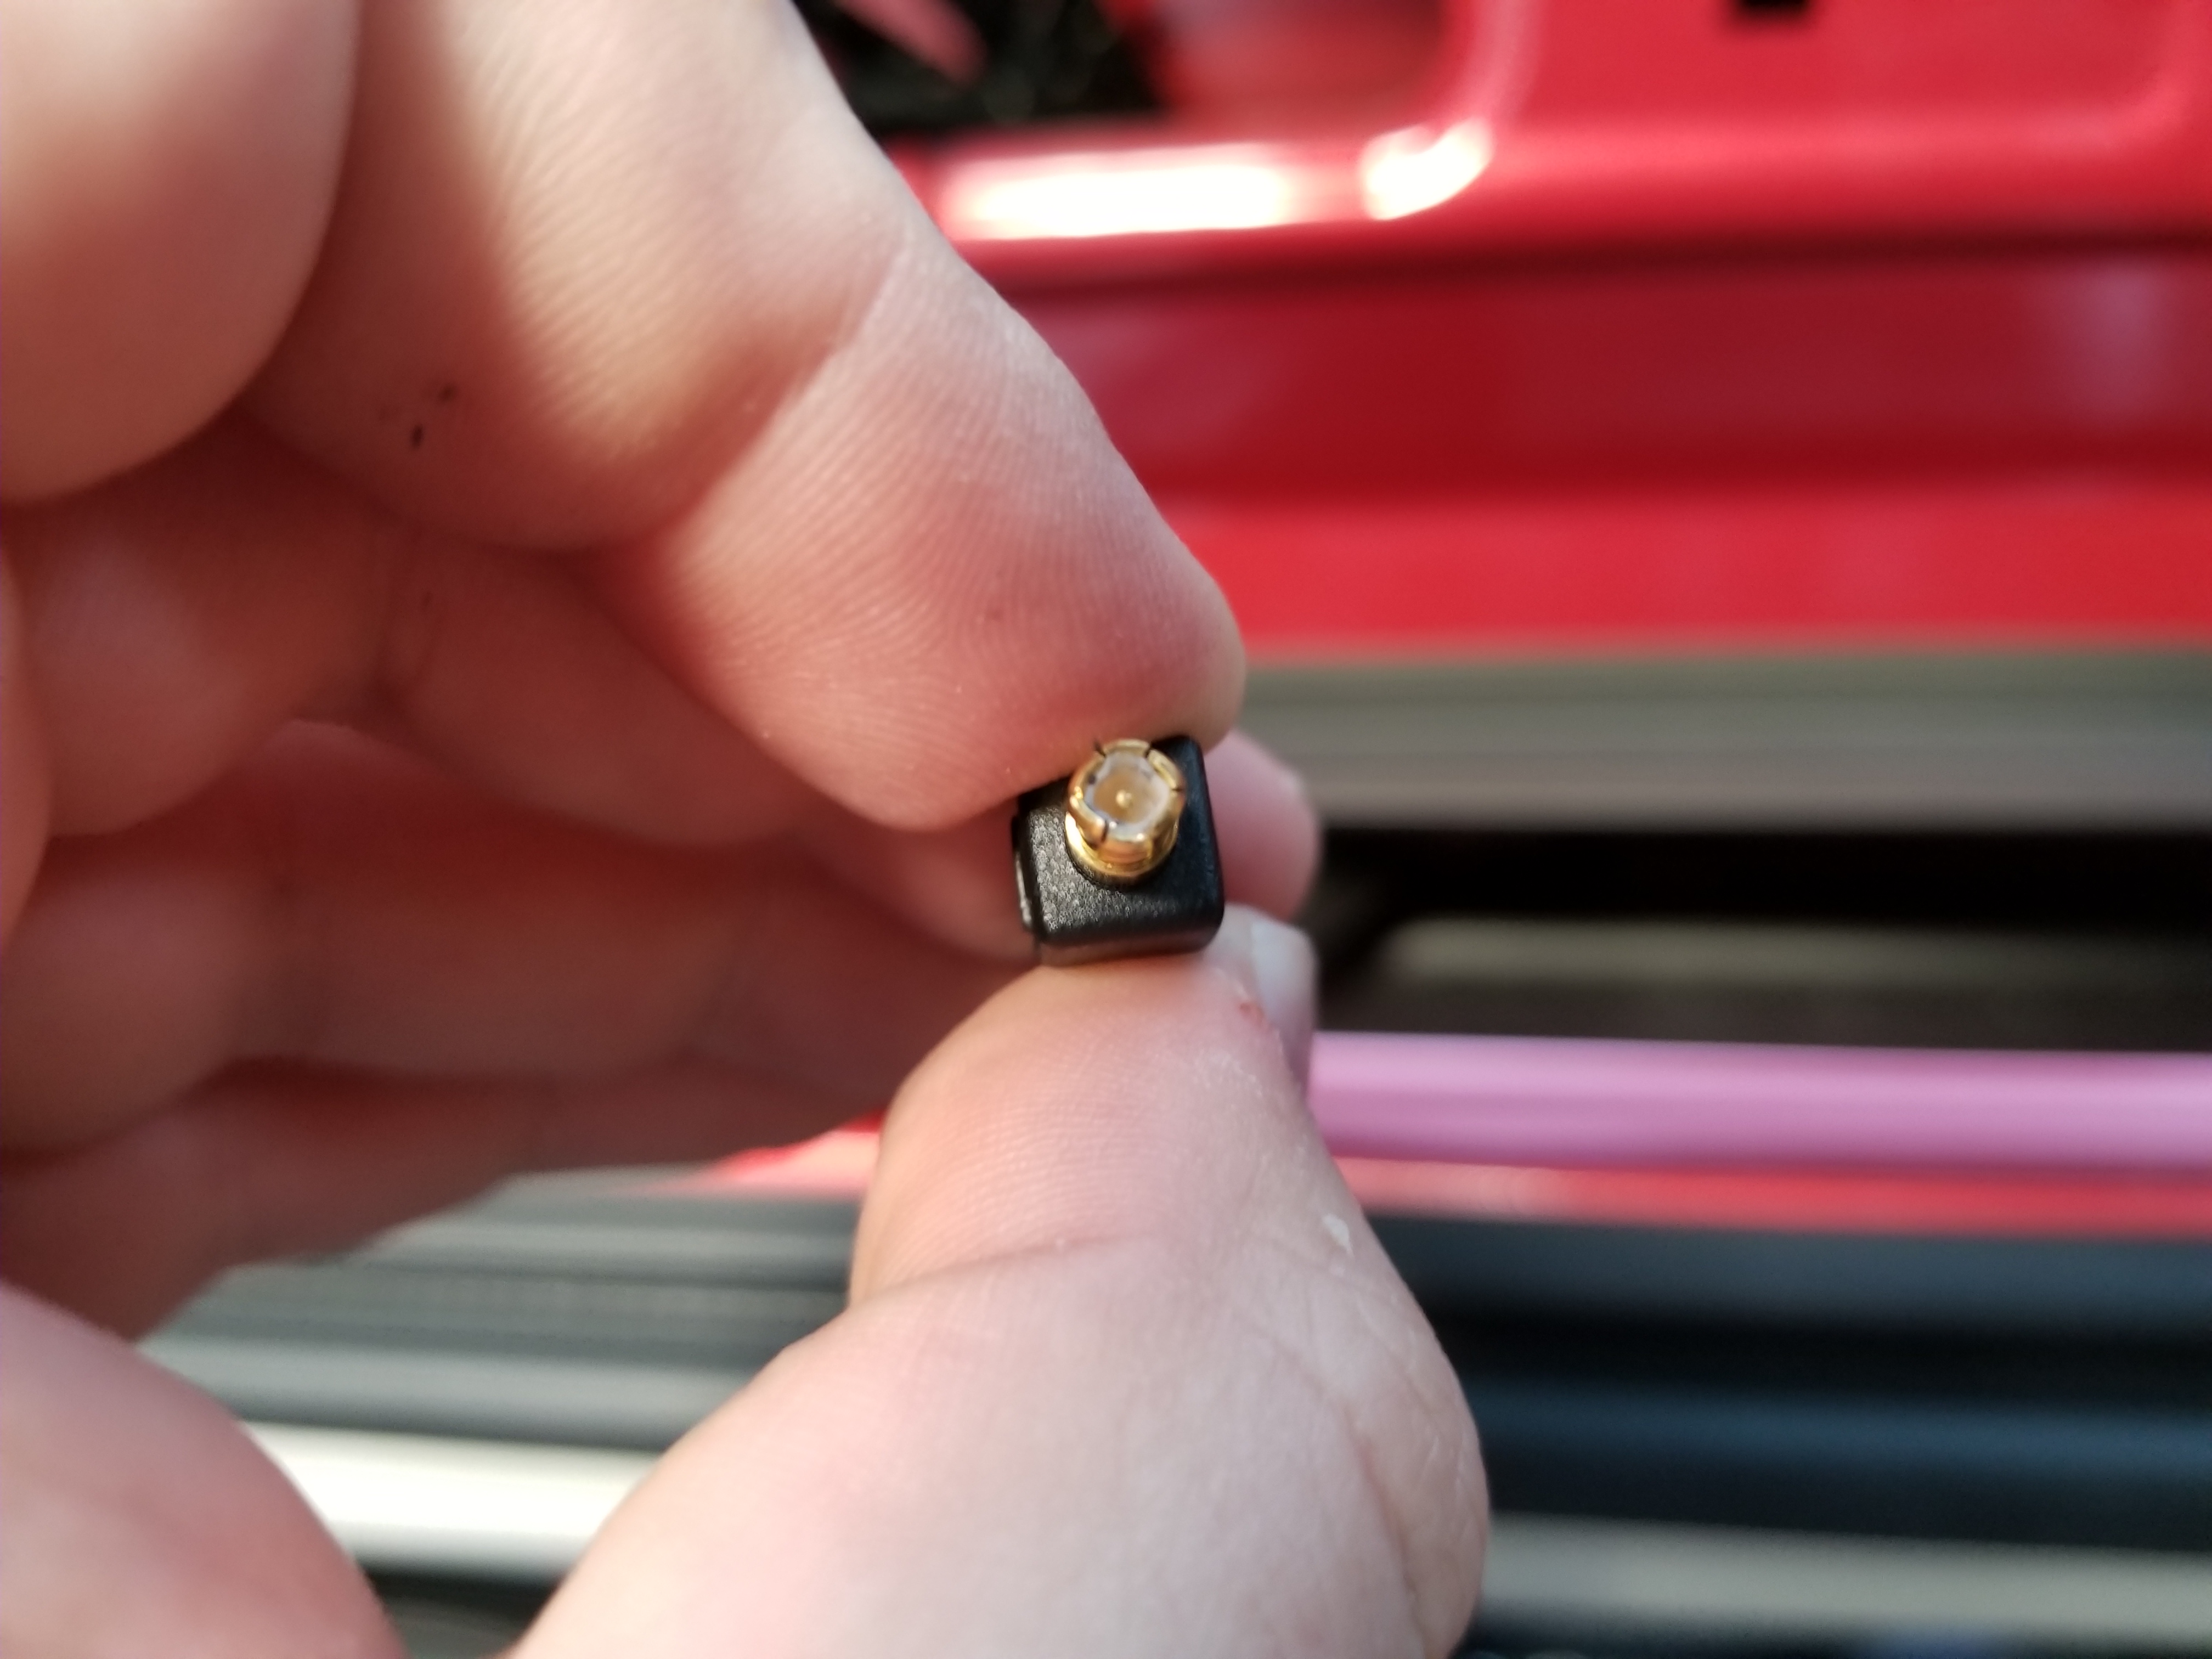
We need to fish out the cable, and then guide it through the hole where the rubber connector is attached (oh and we need to detach both sides of the connector from the body – just use more force and they’ll give in):
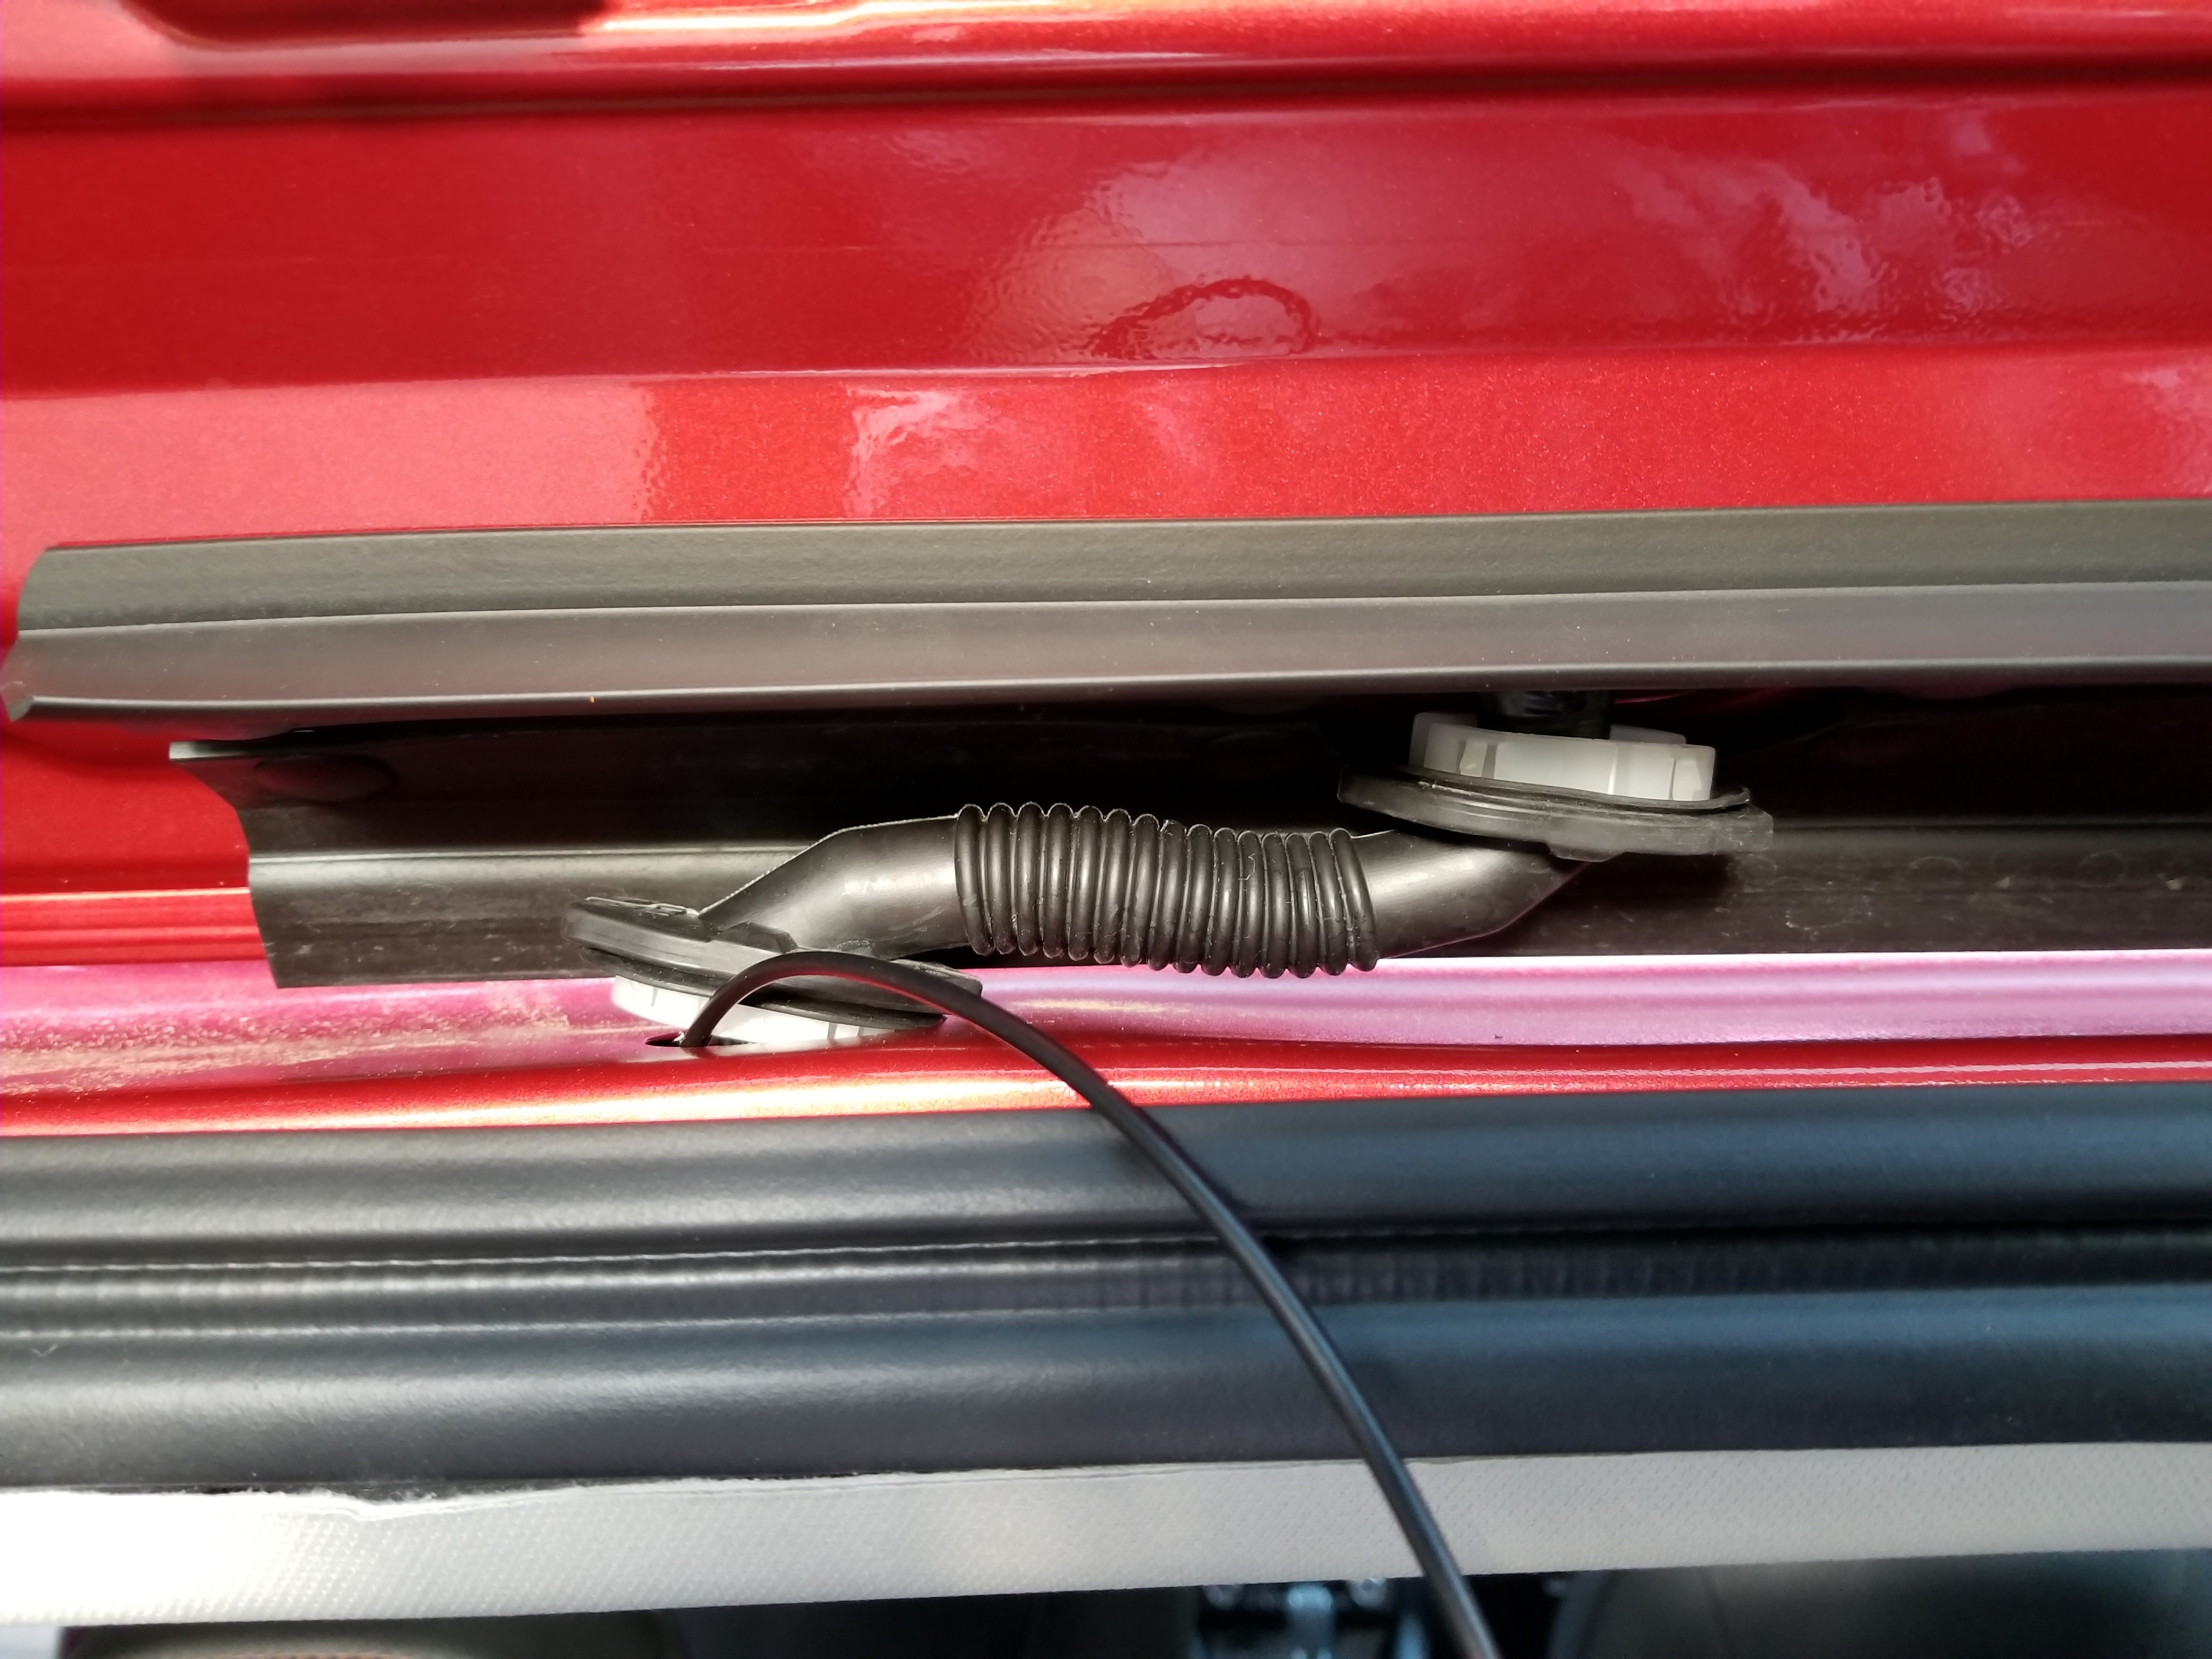
Now here comes the hard part, and a small hint to make it easier: I wrapped the end of the cable in electric tape, to make it “smoother” so it doesn’t catch onto things as it is being pulled through the rubber connector, then pushed a zip tie (one just like this) into the rubber connector from the end connected to the lift gate, and used a bit more tape to stick the wrapped cable to the zip-tie. Now you can pull the zip tie back, and it will bring the cable through. You can spray it with a bit of glass cleaner (which you should have handy after sticking the cameras to the windows) for some lubrication in the process. This probably sounds more complicated than it is… But it works 🙂
Zip tie inside the rubber connector, with cable taped on the left side (zip tie is white):
Then just pull the zip tie back from the right side (pliers can be helpful):
This will take a while – be patient, try to guide it with your hands, and gradually it will find its way through.
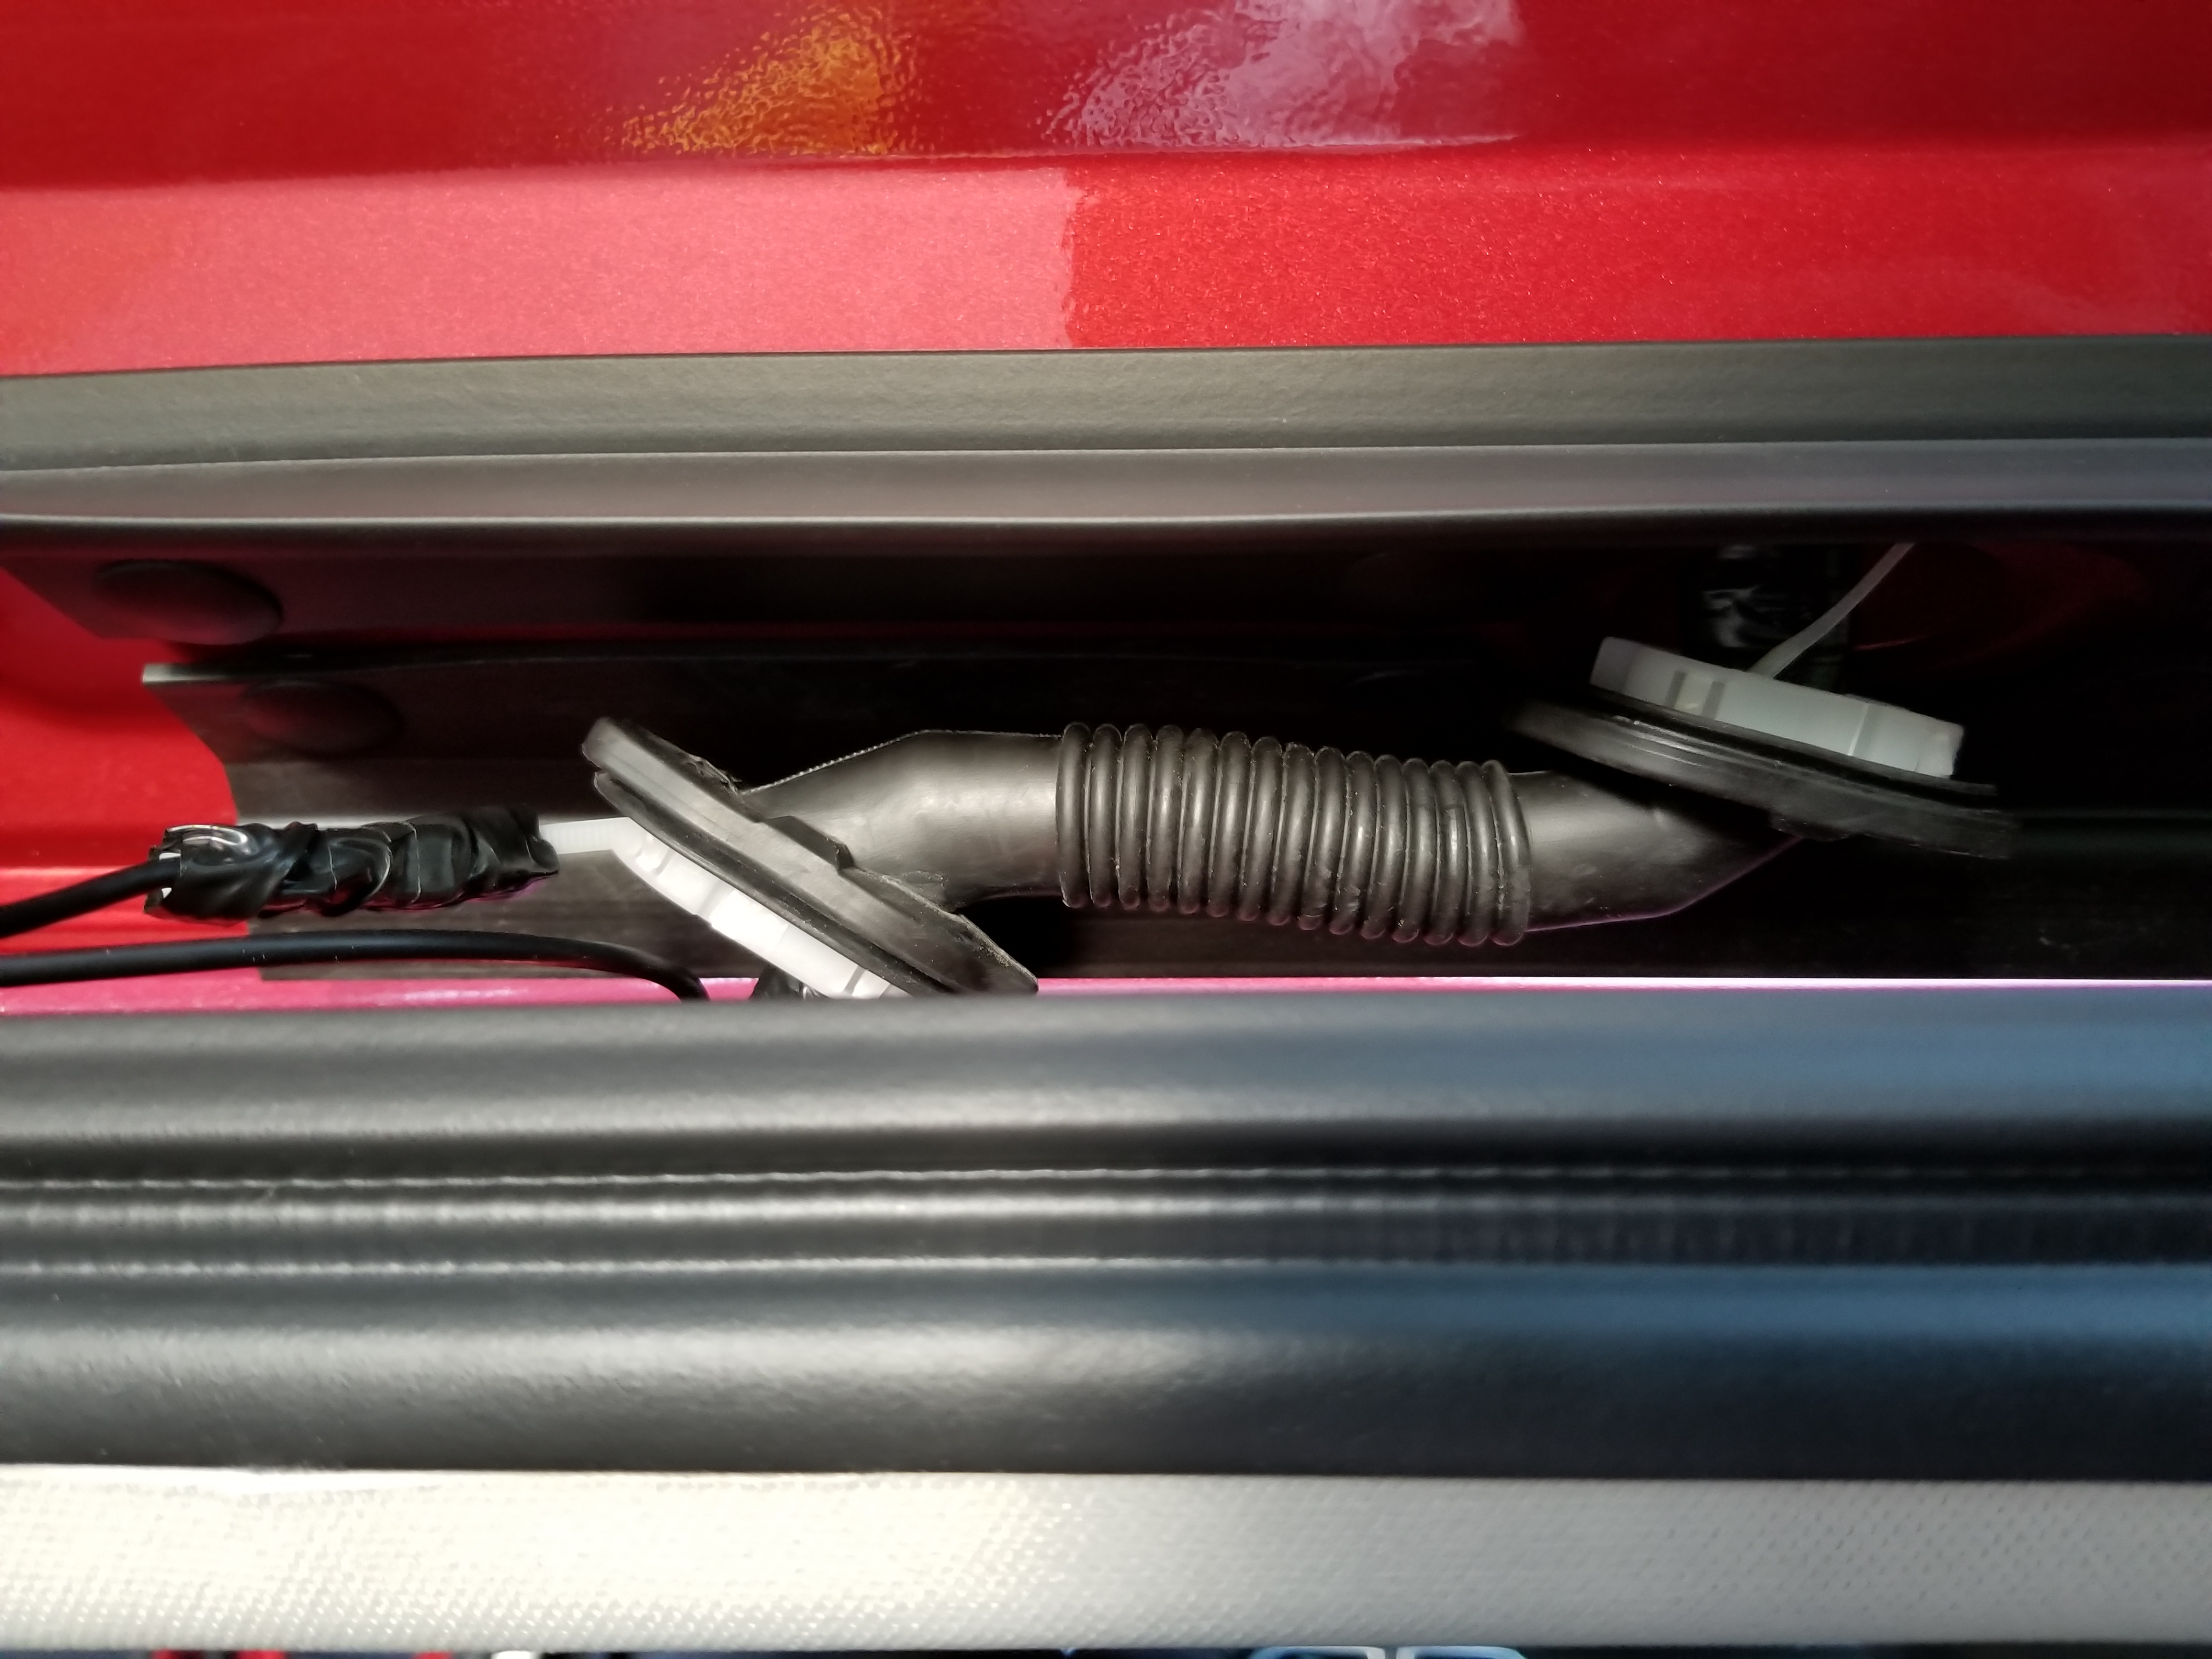
When pulling the zip tie, make sure you don’t squeeze the end of the cable – I made that mistake, which squished the connector:

But luckily I was able to quickly straighten it back – learn on my mistake 🙂
At this point you should be able to claim the victory:
From now on it’s easy – remove the tape, push the cable through the body panel, connect it to the camera (make sure it has enough “slack” and isn’t tight as a guitar string).
You can put back the removed body panels now (on the lift gate, door sills. and head liner in the back).
Hard-wiring
Make sure the car is turned off, and have the Power Magic Pro ready, along with 2 add-a-circuit fuse taps:
The fuse taps need to be cramped onto wires – ones I bought required a lot of force, but they seem to hold strong.
Open the fuse box in driver’s side foot well, and connect the fuse taps as visible on this photo:

Note: it was brought to my attention that the fuse tap in top-right corner on above picture should be flipped upside down. As it’s shown on the picture, the fuse won’t protect the camera when it’s turned on. Please see comment from Joel below for additional explanation (thank you, Joel!).
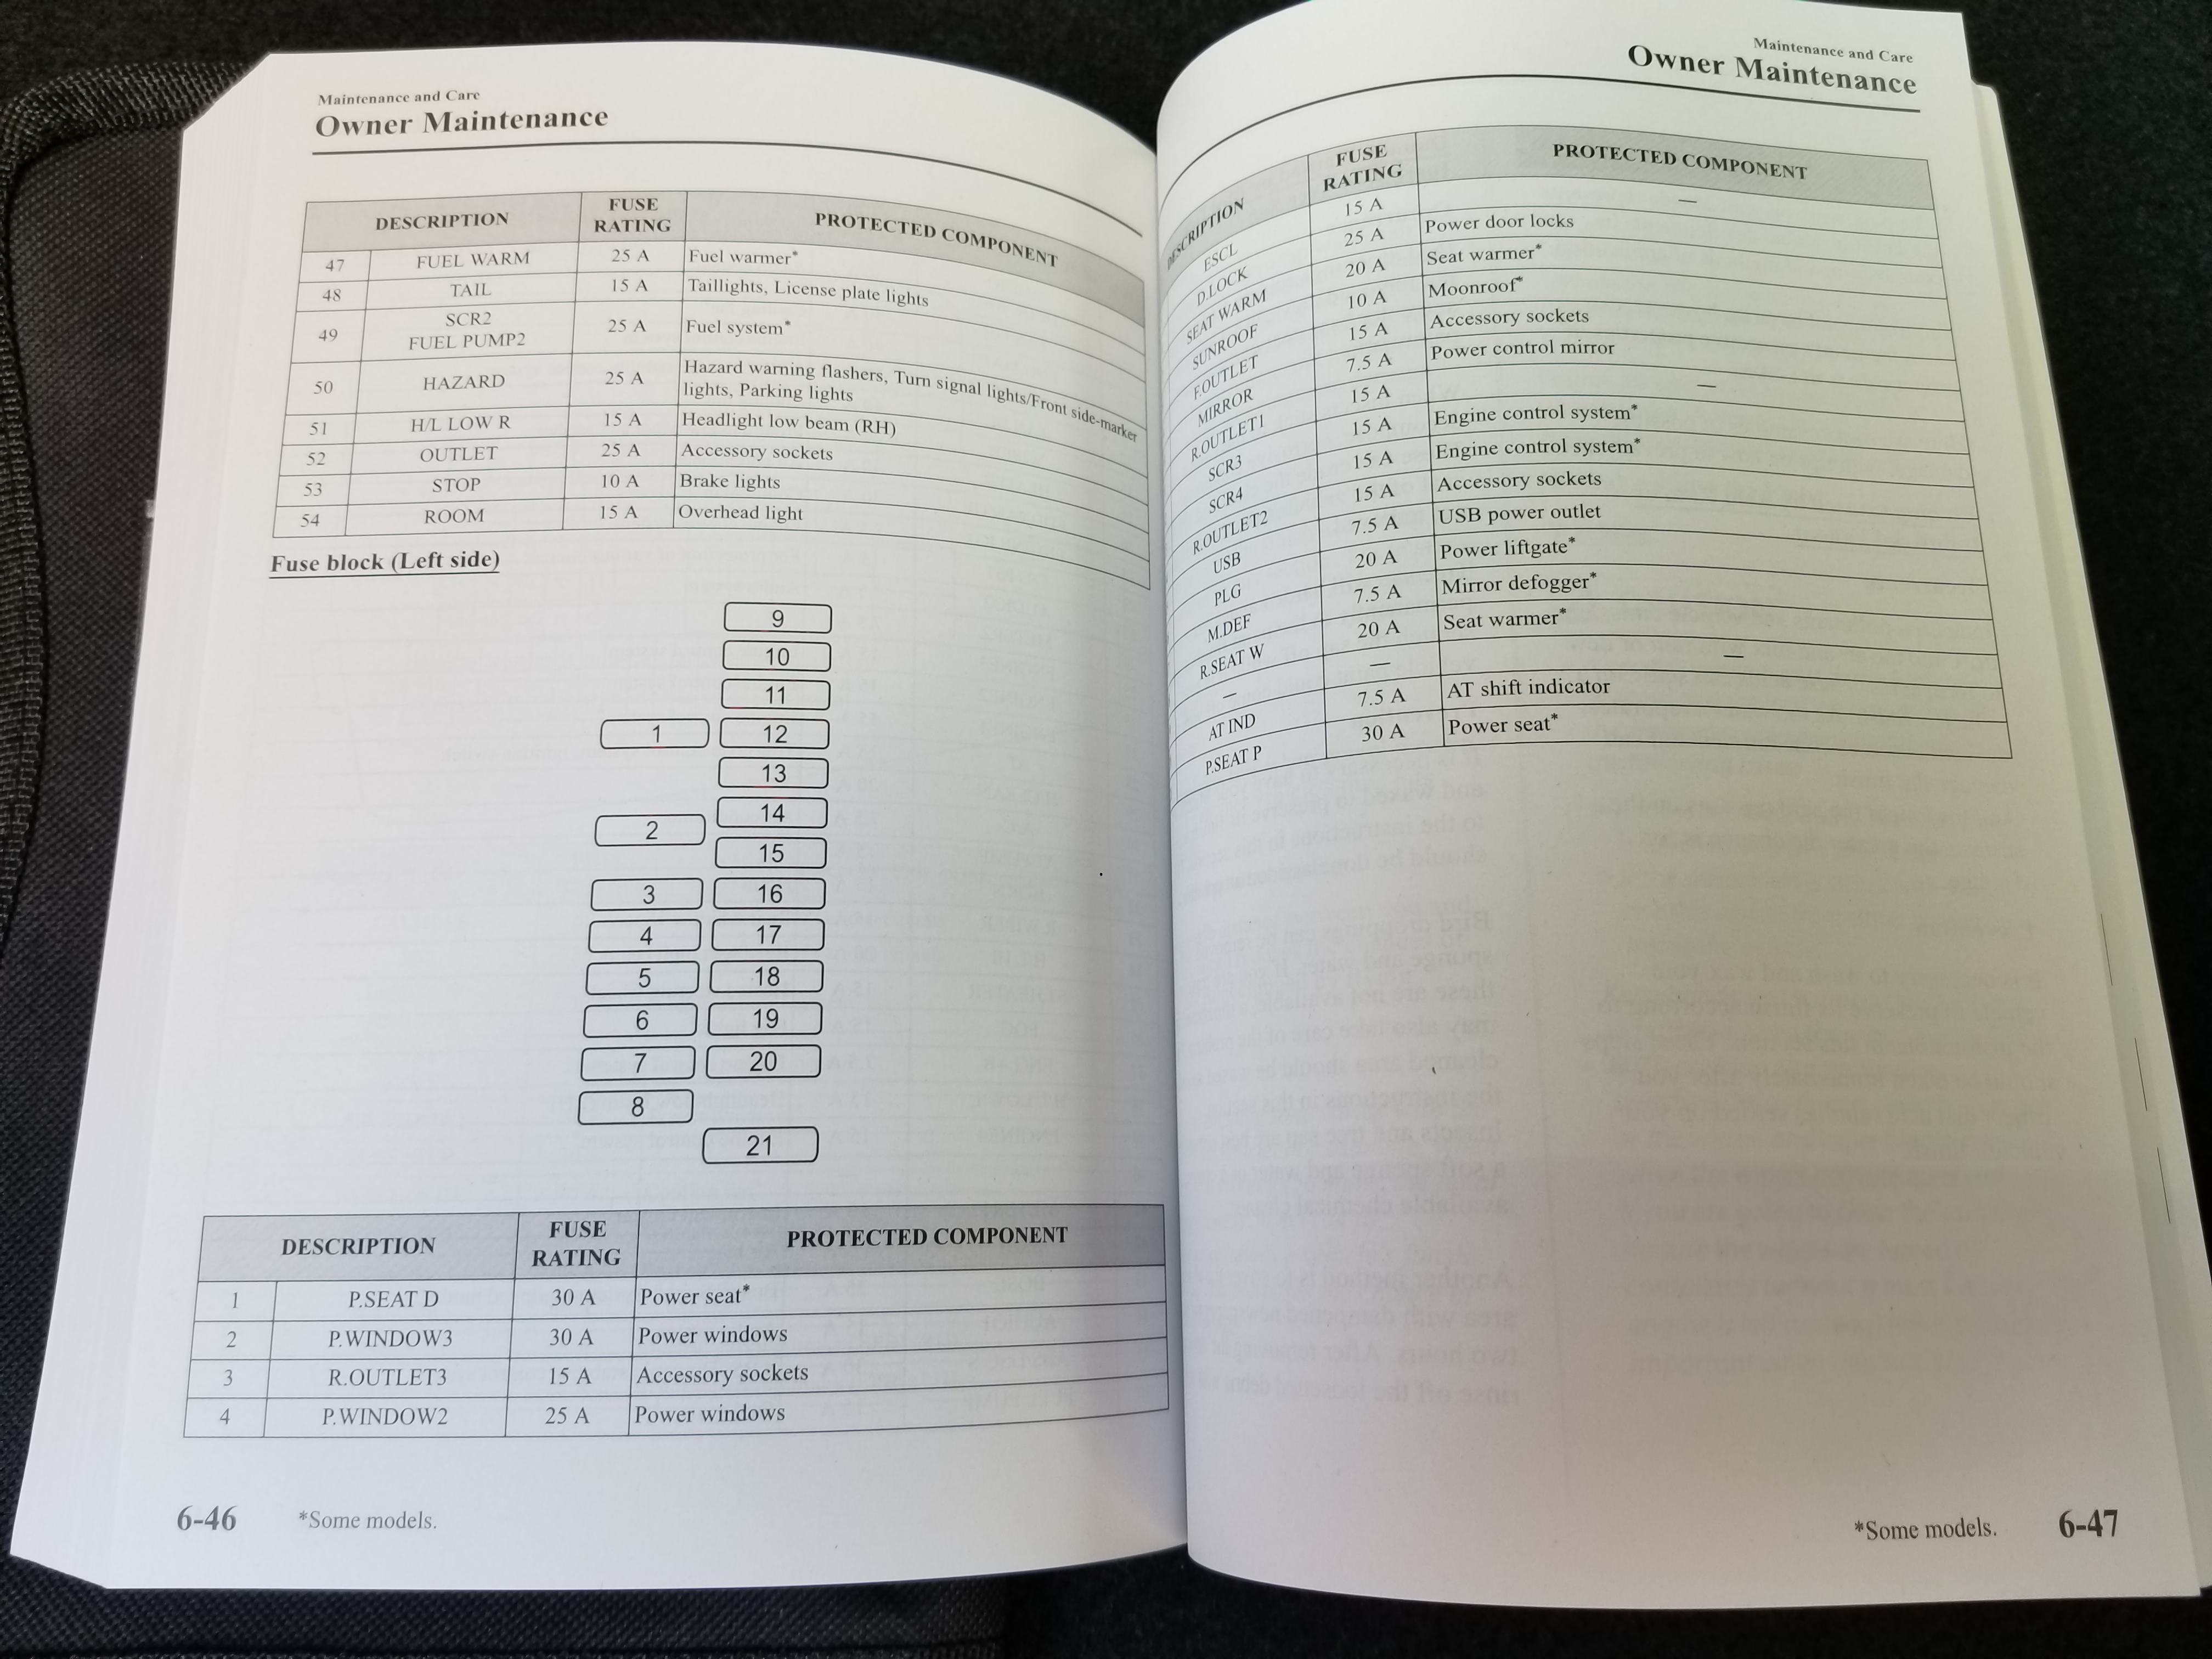
Here’s a reference for the fuse box, from manual, for your convenience 🙂
Make sure you to connect the yellow wire and the red wire appropriately:
– red (ACC+) – fuse on the top on the above photo – fuse #9 in the manual,
– yellow (BAT+) – fuse on the bottom in the above photo (we can only see the red wire from add-a-circuit in the photo), fuse #3 in the manual,
– ground – screw on the side, connected to the car’s body,
Lastly, connect the cigar socket of Power Magic Pro with the camera’s power cable, tuck the black box (Power Magic Pro) somewhere safely – it can be attached under plastic panels in the footwell using double sided tape provided in the set, check the connections. Try it out before finishing the wire cleanup around fuse box.
I also recommend spending few minutes playing around with the Blackvue app on smartphone (after connecting to the camera using its WiFi), checking the options, and configuring it to work the way you want. And don’t forget to set the timing on Power Magic Pro to your preference (I find 12h setting for parking mode working well).
And it should be good to go!
Thank you for reading till the end. I hope you found this guide informational!
Please share if you have any feedback, let me know if this write up helped you in the installation process, or if you encounter any problems/have any questions.
And let’s hope we’ll never need the footage from dashcams… 🙂


Leave a Reply