
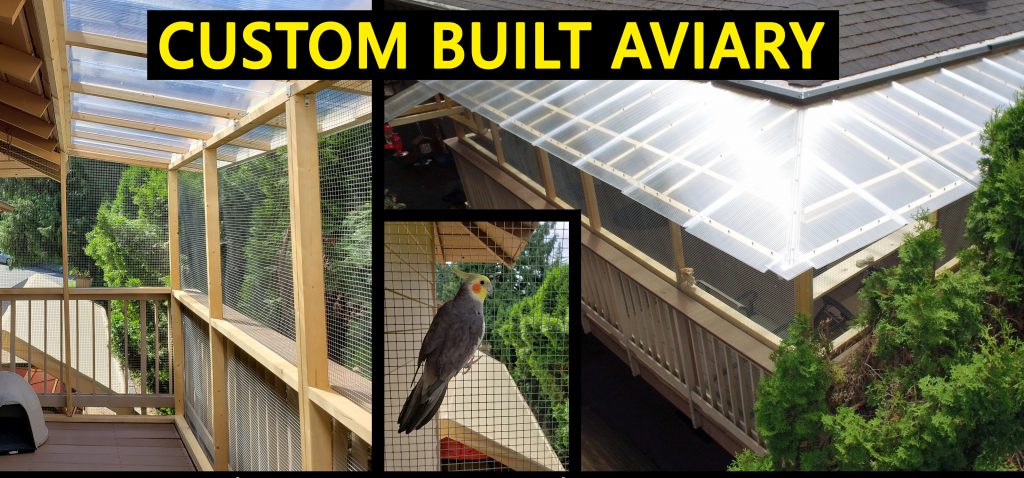
As you may know from my previous posts, we love parrots! 🙂 And since summer is almost here, I wanted to have an outdoor space where we could all spend some time on sunny days. We have a large balcony accessible from living room on the 2nd floor and since that living room is where we spend most of the time, having an attached aviary would be perfect!
So I made a simple design, ordered the parts and got to building. I’d like to share the process with you 🙂
It took me 5 weekends and few extra evenings to build it (I work full-time, so there isn’t much time on weekdays I can dedicate to additional projects). The space amounts to just under 200 sq ft.
Here’s the result!
Guest appearances on the video: Bella (yellow-sided green cheek conure), Sweetie (cockatiel), Hana and Piku (budgies), Ace (cat).
Index
I decided to split this article into main sections:
- Cost estimates
- Materials and tools
- Bird safety considerations
- Preparation and general tips
- Building walls (and adding a window and wild bird feeders)
- Putting the roof
- Finishing touches, customization
- Bonus project – squirrel feeder
Cost estimates
The cost, as always, depends on few factors – whether this is something you’d like to get done by a company instead of DIY, the size of the construction, even area you live in (with high cost of living areas always bringing in premium pricing). And if you decide to build it yourself (which I encourage, don’t be hesitant – it’s a lot of fun if you like to create things and it’s really not that hard, even if it would be your first construction project), there’s the matter of buying few tools if you don’t have them already.
In my case, I started by getting some quotes from local companies – I wanted to build it myself, but I wanted to know what to expect. This aviary was considered to be big by their standards, thus the prices were on the higher side. Also note that I live in high COL area. The estimates ended up being around the $12,000 – $15,000 area, but with further modifications it feels like the final cost could reach $20,000. Yeah, I wasn’t expecting it to be that expensive 🙂 Oh well, even more reasons to have fun building it yourself!
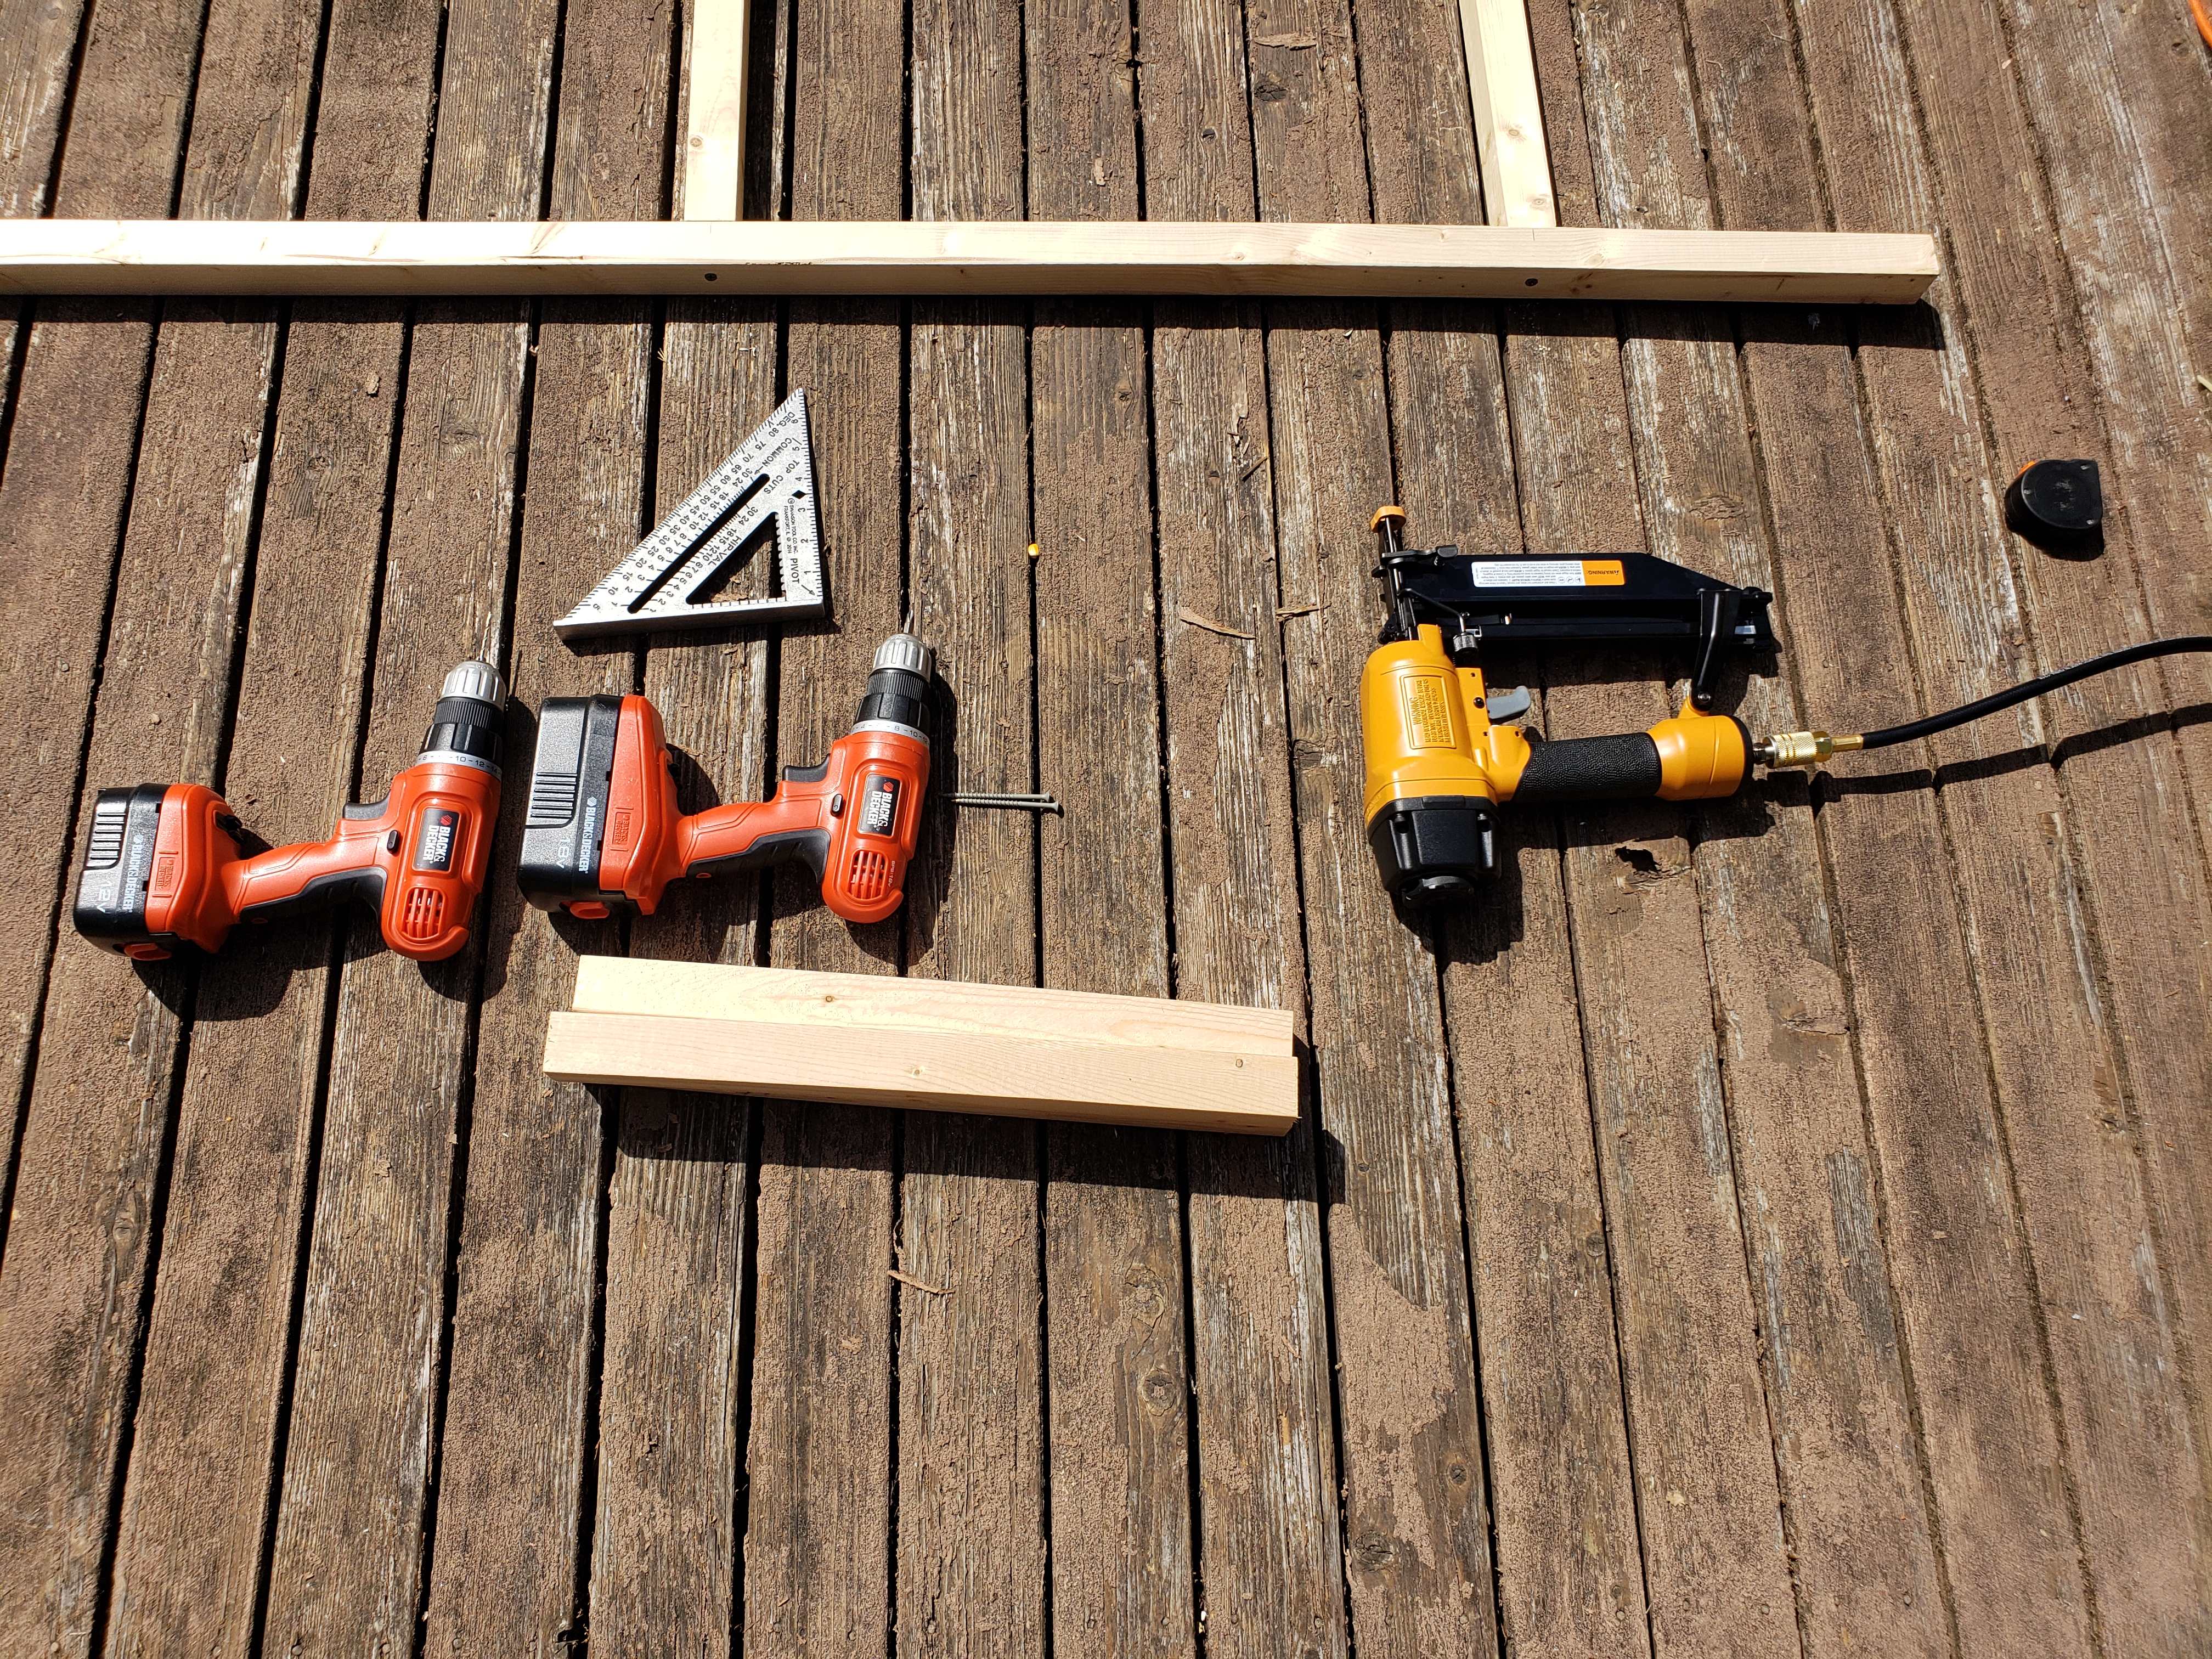
Now that we’re discussing the prices – the total cost for me was under $2,000 (for materials and some additional tools, not including labor since I did the work). Again, this depends on the size of your construction and tools you have and need to buy. I already had a table saw, but ended up buying 3 pneumatic nailers (brad, finishing and staples) with a compressor.
See the detailed breakdown of cost in the next section.
Materials and tools
Since I decided to build the aviary on our balcony, it drove some of the design considerations. The newly added roof part is going to be short since there are already eaves (new part will be 4ft long), doesn’t have to support heavy load (it maybe snows 3 days in a year around here), and generally I didn’t want to add more load to the balcony than needed. As such, I decided to do the wall framing using 2×3 and for roof I used 2×2.
Now, I bought dimensional lumber in 8ft long pieces. Since I needed to cover all the sides with a mesh, it helps to have mesh with a width that simplifies the process. I bought rolls of a 19GA zinc coated wire mesh (important detail: it’s coated after welding, as doing it the other way can release some toxic stuff from zinc, and this is for our lovely birds – their safety is very important). This way I can use 2 strips of mesh for each 8ft long wall.
Bill of materials
| Product | Quantity | Unit price | Total price | Link |
| Lumber, 2x3x8 | 55 | $4 | $220 | Home Depot |
| Lumber, 2x2x8 | 32 | $6 | $192 | Home Depot |
| Wire mesh, 19ga, galvanized, 50 ft roll | 2 | $70 | $140 | Amazon |
| Polycarbonate roofing panels, 24 inch x 96 inch | 10 | $37 | $370 | Home Depot |
| H-connectors for panels | 10 | $16 | $160 | Home Depot |
| U-caps for panels | 8 | $5 | $40 | Home Depot |
| Screws, 3 inch, 5lb box, outdoor | 1 | $27 | $27 | Home Depot |
| Screws 1 1/4 inch, 1lb box, outdoor | 1 | $9 | $9 | Home Depot |
| Roof screws, 1 inch, 50-pack | 2 | $5 | $10 | Home Depot |
| Roof screws, 2 inch, 50-pack | 5 | $6 | $30 | Home Depot |
| Staples T50, 3/8 inch, 5000-pack | 1 | $11 | $11 | Amazon |
| Finish nails, 16 ga, 2 1/2 inch | 1 | $15 | $15 | Amazon |
| Painters tape | 1 | $9 | $9 | Amazon |
| Piano hinge, 12 inch | 1 | $11 | $11 | Home Depot |
| Window bolt, 2 inch | 1 | $3 | $3 | Home Depot |
| A21 strong ties | 40 | $1 | $40 | Home Depot |
| T-plates, 3 inch, 2-pack | 2 | $3 | $6 | Home Depot |
| Corner braces, 1 1/2 inch, 20-pack | 1 | $9 | $9 | Home Depot |
| Screw eyes, #8, 50-pack | 1 | $9 | $9 | Home Depot |
| Roof flashing, drip edge, 2×3, 10 ft | 4 | $8 | $32 | Home Depot |
| Misc (sanding block, electrical box lid, jgsaw blade, 3/8 drill bit, pencil, sharpie, etc.) | 1 | $100 | $100 | |
| TOTAL | $1,443 |
Tools
| Product | Quantity | Unit price | Total price | Link |
| Table saw, DEWALT, 10-inch | 1 | $320 | $320 | Amazon |
| Jigsaw, BLACK+DECKER | 1 | $29 | $29 | Amazon |
| Pneumatic tools kit, BOSTITCH | 1 | $219 | $219 | Amazon |
| ALTERNATIVE: manual stapler | 1 | $20 | $20 | Amazon |
| Battery powered drill/driver | 2 | $42 | $84 | Amazon |
| Heavy duty metal snips | 1 | $11 | $11 | Amazon |
| Measuring tape, 25 ft | 2 | $8 | $16 | Amazon |
| Speed square, 12 inch | 1 | $9 | $9 | Amazon |
| Level | 1 | $8 | $8 | Amazon |
| Pliers | 1 | $15 | $15 | Amazon |
| Clamps (set of 4) | 1 | $12 | $12 | Amazon |
| TOTAL | $743 |
Note: some tools come with a starting set of accessories (e.g. blade for table saw, blades for jigsaw, staples, drill bits, etc.), thus those are not included in my cost estimate. And if you already have the tools, I’m making assumption you have the necessities to keep them running.
Also, I mentioned that the total cost I incurred was under $2,000, but you’ll exceed that slightly if you need to buy all the tools I called out (I simply had few of them already).
Bird safety considerations
Birds are beautiful, yet quite fragile. Their respiratory system is very sensitive – they have relatively small lungs, that work efficiently along with air sacks, but that makes them highly susceptible to pollutants in the air. It’s important to avoid dangerous to them scents (scented candles, fumes, smoke, perfumes, any air pollutants).
Another aspect is what they ingest – they’re very curious by nature, and like to play and exercise their beaks. They will chew on various materials, it’s important to ensure that they’re safe if get ingested by birds.
This brings us to considerations for when choosing materials:
- lumber – avoid treated wood, it can be poisonous if ingested by birds. Pressure treated lumber used to be even more poisonous in the past (it used to contain arsenic!), but even with current standards, it’s not a safe choice for birds who may chew on it. Untreated lumber won’t last as long, so be sure to choose best compromise, that is safe for your birds. Check what lumber is available in your location, and confirm that it’s safe by searching for “bird safe wood” online.
- wire mesh – this is a bit of a tricky situation – we don’t want for the mesh to start rusting, but at the same time zinc negatively affects bird health. And getting stainless steel panels to cover the whole area can get prohibitively expensive very quickly. The compromise I found was to use galvanized (hot-dipped) mesh, then brushing it extensively to make sure any loose pollutants have been removed. I got 2 rolls, shipped separately, and first one was in great condition – completely clean. Unfortunately the second one was very dusty, so I spread it on the deck and proceeded to clean, using floor brush and a leaf blower. Only put it on the walls once you’re confident it’s clean. Furthermore, discourage chewing on the mesh – put more toys, add perches to encourage sitting further from the walls, etc.
Preparation
Before beginning with the construction, the selected site needs to be prepared. If you’re planning to build on the ground, the process will be different from what I did – the ground needs to be leveled, and then it all depends on your plans – if you’ll be adding floor boards, you could use concrete deck blocks, or pour a solid concrete slab, etc.
In my case, I was enclosing the existing balcony, which lead to minimal preparation. I pressure washed the floor, since it was dirty from rain water dropping from the roof. Then, to make sure the lovely green algae doesn’t return (we live in Seattle, thanks to rain it’s quite humid most of the year), I sealed the floor.
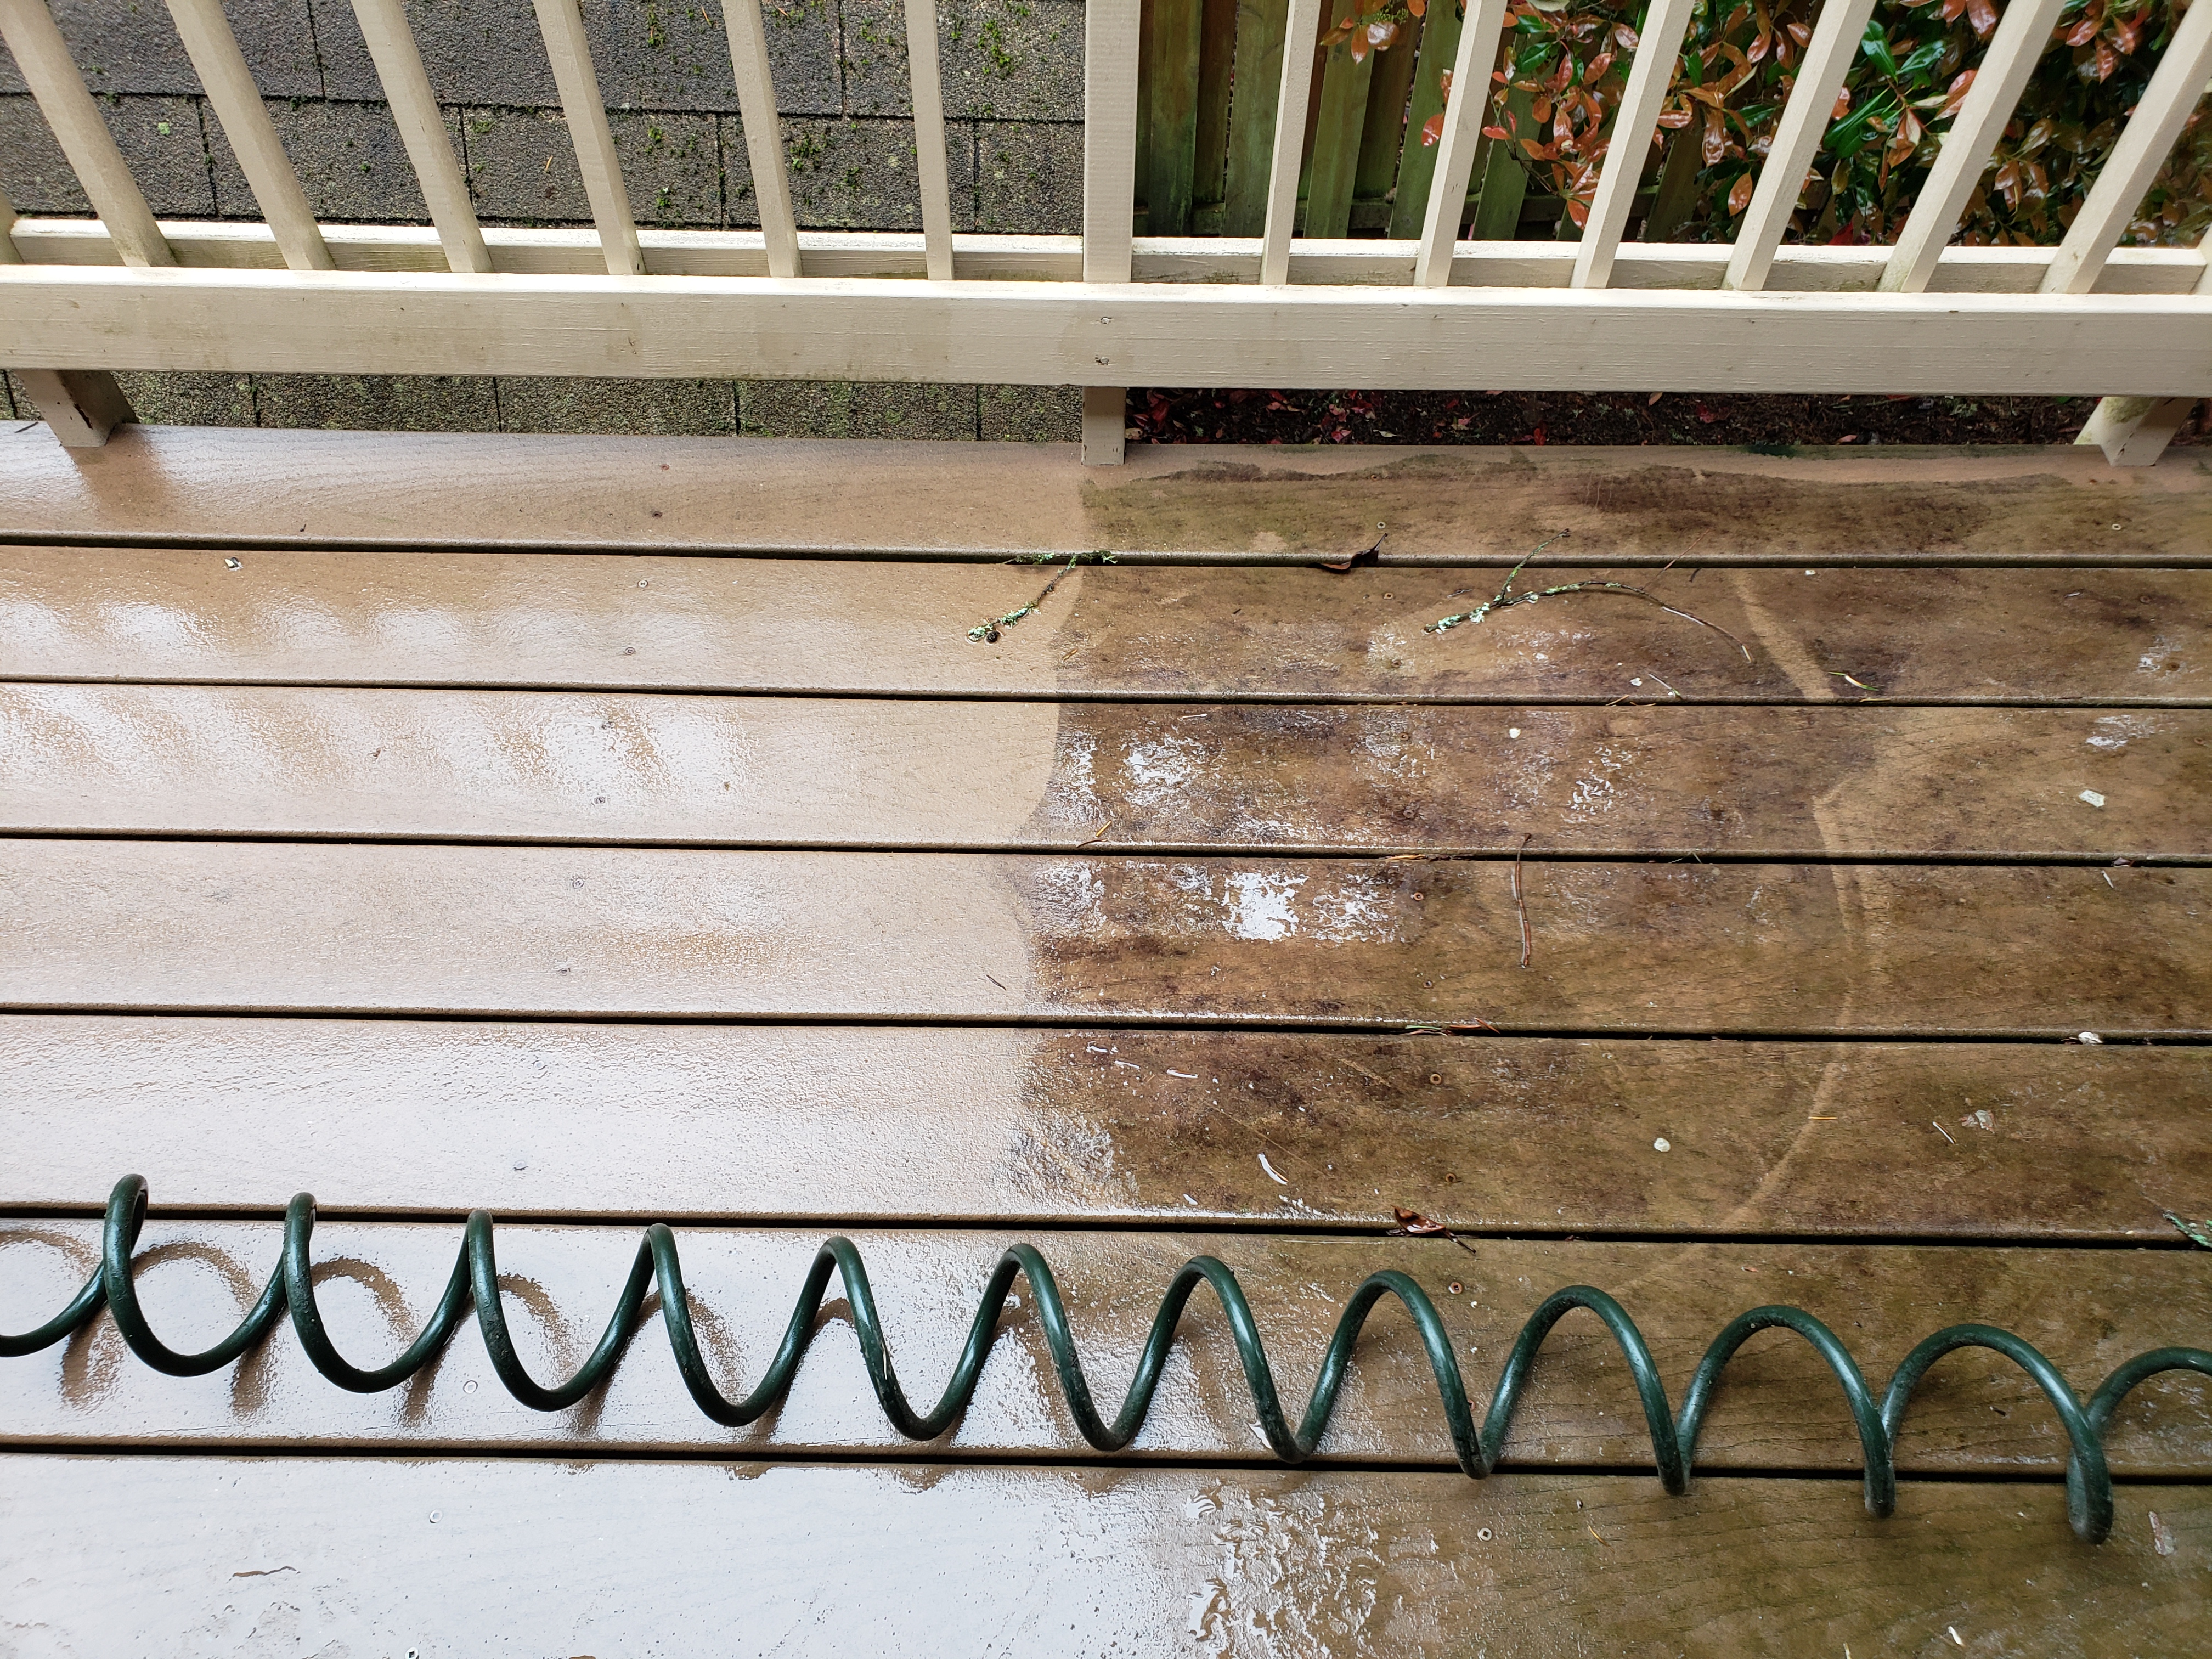

I’m using an electric pressure washer (Sun Joe makes popular and affordable models) – hard to argue with the convenience, even if they’re generally less powerful than gas models.
Interestingly, for first few minutes after applying sealant, the deck turned…. blue. I wasn’t expecting that, but luckily it quickly regained its original color upon drying 😉
As a reference, our balcony floor is made out of Trex composite decking. If you’re buying cleaning and sealing products, make sure they’re right for your surface.
General tips
Before we jump into it, let me share some overall tips and tricks that I learned, or I just find helpful while working on projects like that.
- measure twice, cut once 🙂 – no surprises here, this always stands true. Your cuts can only be as precise as your measurements, so don’t rush.
- have a plan before just jumping in – calculate how much lumber you’ll need, how to best use it to minimize the scraps, if you find yourself short on something – add it to list and then buy everything you need at once, instead of going shopping for each item separately,
- if you work in 2 places (e.g. construction on the balcony, but you’re doing the cuts in the garage/driveway/backyard), have basic tools in both locations (absolute minimum: measuring tape, pencil),
- if it’s one of first projects you’re working on, try out some things – e.g. grab piece of scrap wood and see how easy it is to split it when using screws (you may get convinced to pre-drill holes). Just to get a feel for things. Better to learn in a controlled environment, than mess up something and lose 30 minutes of having to re-do it.
Alright, let’s get started!
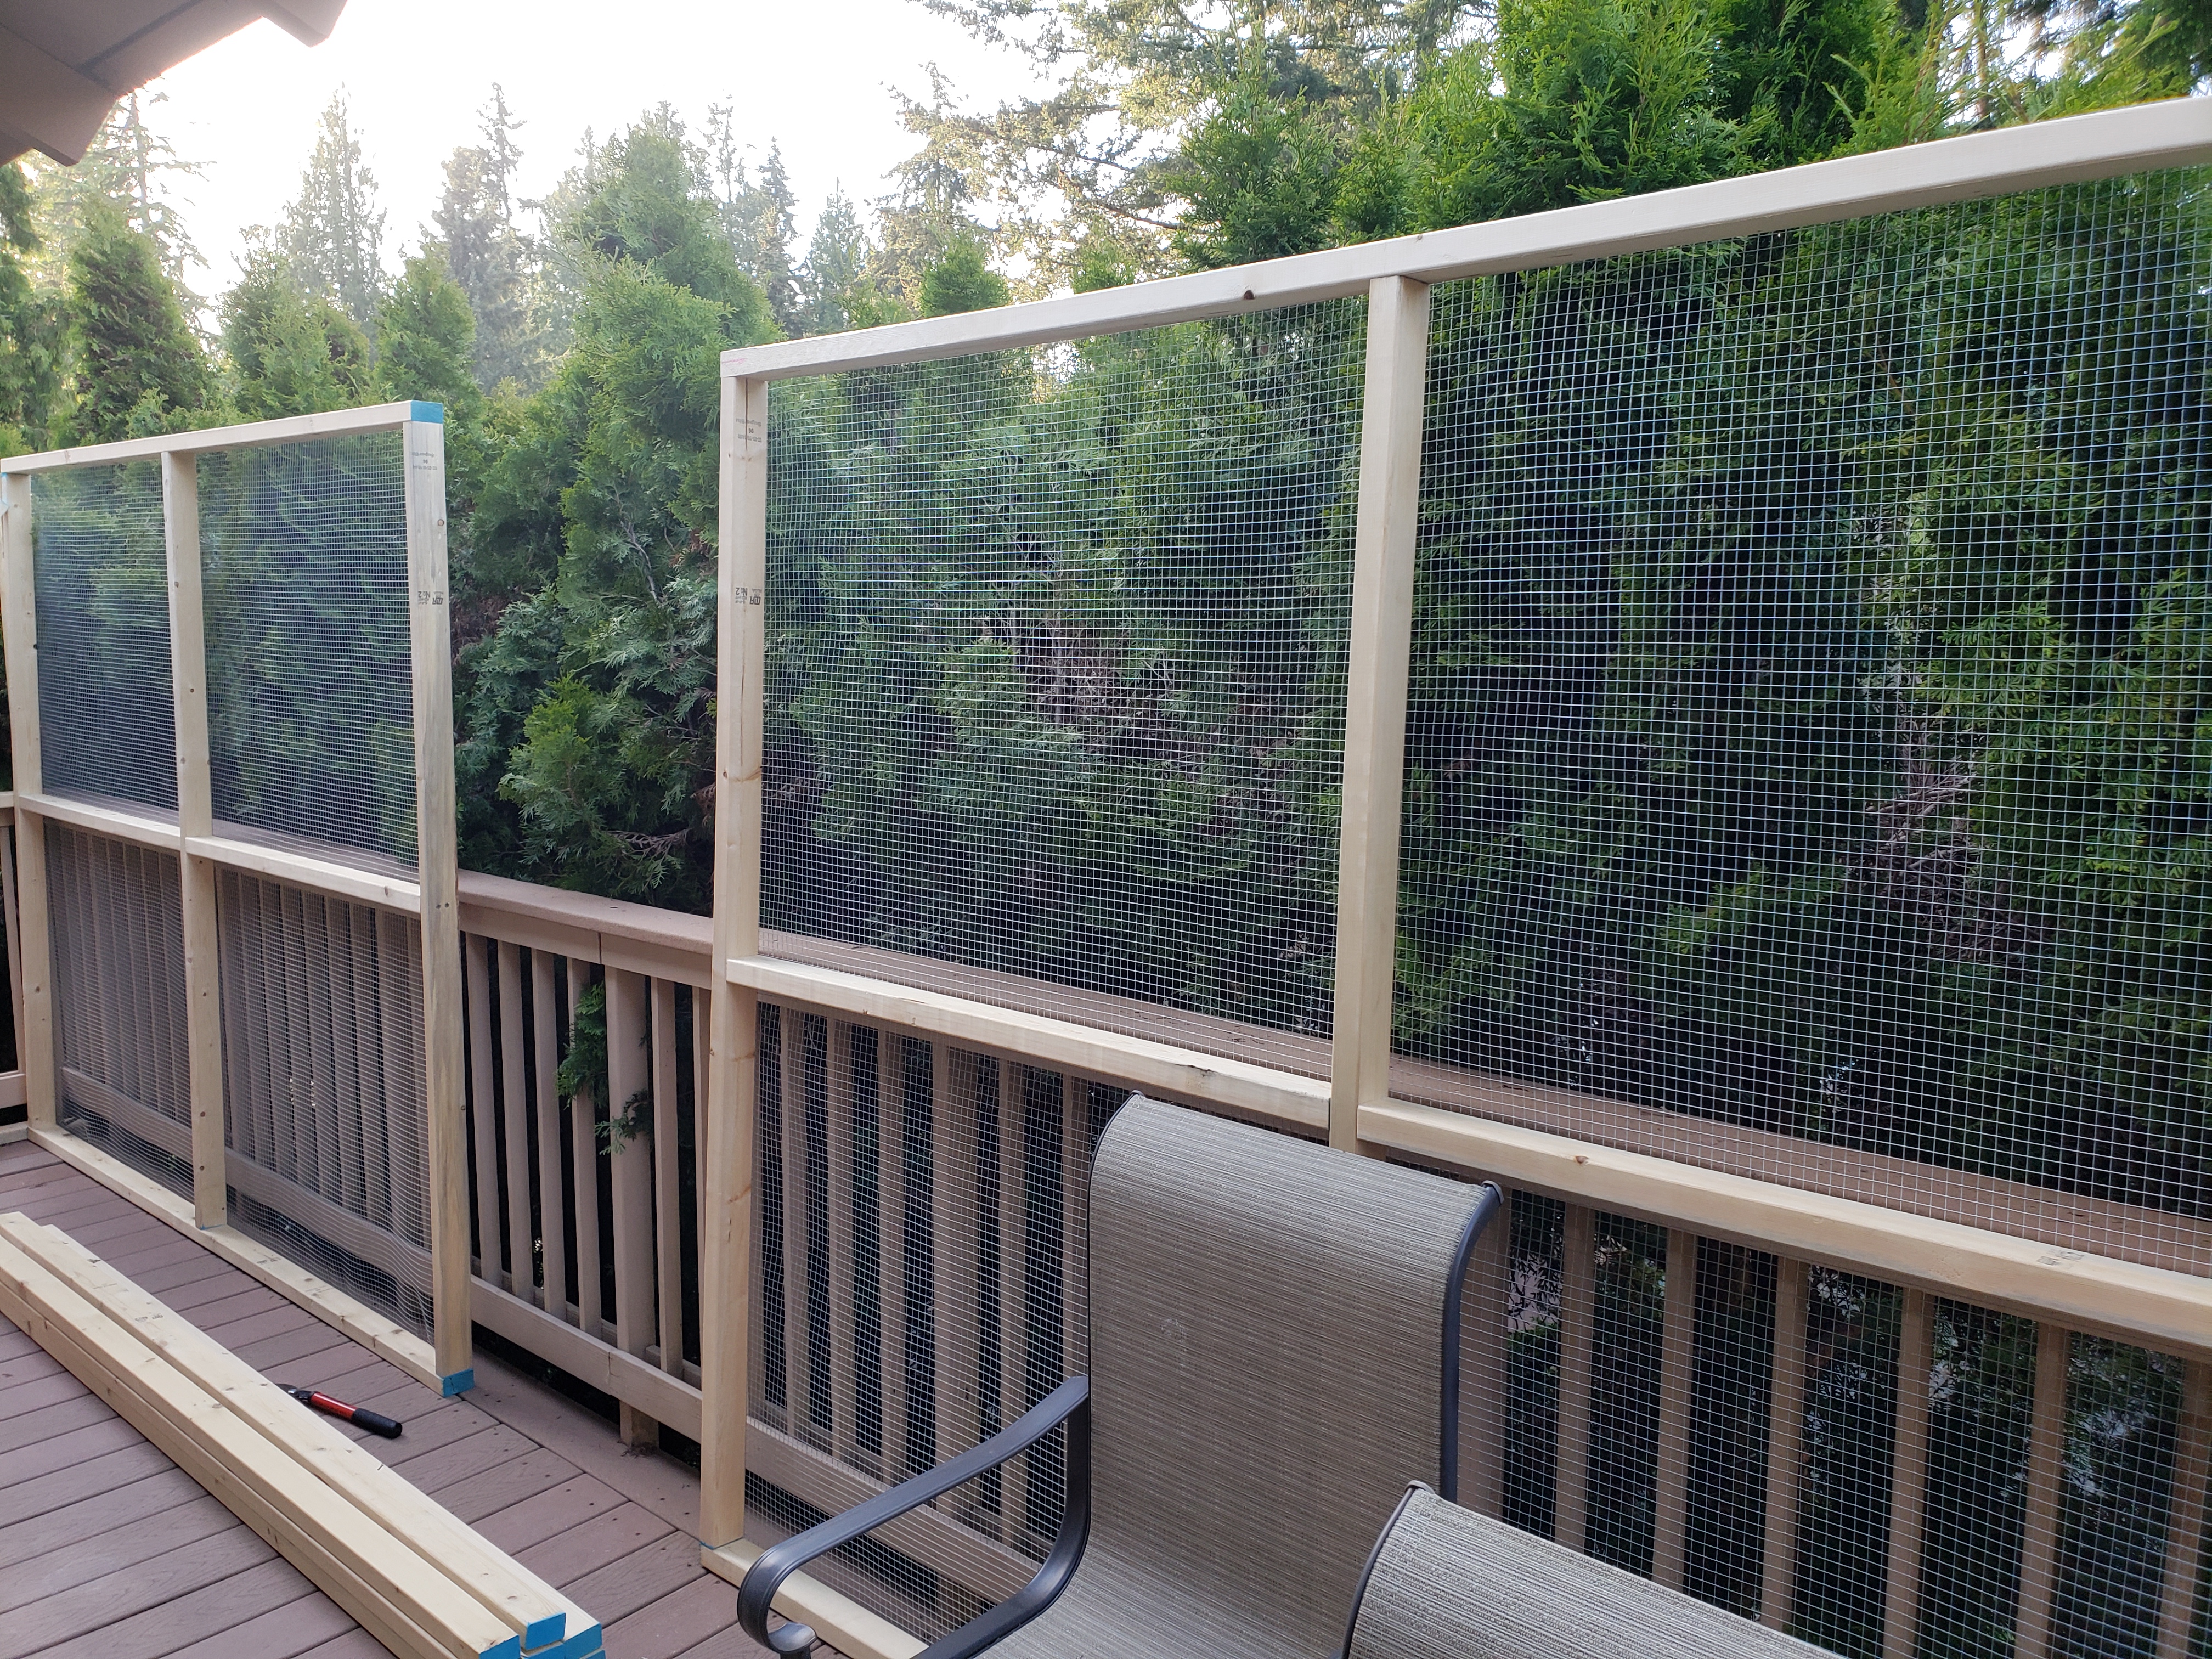
Building walls
As I mentioned before, I decided to make the framing from 2x3s. I began framing the walls from one end of our L-shaped balcony. An aviary needs to be tightly enclosed, so our birds don’t get out. And the end profile is quite tricky, since it needs to follow the profile of a wall and the roof eaves above. I think there’s benefit to starting project by tackling some of the trickier bits first, while we’re all energetic and excited, and then benefiting from having remaining work being more easy-going and bringing quick results 😉
Few considerations:
- I wanted to have the horizontal beams at the same height as the existing railing on the balcony – I think it looks cleaner, and doesn’t obstruct more view than needed, while providing sufficient support,
- The spacing between vertical pieces is dictated by the width of the wire mesh (4 ft), except in case of the end-walls, it’s dictated by the distance between wall of the building, end of the roof and the existing railing, so I had to do some trimming for the excess wire mesh on the sides.
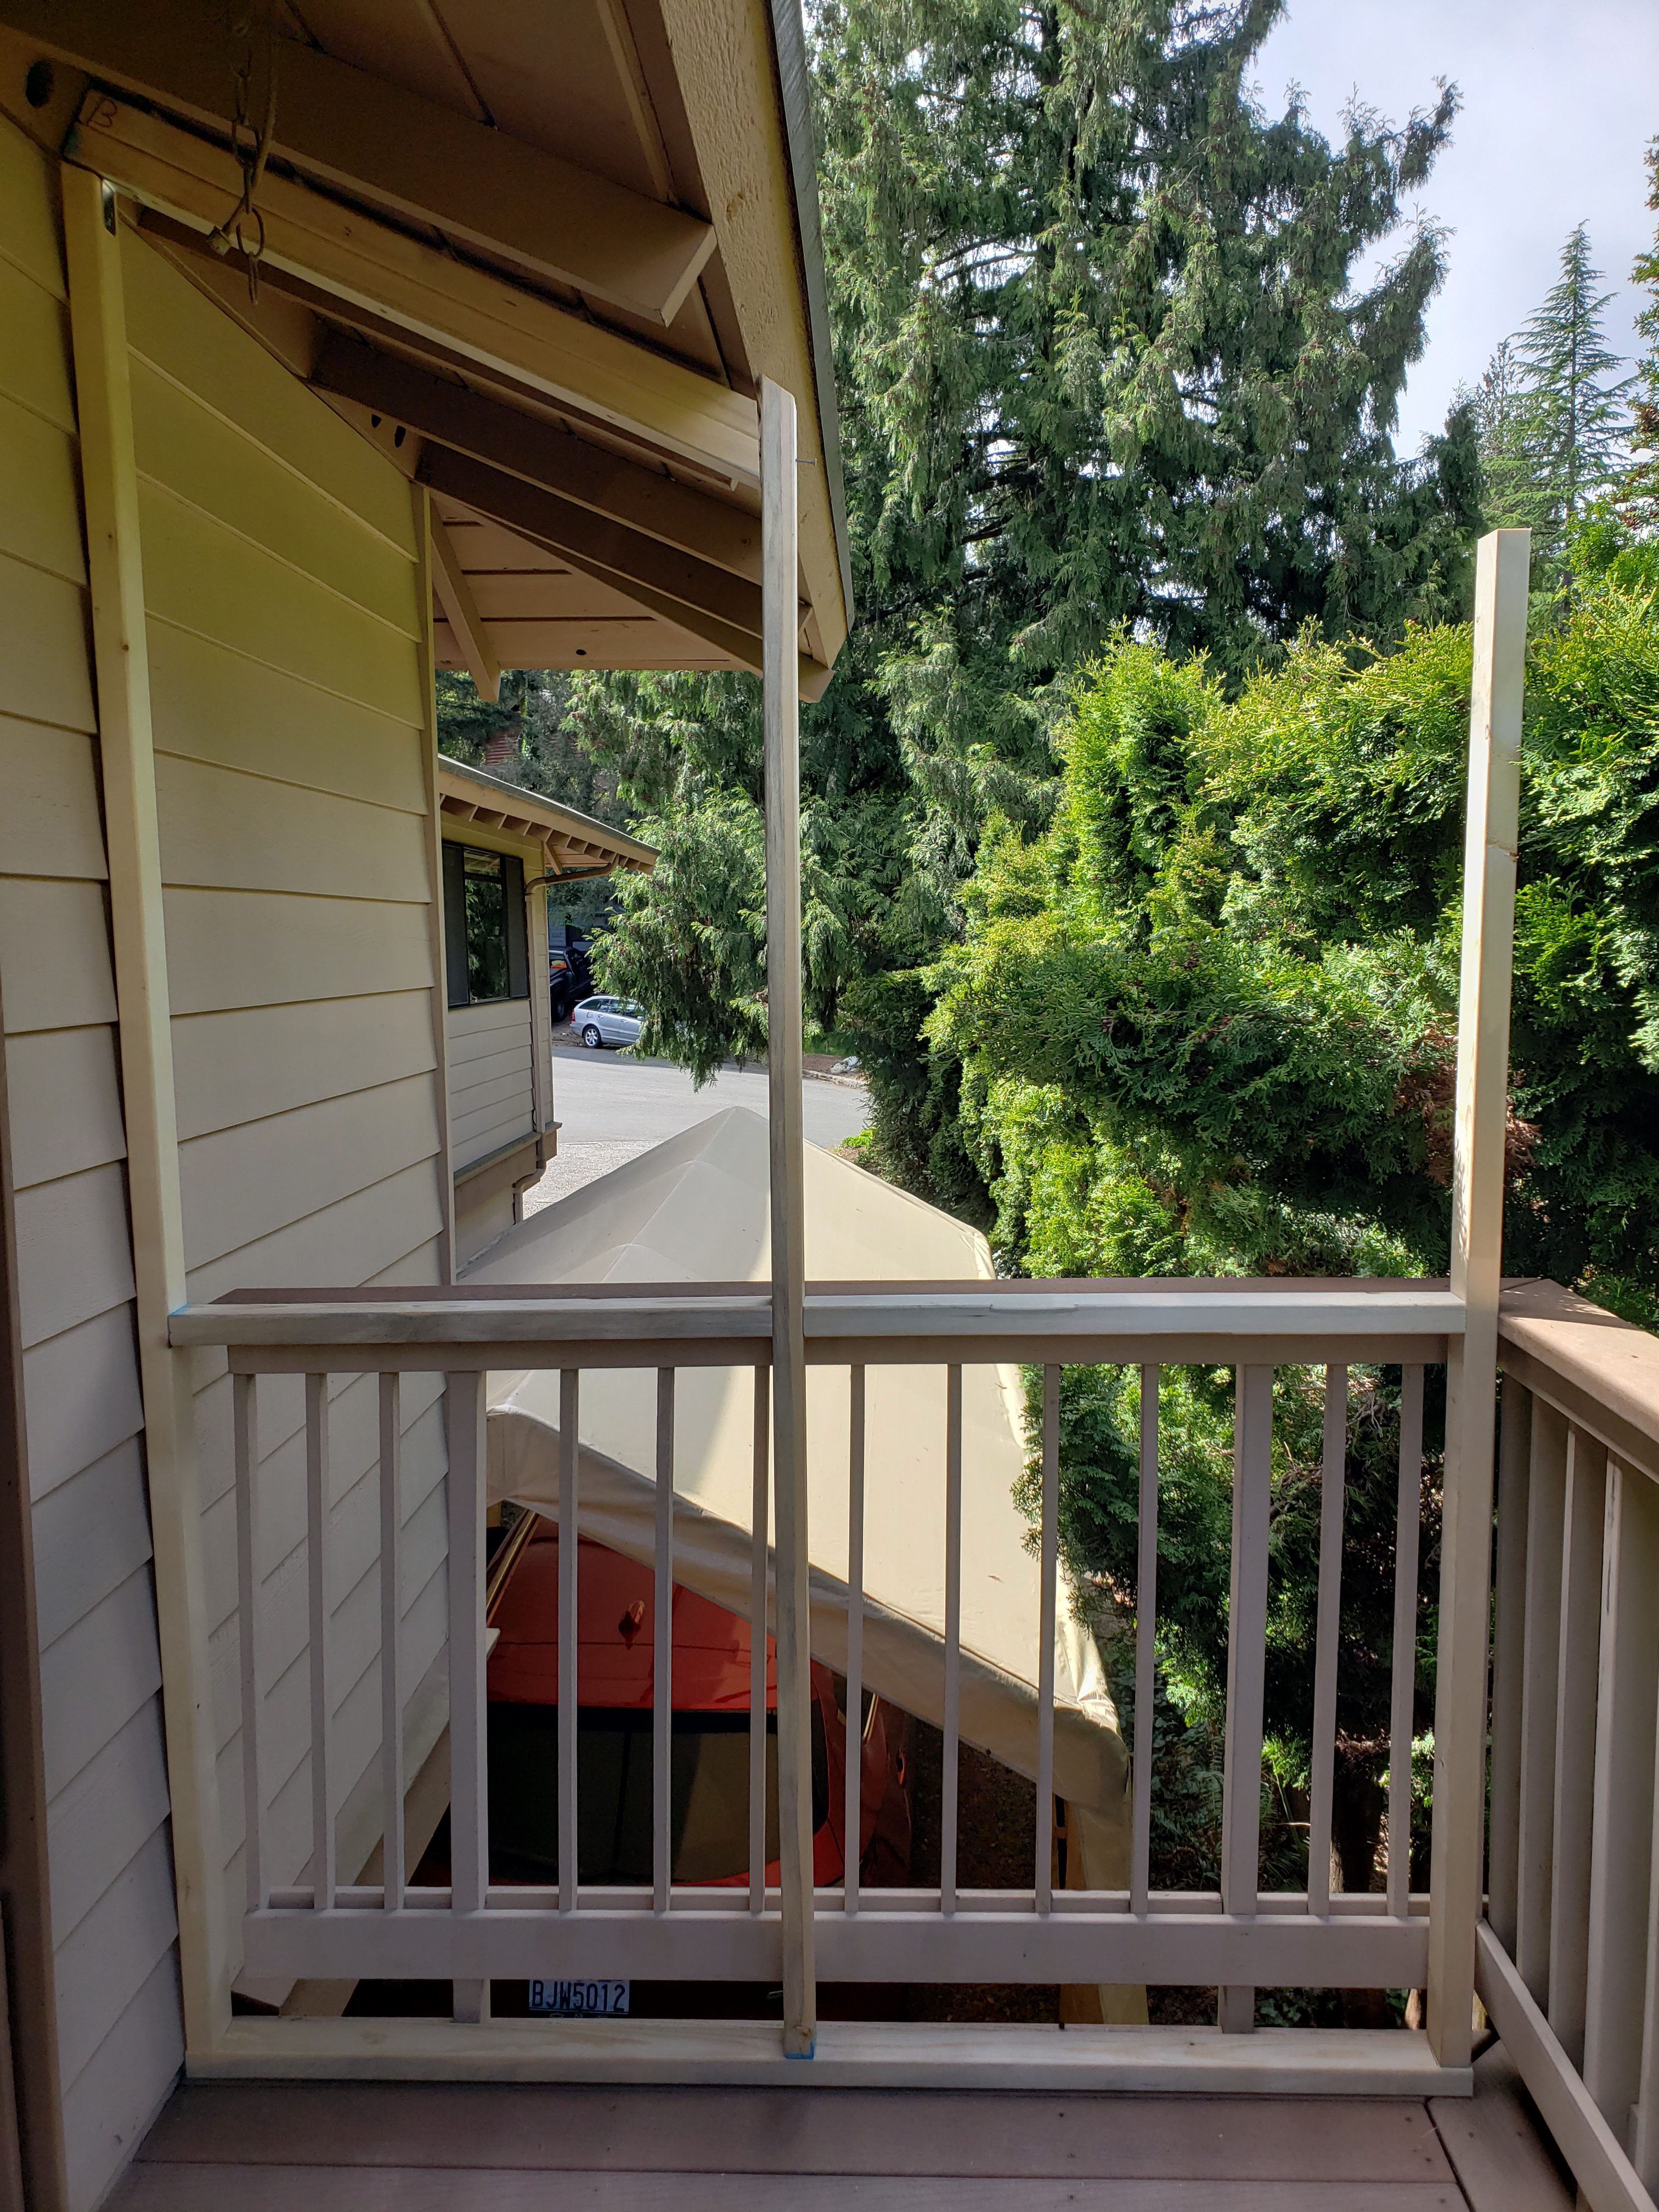
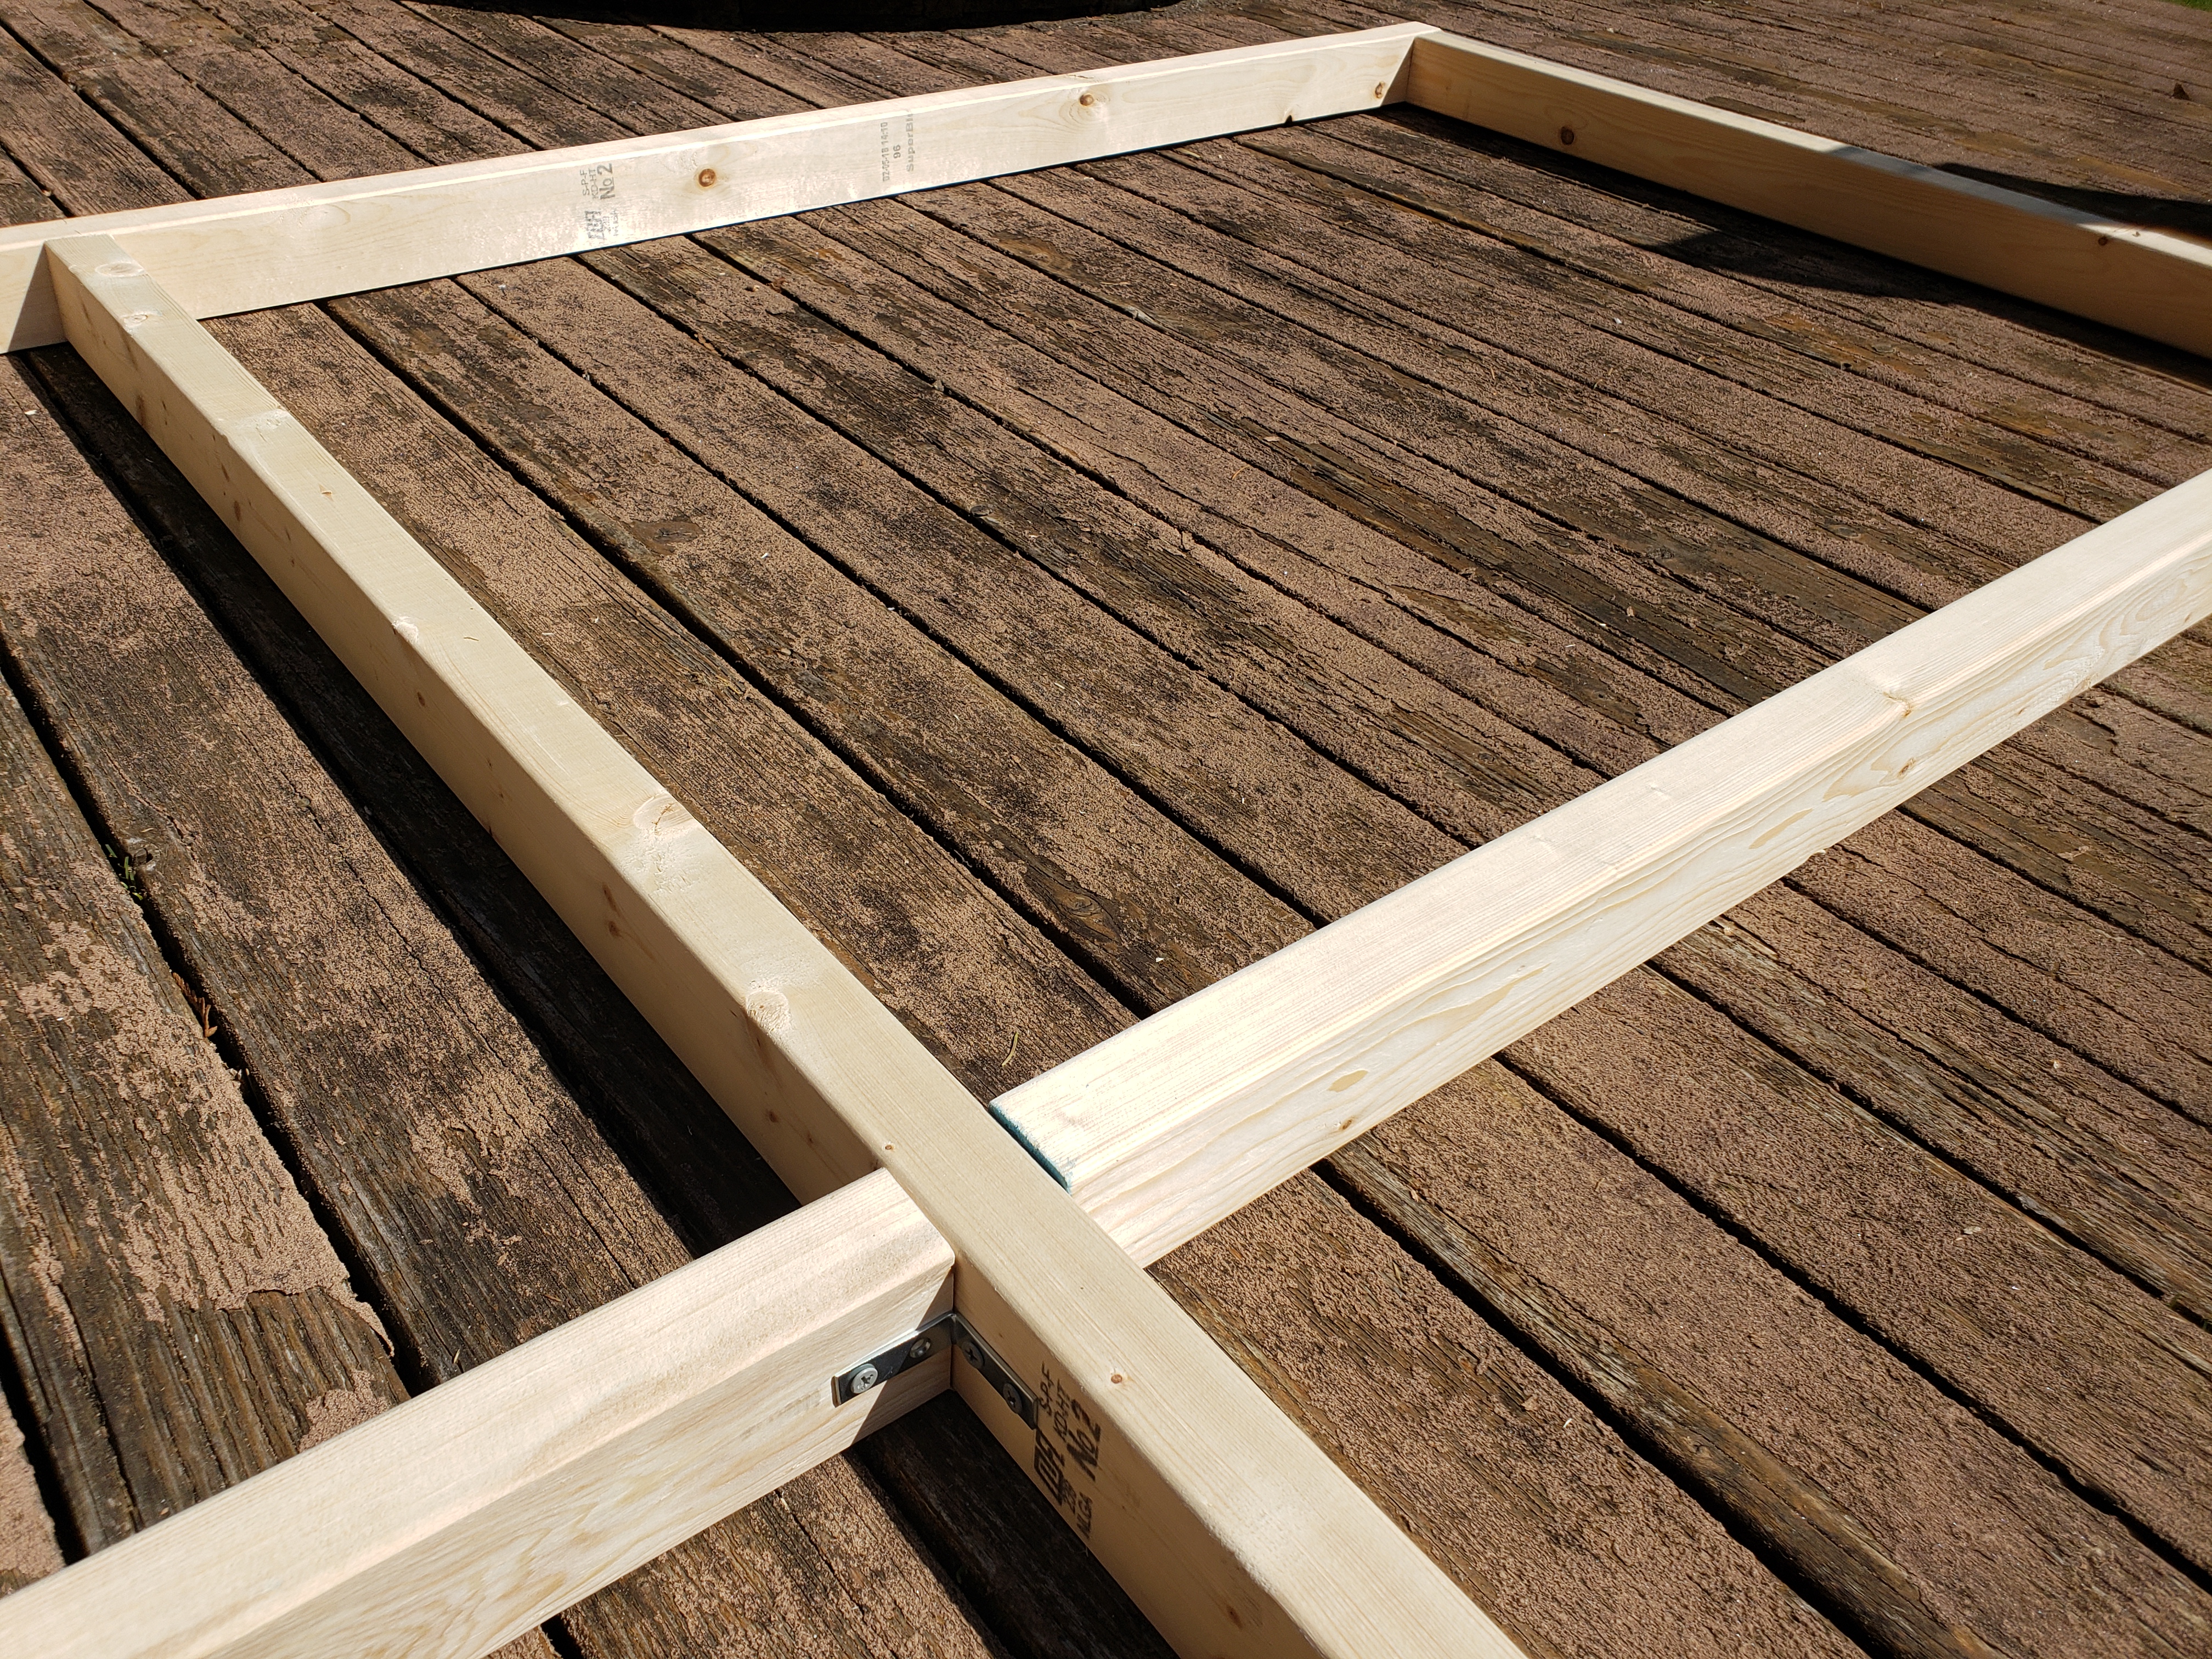
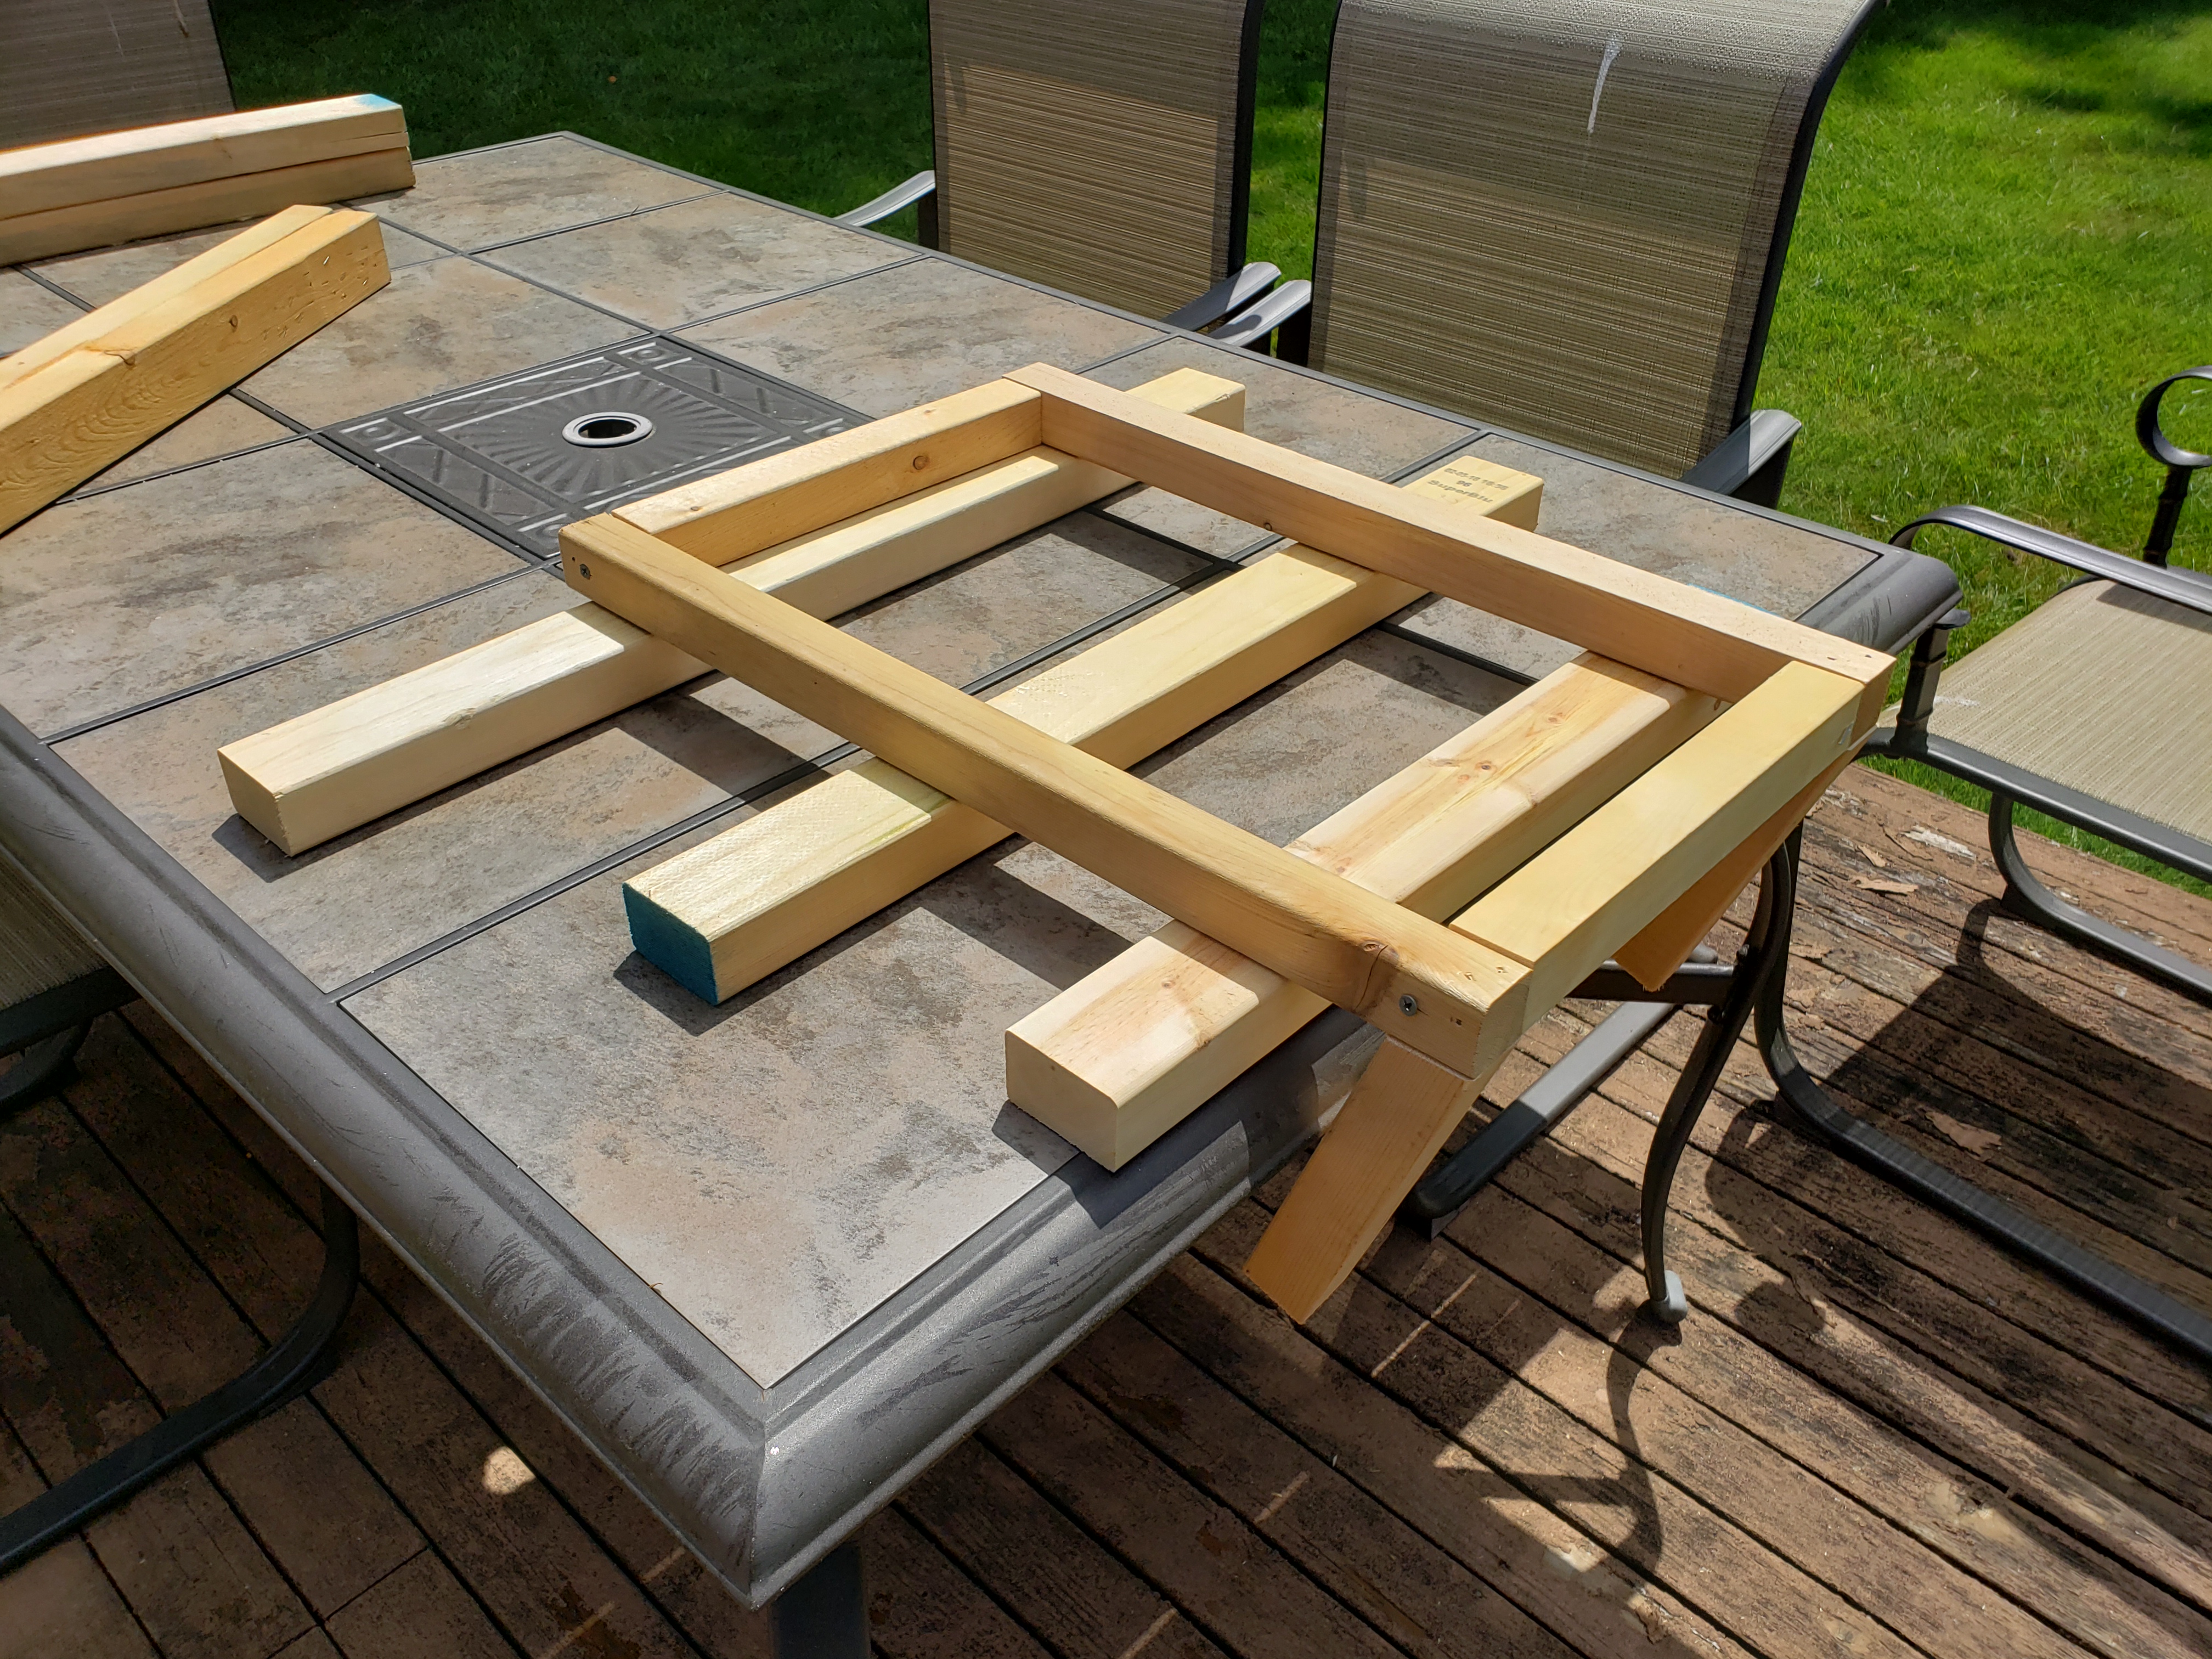
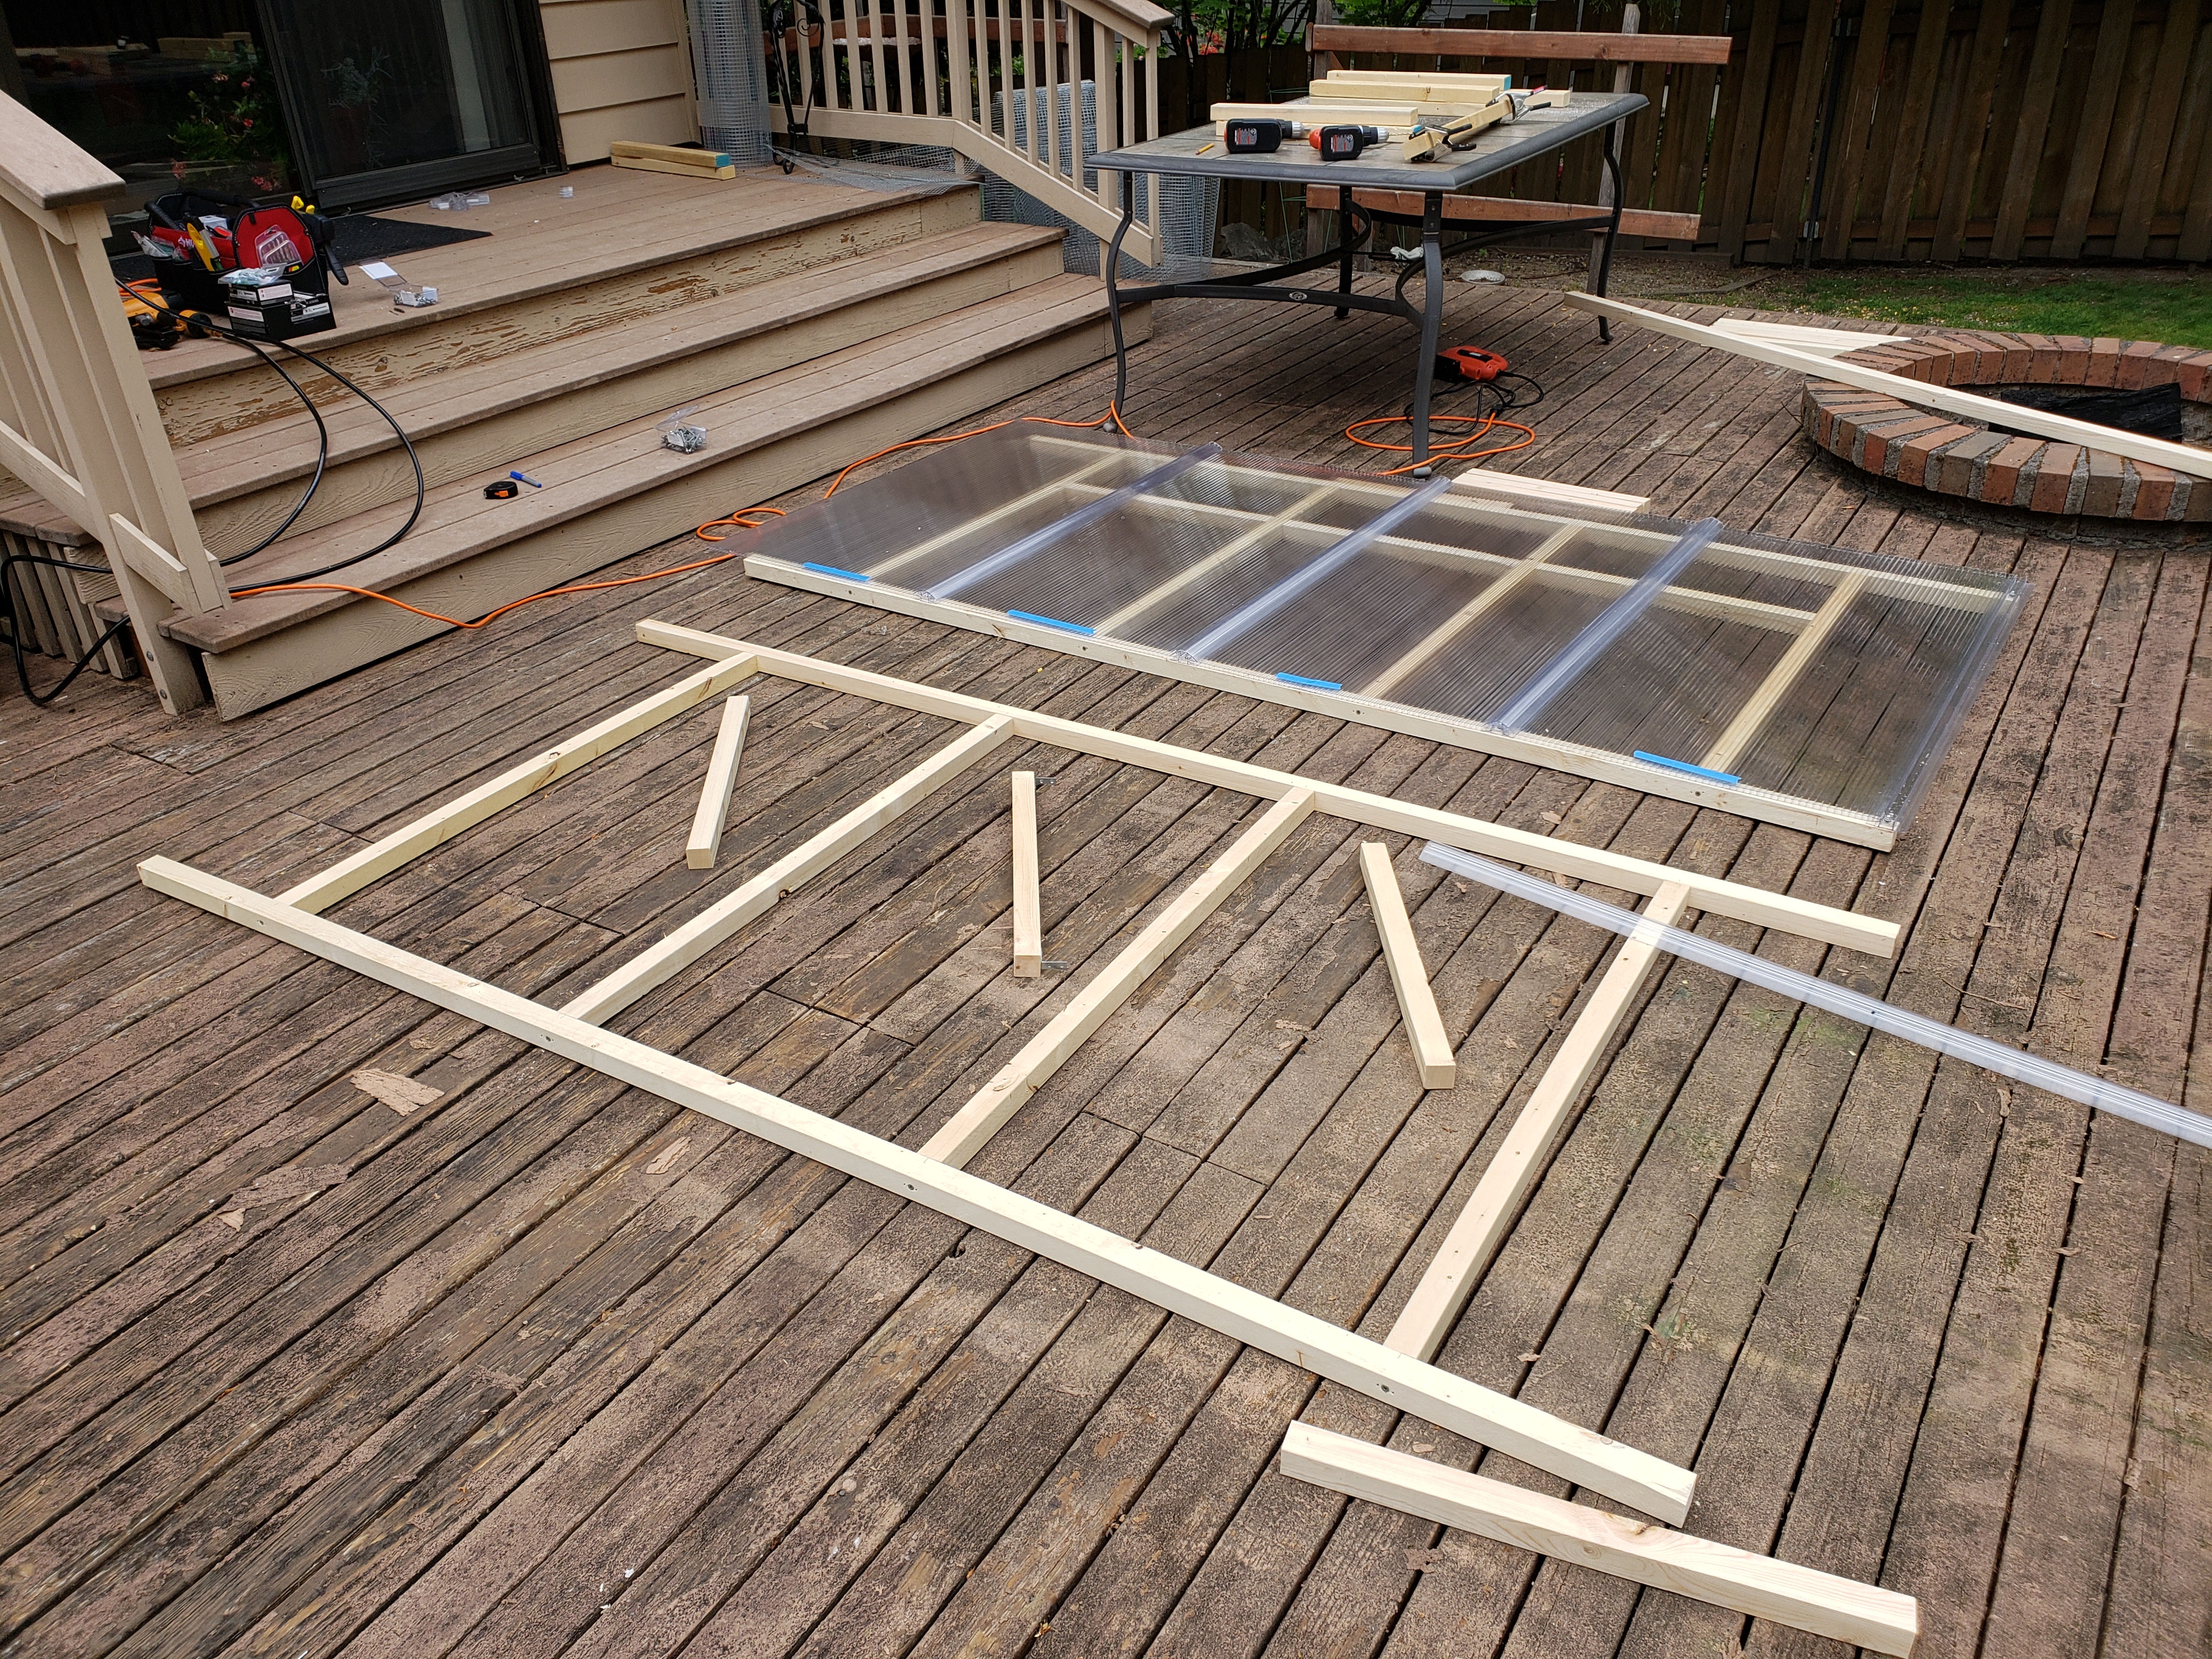
I measured each length separately, did a try fitting, and then screwed the parts for frame of the end-wall together.
That’s a good call-out: I didn’t use nails, but instead I screwed everything. Furthermore, I pre-drilled majority of holes to avoid wood splitting (especially close to the ends of the pieces). I prefer using screws, since in case something needs to be fixed, it’s easier to deal with them (simply unscrewing vs. having to pull nails). If you’re reading this and have different opinion, why nails could be better in this application, please share in the comments – I’d love to learn 🙂
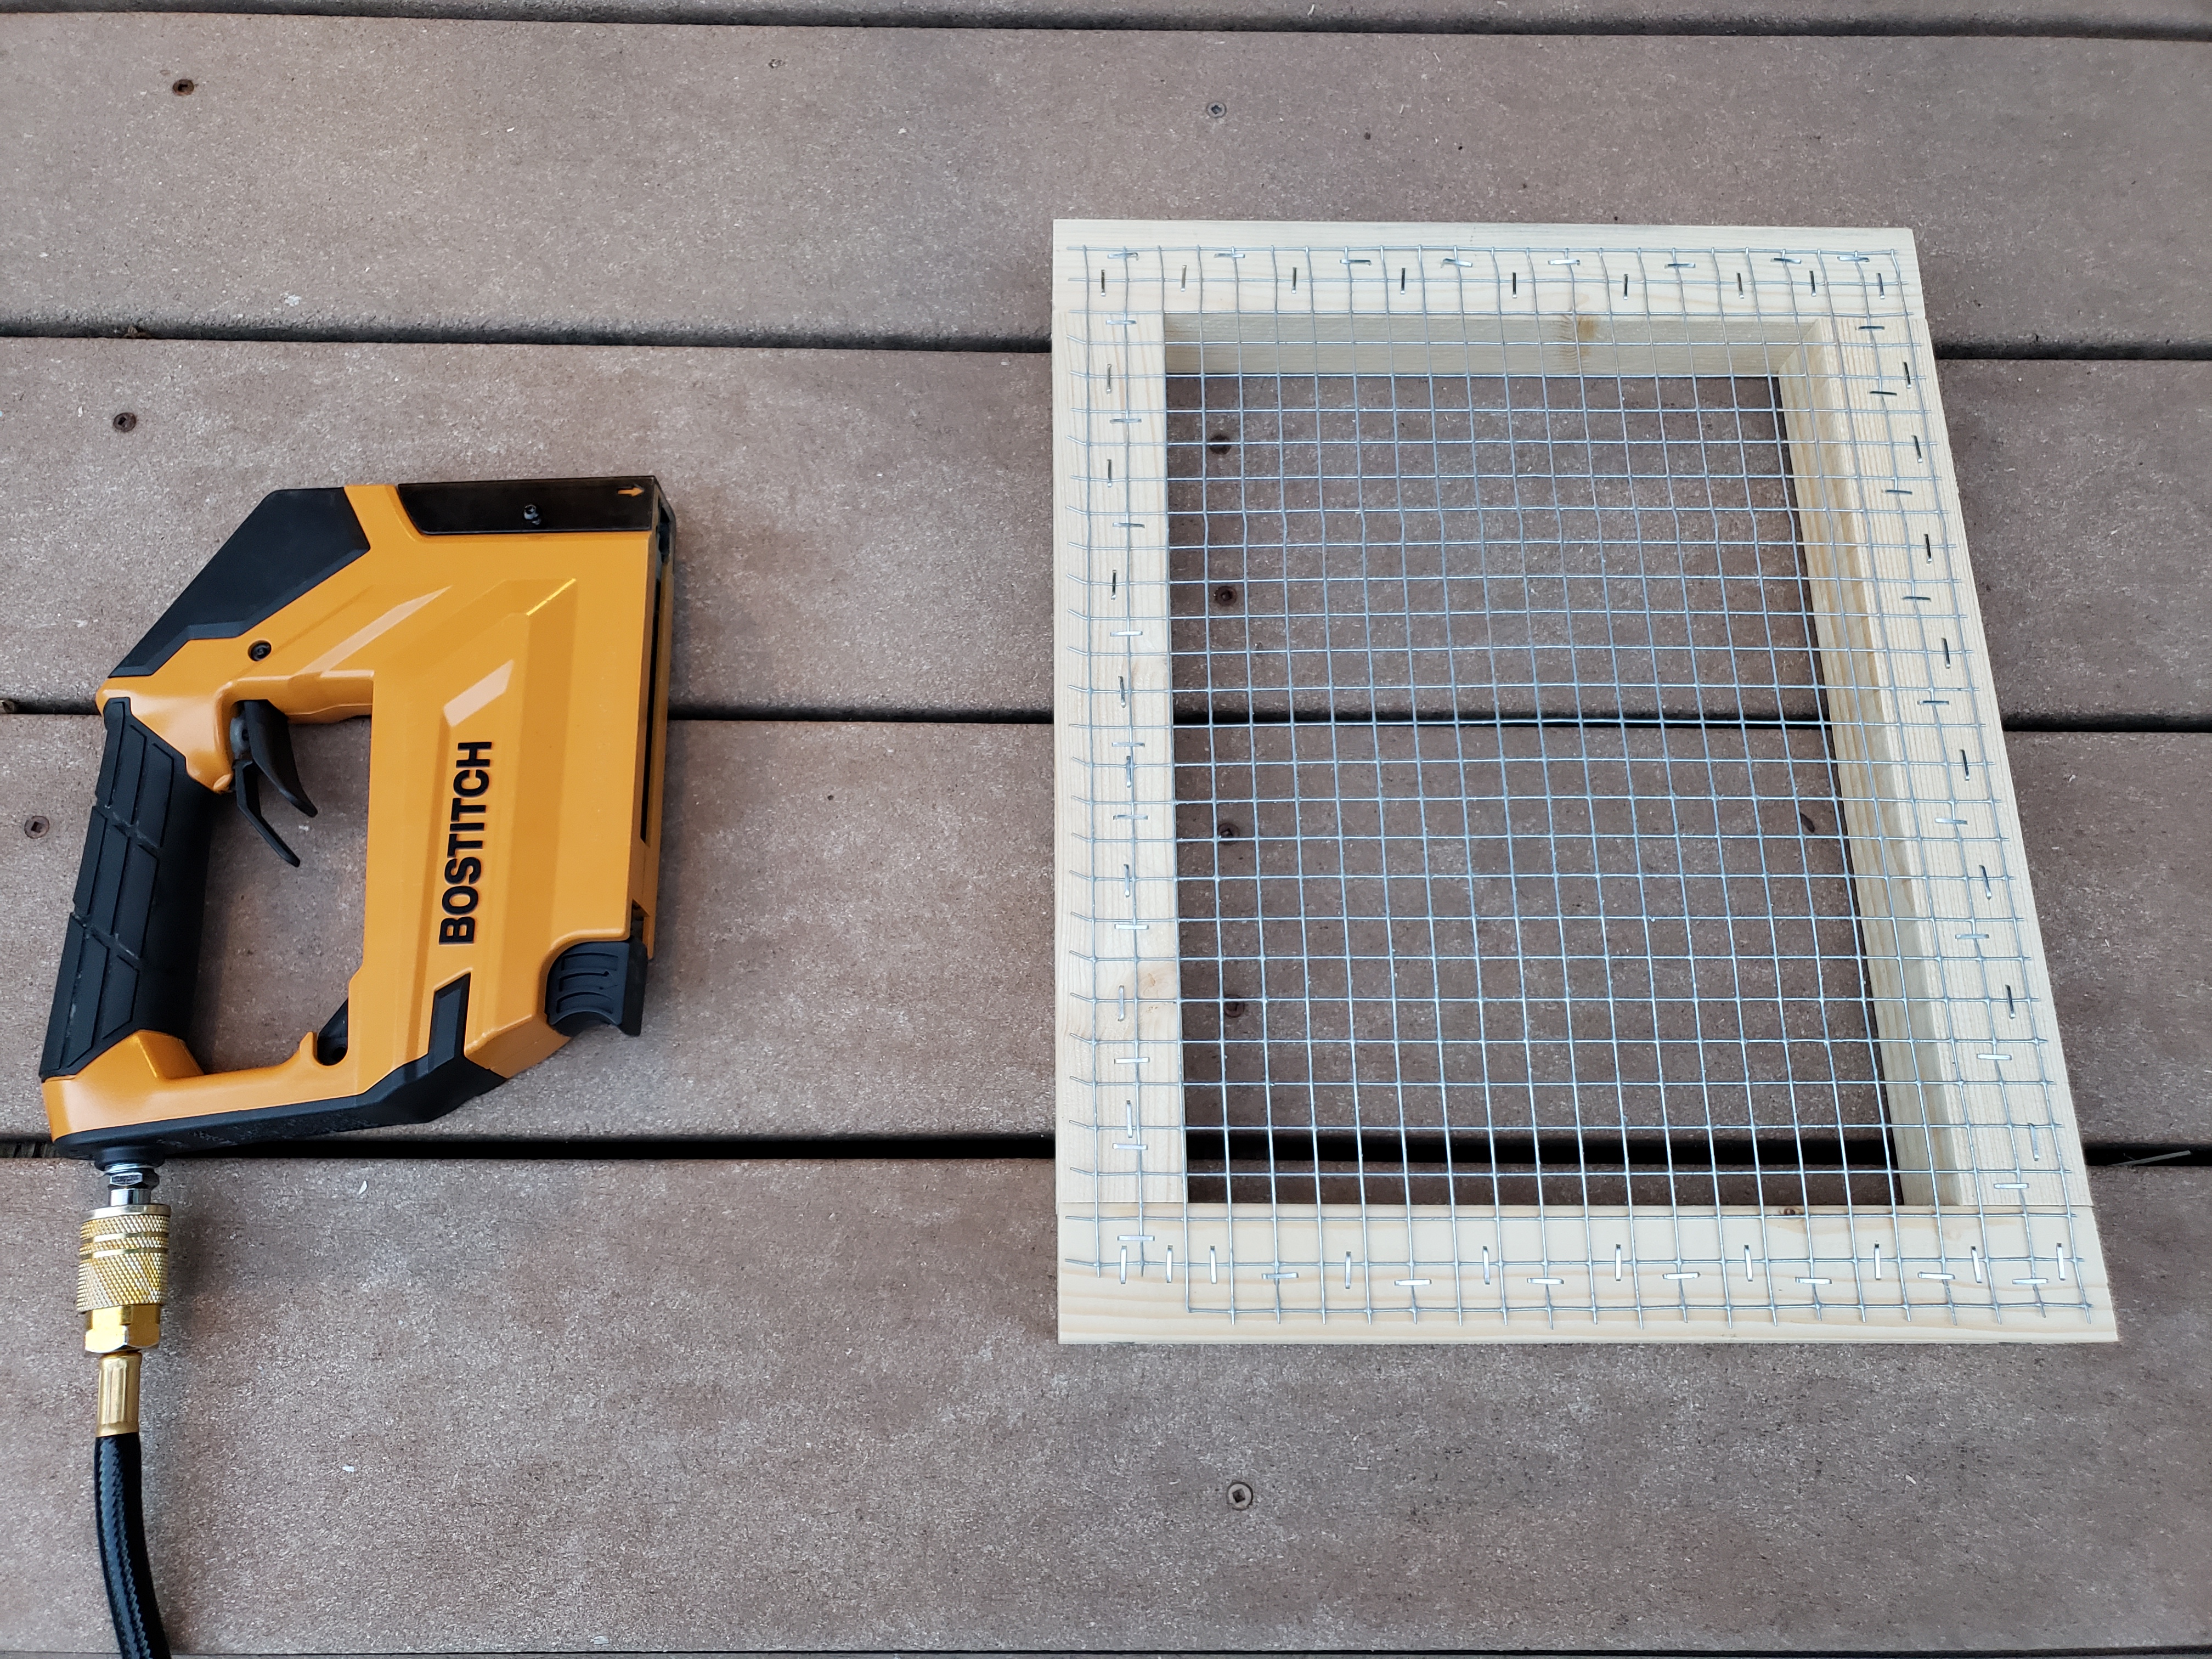
After test fitting the end-frame, I took it down and stapled the mesh to fill in that wall. At first, I was using a manual heavy-duty stapler. It’s completely doable, bu can be somewhat time-consuming and tiresome. I did a quick check for the prices of pneumatic tools, and realizing that they’re quite affordable, I bought a set with compressor, brad nailer, finish nailer and stapler. See list of tools above for reference. That made the process much more faster and more convenient.
I followed exactly same process to make the end wall for the opposite side. Even the measurements were almost same 😉
Now, making the remaining walls went very fast. I needed 2 full length (8 ft) walls for each side of the L-shape. That would leave me with a smaller opening on each side to fill in with a narrower wall. Each side measured 20 ft, leading to 2x 8 ft walls, and 1x just under 4 ft (considering the thickness of the end wall and alignment of corner where the walls from each side meet).
It’s handy to have 2 drills: one with the screwdriver bit and one with a drill bit (for pre-drilling holes). Also grab a quick square, or use your measuring tape to check opposite-corner distances to make sure things are nice and square. While this construction allows for a bit of flexibility, any imperfections add up. Oh and a finish nailer also helps to keep things in place (kind of goes against of what I said with nails vs screws before, but the convenience of it is hard to ignore… I didn’t use it everywhere though).
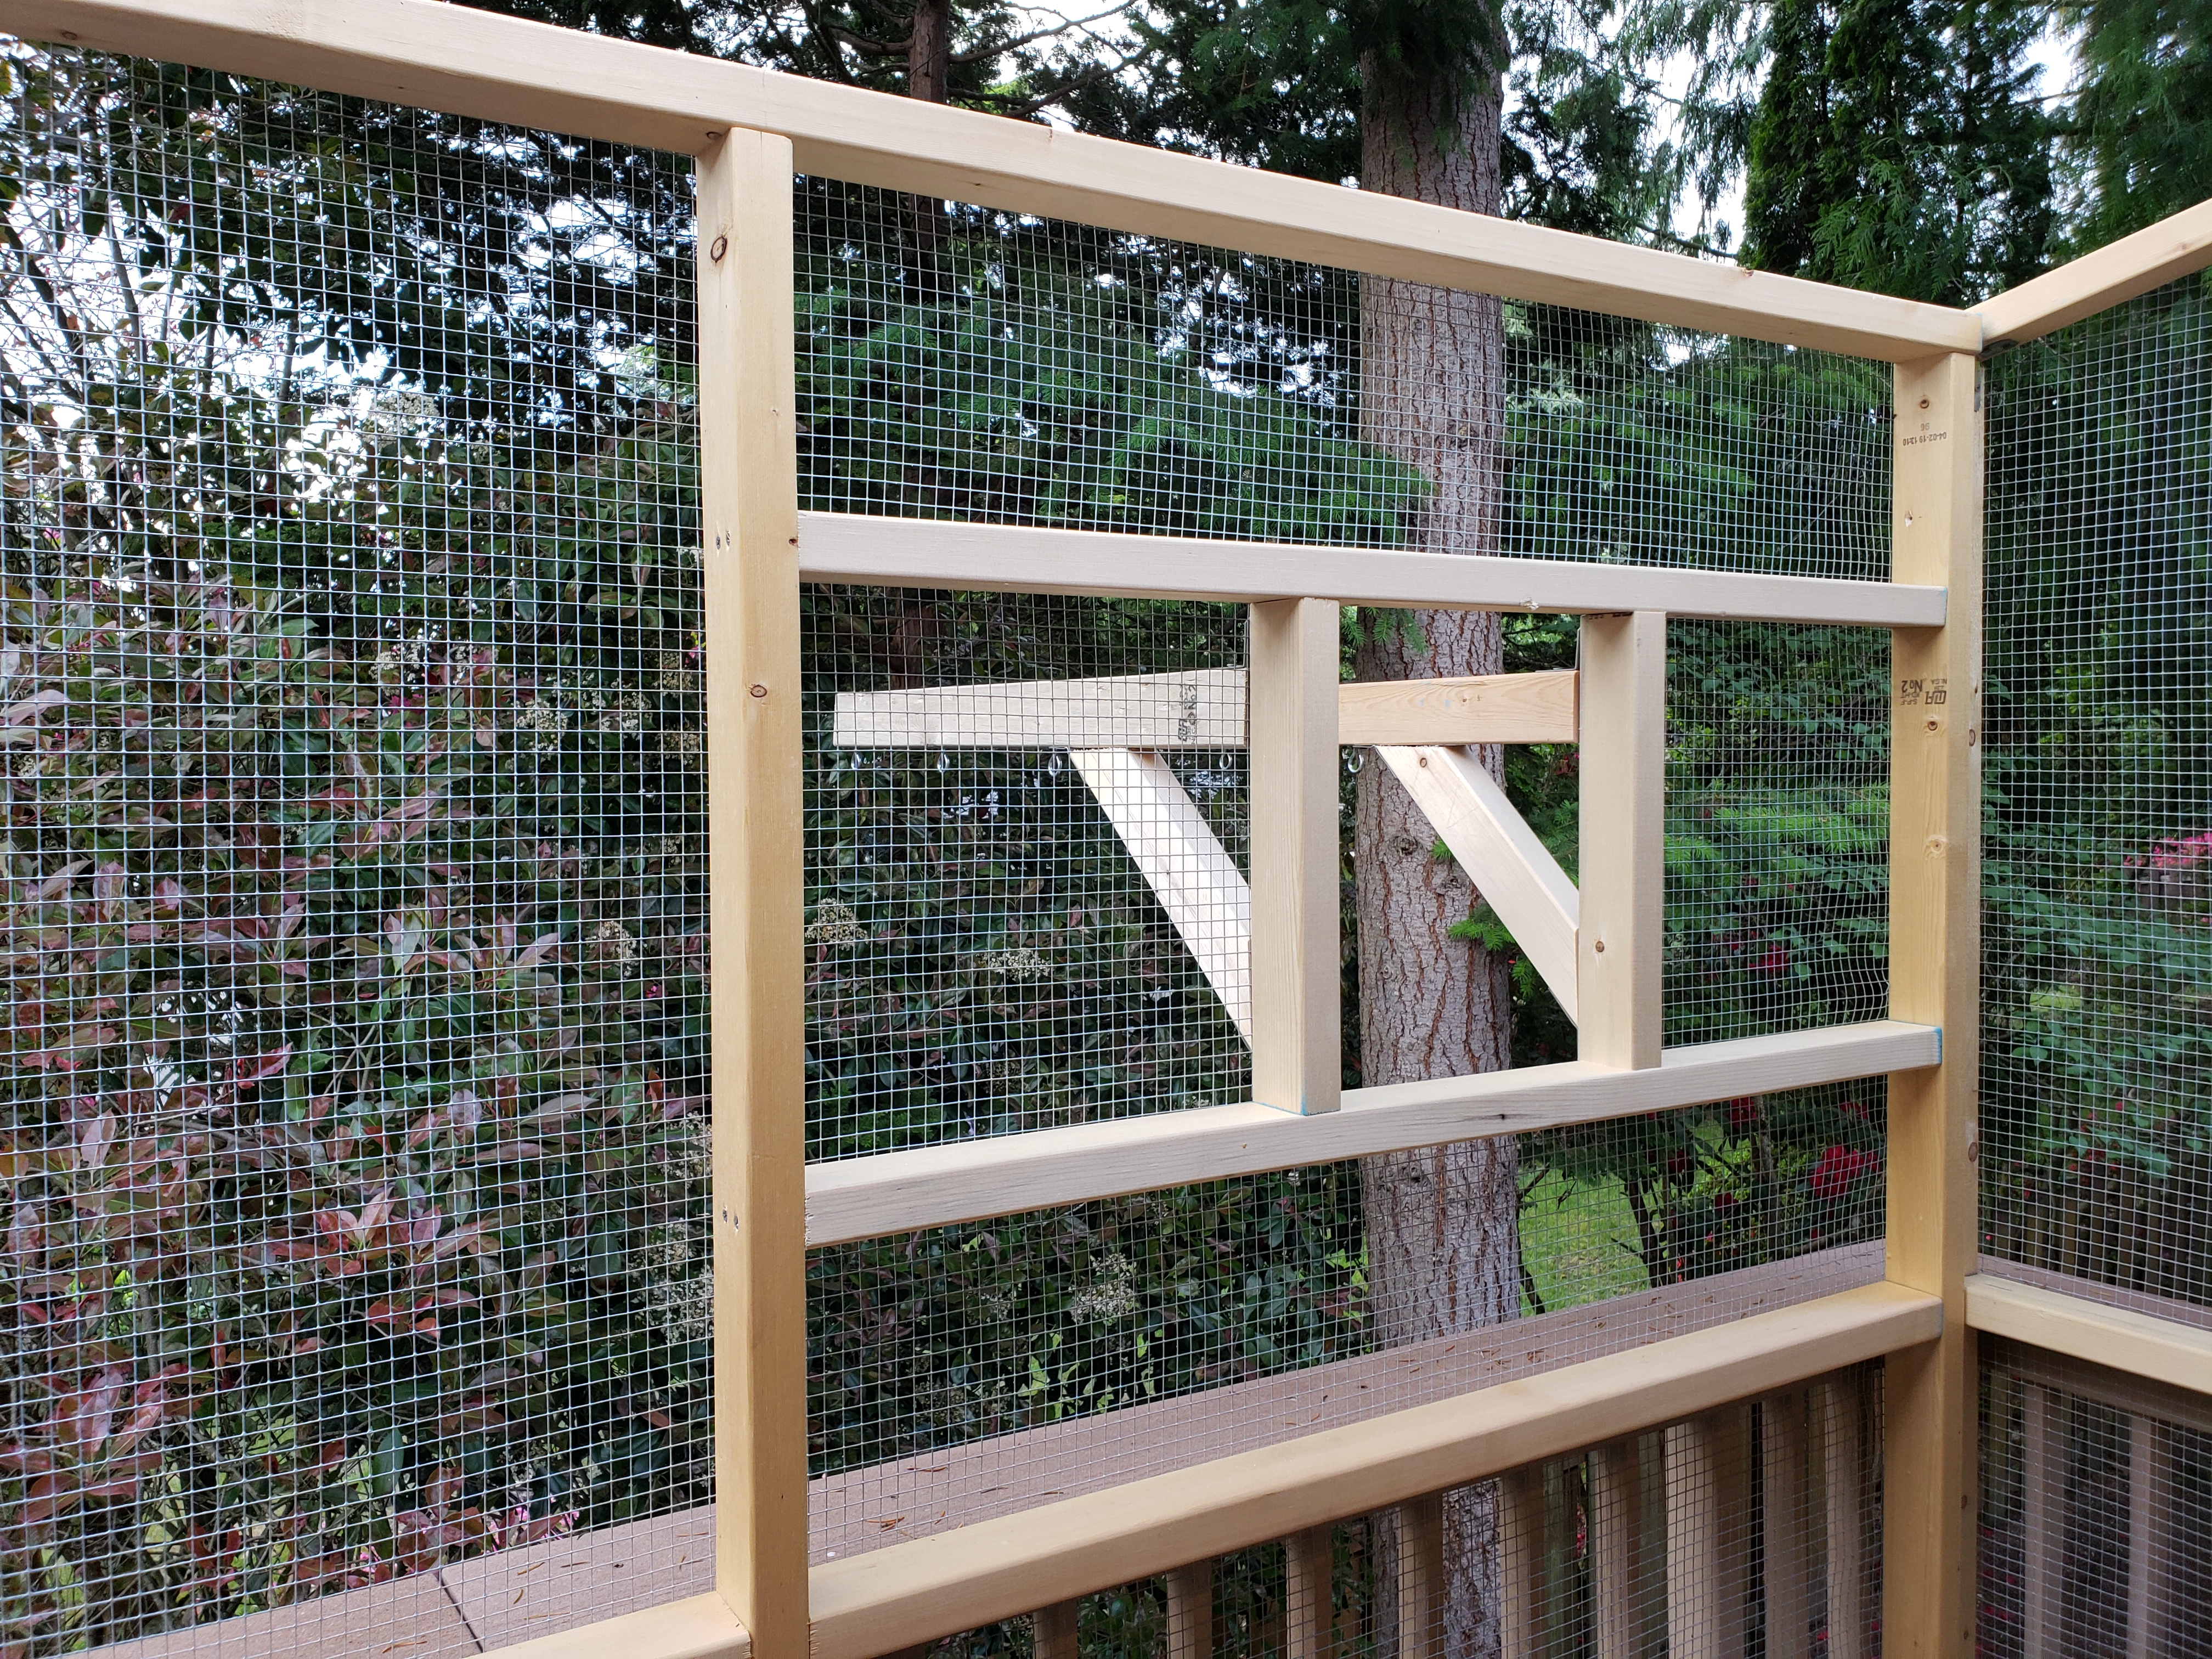
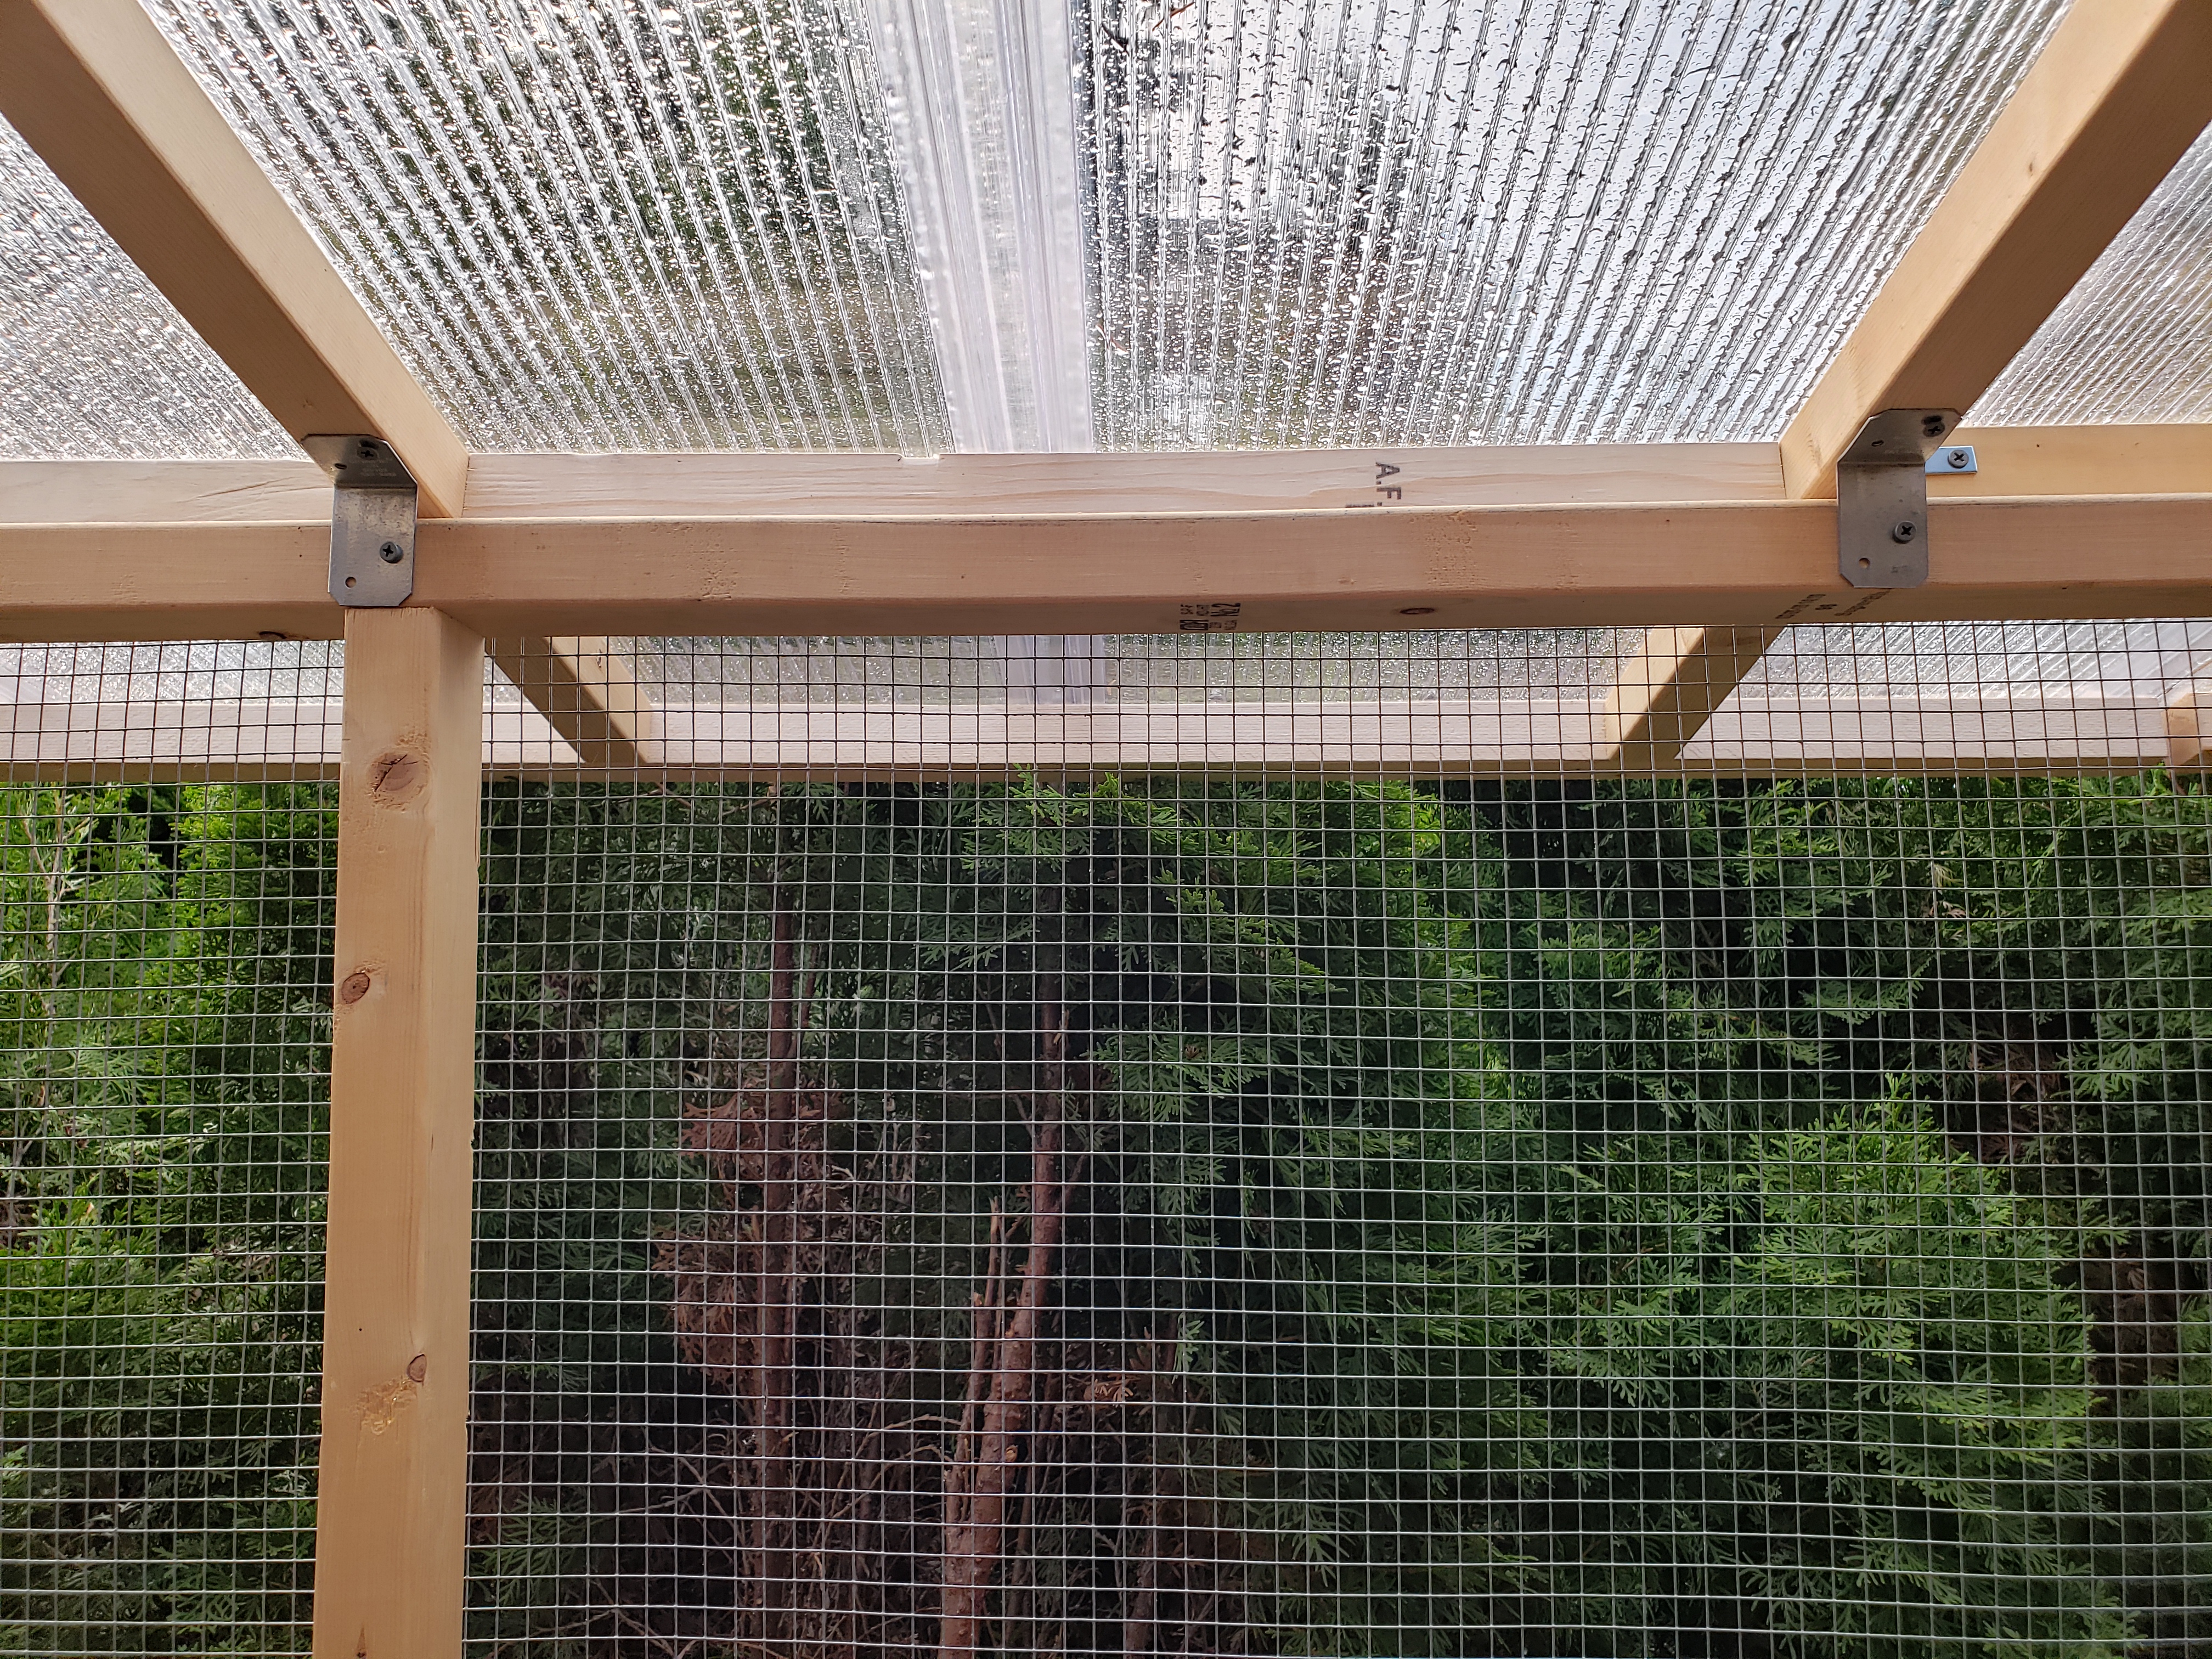
I’d like to bring your attention to a small detail: attaching the horizontal support pieces. I mentioned that I wanted to have them on the same height as the existing railing, so attaching them in a staggered way (as commonly done with wall framing) was not an option. If you have an angle nailer, I think this could be one way to approach it. I screwed one side from both ends, then other size from the outer and, but then used a bracket to support it at the middle beam. A bit asymmetric, but not really visible 😉
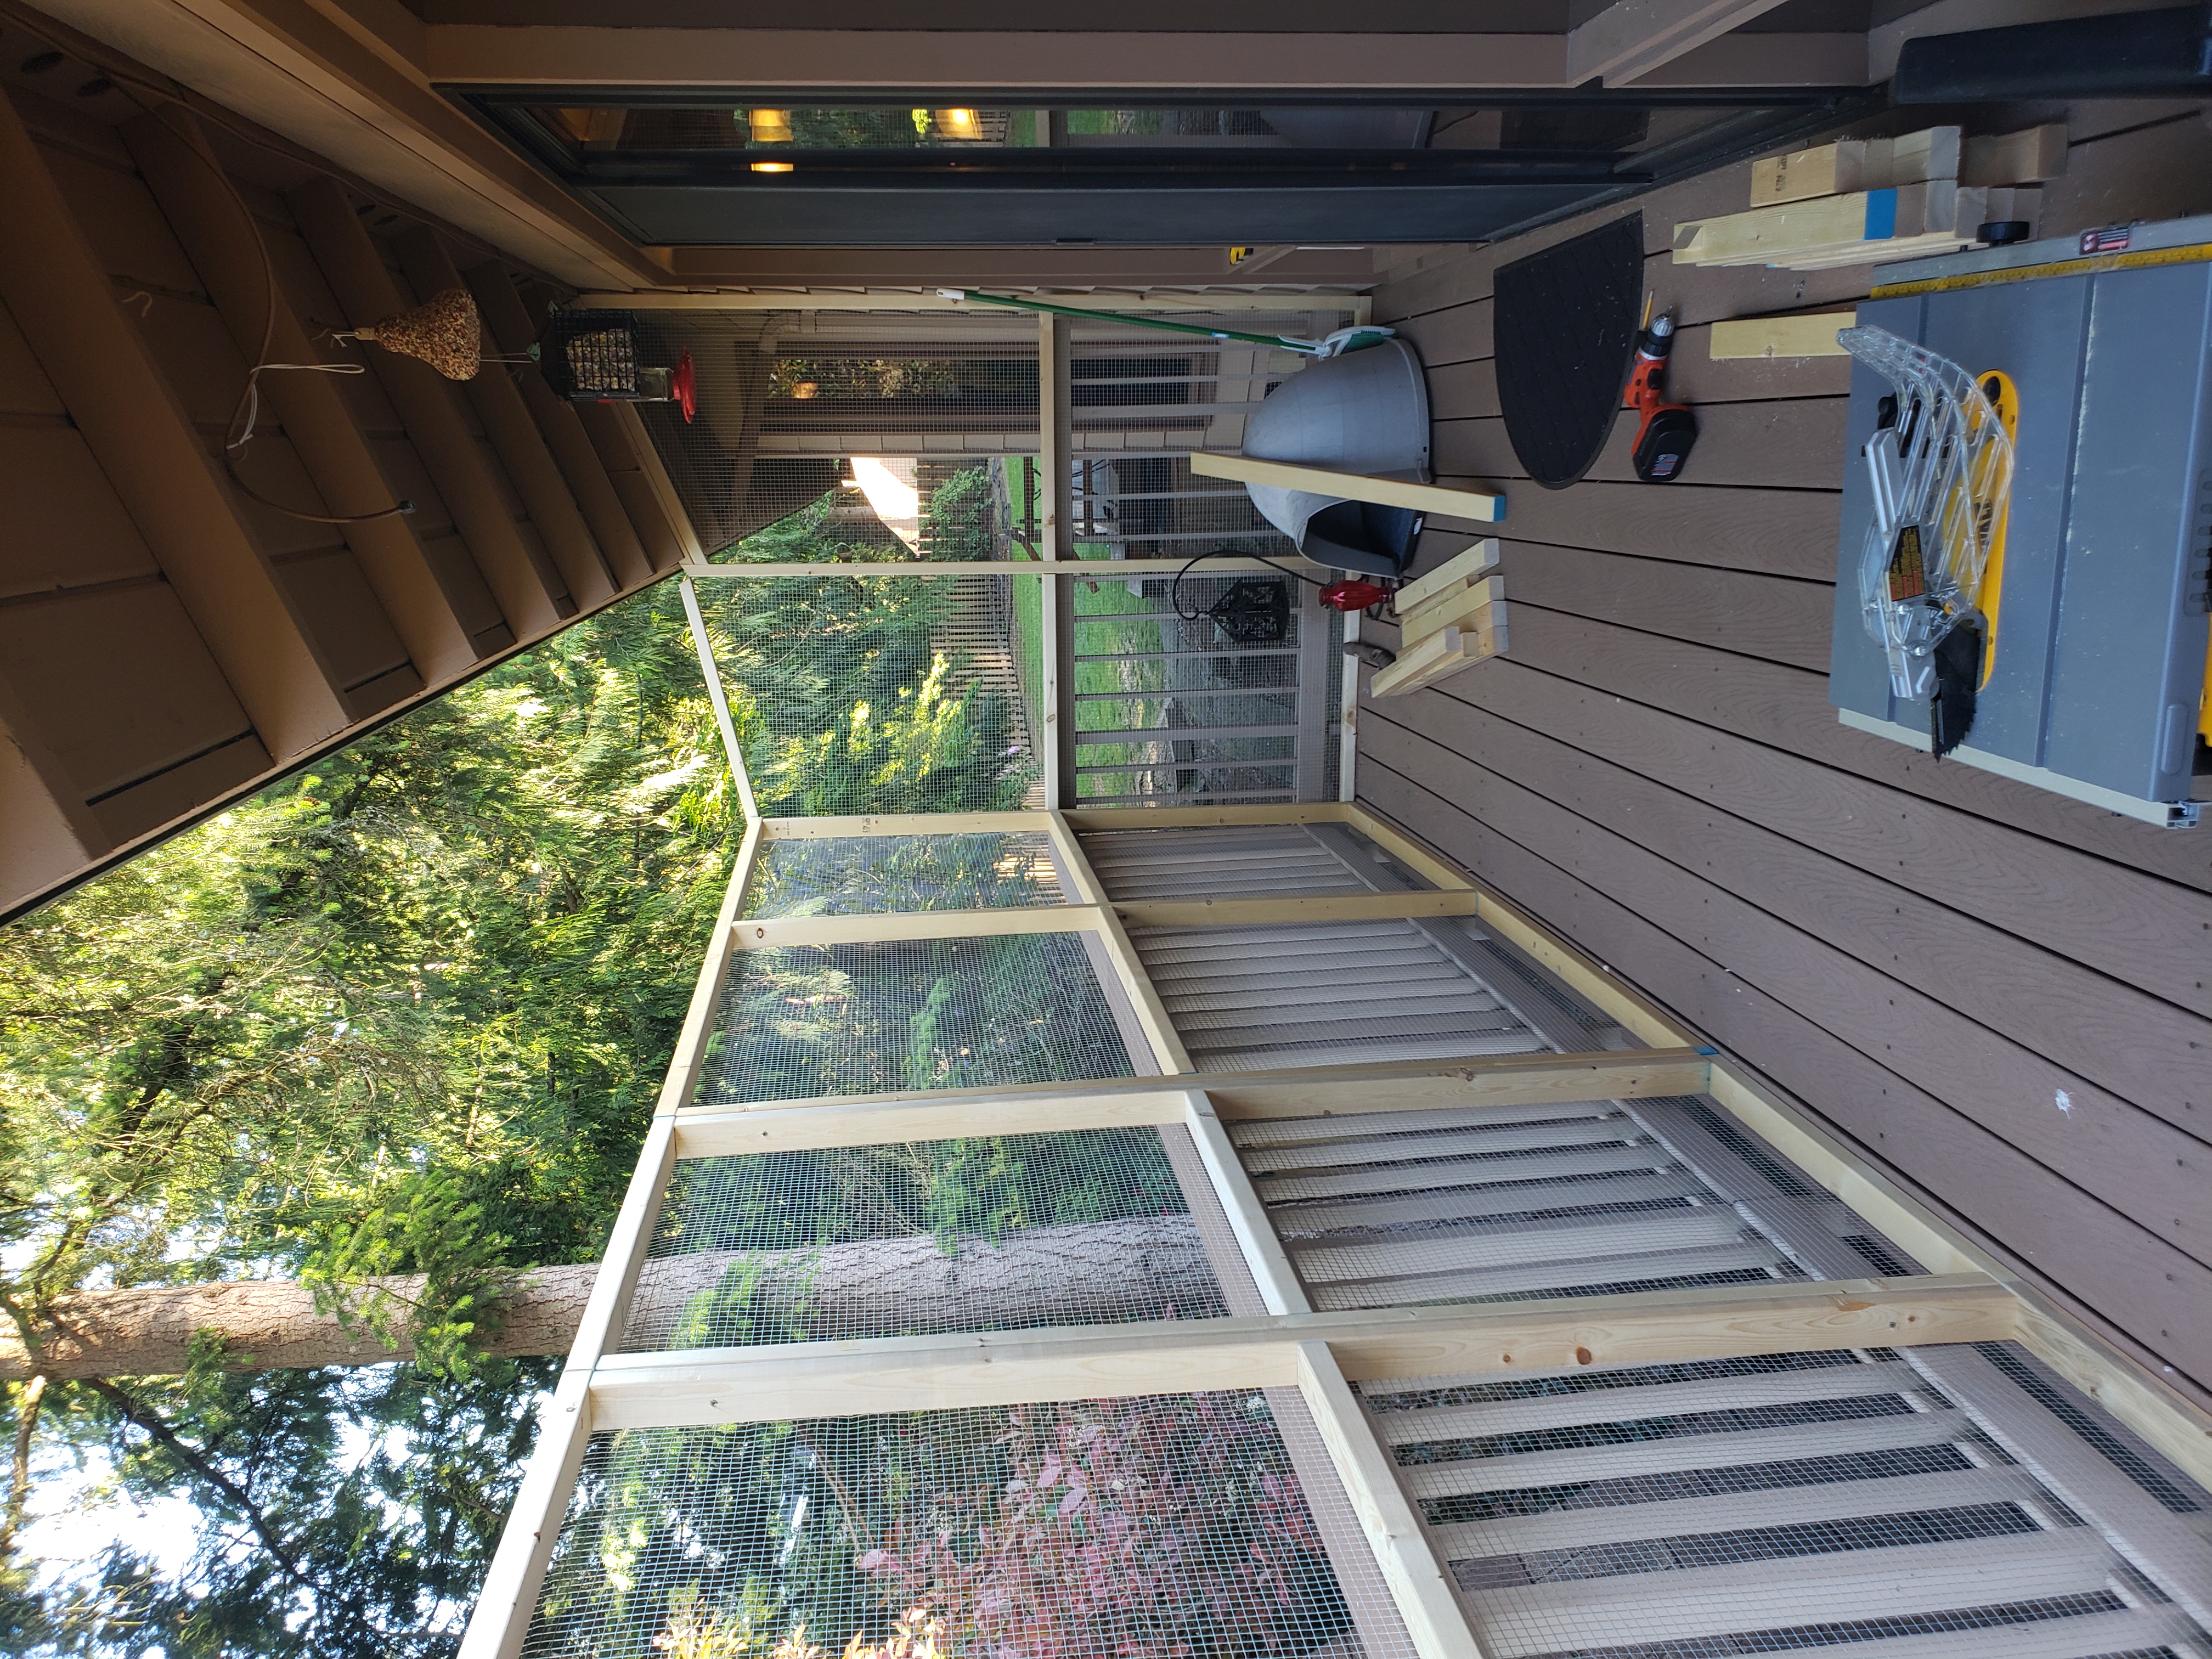
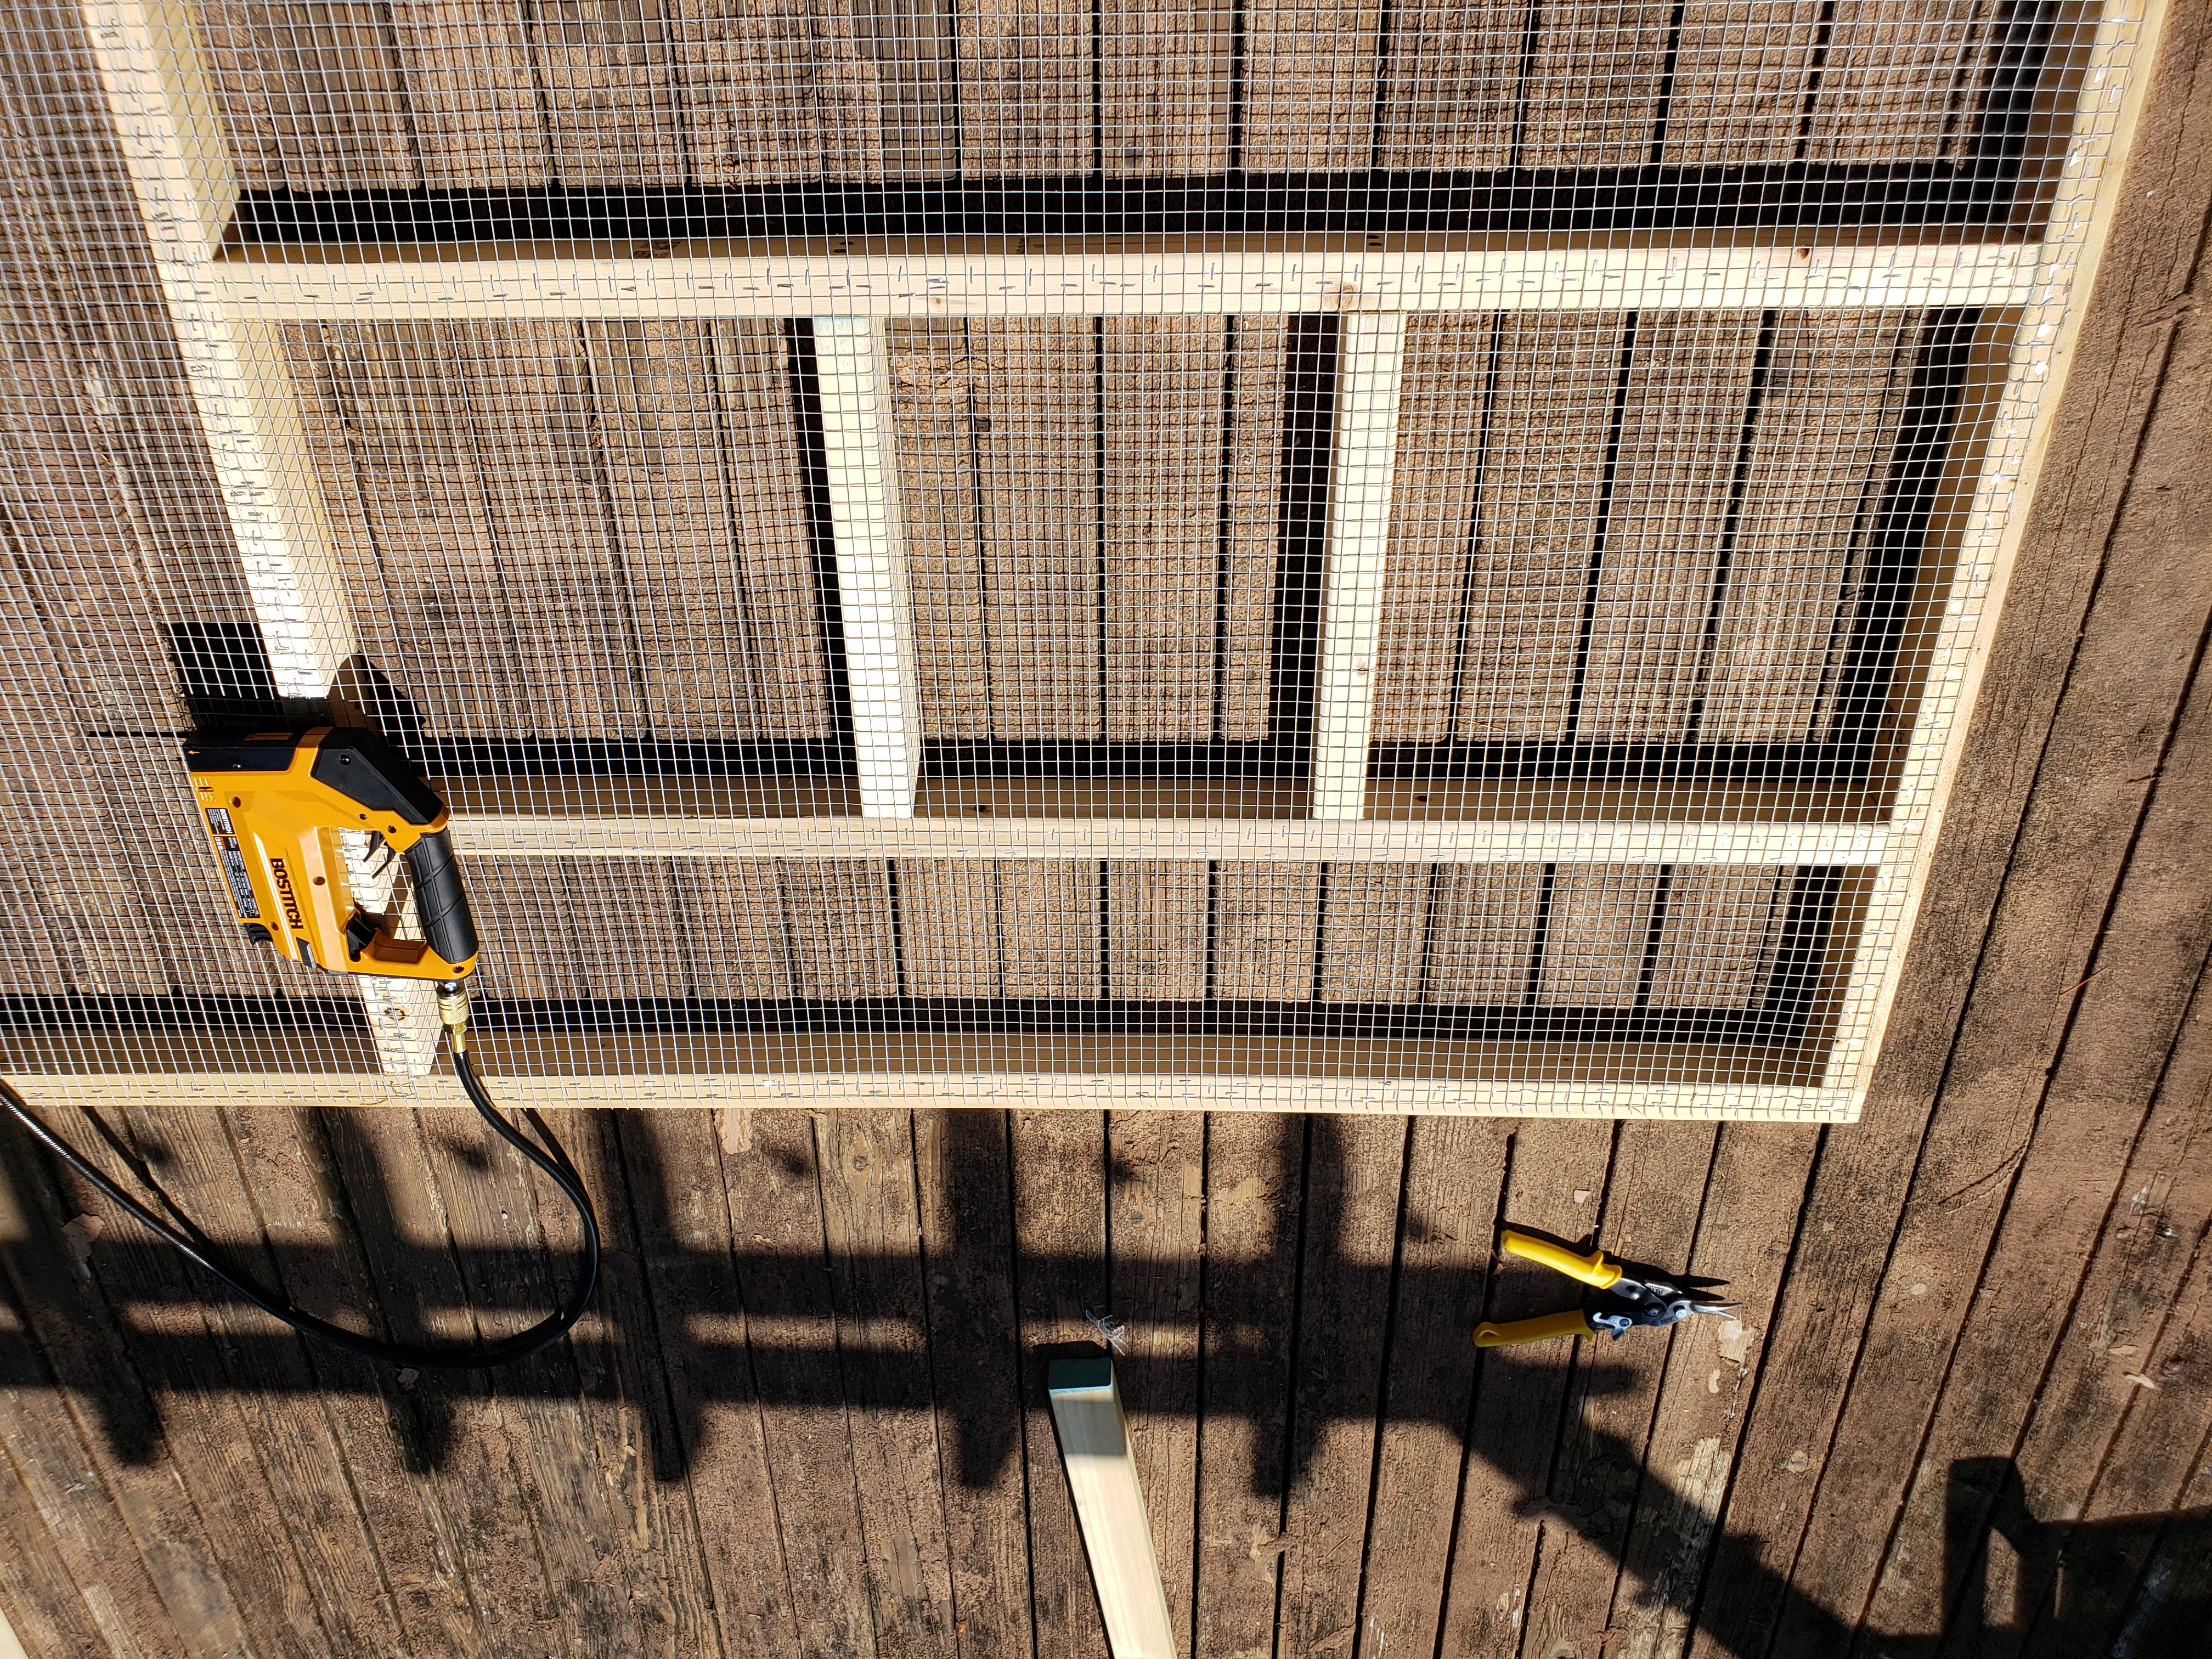
Having the framing ready, time to fill in the walls with wire mesh. I ordered it in 50 ft long rolls. It’s a bit tricky to maneuver it a first, when the roll is new, but it only gets easier from there.
Since there’s 4 ft of spacing between vertical beams, I used some scrap pieces of wood as supports under the roll of mesh – they were of great help to keep the mesh flat and even while stapling it to the frame.

Btw. I know – the deck is showing its age… I’ll replace it 😉 Look for a build log showing it in future!
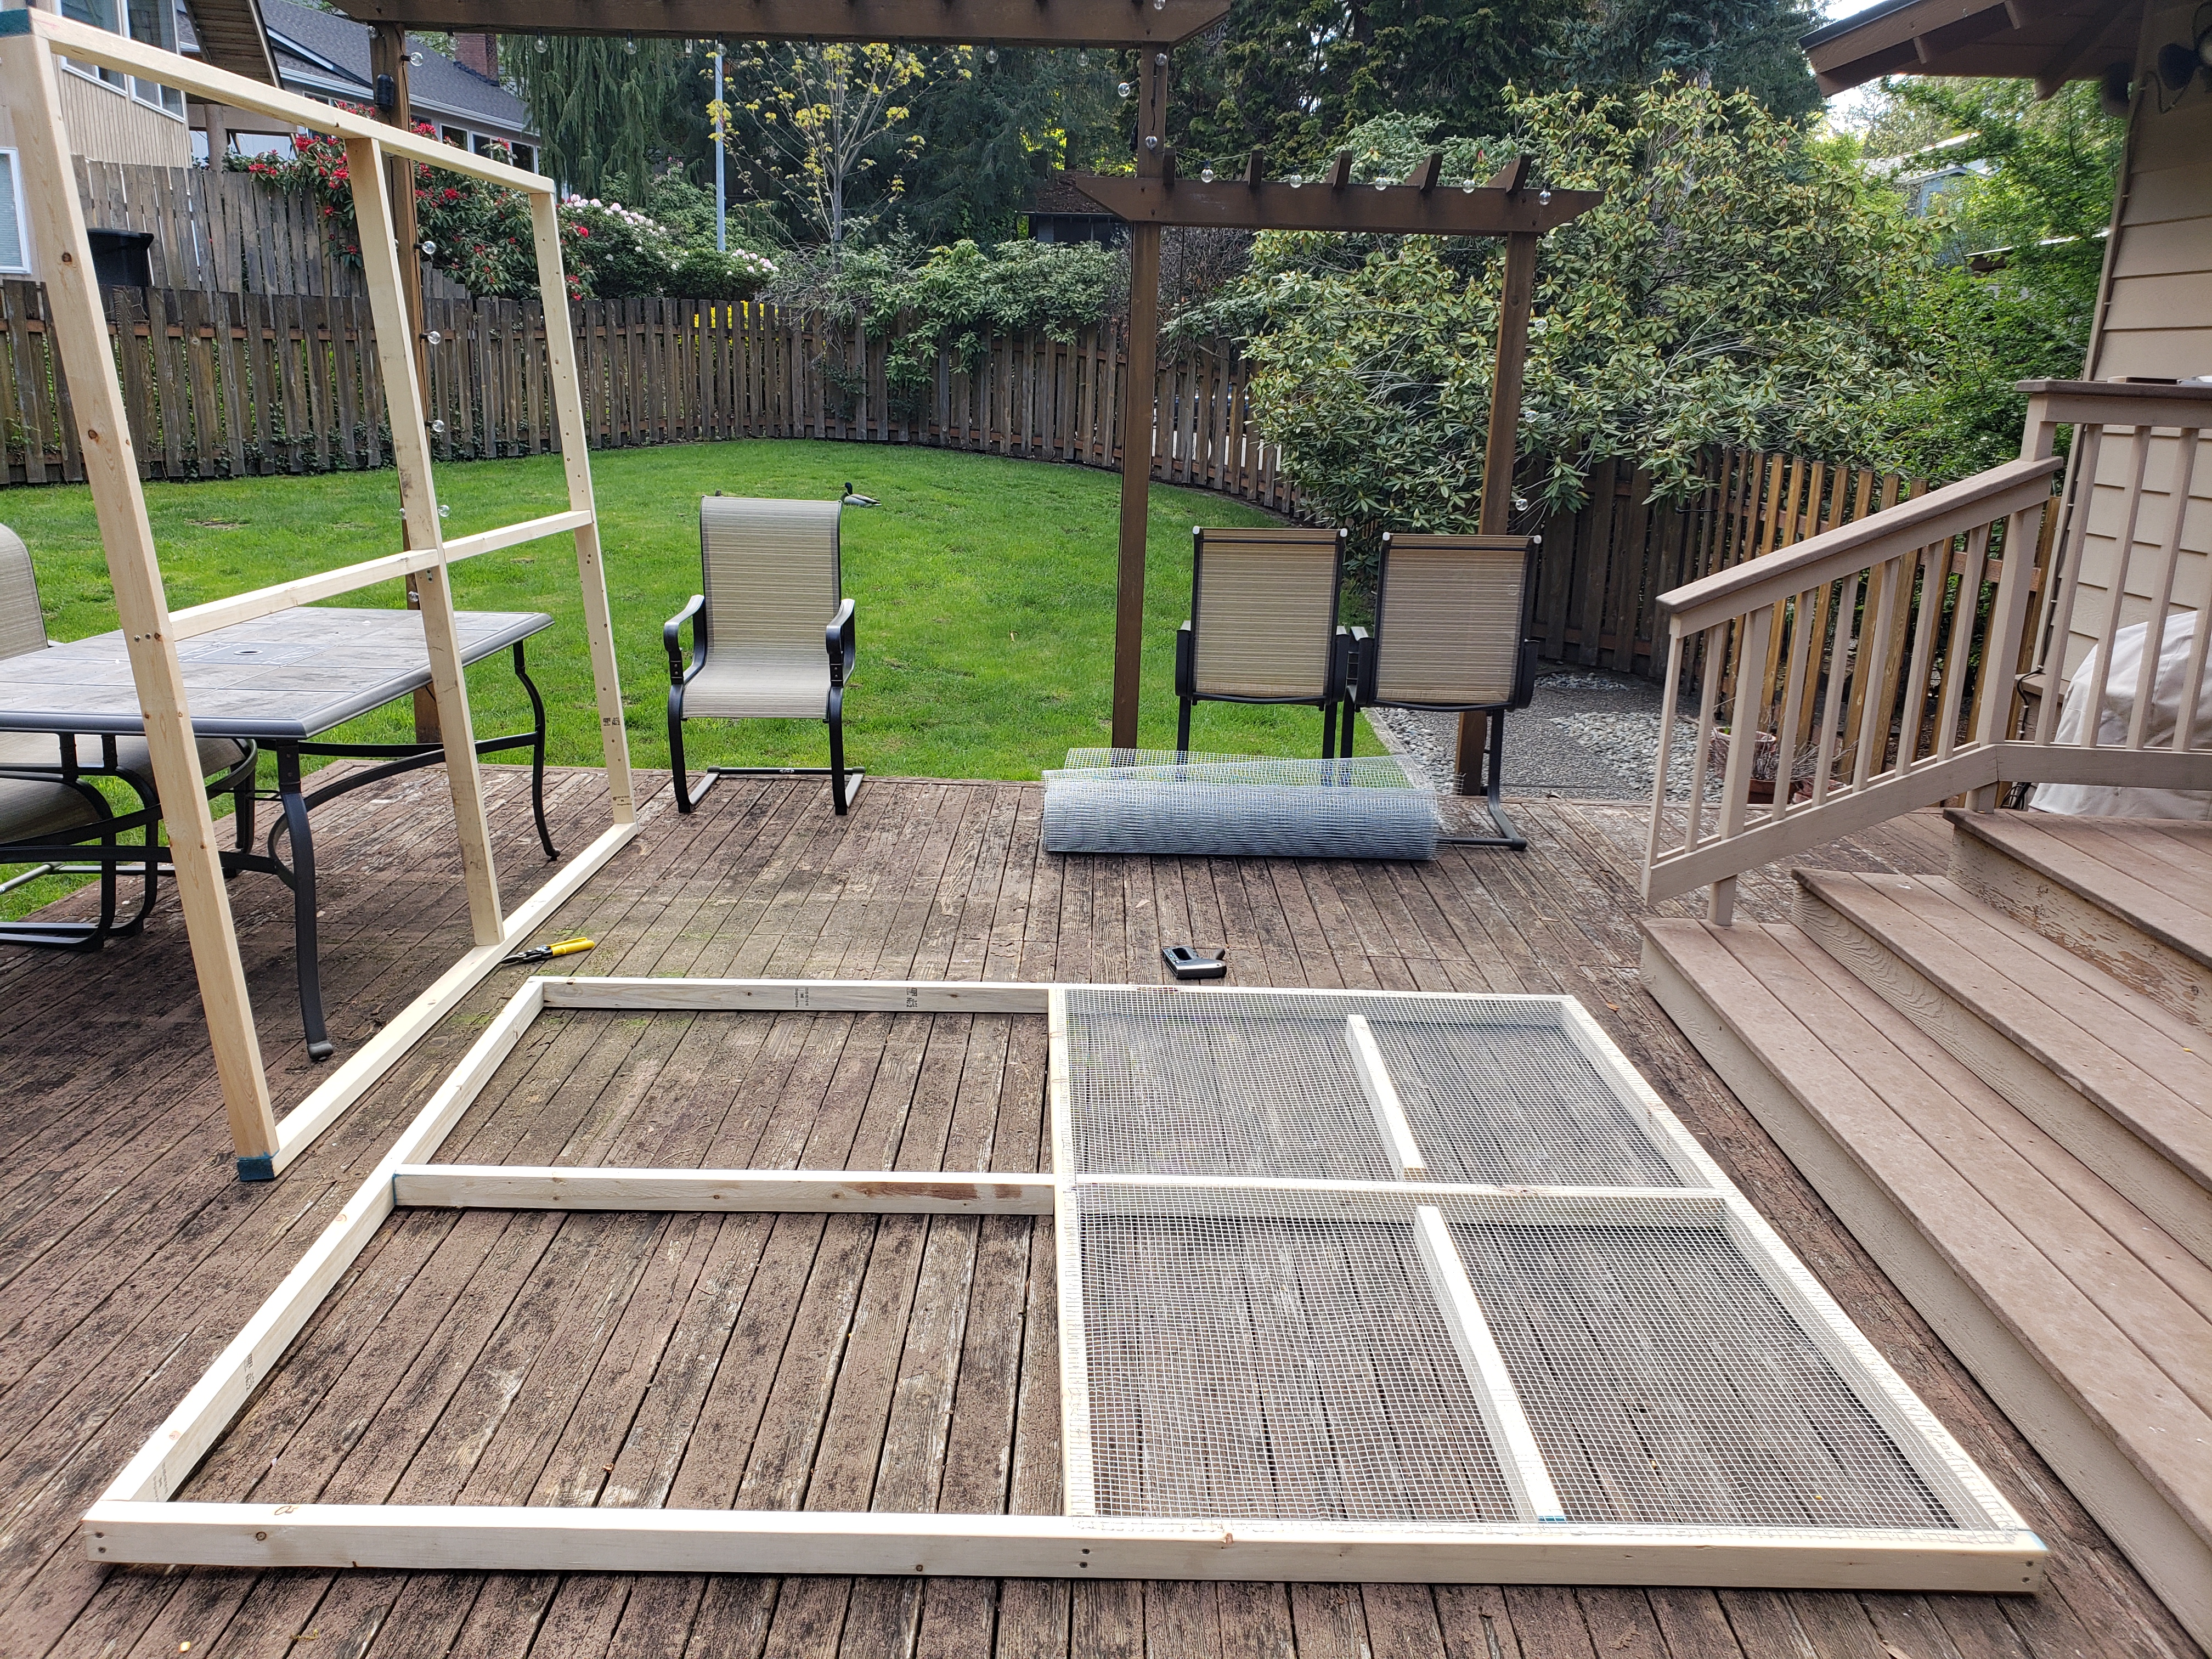
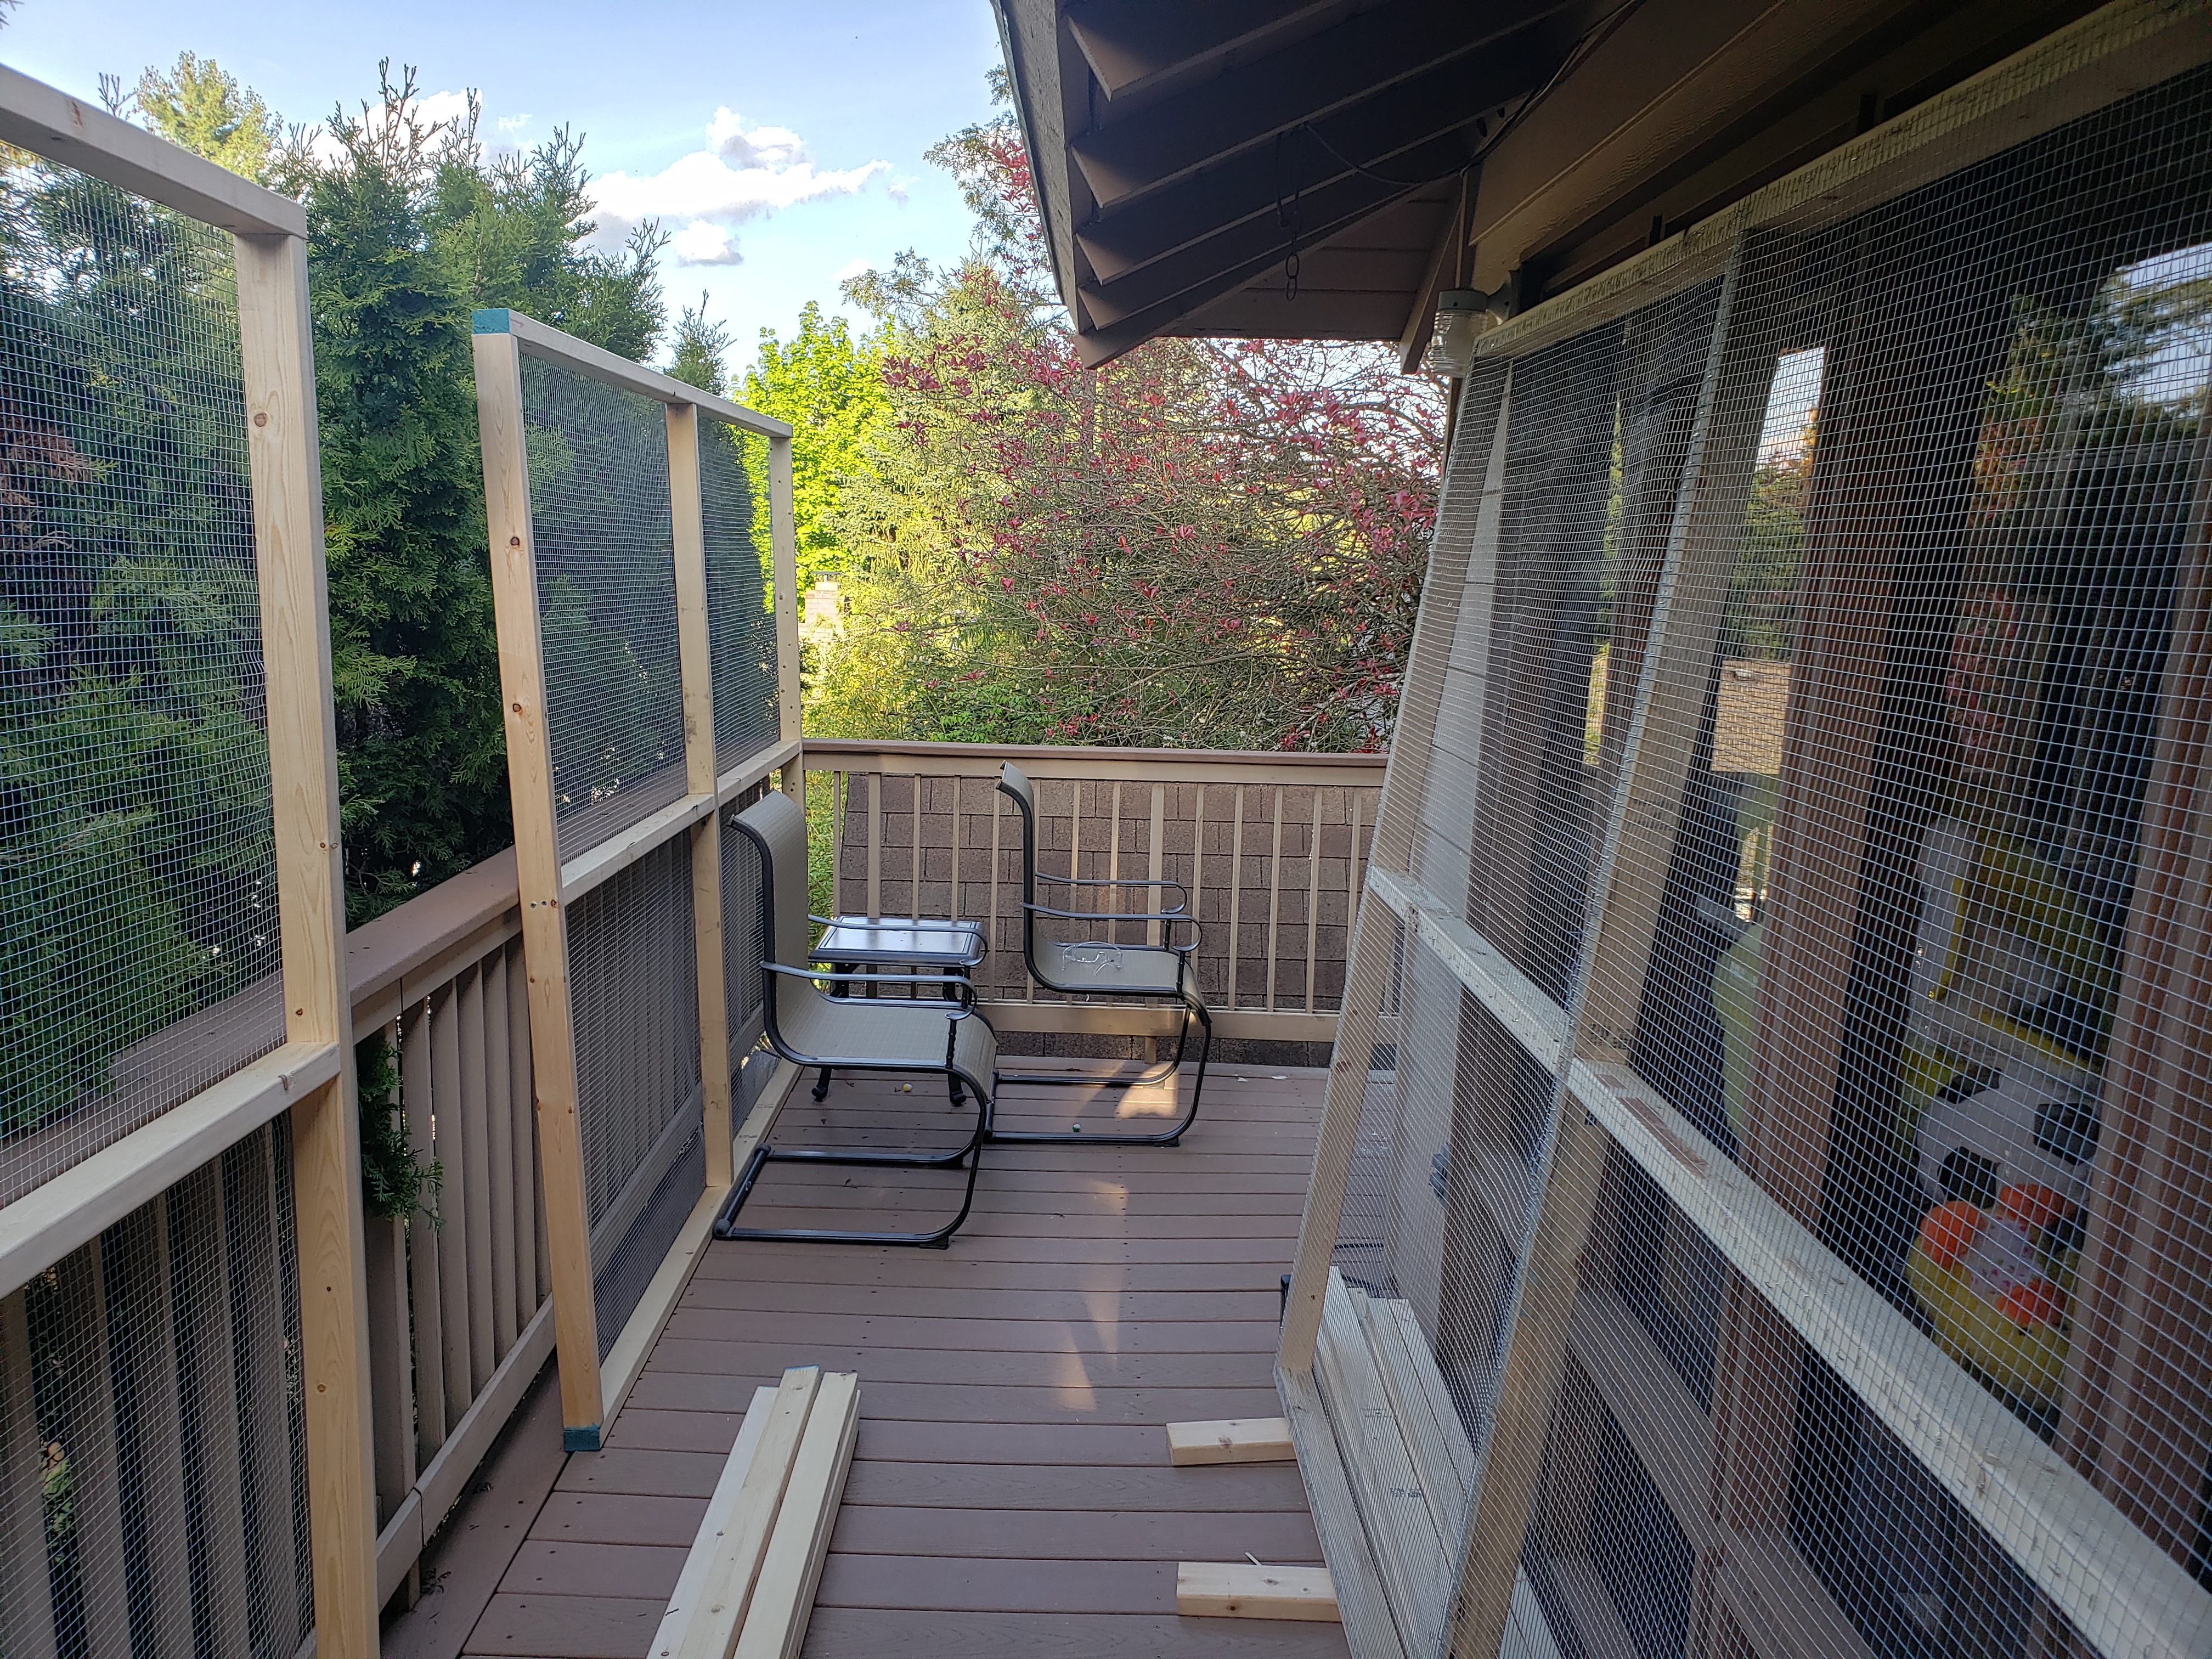
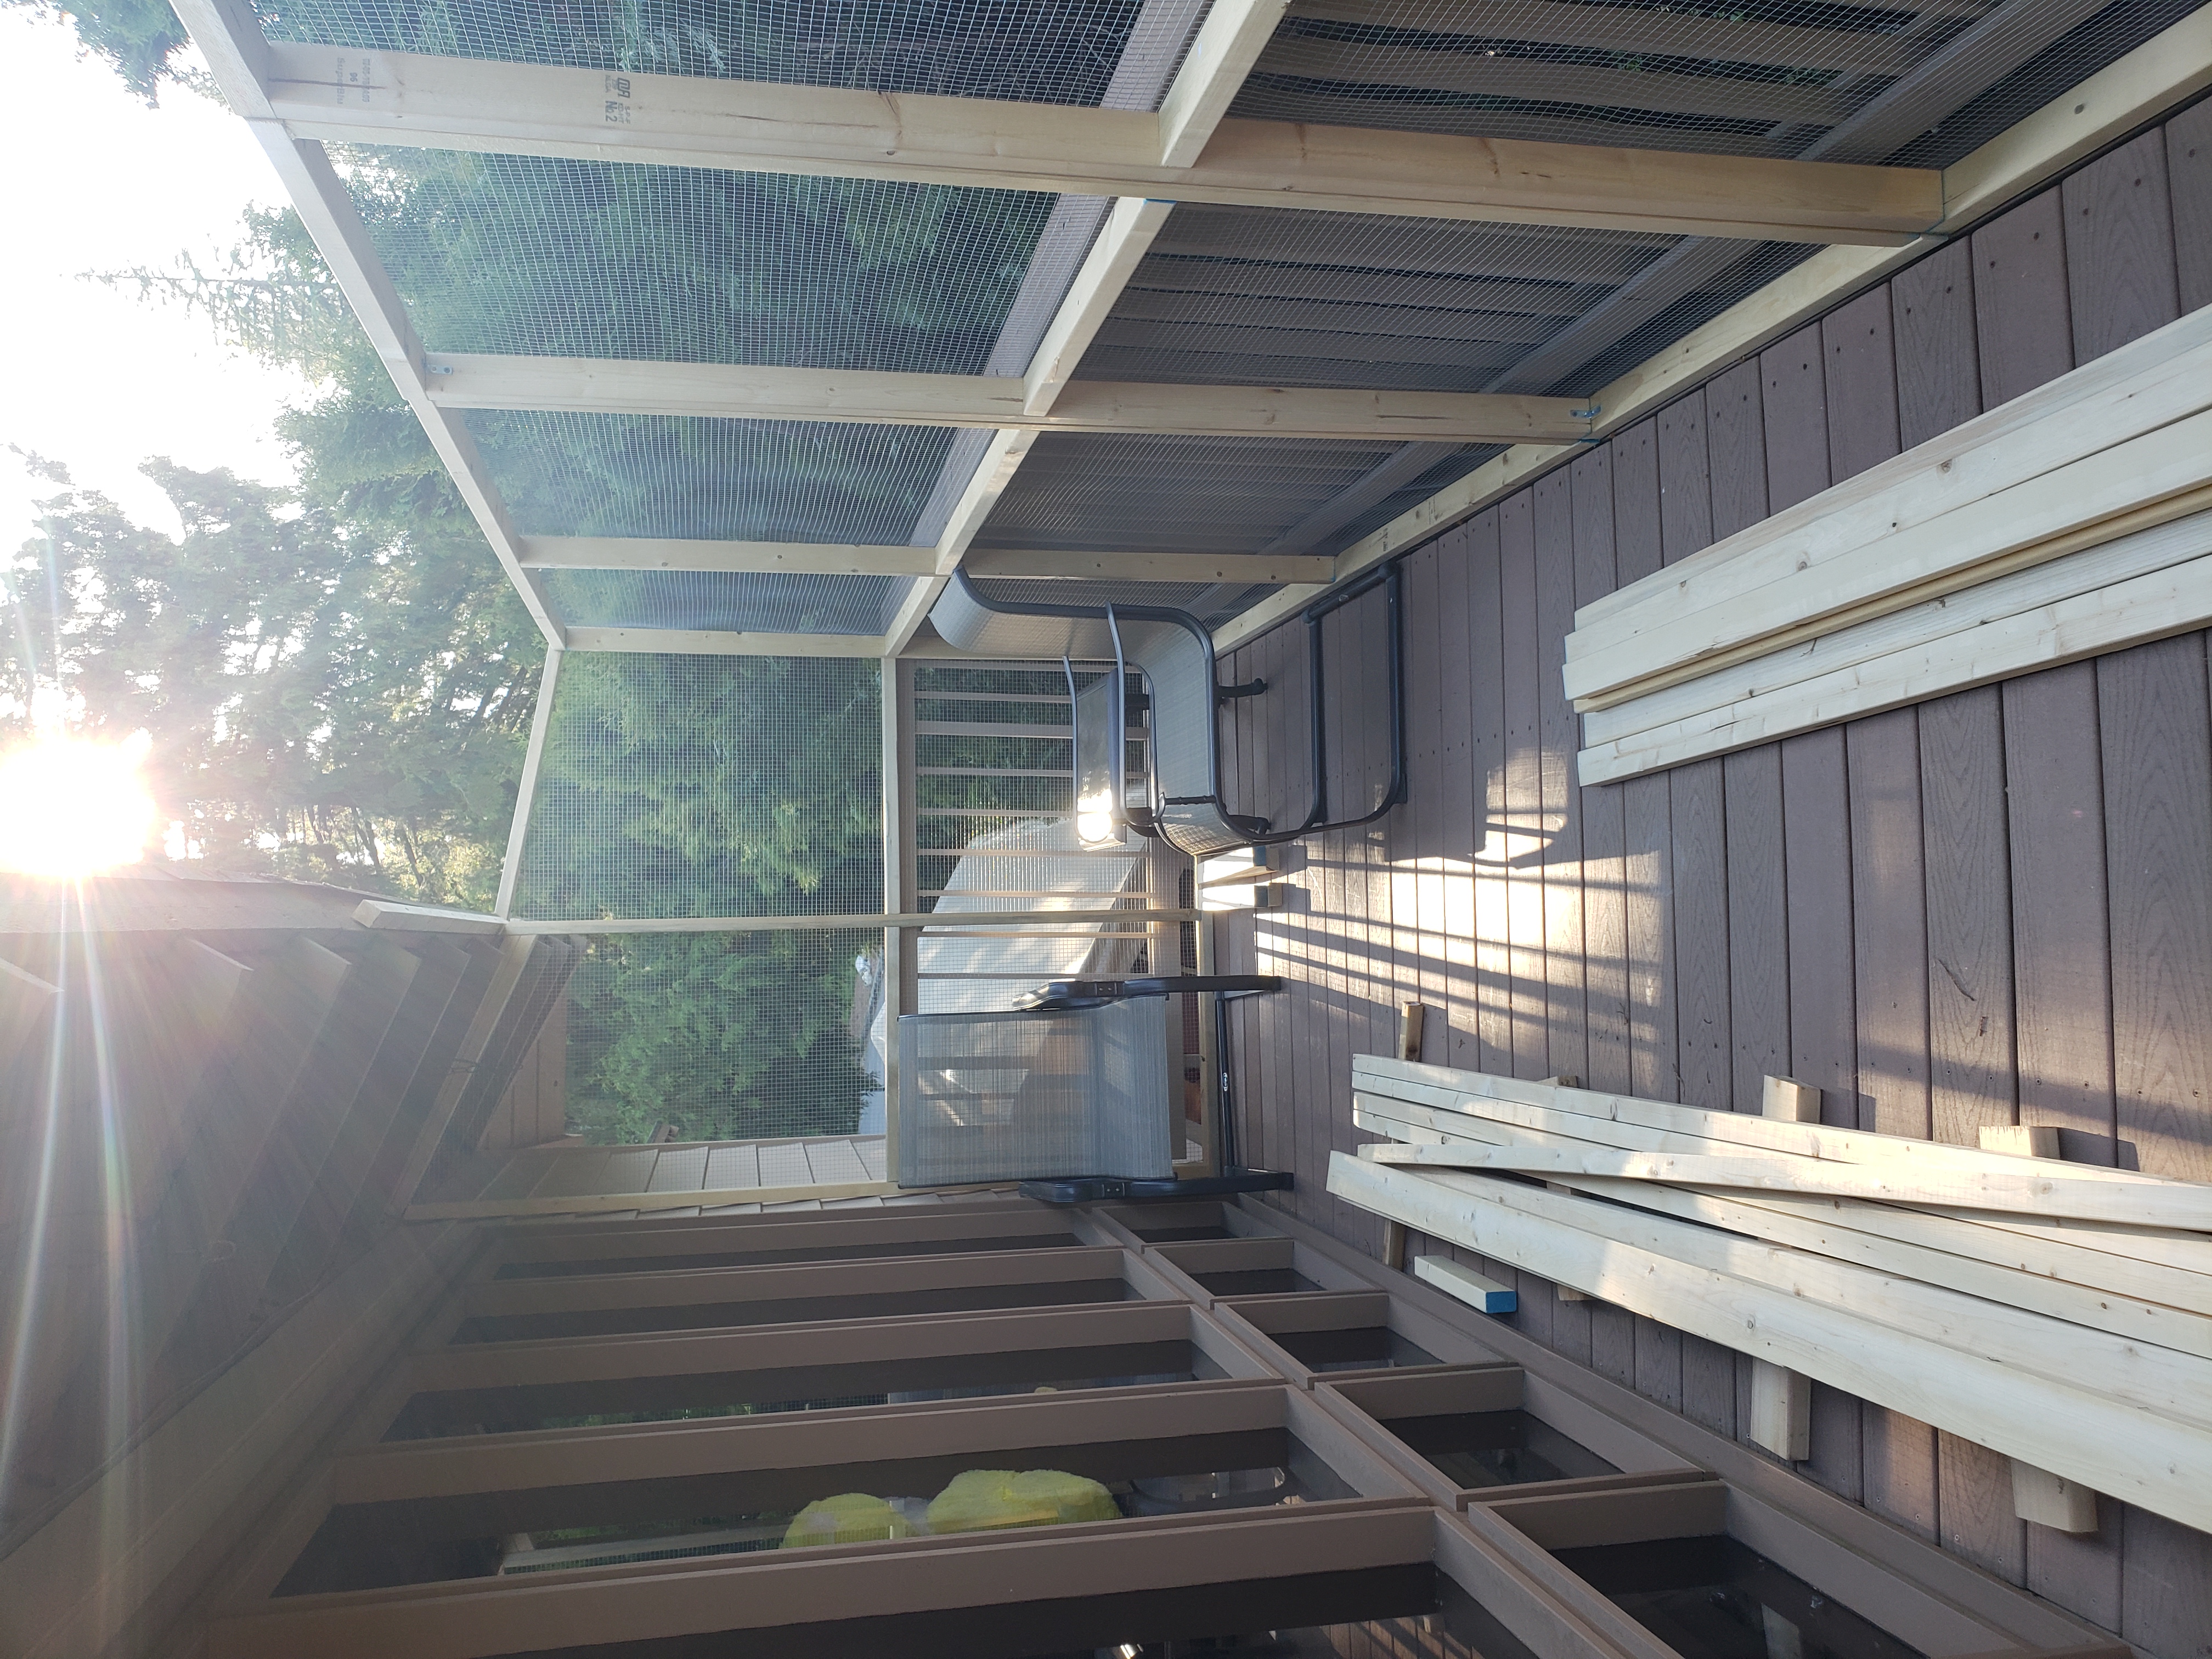
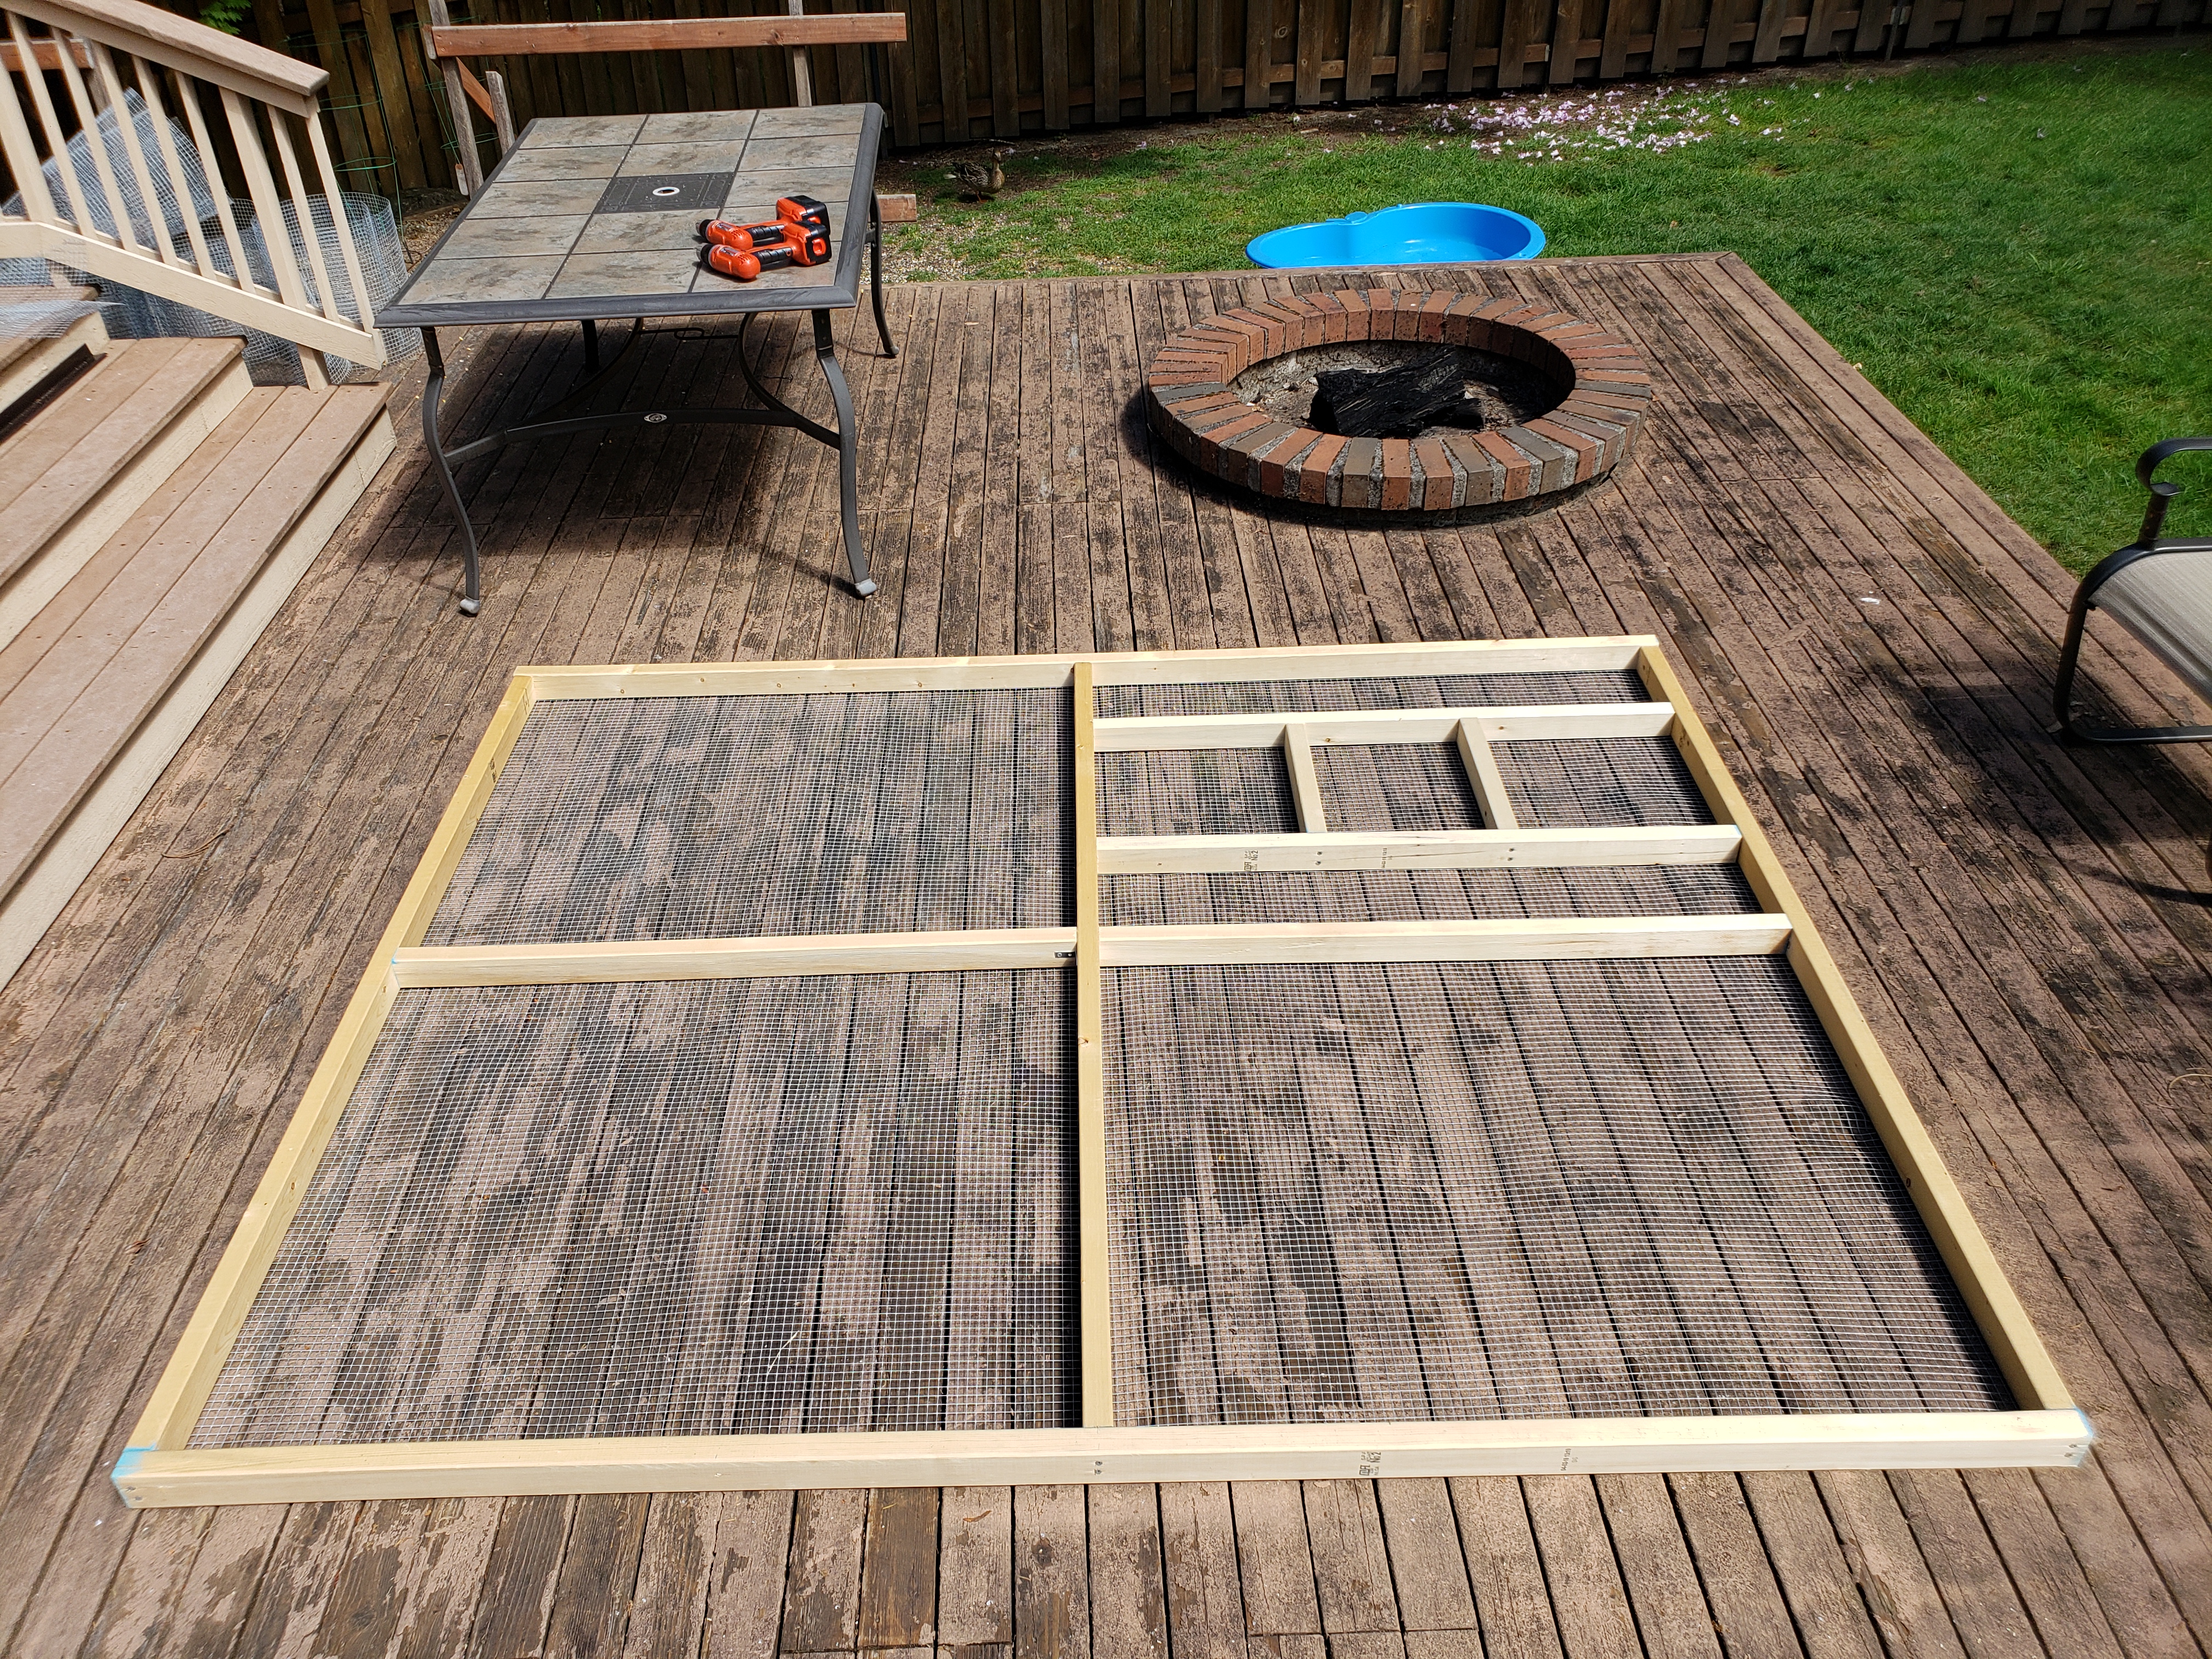
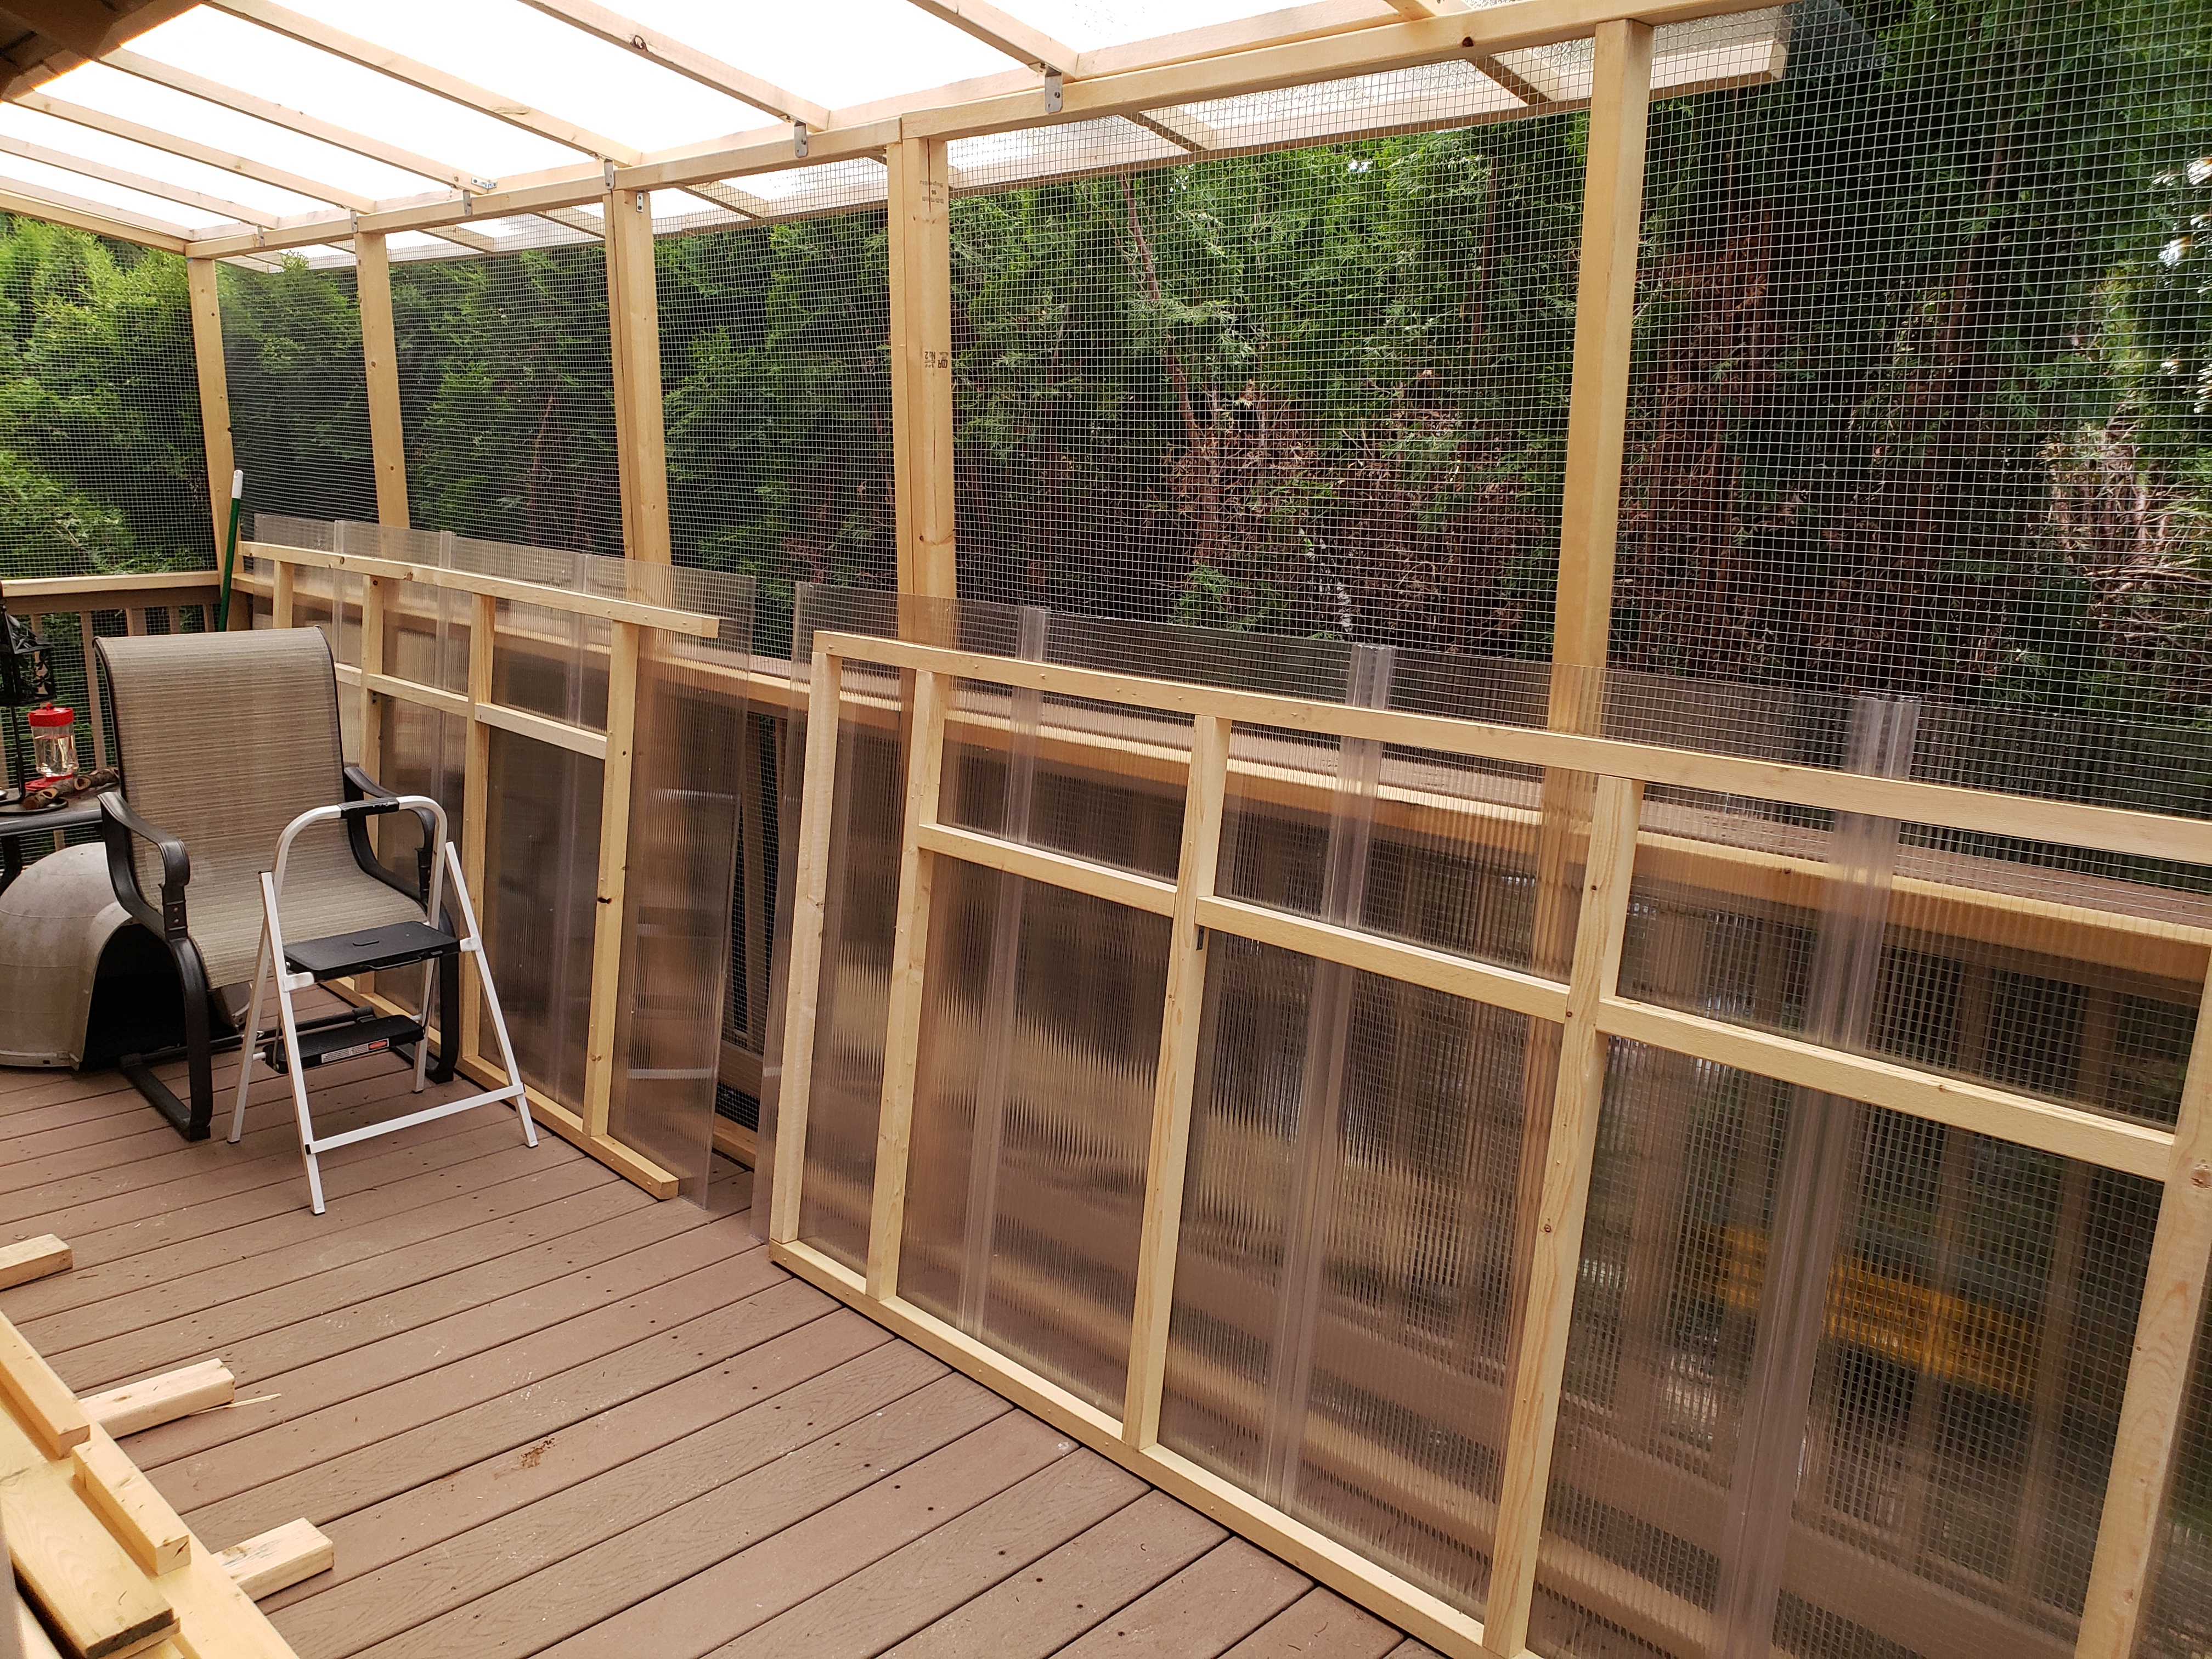
Alright, time to get the walls into place and see how it looks. Notice the narrower opening that still needs to be filled. I did it at the end, once I knew the precise length to make sure it fits nicely.
It was during this test fitting that I realized the bushes behind could use some trimming…

All walls are in place, including the end-walls and shorter middle-pieces (I decided to have those located between 2 full-length walls on each size, for a pleasantly looking symmetry).
BONUS
Built-in wild bird feeders
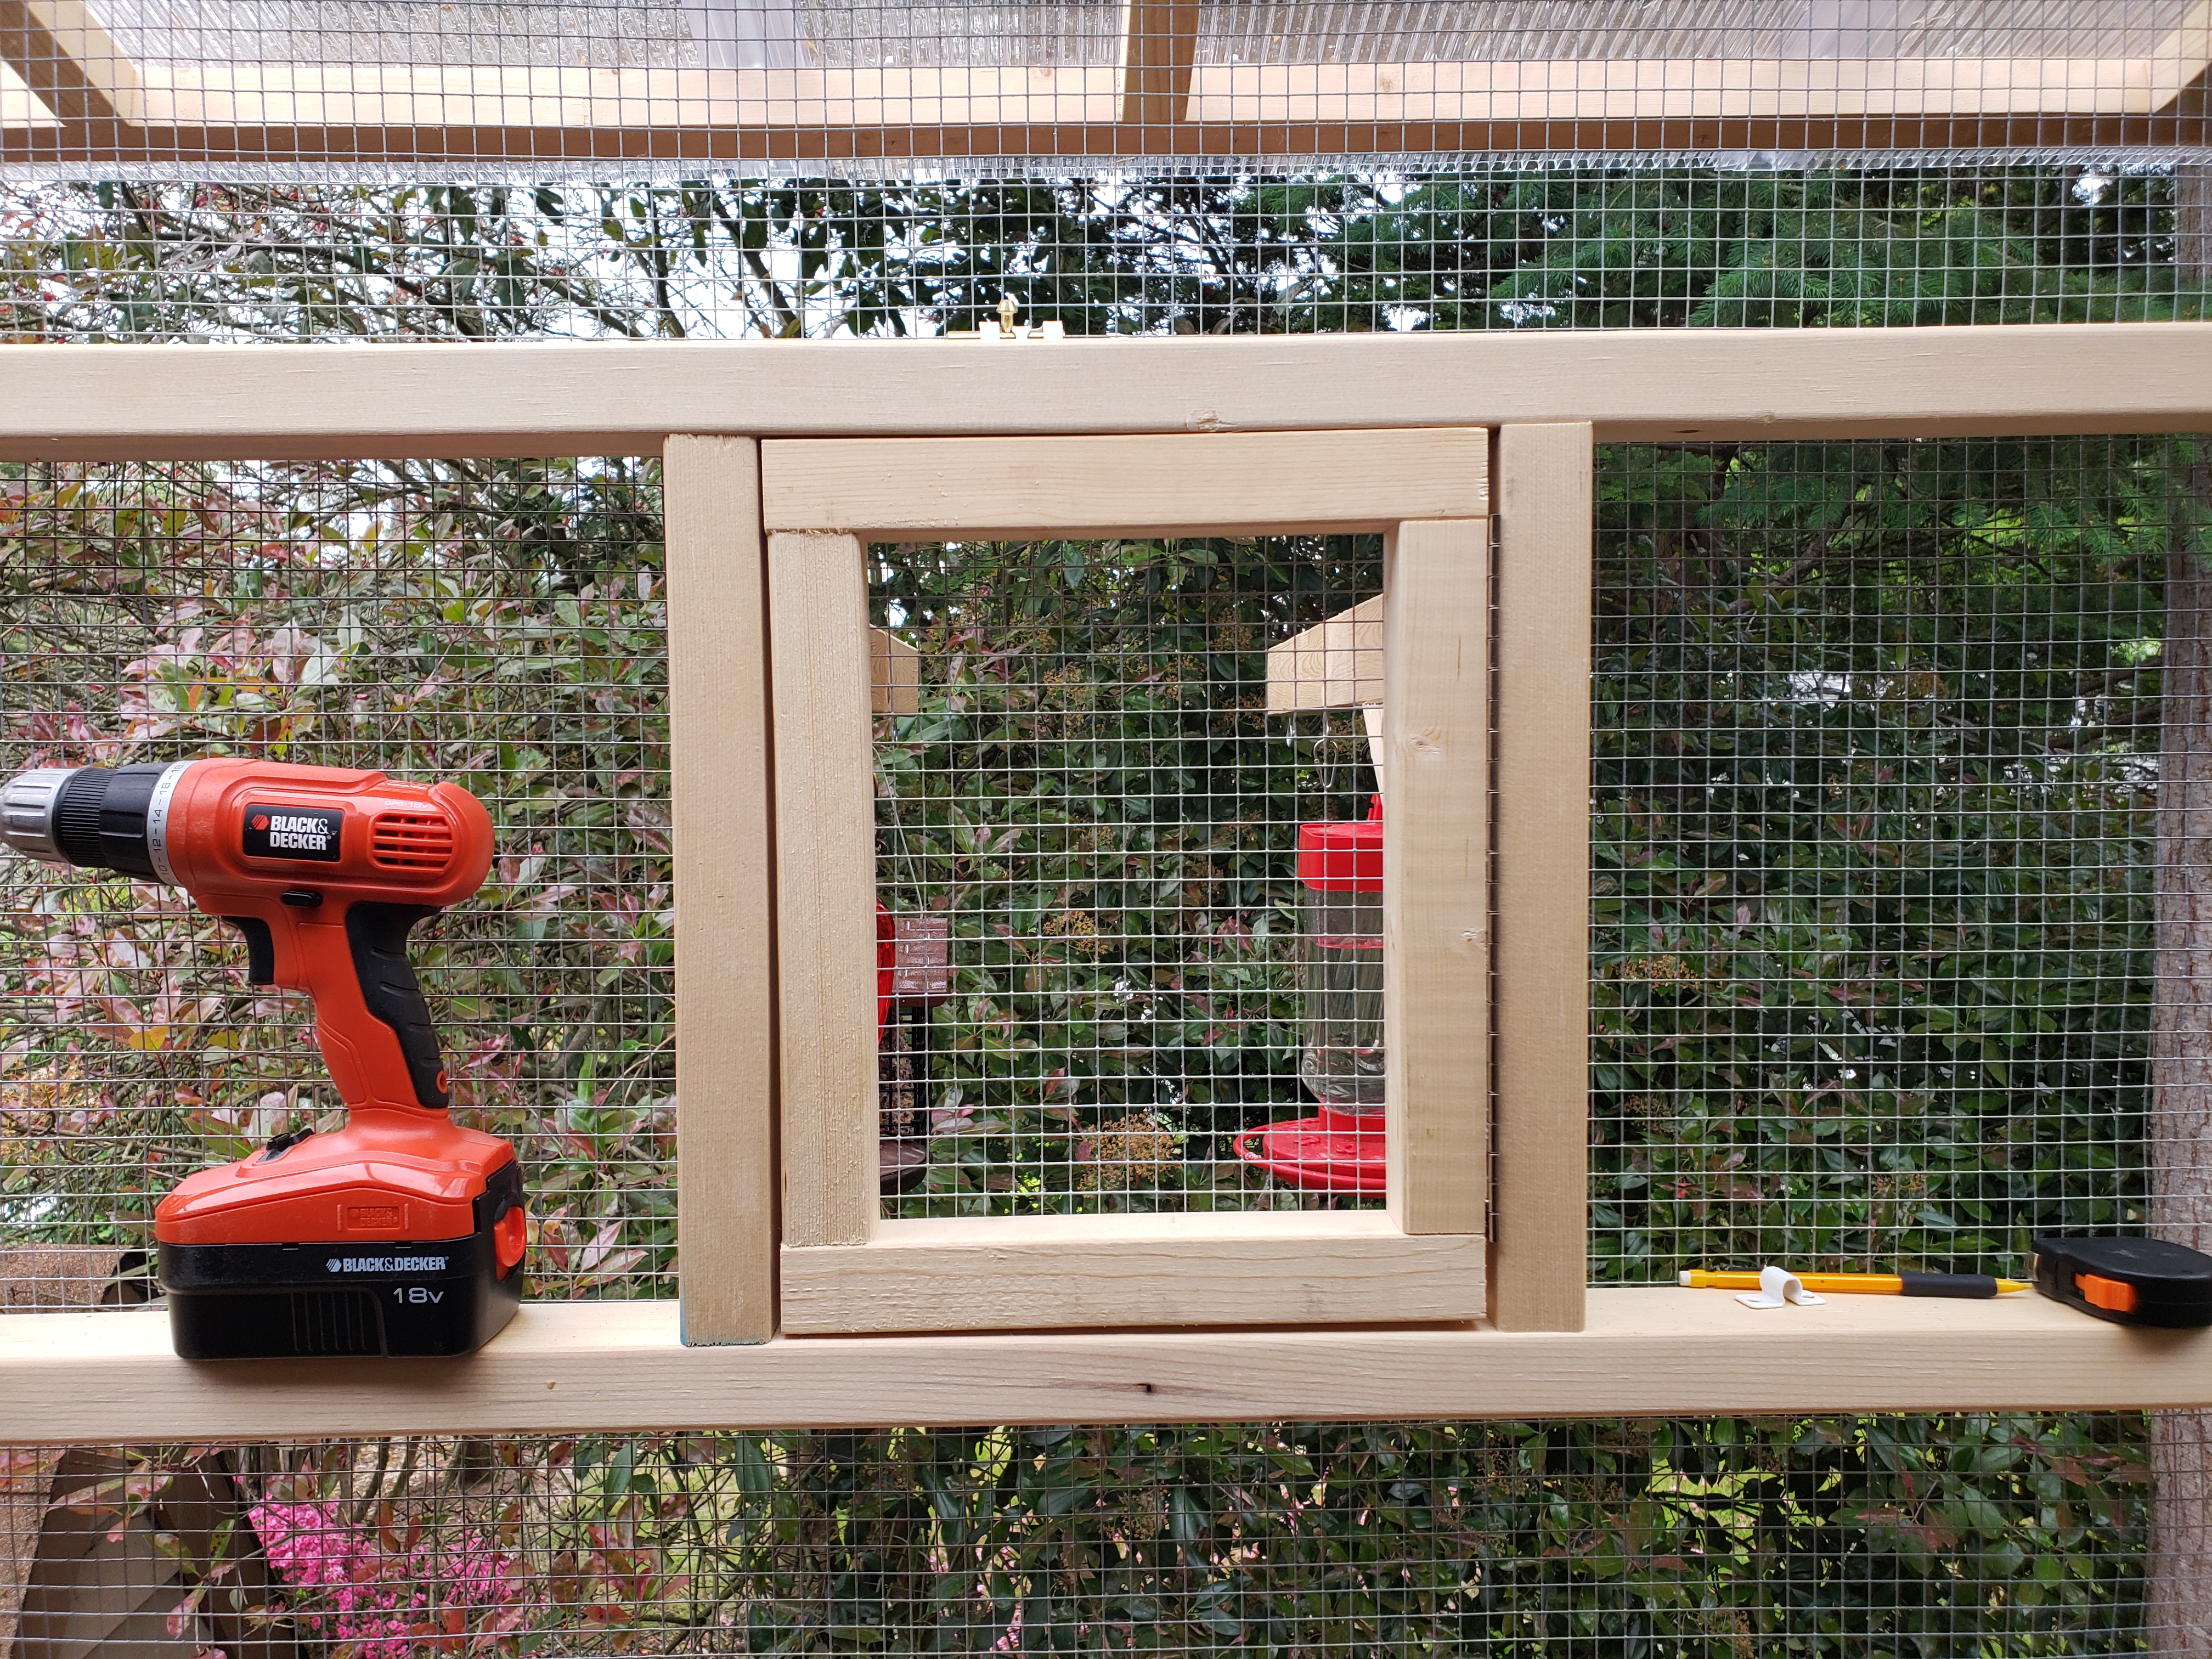
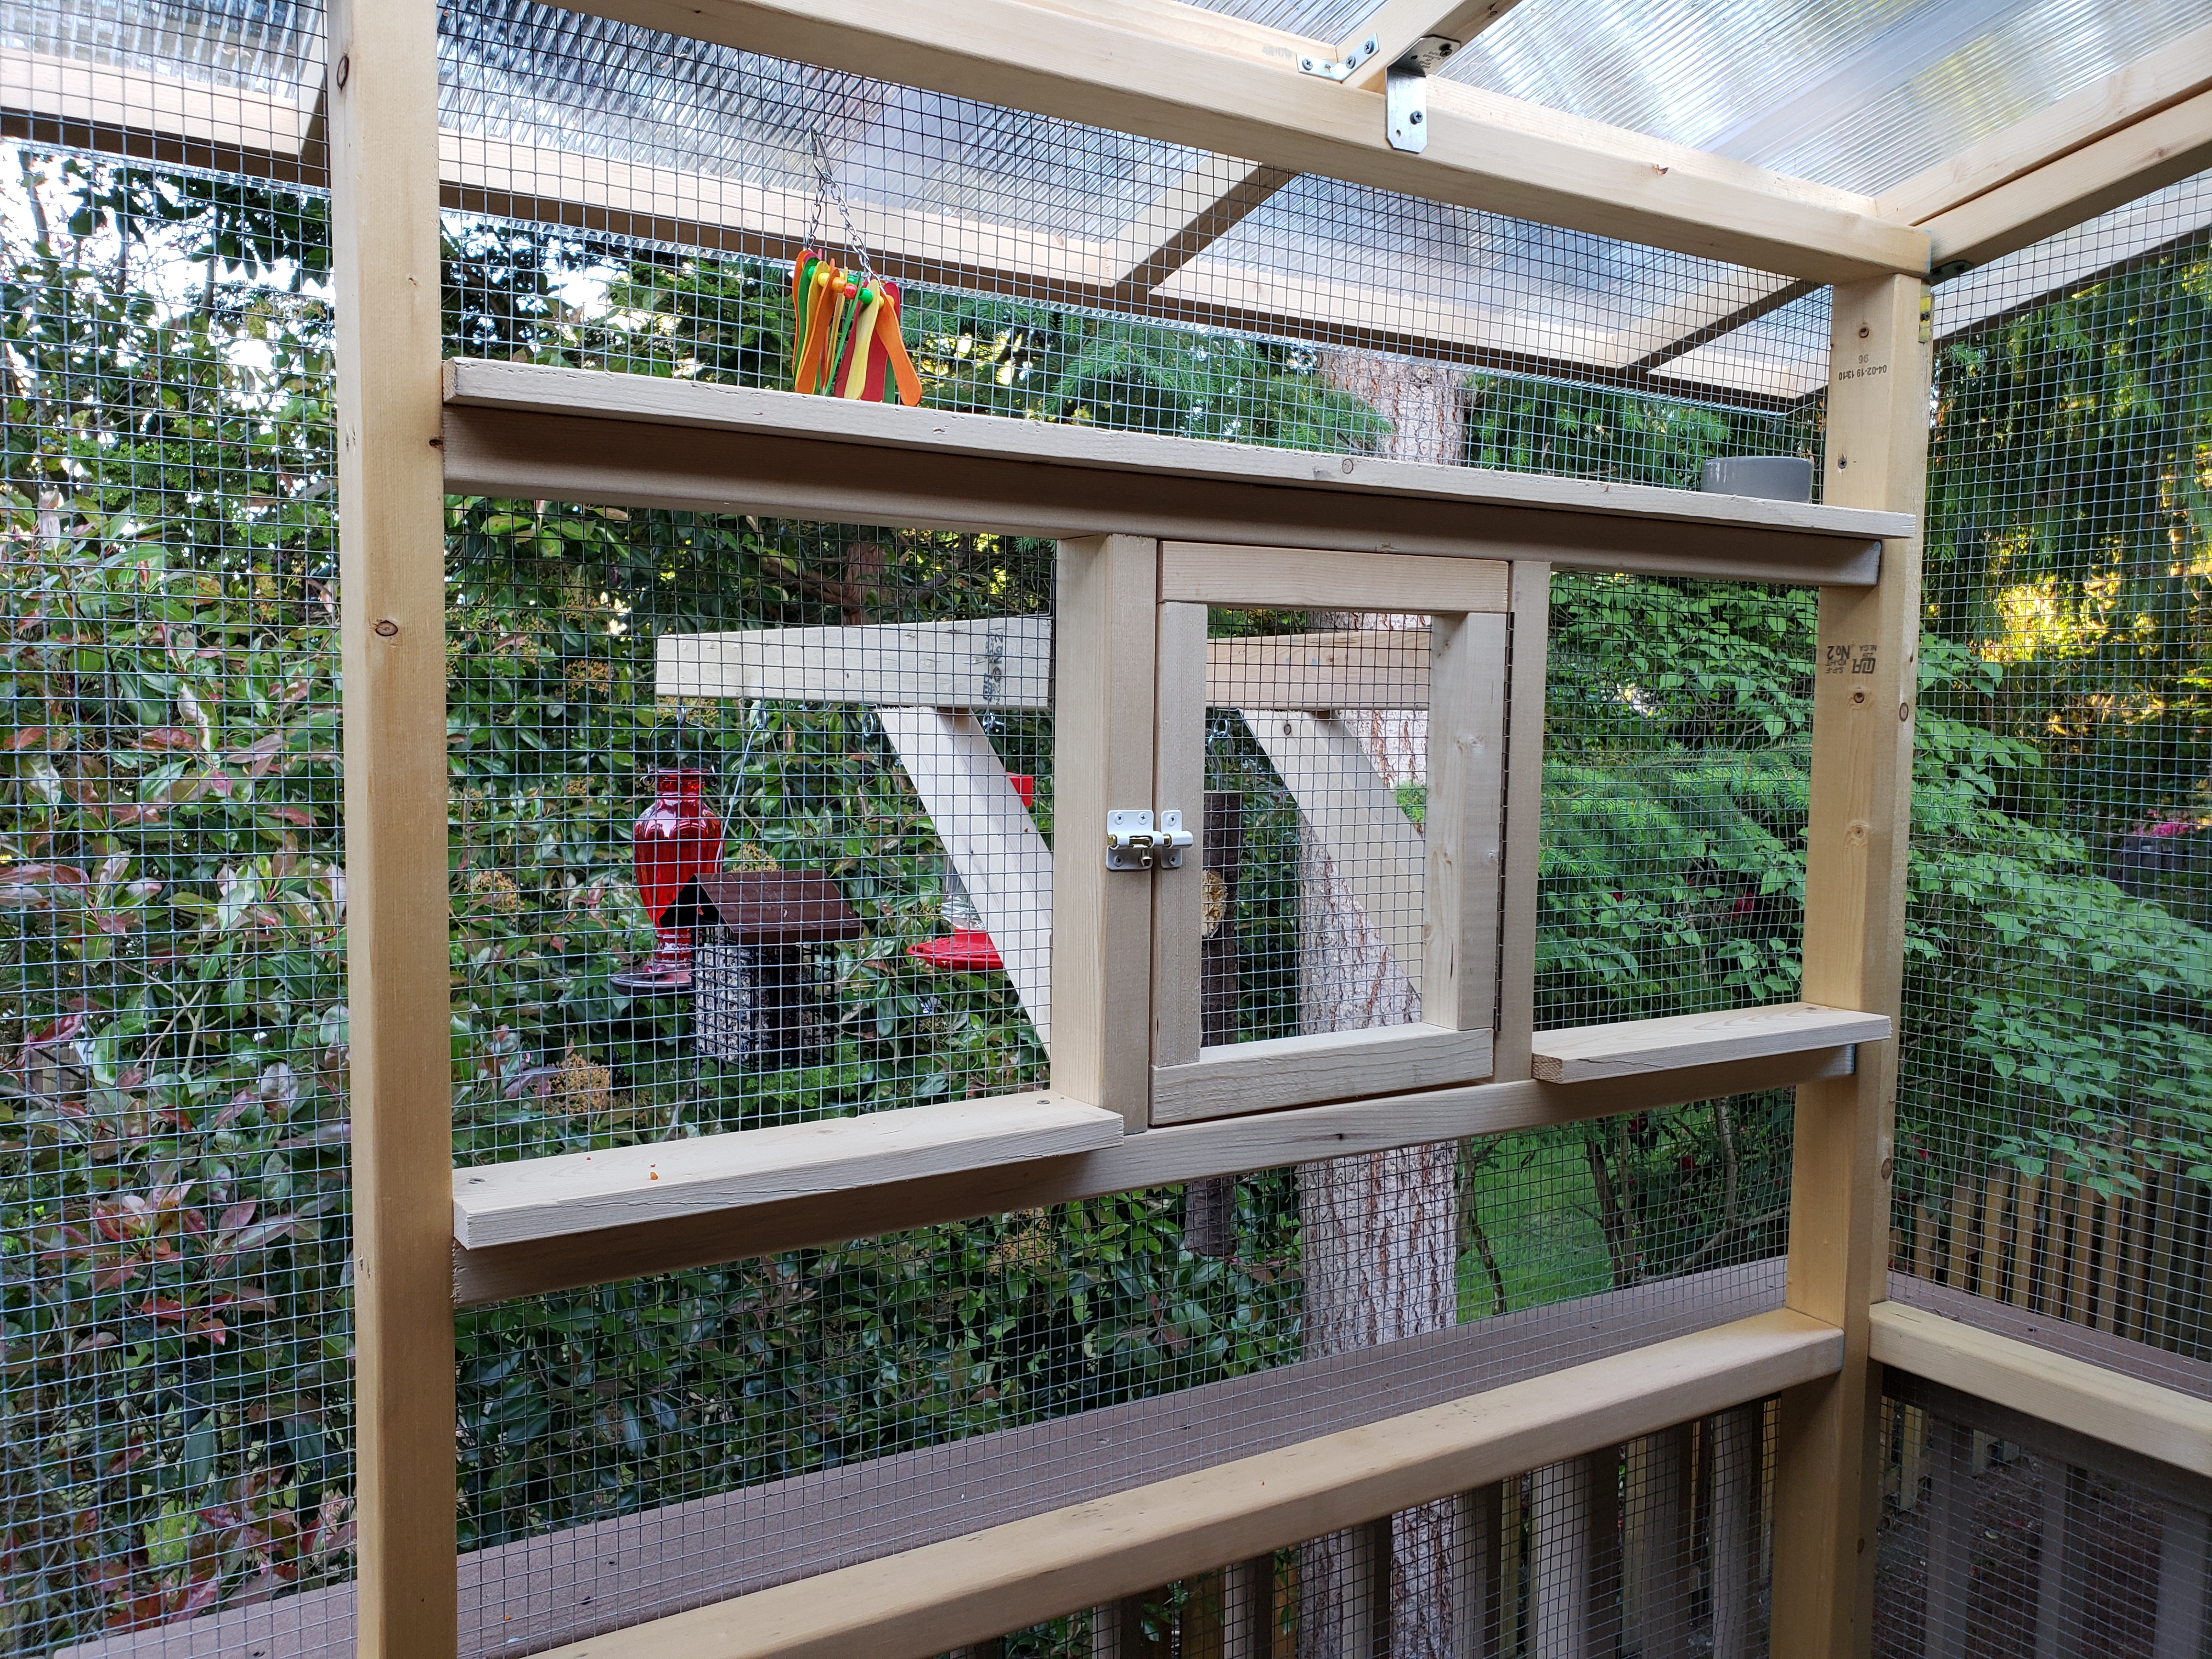
We used to have bird feeders hanging under the roof eaves, but with the space being enclosed, wild birds wouldn’t have access to them anymore… Did I mention how much we love birds? 🙂 So I decided to make a window in one of the walls, and add some hooks for bird feeders, that we could easily access and refill. So I took one of the walls back to the deck and added framing for the window.
I wanted to make sure that bird feeders will fit through the window easily, so I settled on a window 12 inch high and a a bit less than that width. This is specially important for humming bird feeders, as they will leak if tilted 😉
The window needs to have mesh as well (I used a newly cut piece of mesh, but you could probably also just use the piece ultimately cut from the already filled in wall).
Then I simply screwed the frame in place, stapled the mesh to all newly added framing pieces and cut out the opening for window in the mesh. Make sure you don’t leave sharp edges around the opening of the window, we don’t want for anyone to get scratched (cut wire mesh can be very sharp!).
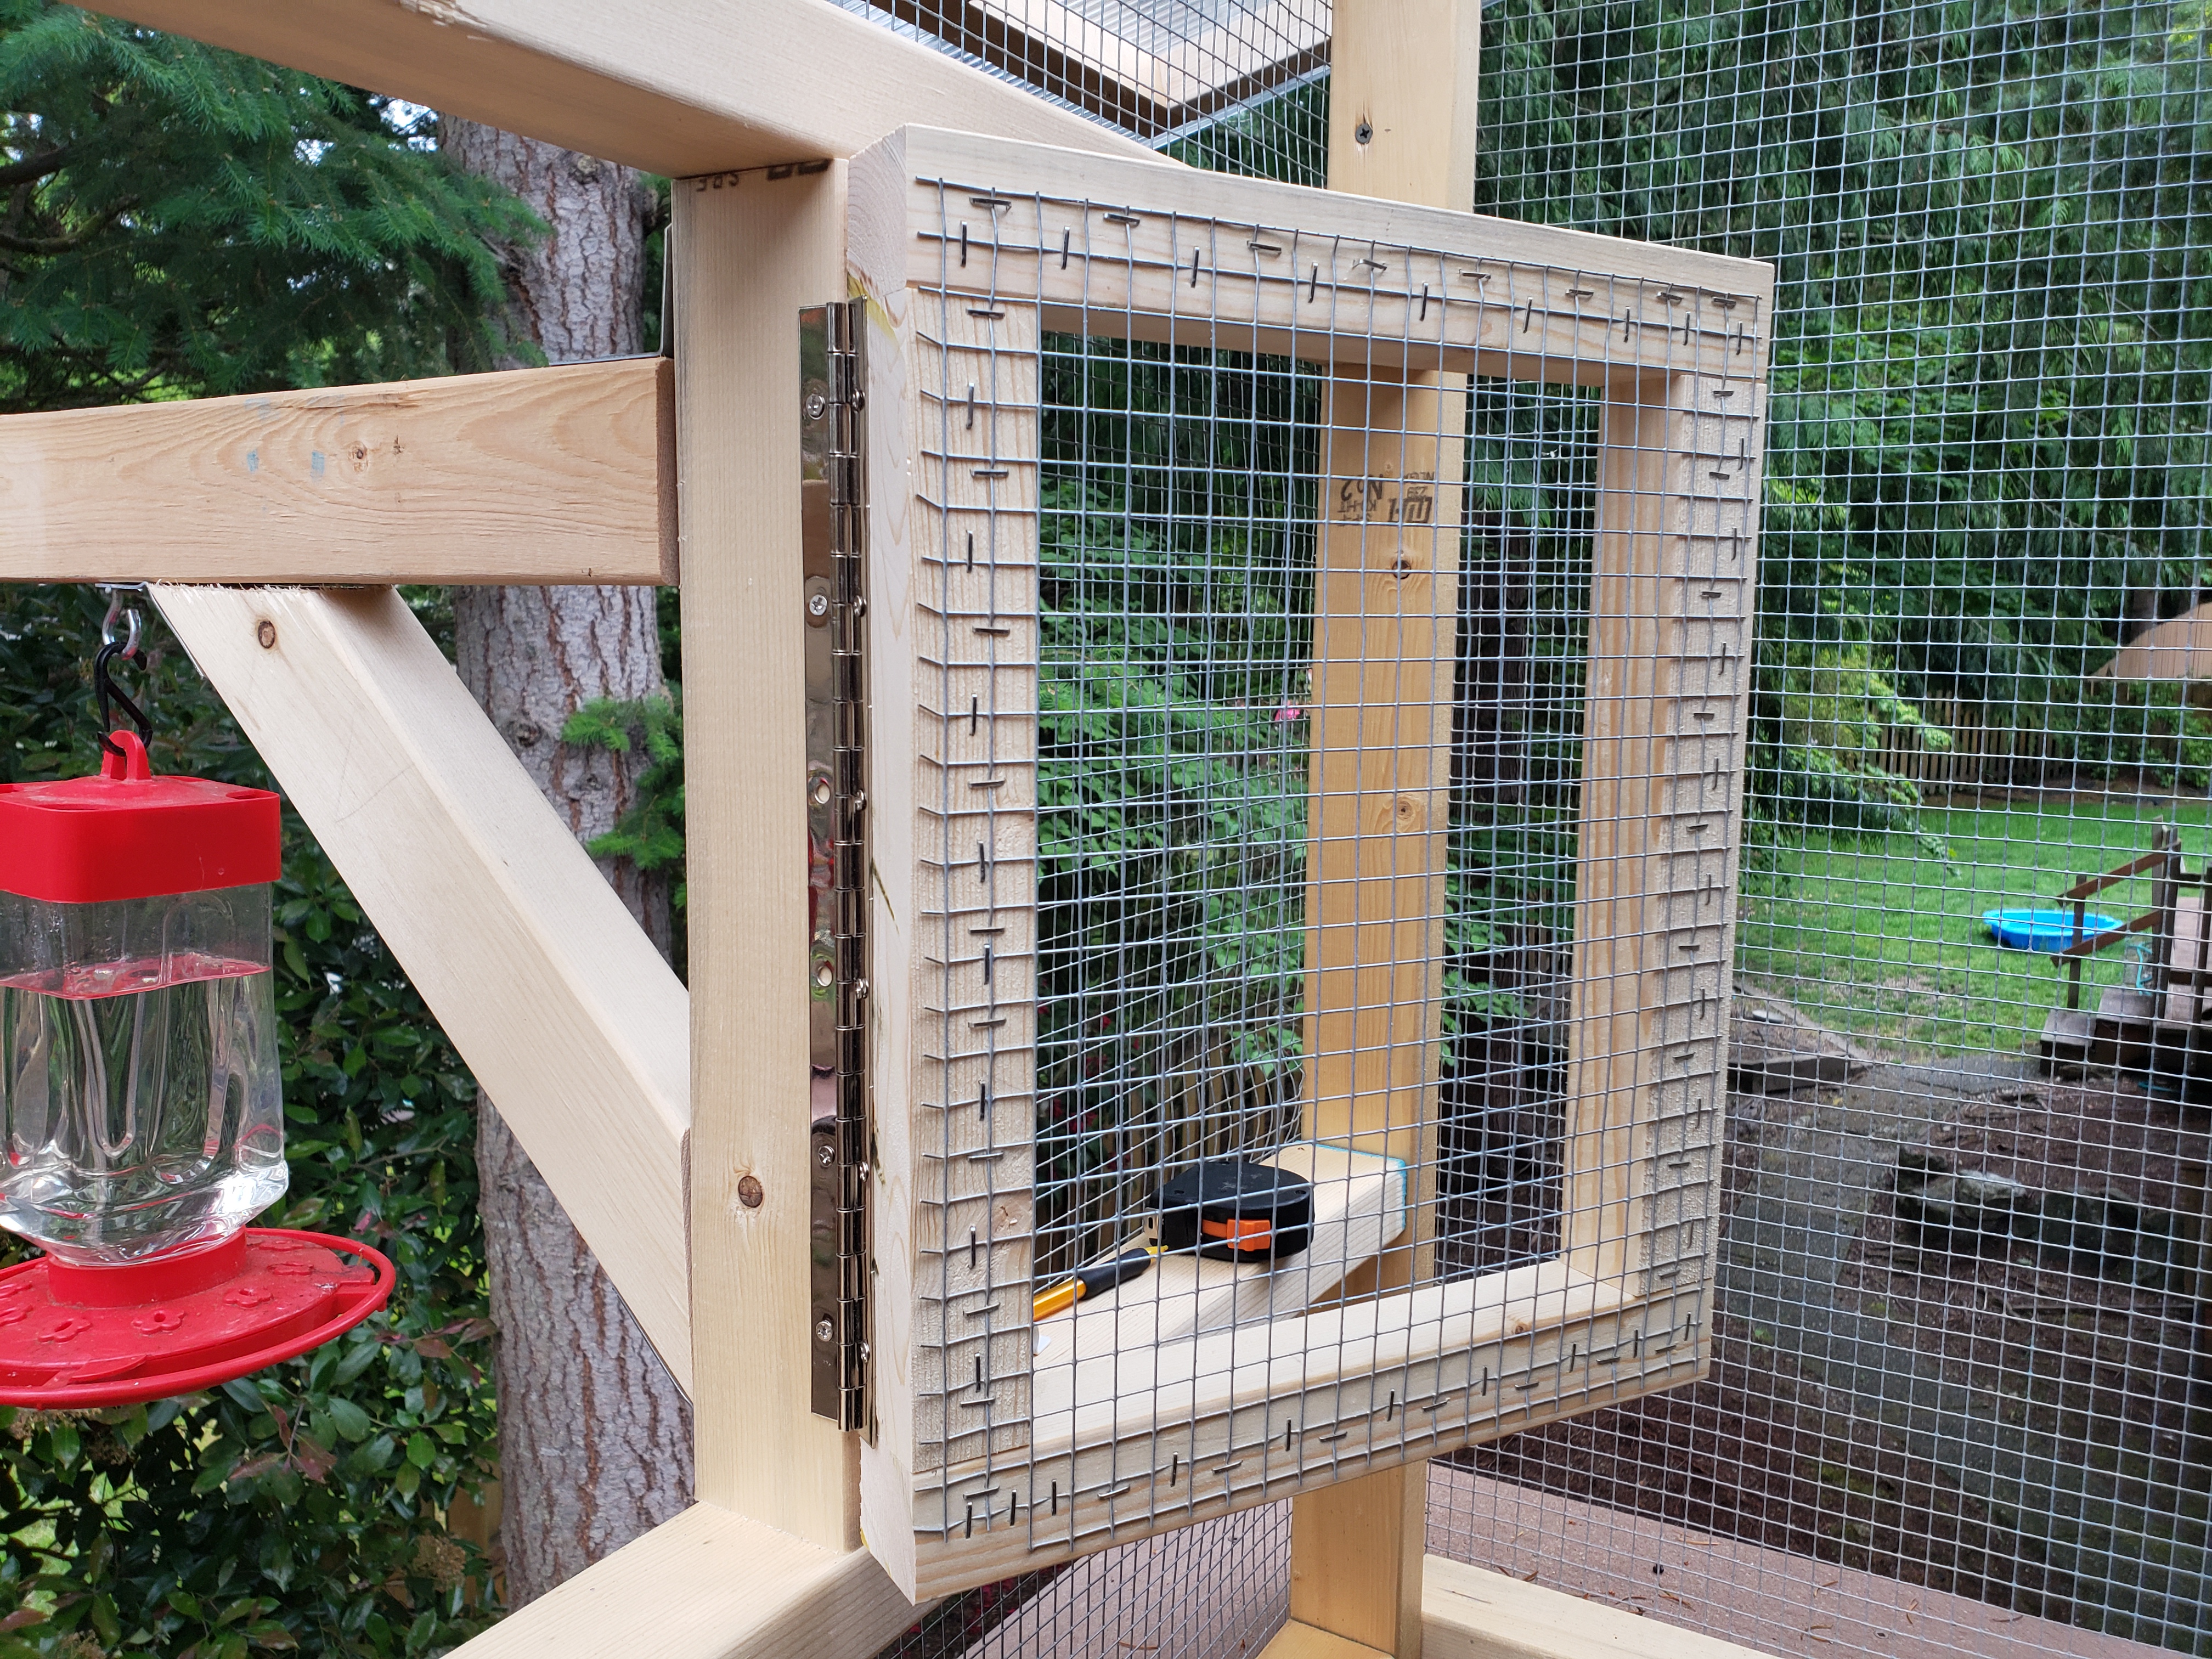
Notice that on the above 2 photos the window appears on opposite sides – it’s because the mesh is stapled from behind, so that there are no share edges inside (and it’s more roomy from inside, since the mesh is adjacent to the outer edge of the wall profile).
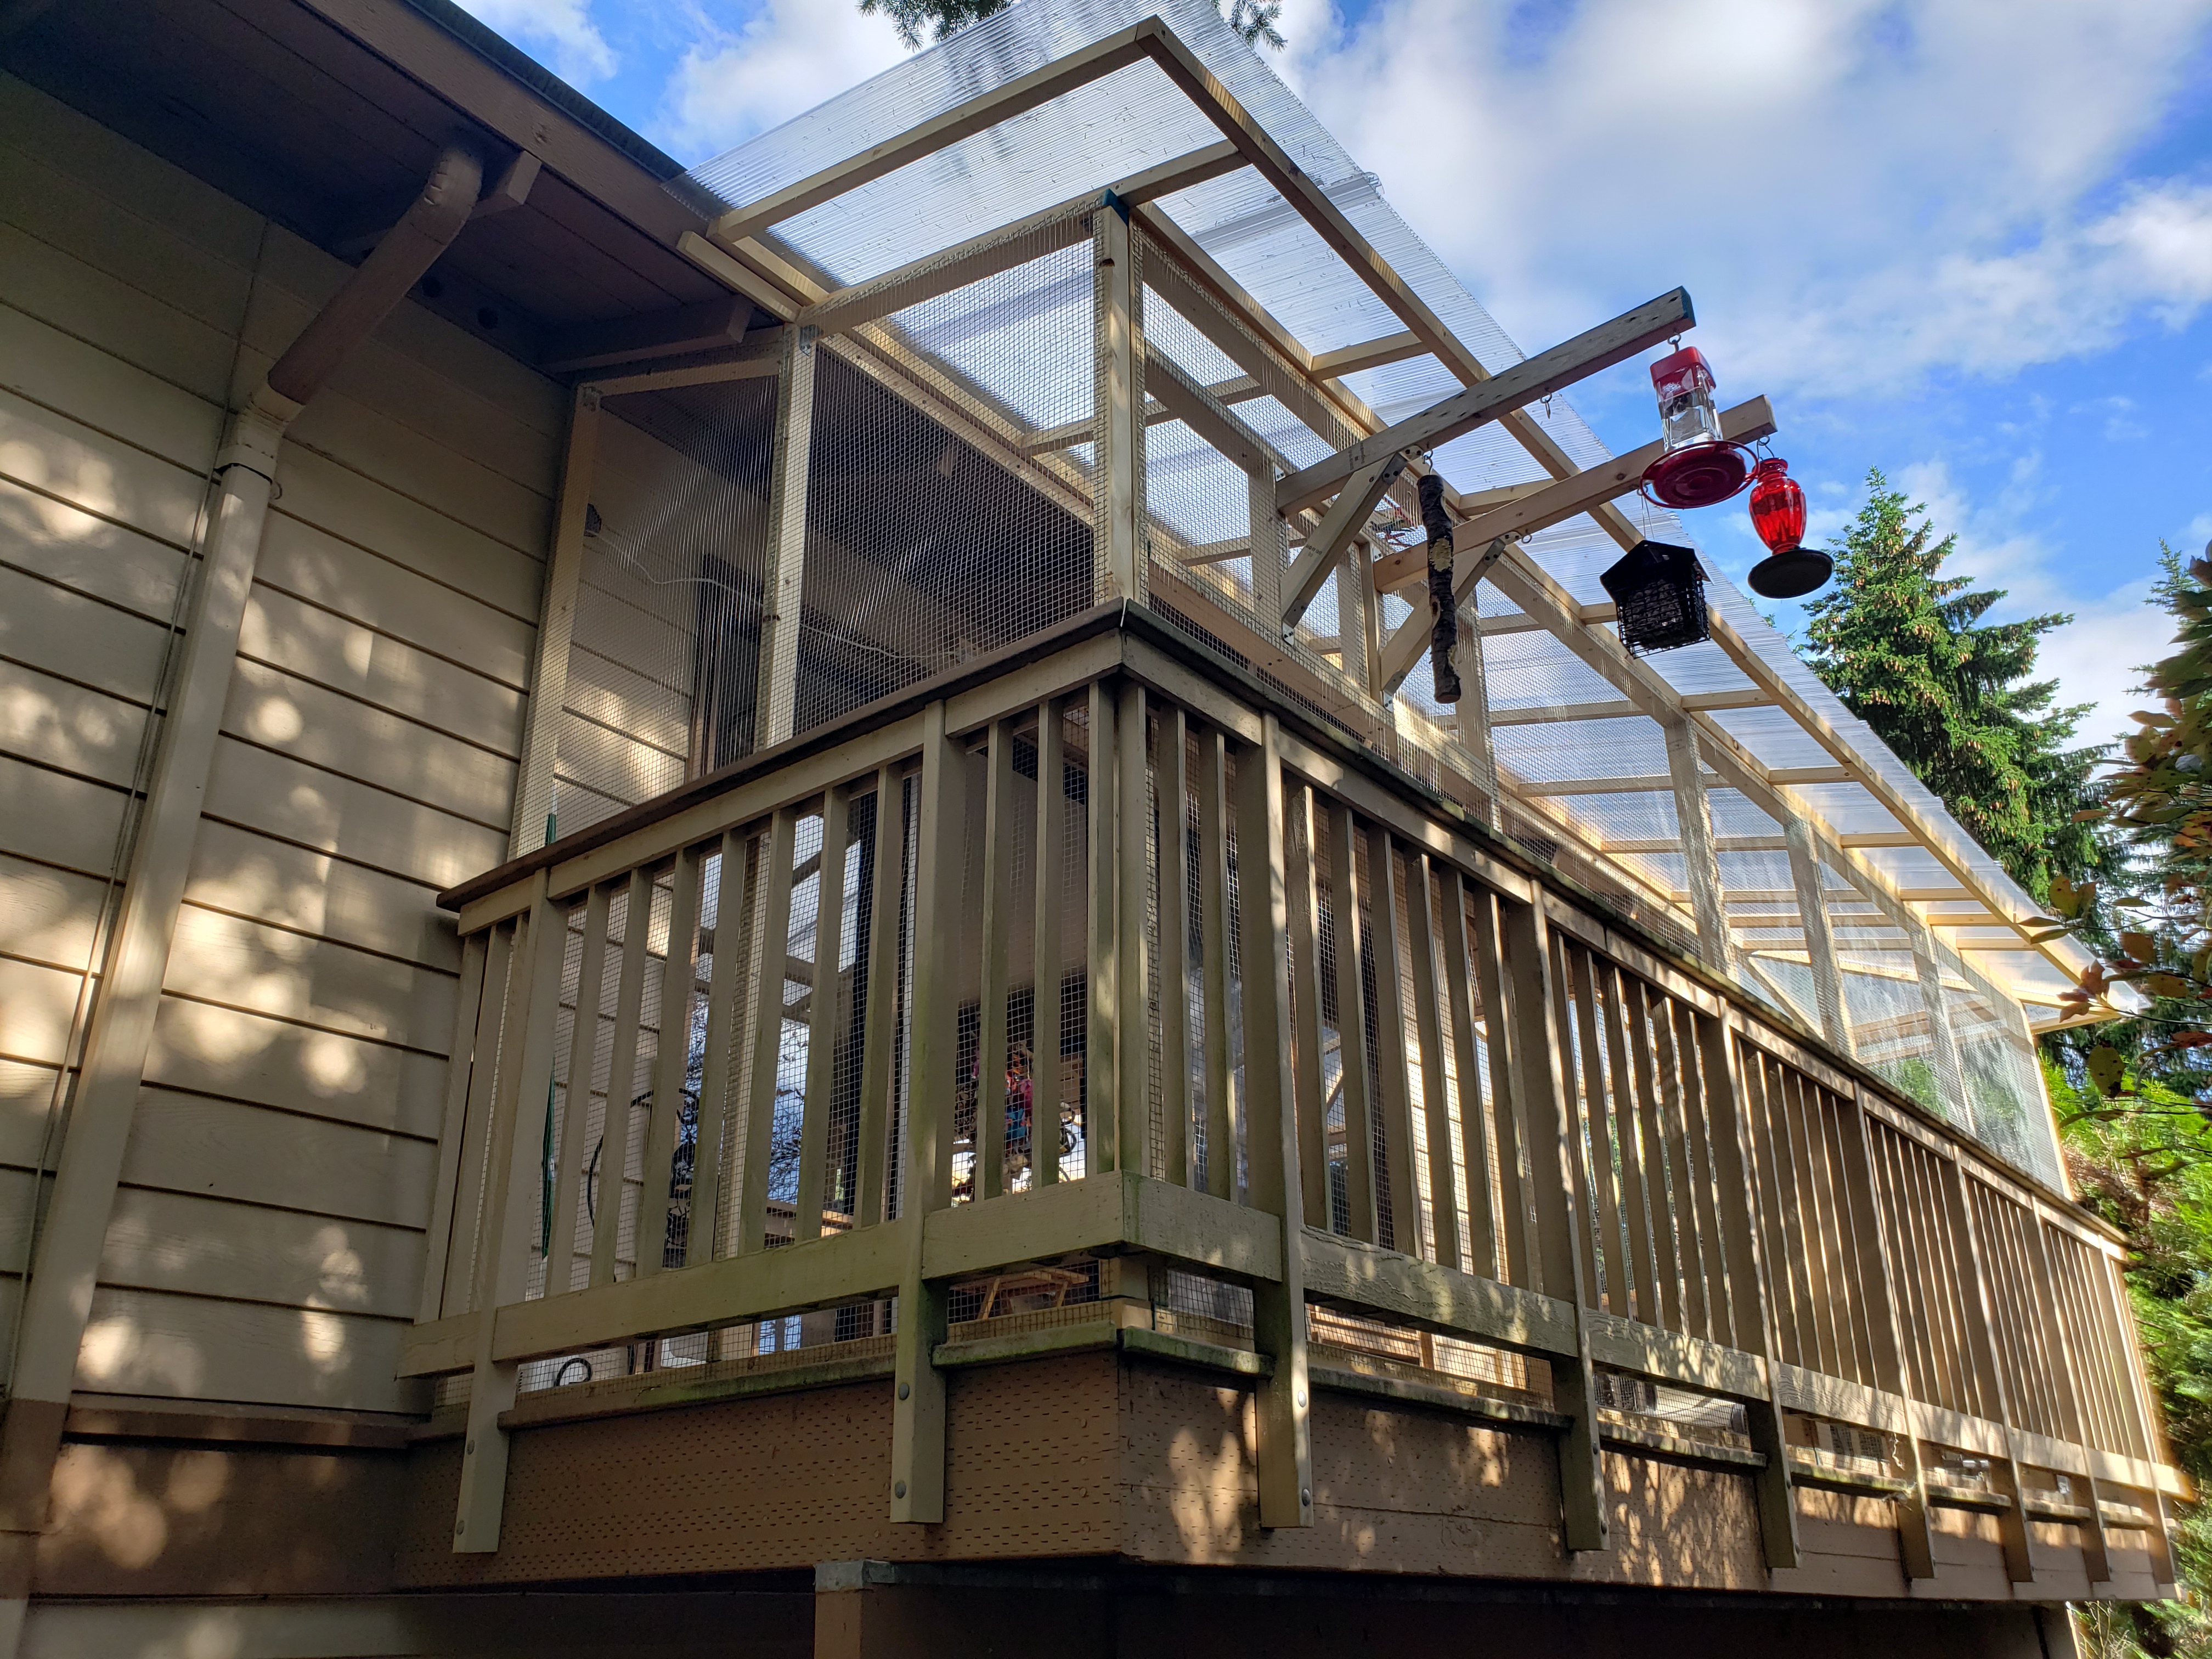
Next, I made 2 posts on which to hang the bird feeders outside. Make sure they’re not too long, since it may be difficult to reach their end through the window.

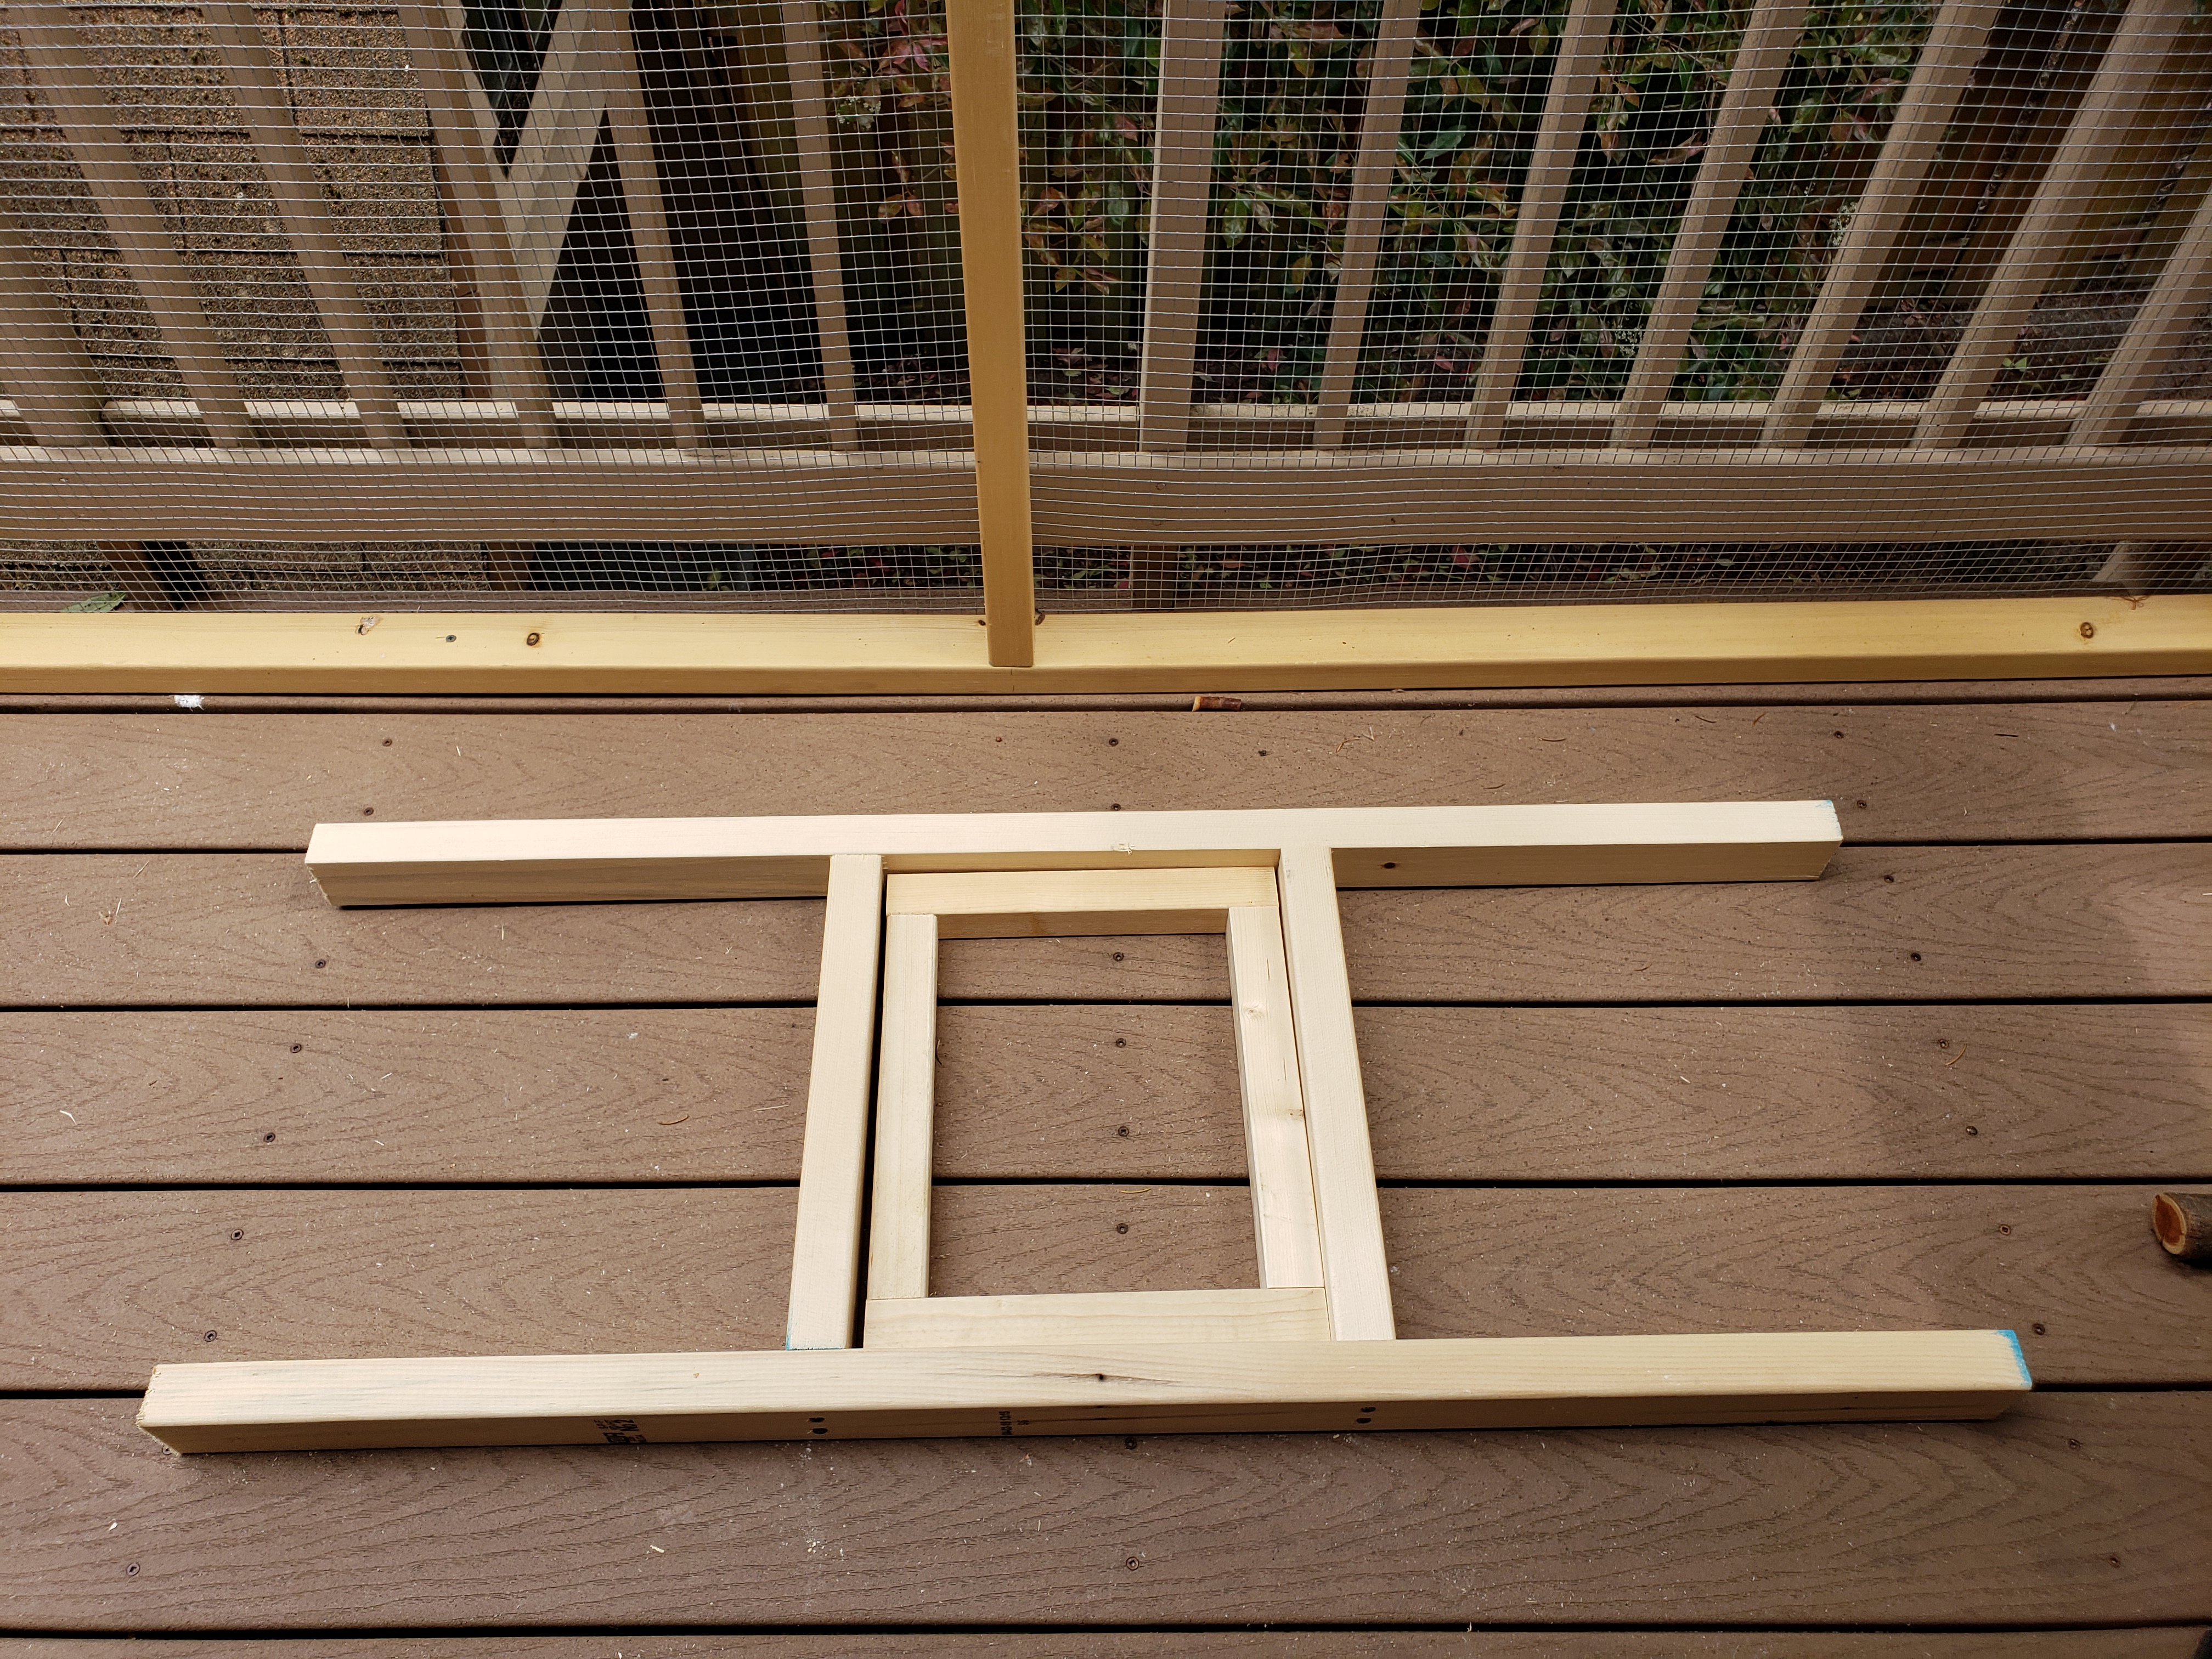
Now I’m going to get a bit ahead – I did an additional roof over the bird feeders at the very end, even though it would have been easier to put it on at this time, before the wall was put back in place. Thus I’m not going chronologically with this part of the project – but showing how it should’ve been done instead.
The frame for roof was very simple, just measured the distance between feeder posts and added some slope.
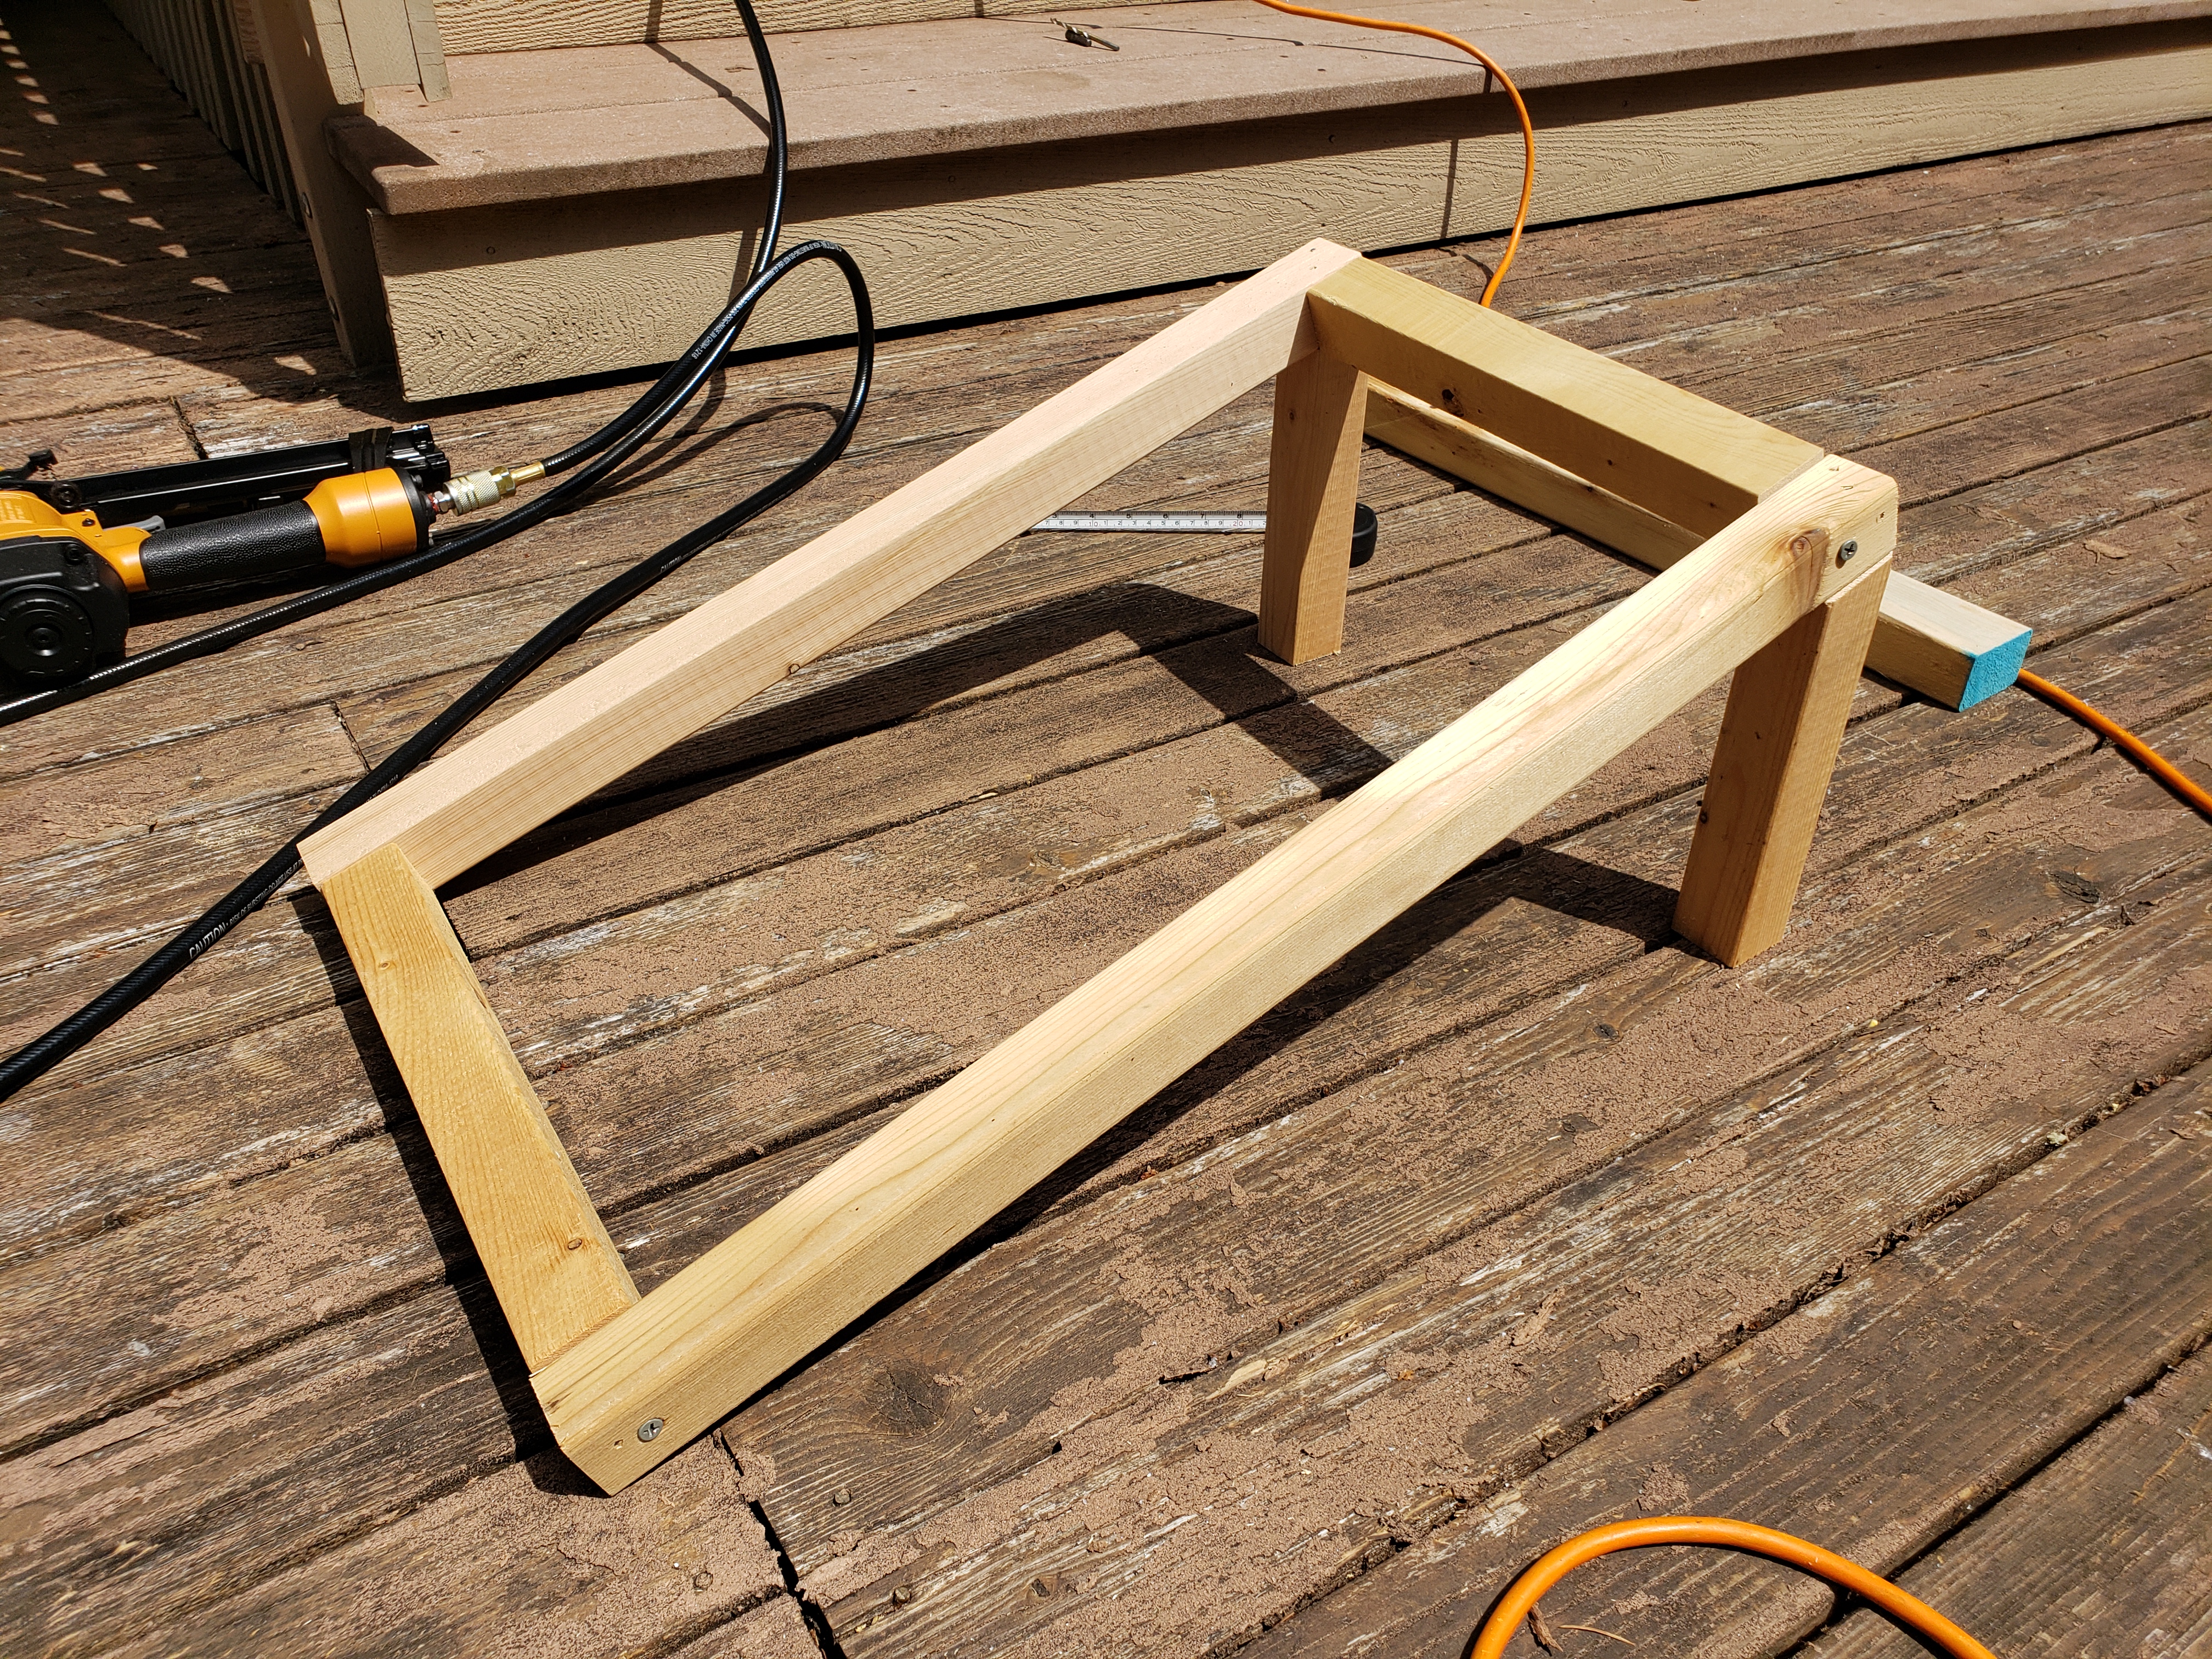
I positioned it on the table, with the support hanging on the side, to make the screwing of polycarbonate panel easier. Please see the next section for details on that part.
Now, as I mentioned, this small piece of roof was added at the very end. It wouldn’t fit through the window I added, so I had to lift it up on a rope, from the ground. It went way easier than I thought (I was worried about dropping it).

I used blue painters tape to keep the Simpson ties in place while screwing the roof piece onto the feeder posts:

(alright, now back to the chronological order of the project, which is why roof will again be missing for few photos)
And so the newly upgraded wall was back in place (as I mentioned, I put the roof over this piece in the end):
I used piano hinge to attach the window. The hinge itself is quite sturdy, and it’s a small window to begin with, so I don’t think there’s any risk of it sagging over time. Also, you may see that I was trying to minimize any gaps (there’s a 1/2 inch spacing in the mesh, so I didn’t want any gaps larger than that), so if you happen to have too small spacing around the window, simply sanding down the edge where it’s rubbing on the frame is a quick fix to make sure window opens without issues.
I don’t want to spoil a surprise, but we’ll come back to this part of aviary when making roof… 🙂
All the walls were screwed to adjacent walls and additionally I put few screws into the deck boards to make sure they’re solid in place and won’t move.
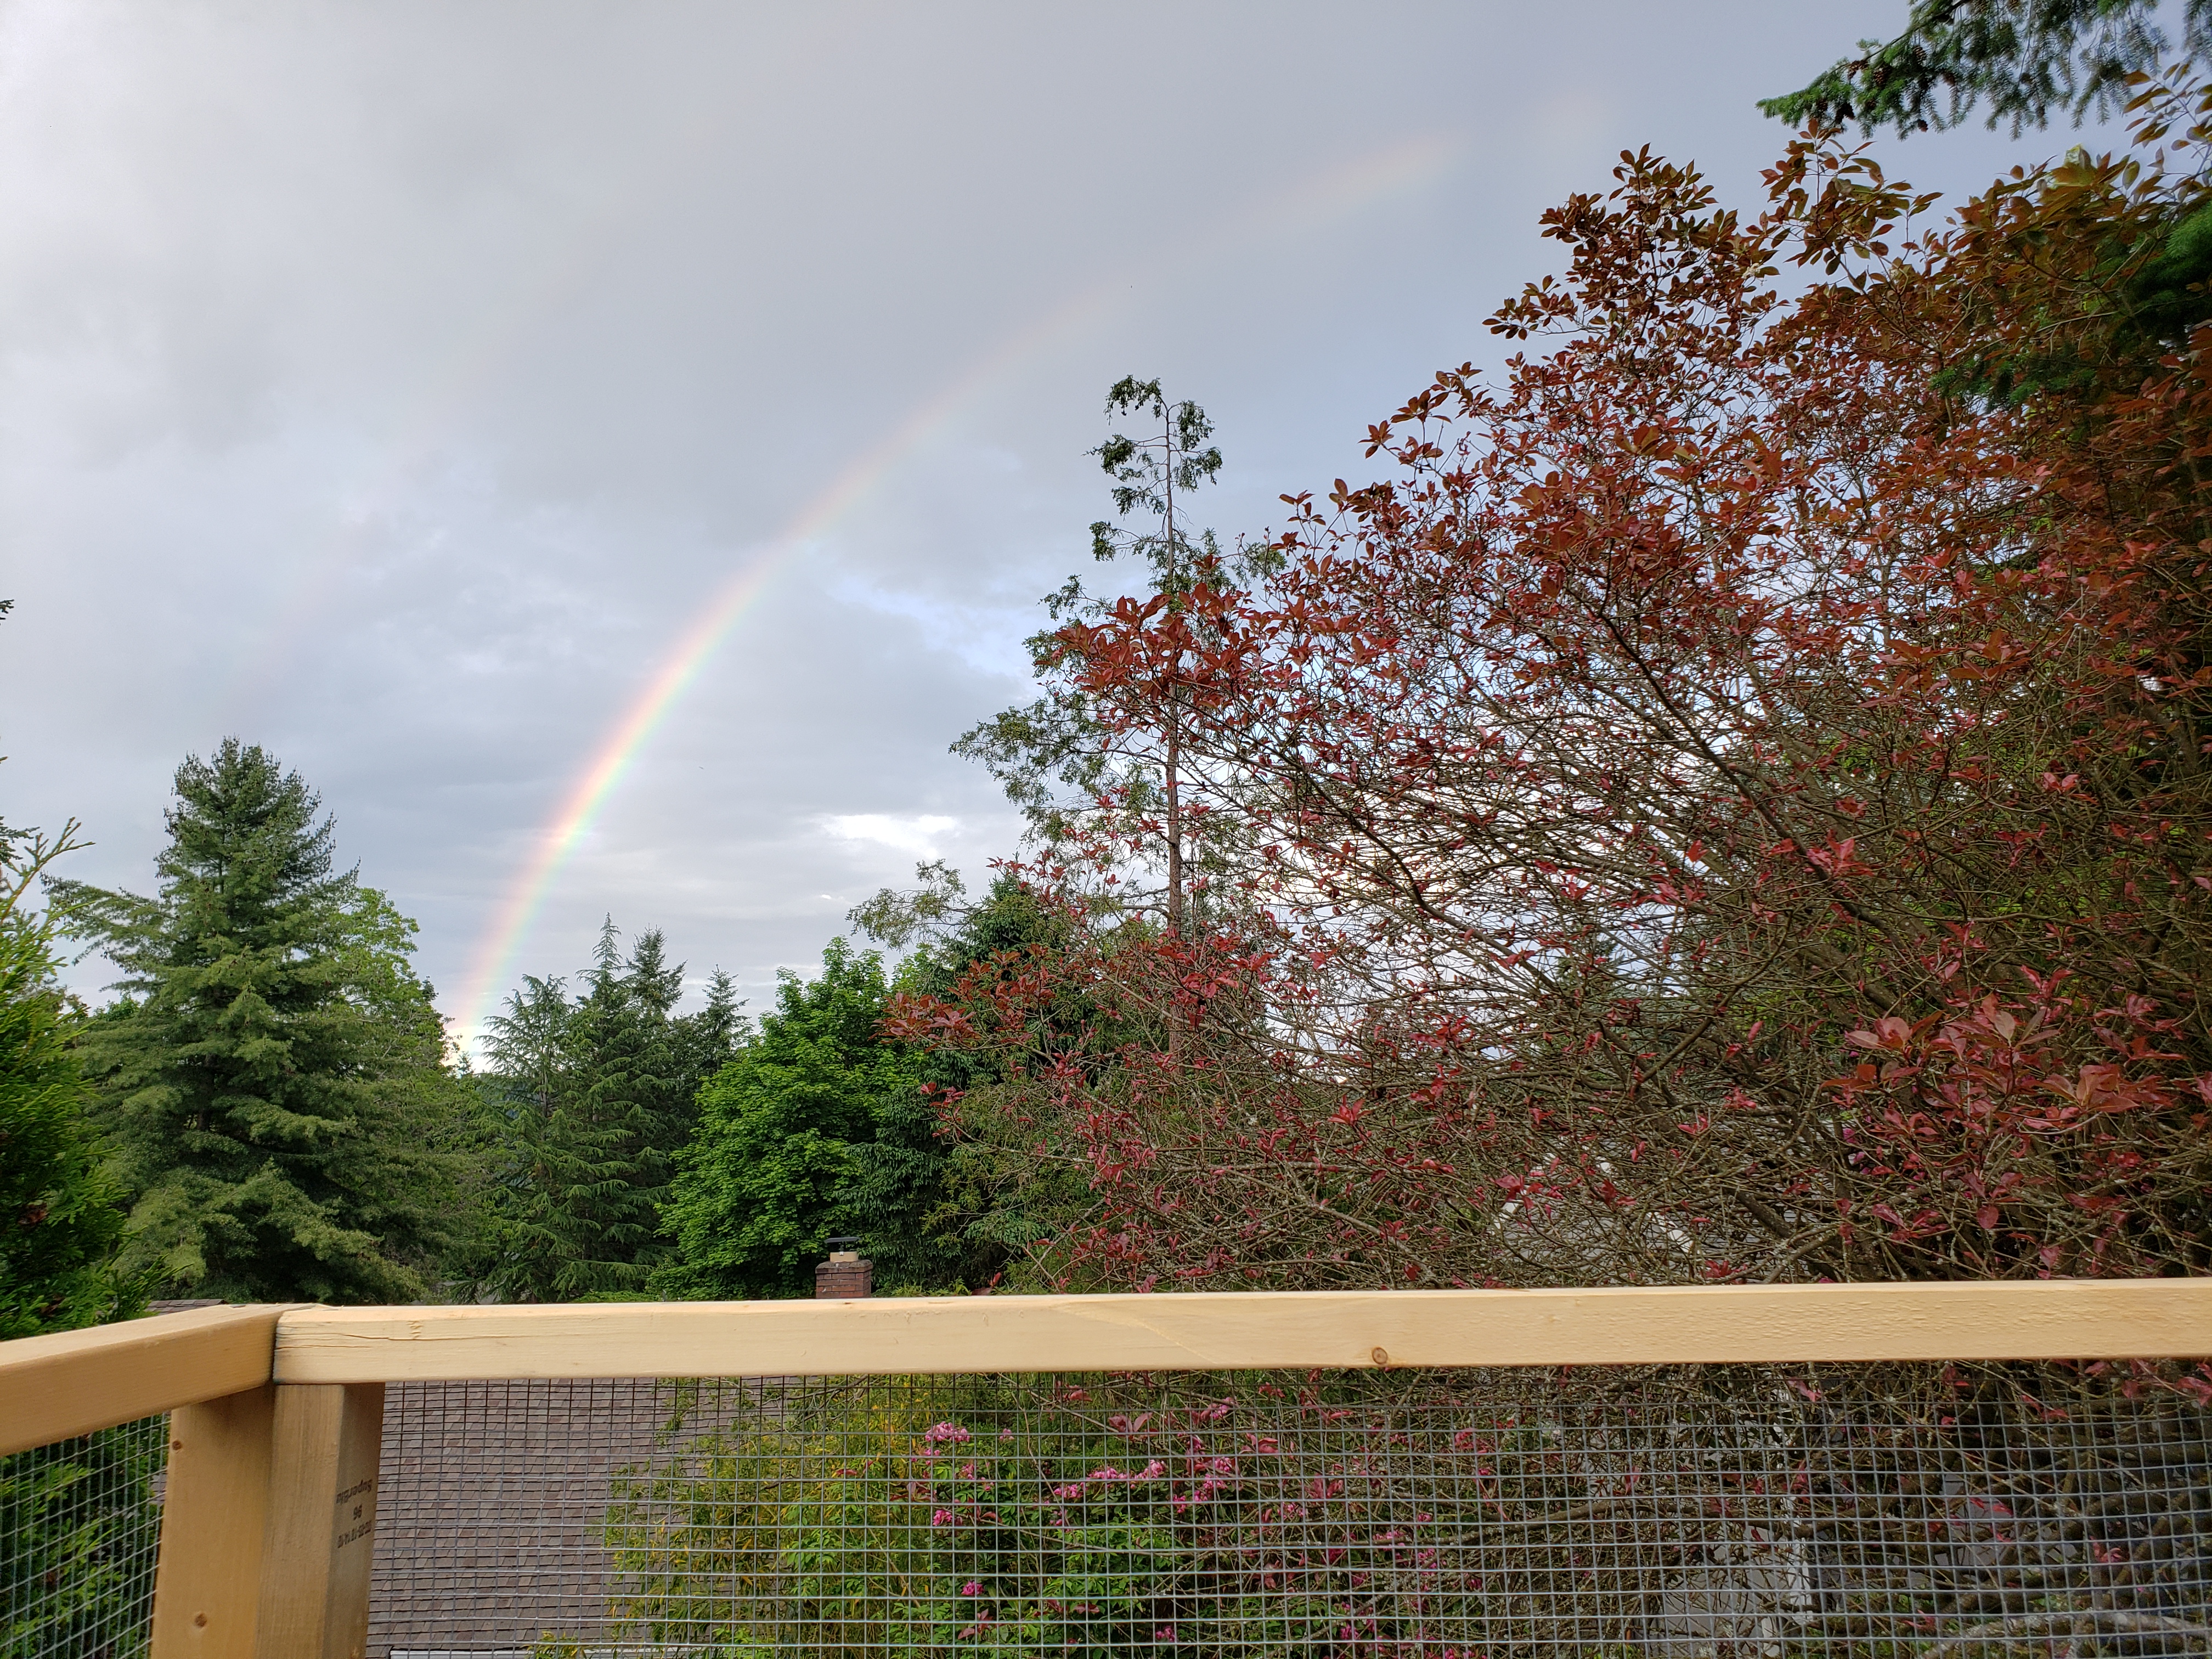
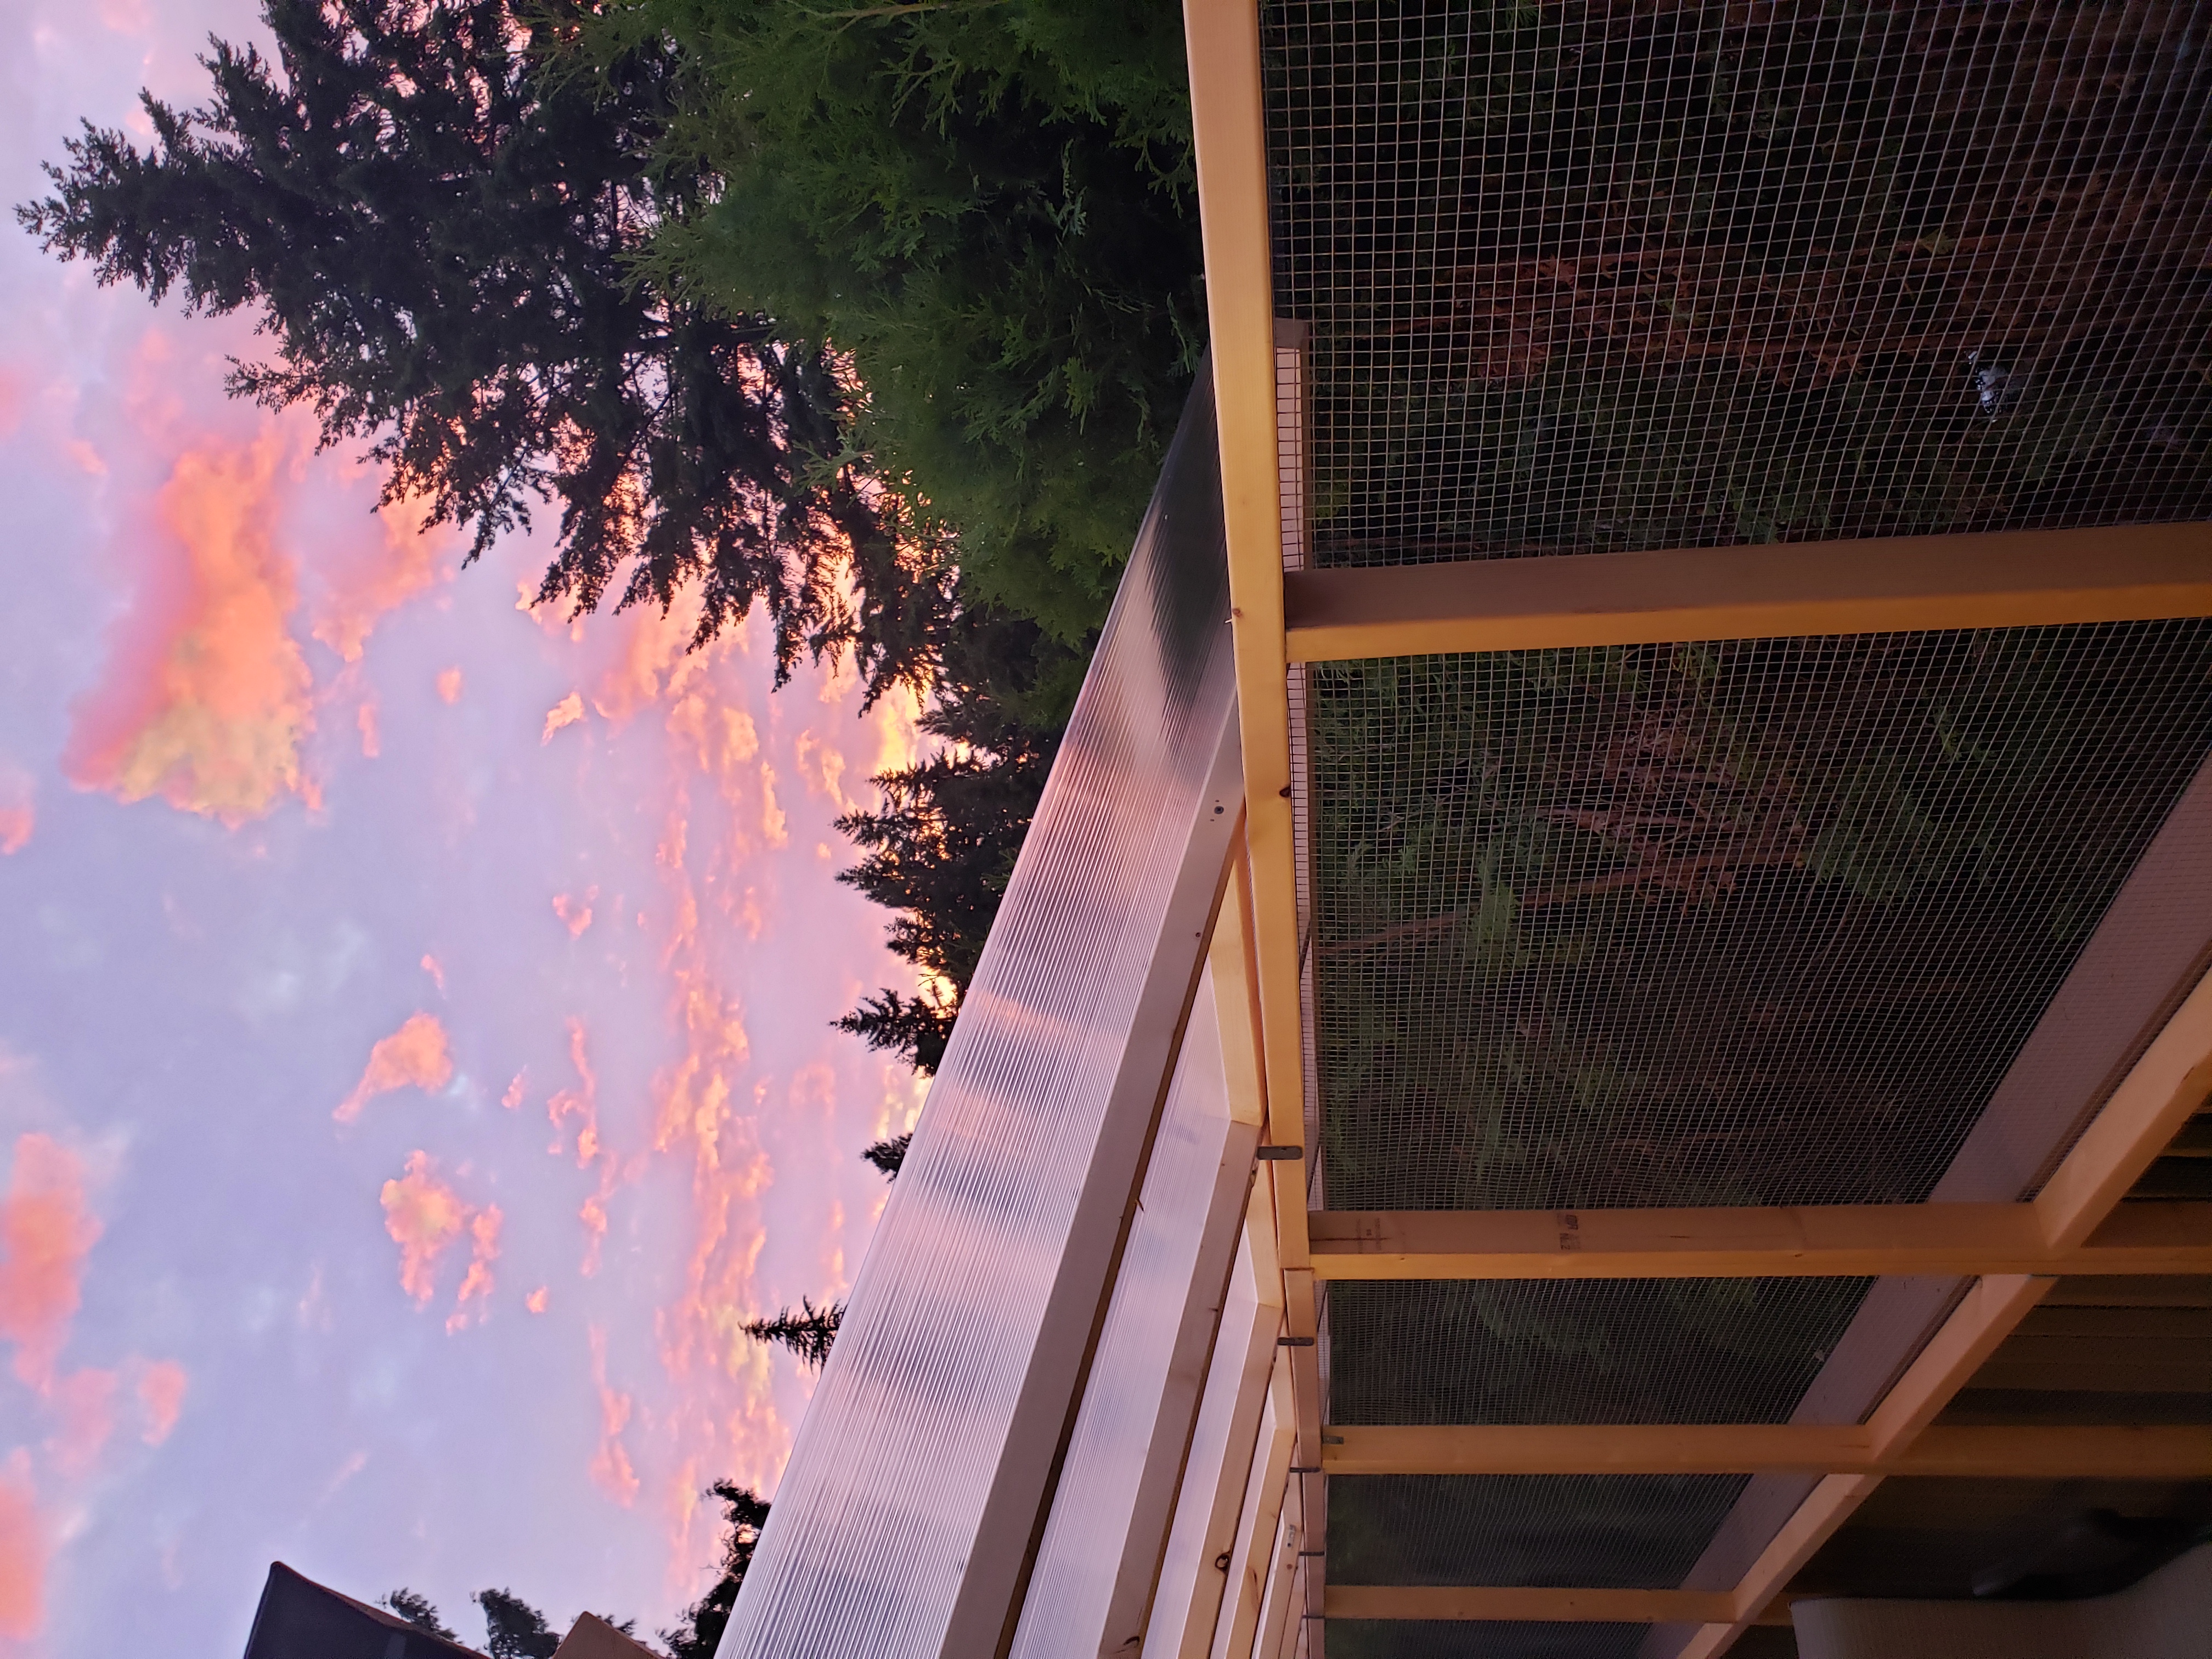
Right on time to admire a rainbow brought by rainy afternoon…
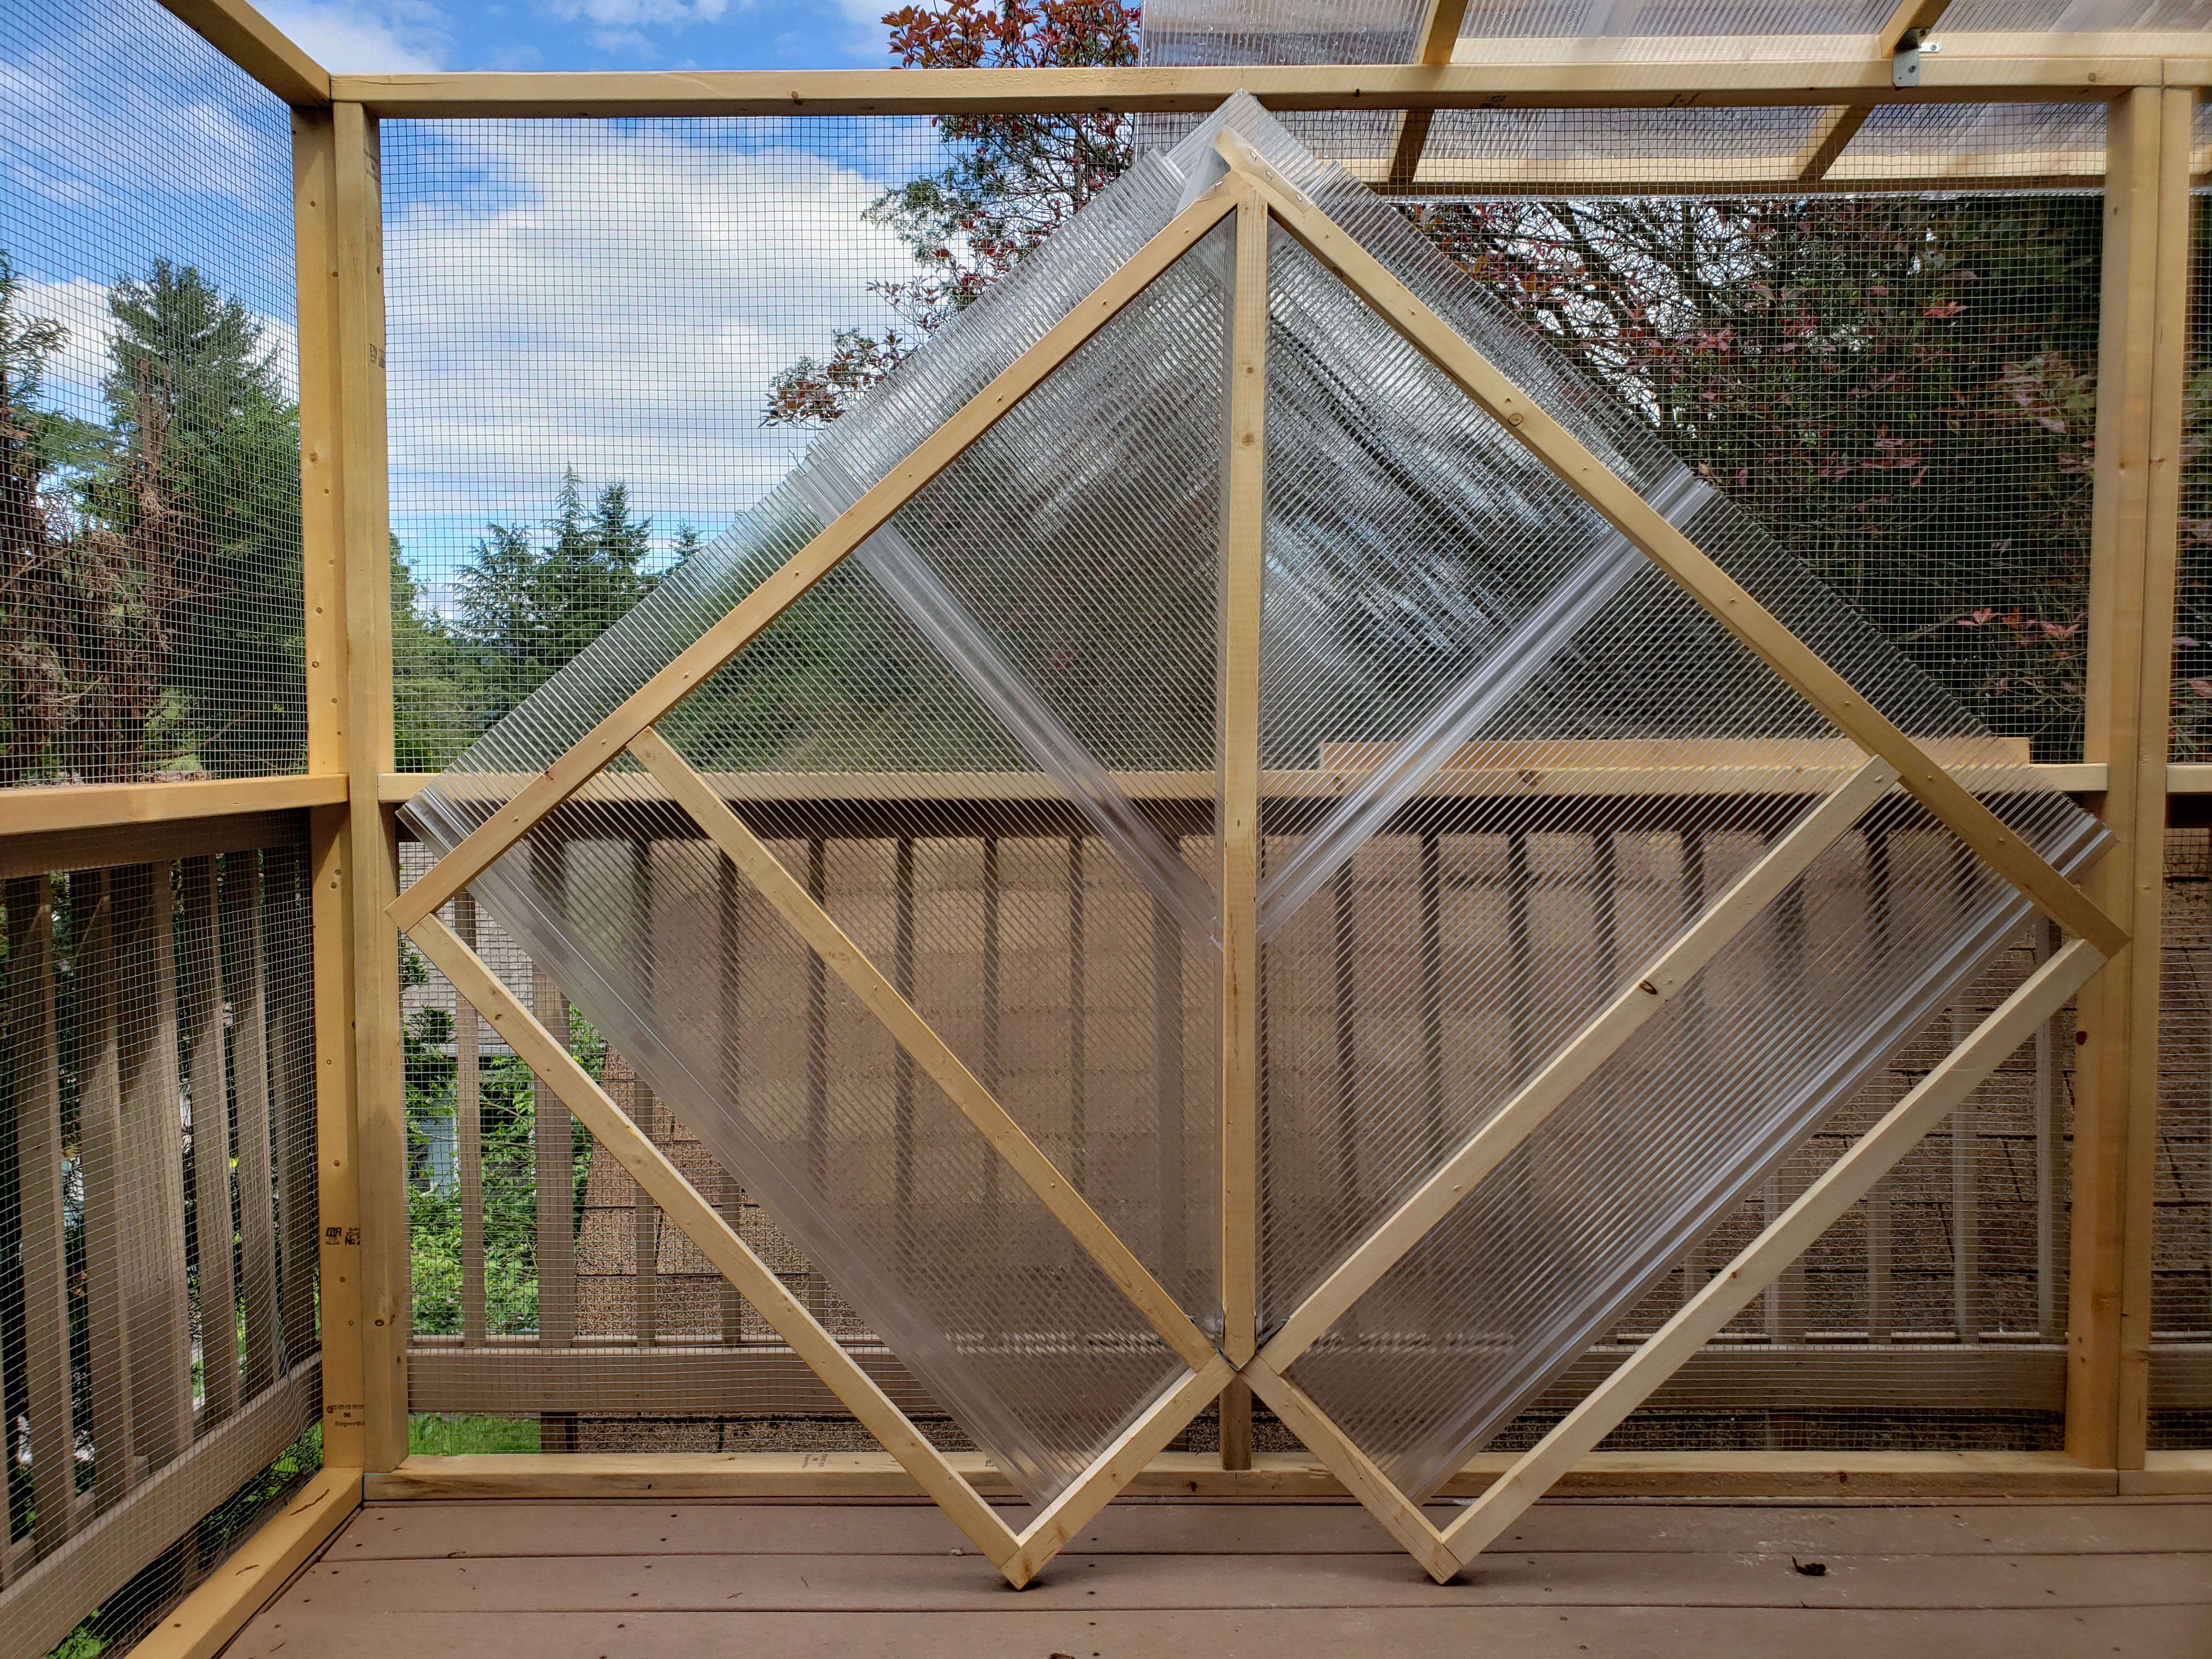
Putting the roof
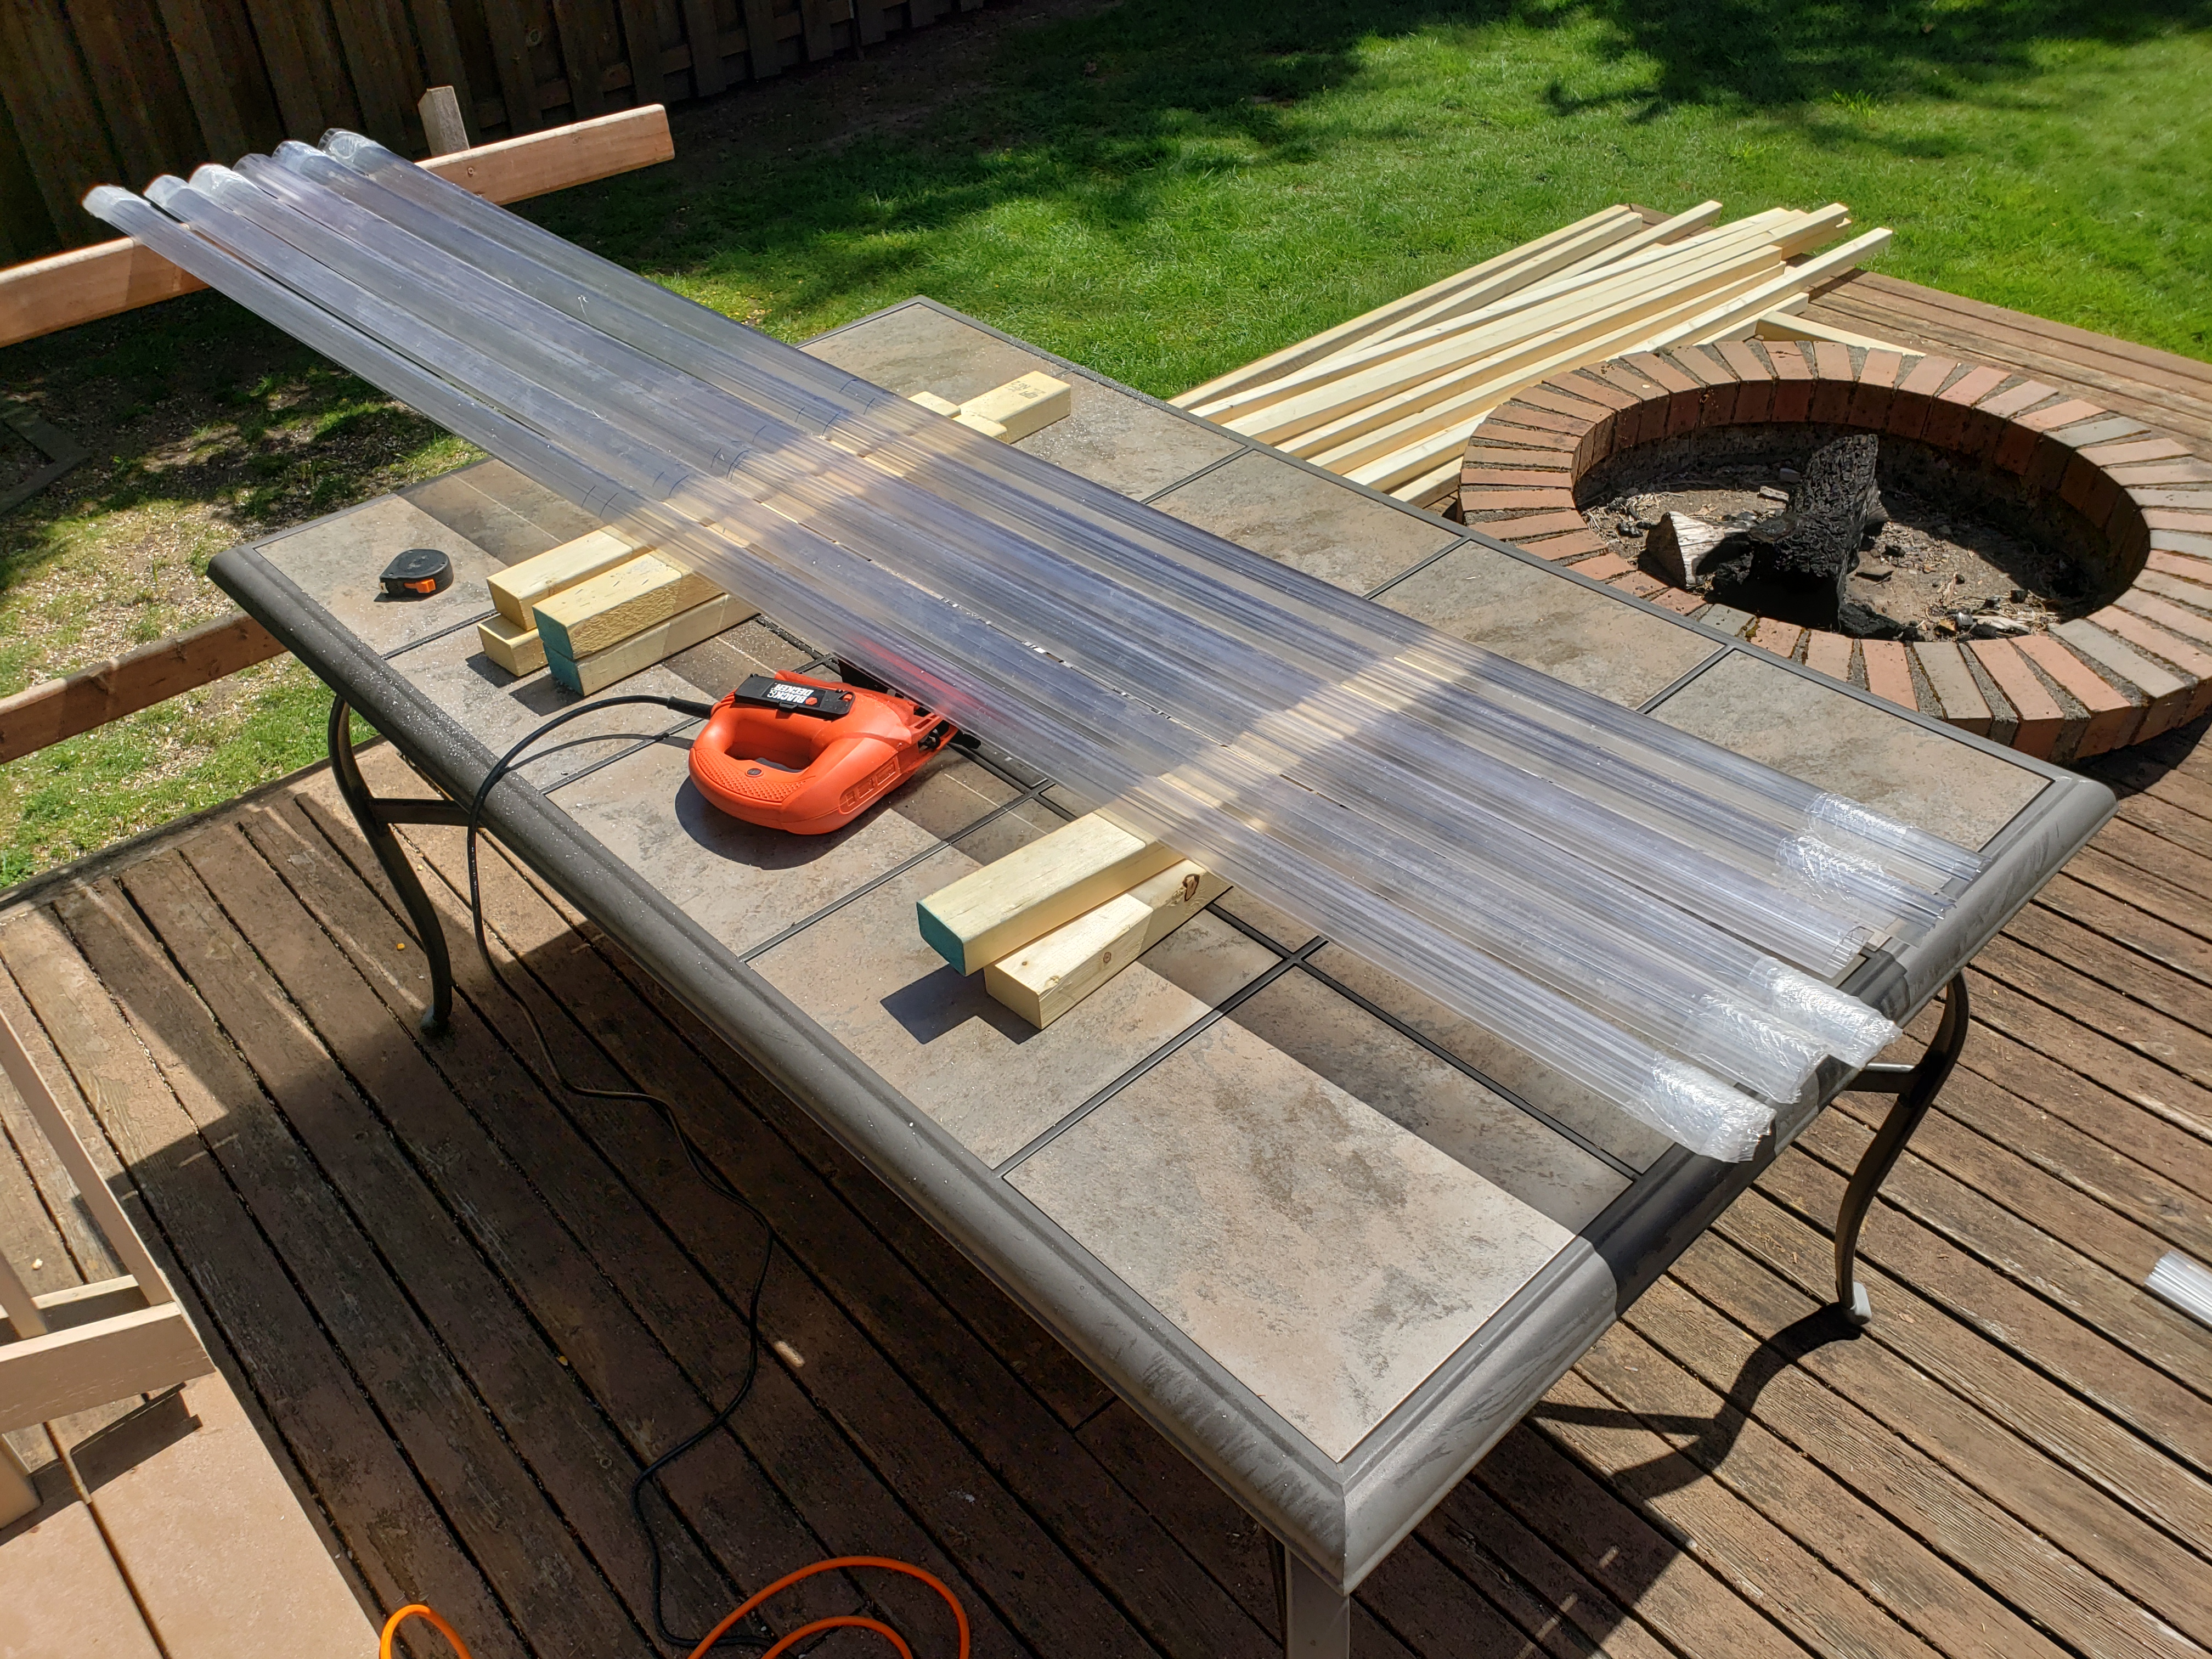
Building the roof is a quite similar process to how we built the walls. Here I’m using 2x2s for framing, and polycarbonate roofing panels (along with the special accessories: U-shaped ending cap for panels, H-connectors, special screws with rubber gaskets – see parts list for more information).
Those panels have few important characteristics:
- only one side is UV protected (the one with printed instructions), so after removing the protective sheets I’d put a small piece of painters tape to clearly indicate the top side, so it doesn’t get mixed up until it’s attached,
- the panels are supposed to be attached so that the inside “ribs” point from the top of the roof to the side – I’m having hard time describing it… Long story short – the panels are 2 ft x 8 ft, but the width of the roof I’m building is only 4 ft from the existing building roof to the overhang of the aviary, thus I had to cut each panel exactly in half.
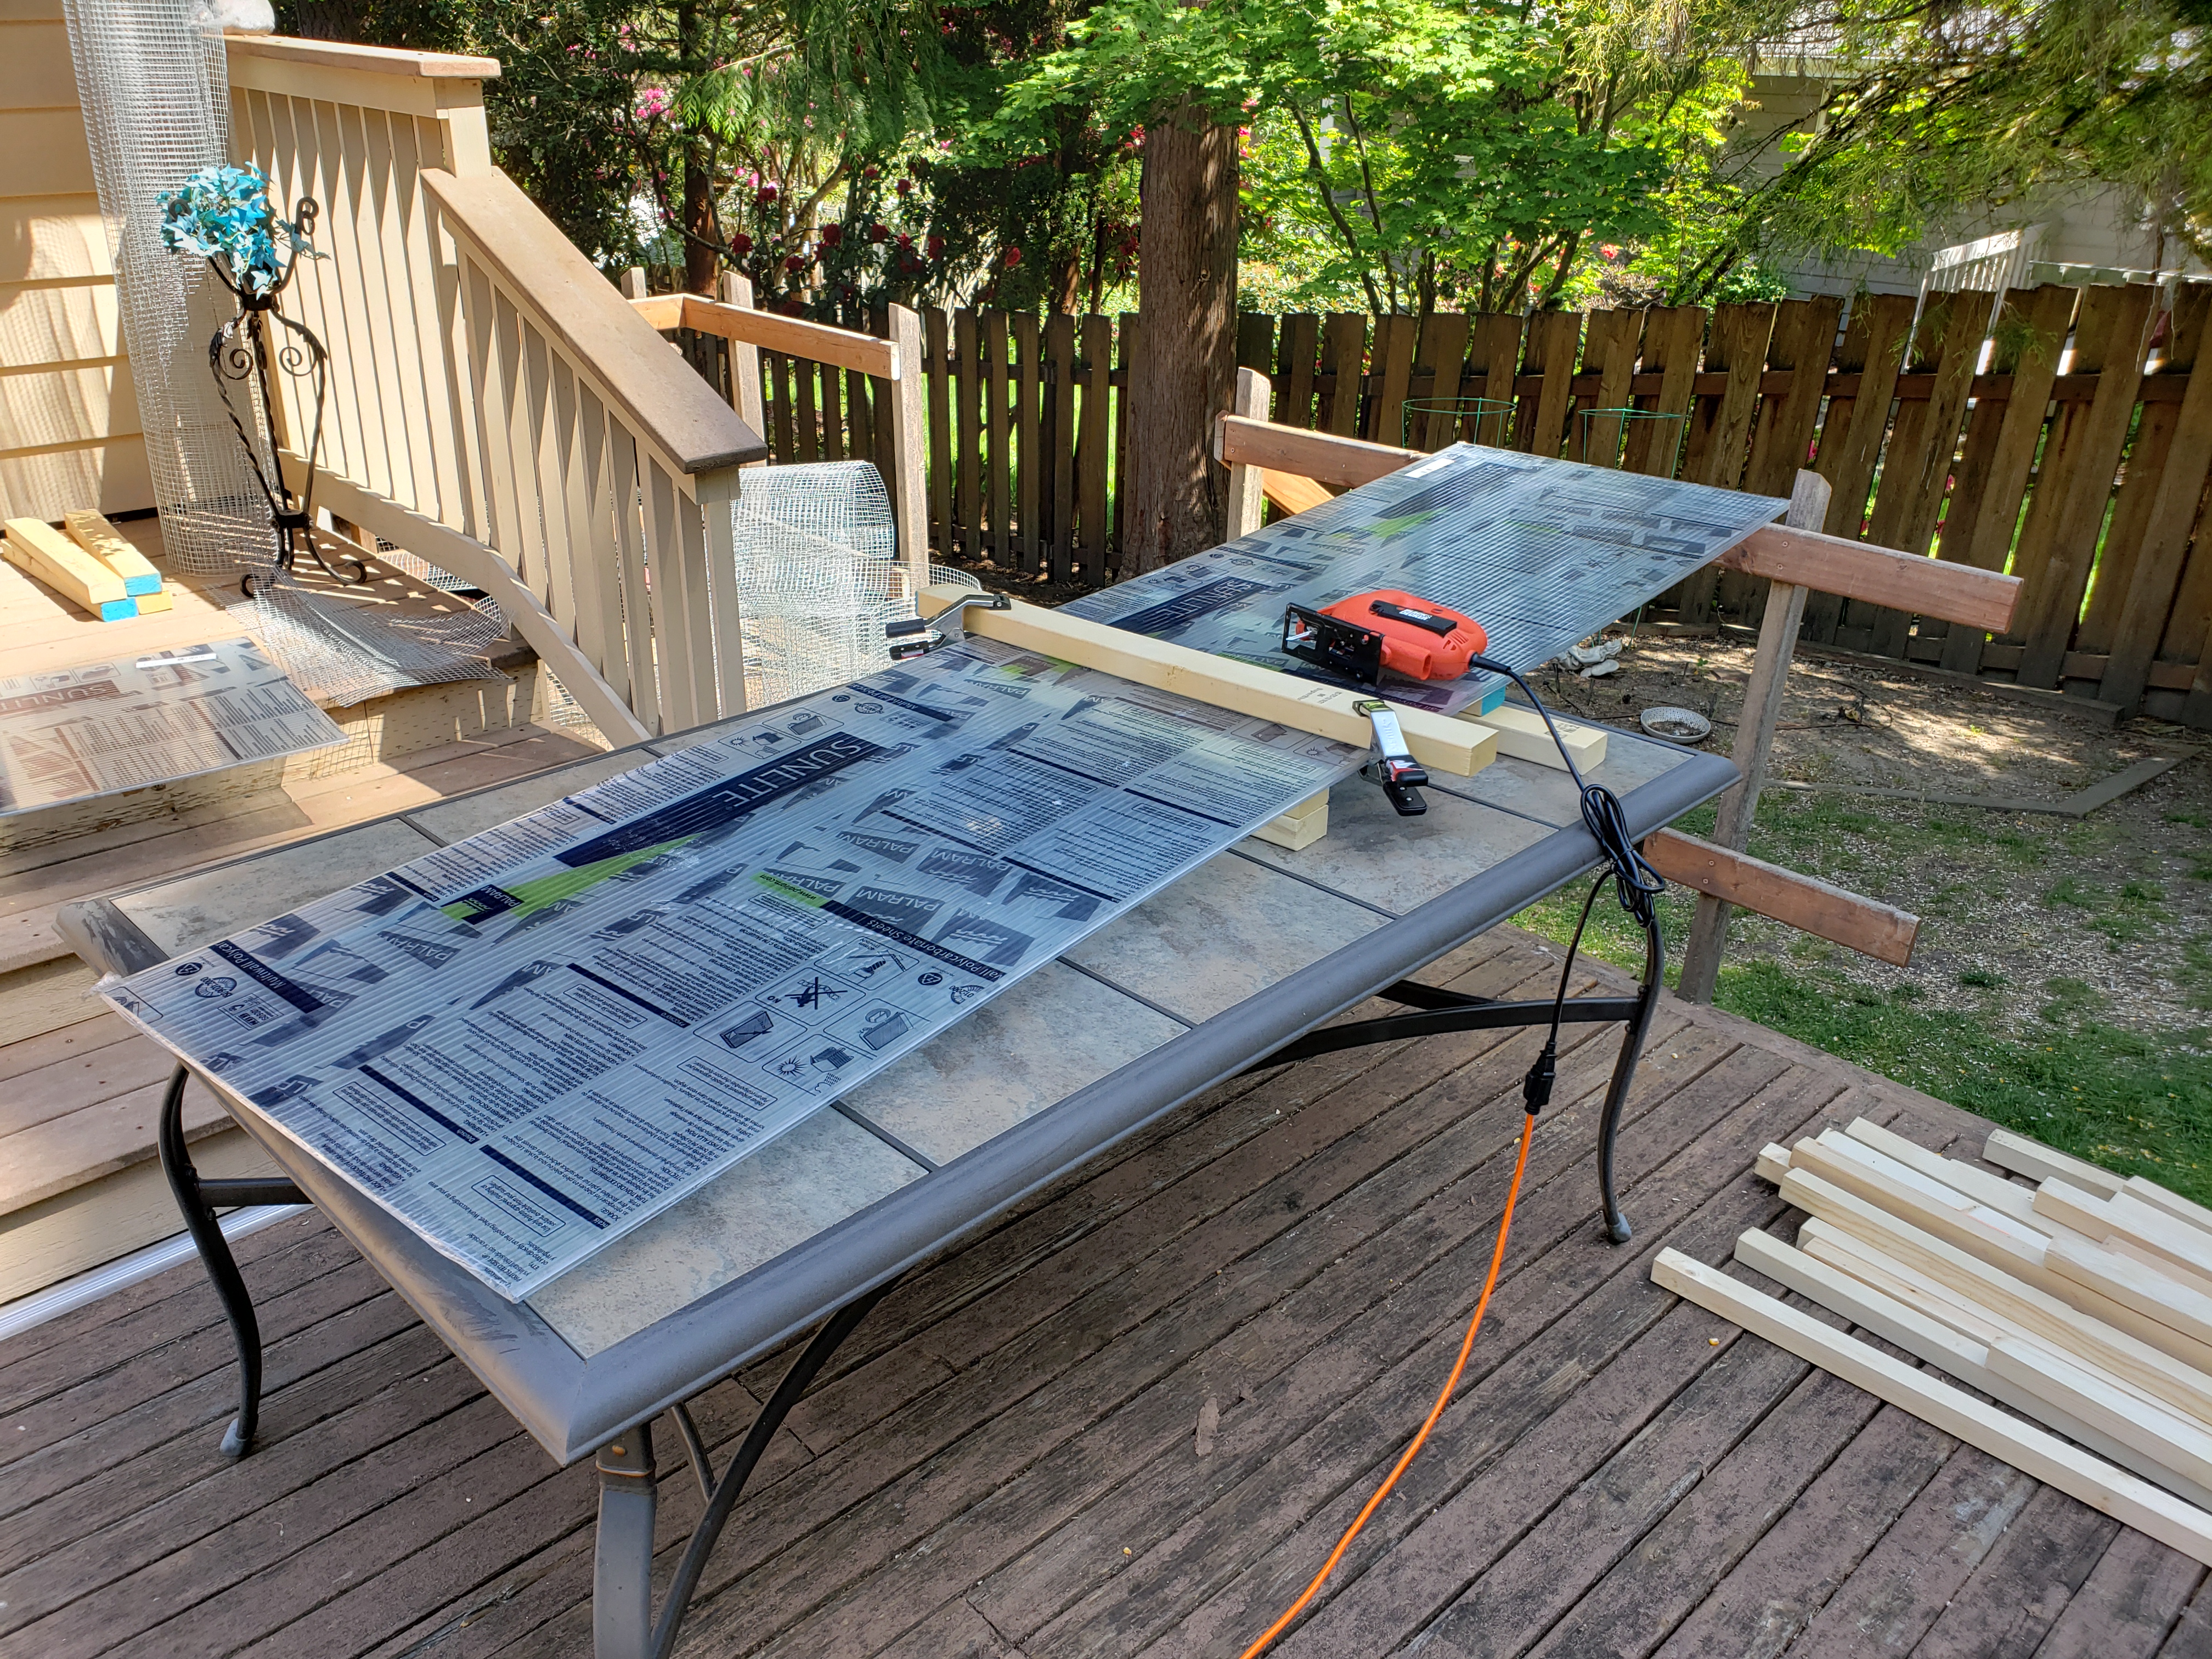
I used a jigsaw to cut both the polycarbonate panels as well as the connectors used to attach them.
Hint: clamp a long piece of wood to the roof panel and use it as a guide for your jigsaw for a perfect cut each time 🙂
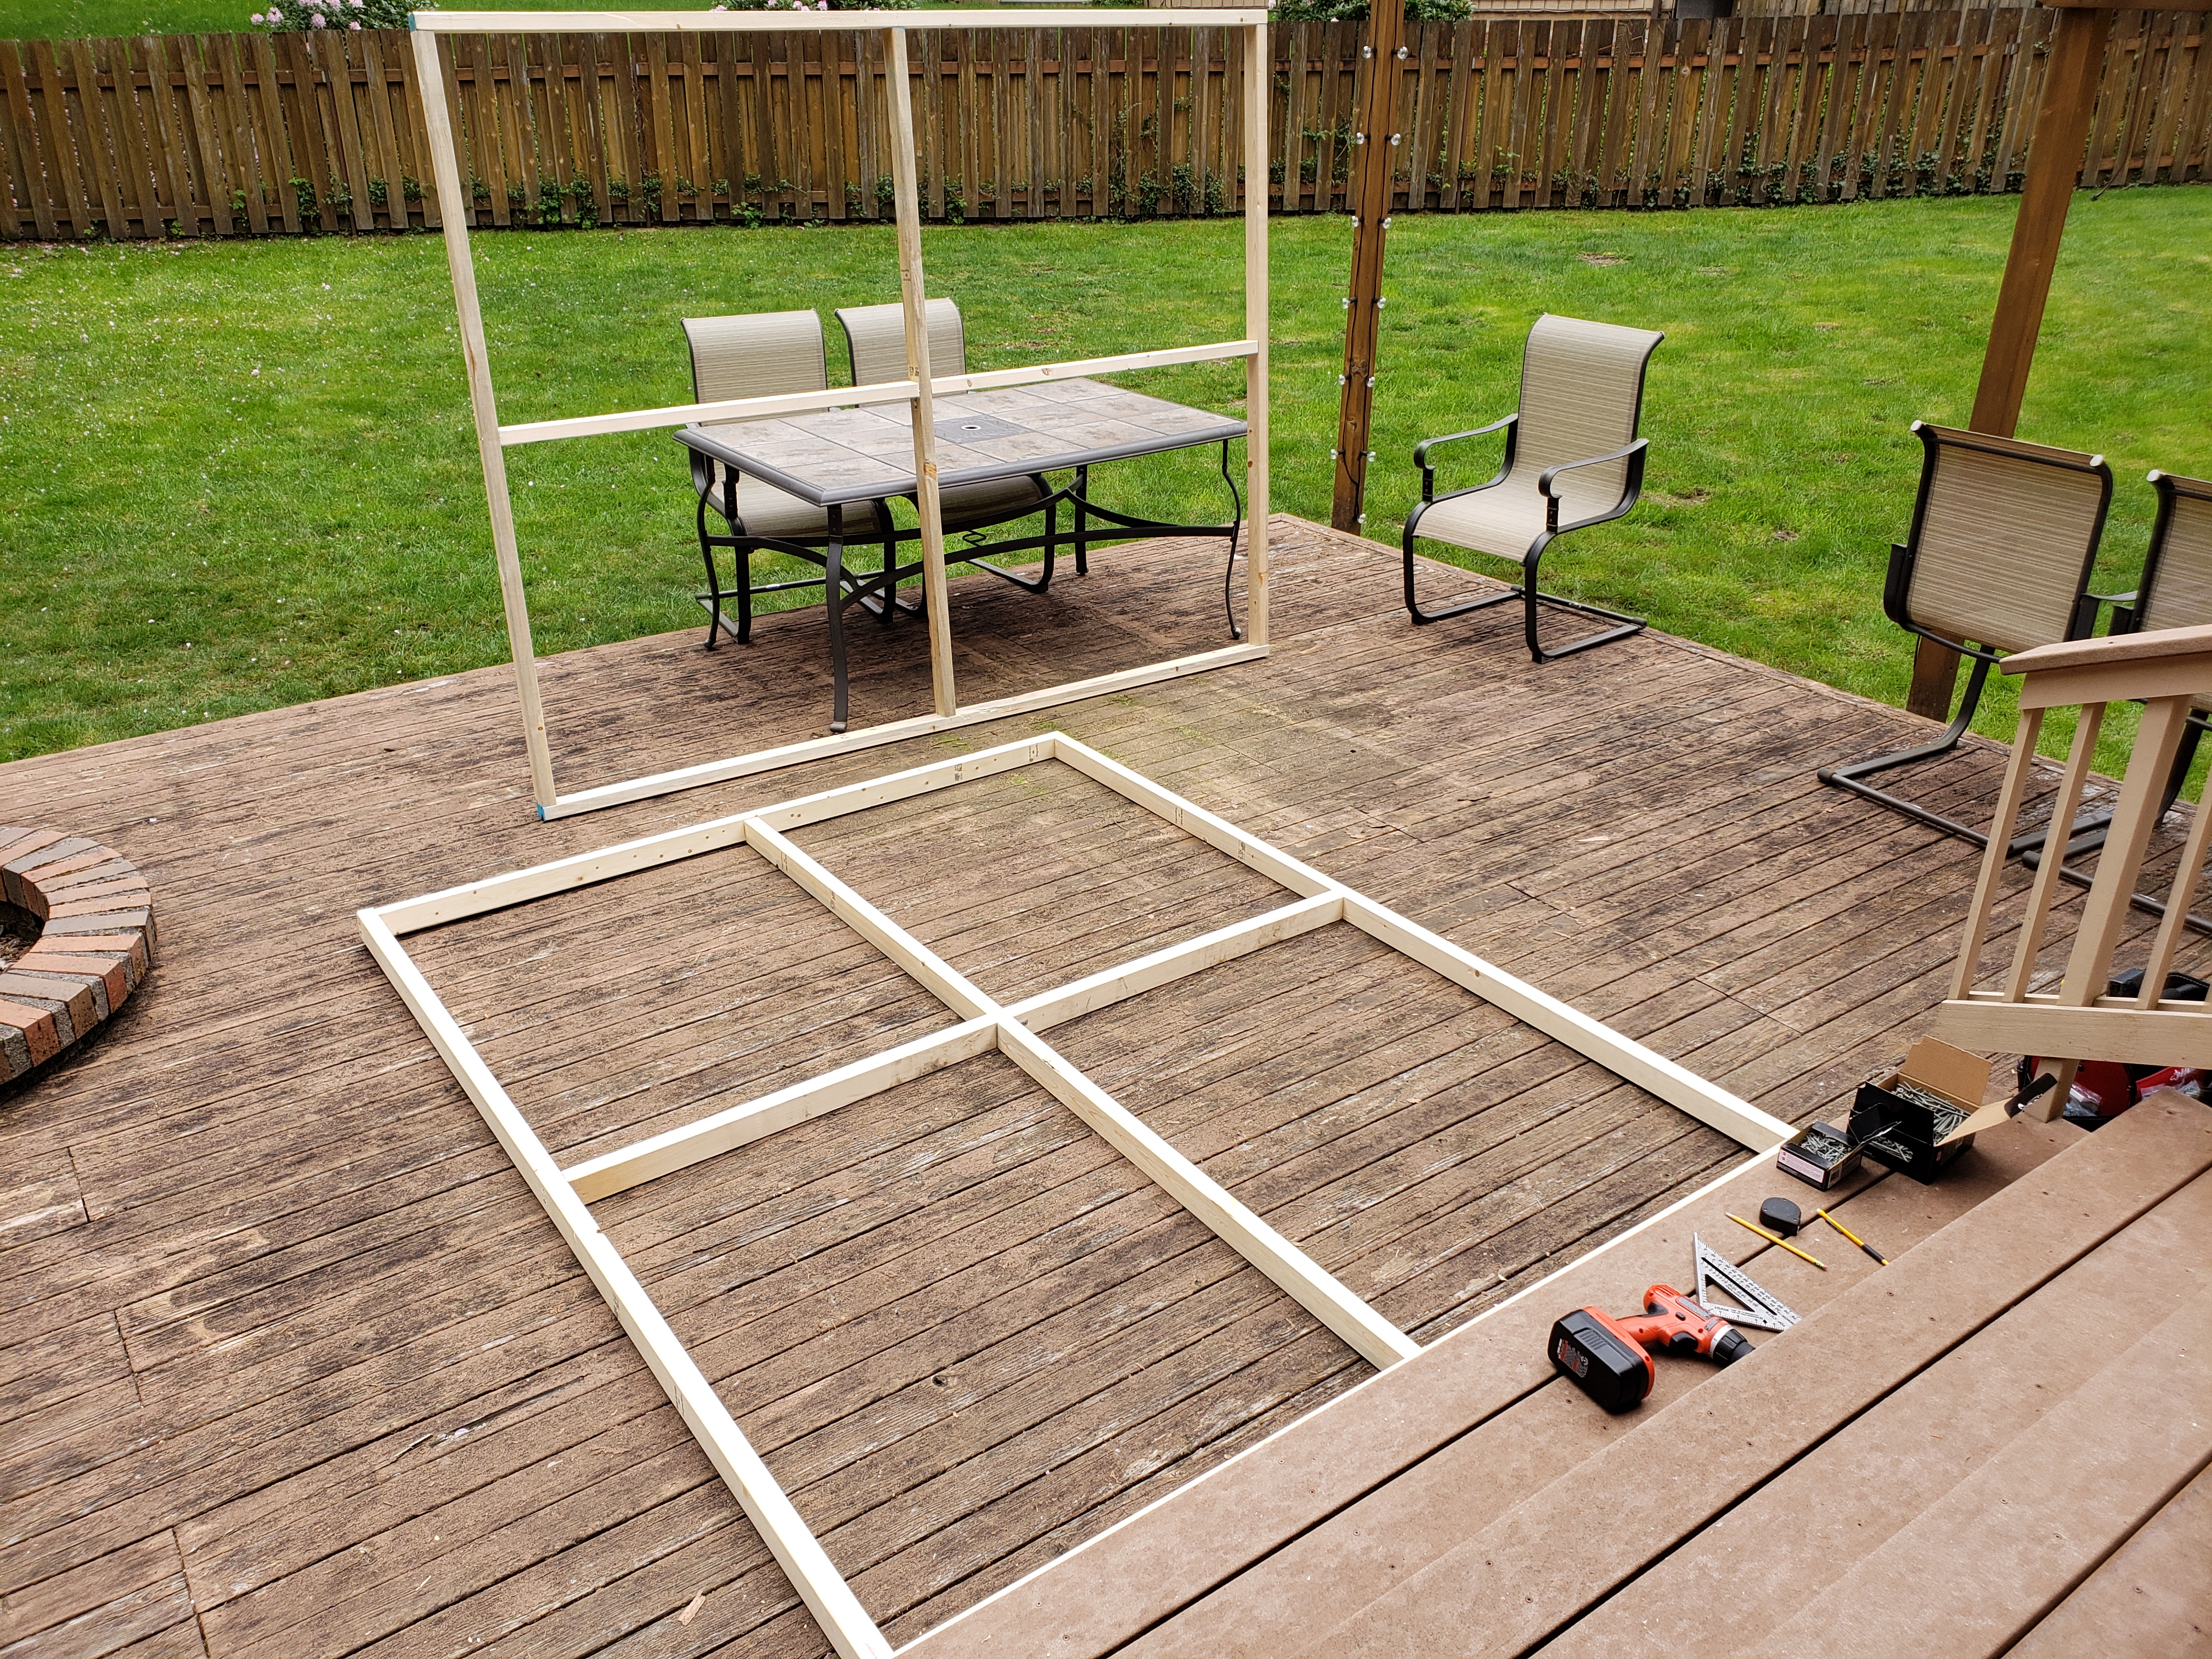
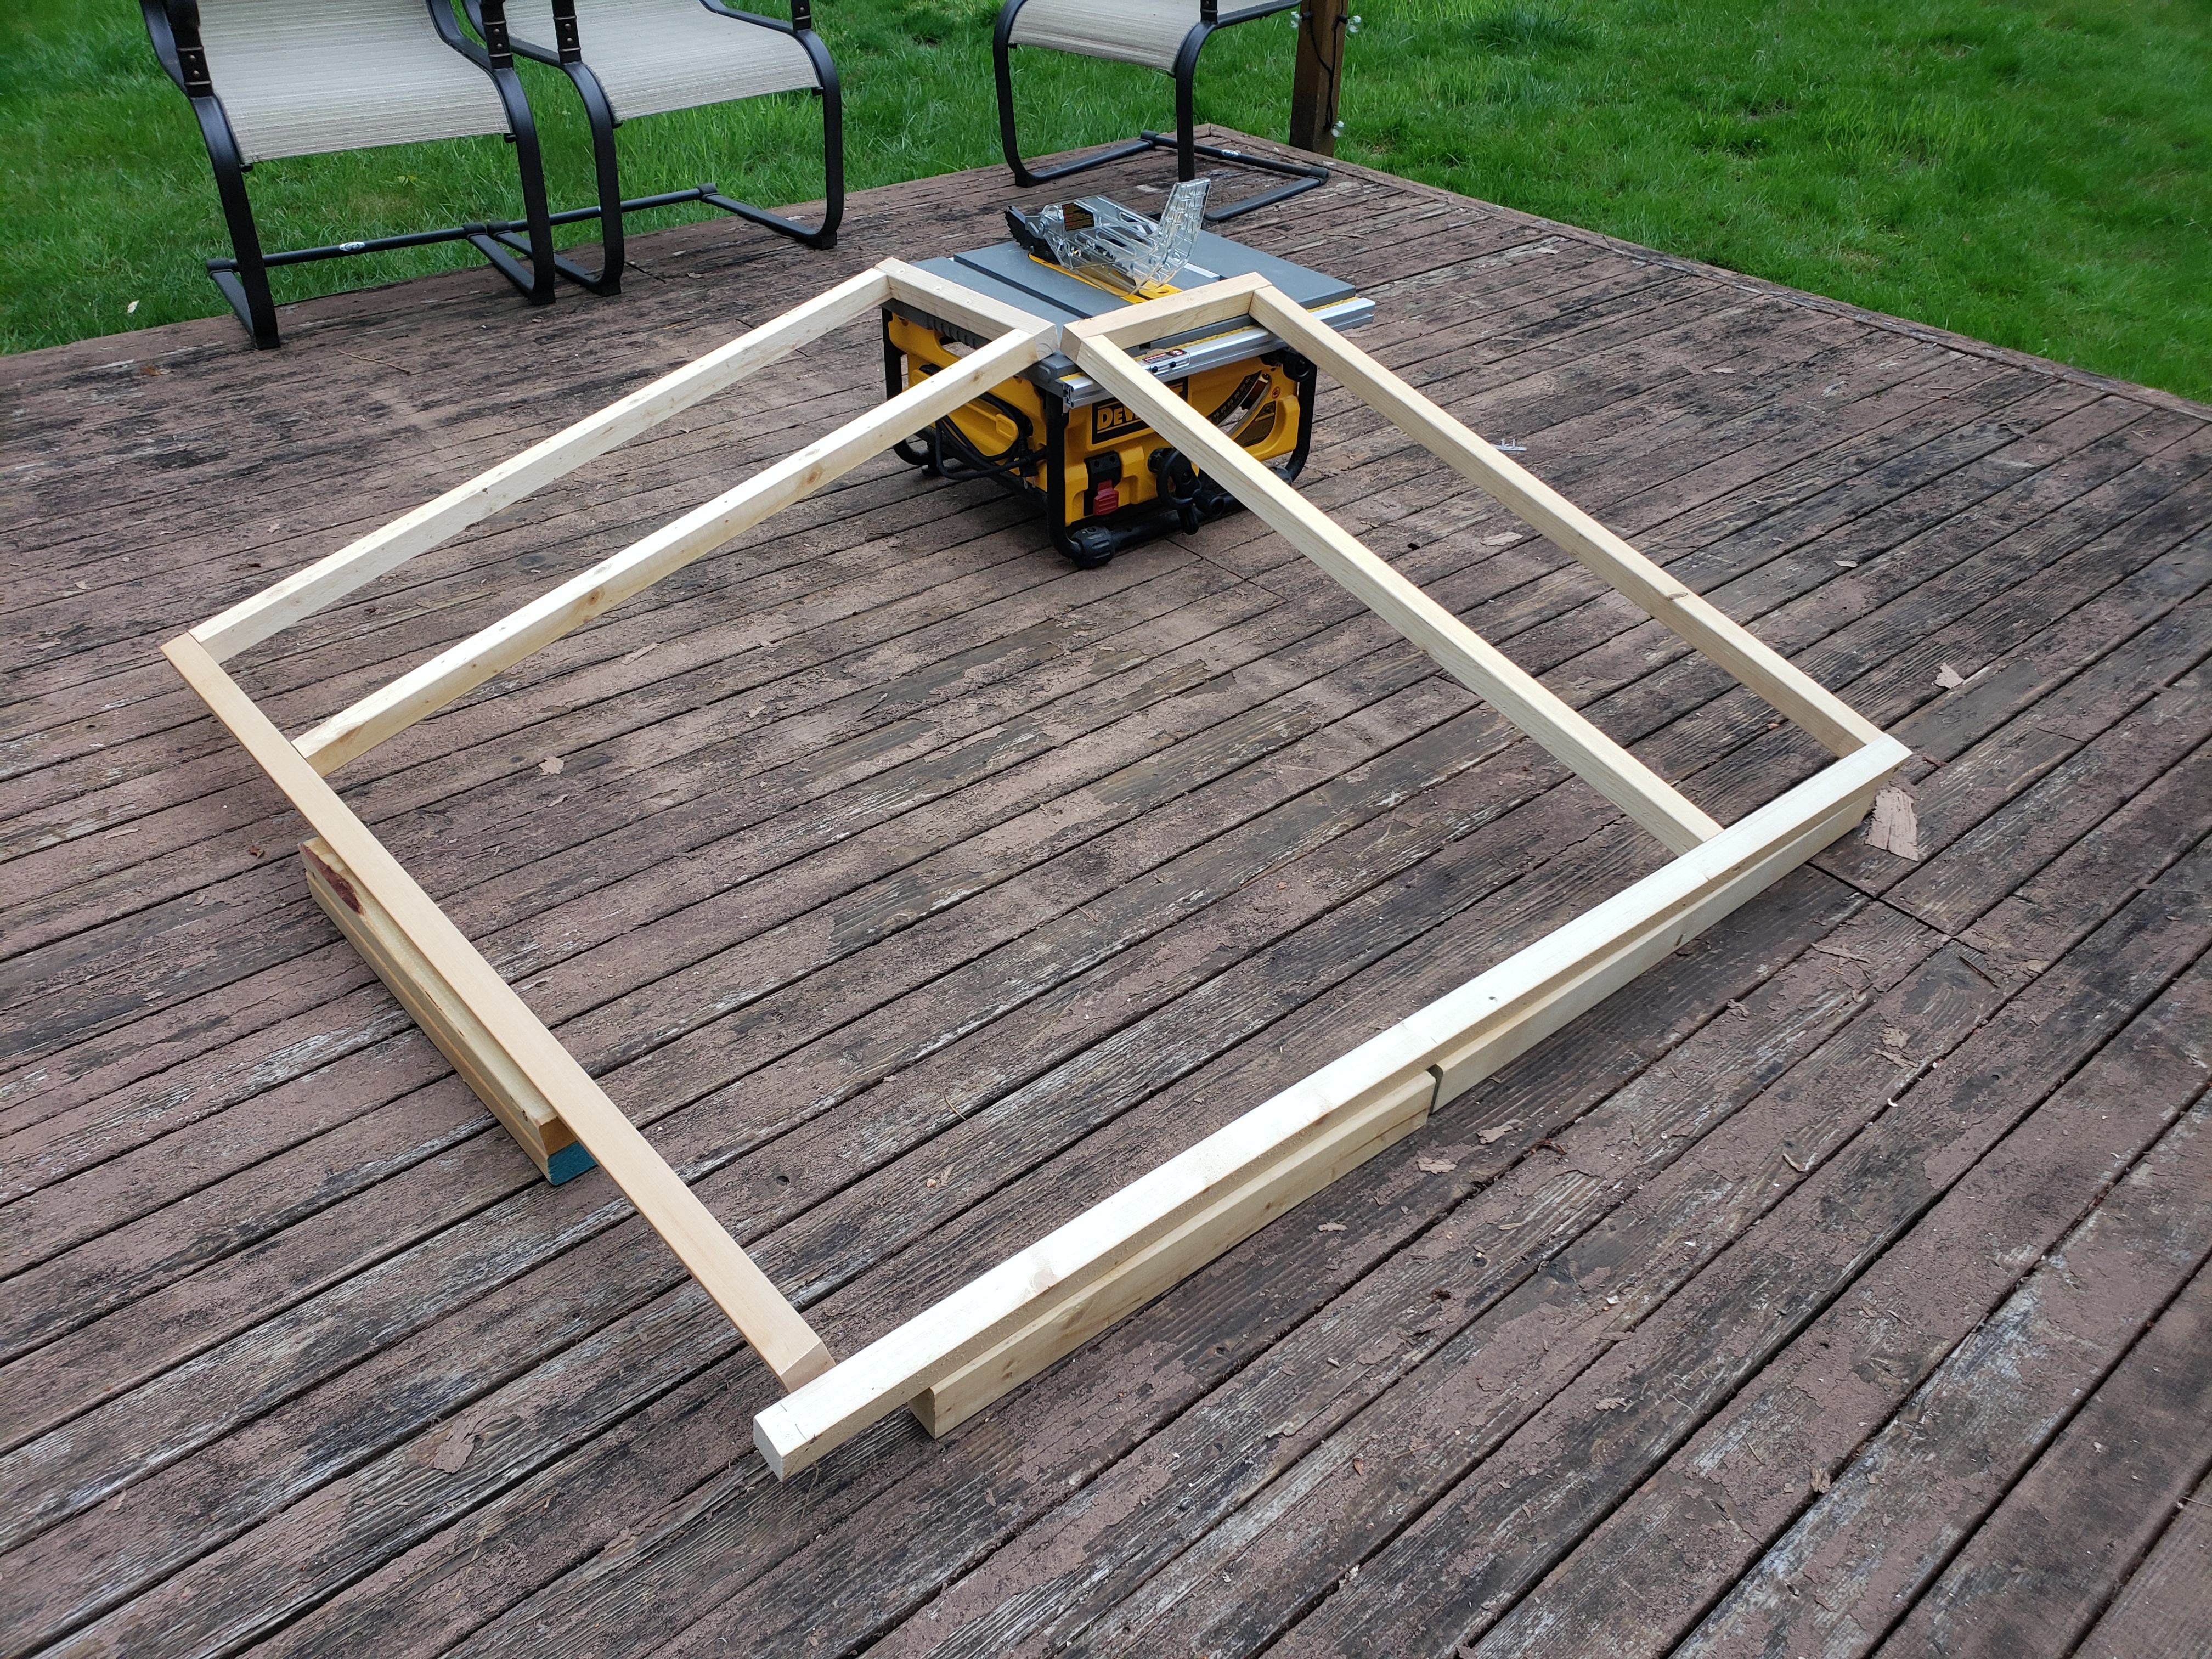
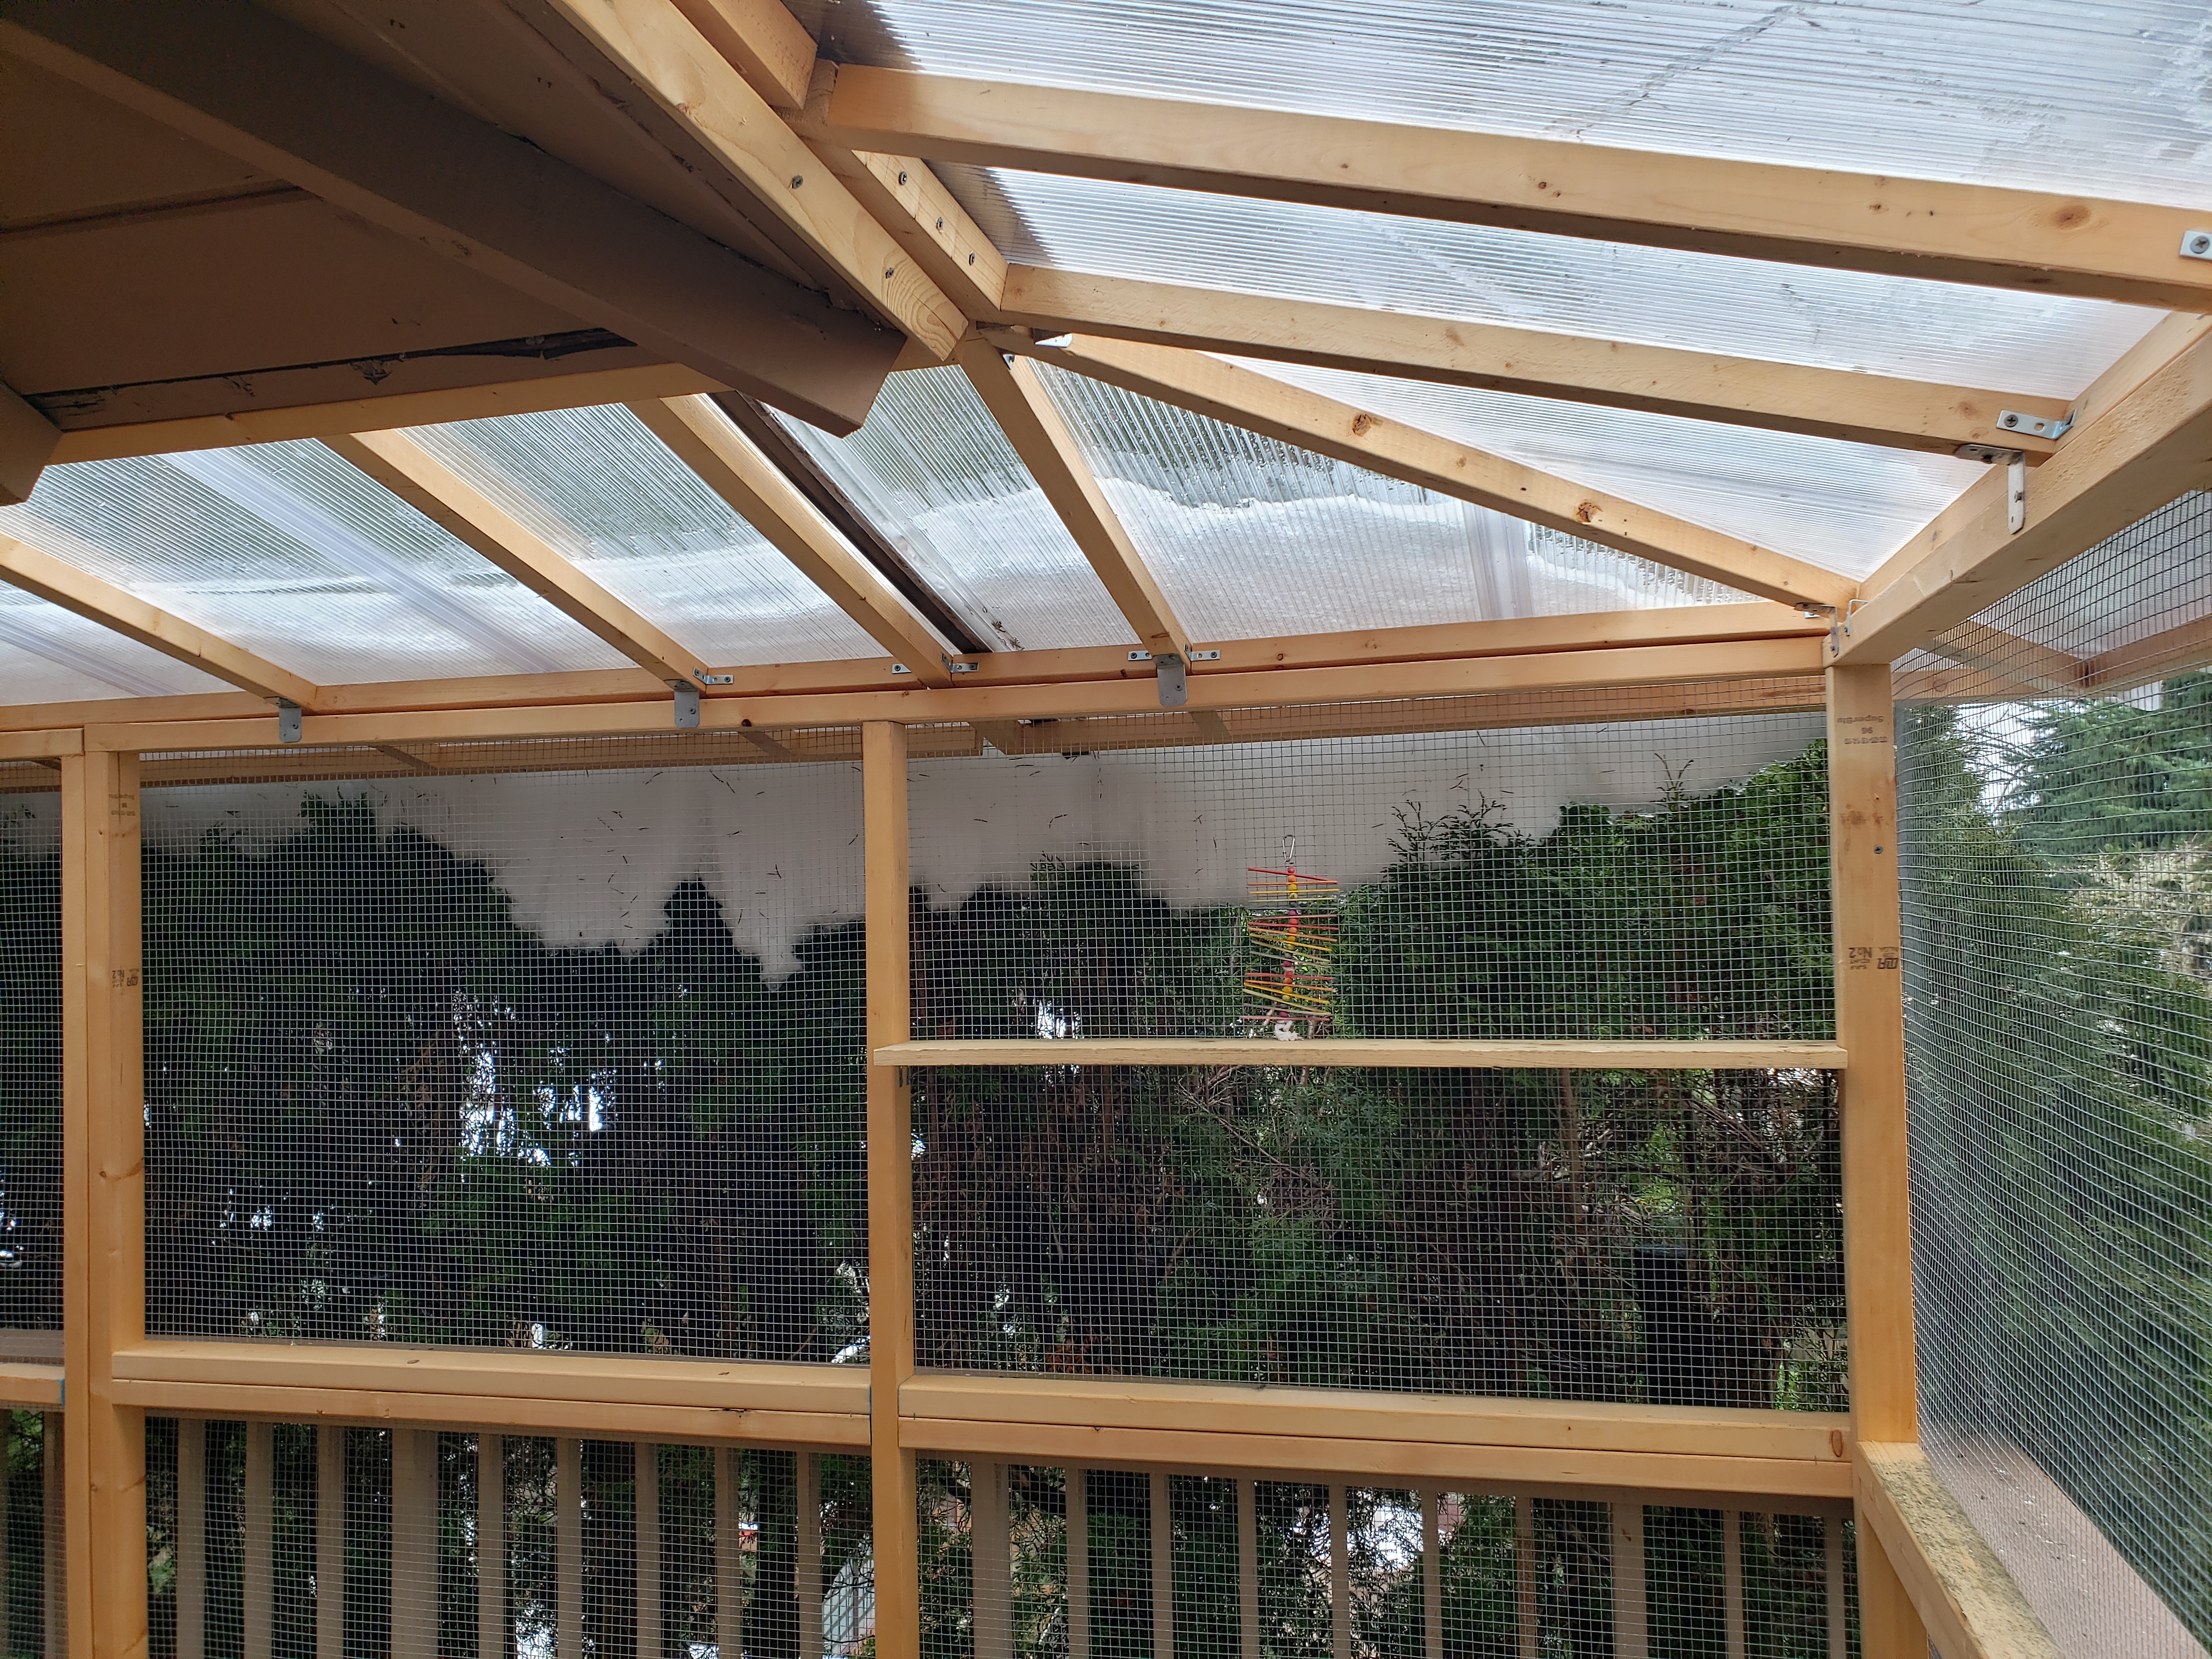
The framing was simple, and just as before I made all 4 frames at once. They’re again 8 ft long each, but this time we don’t need additional shorter frames, since the inside length is smaller (as a reminder, the balcony serving as a foundation for our aviary is L-shaped, and the new roof is to be attached to the eaves of the existing roof of the building).
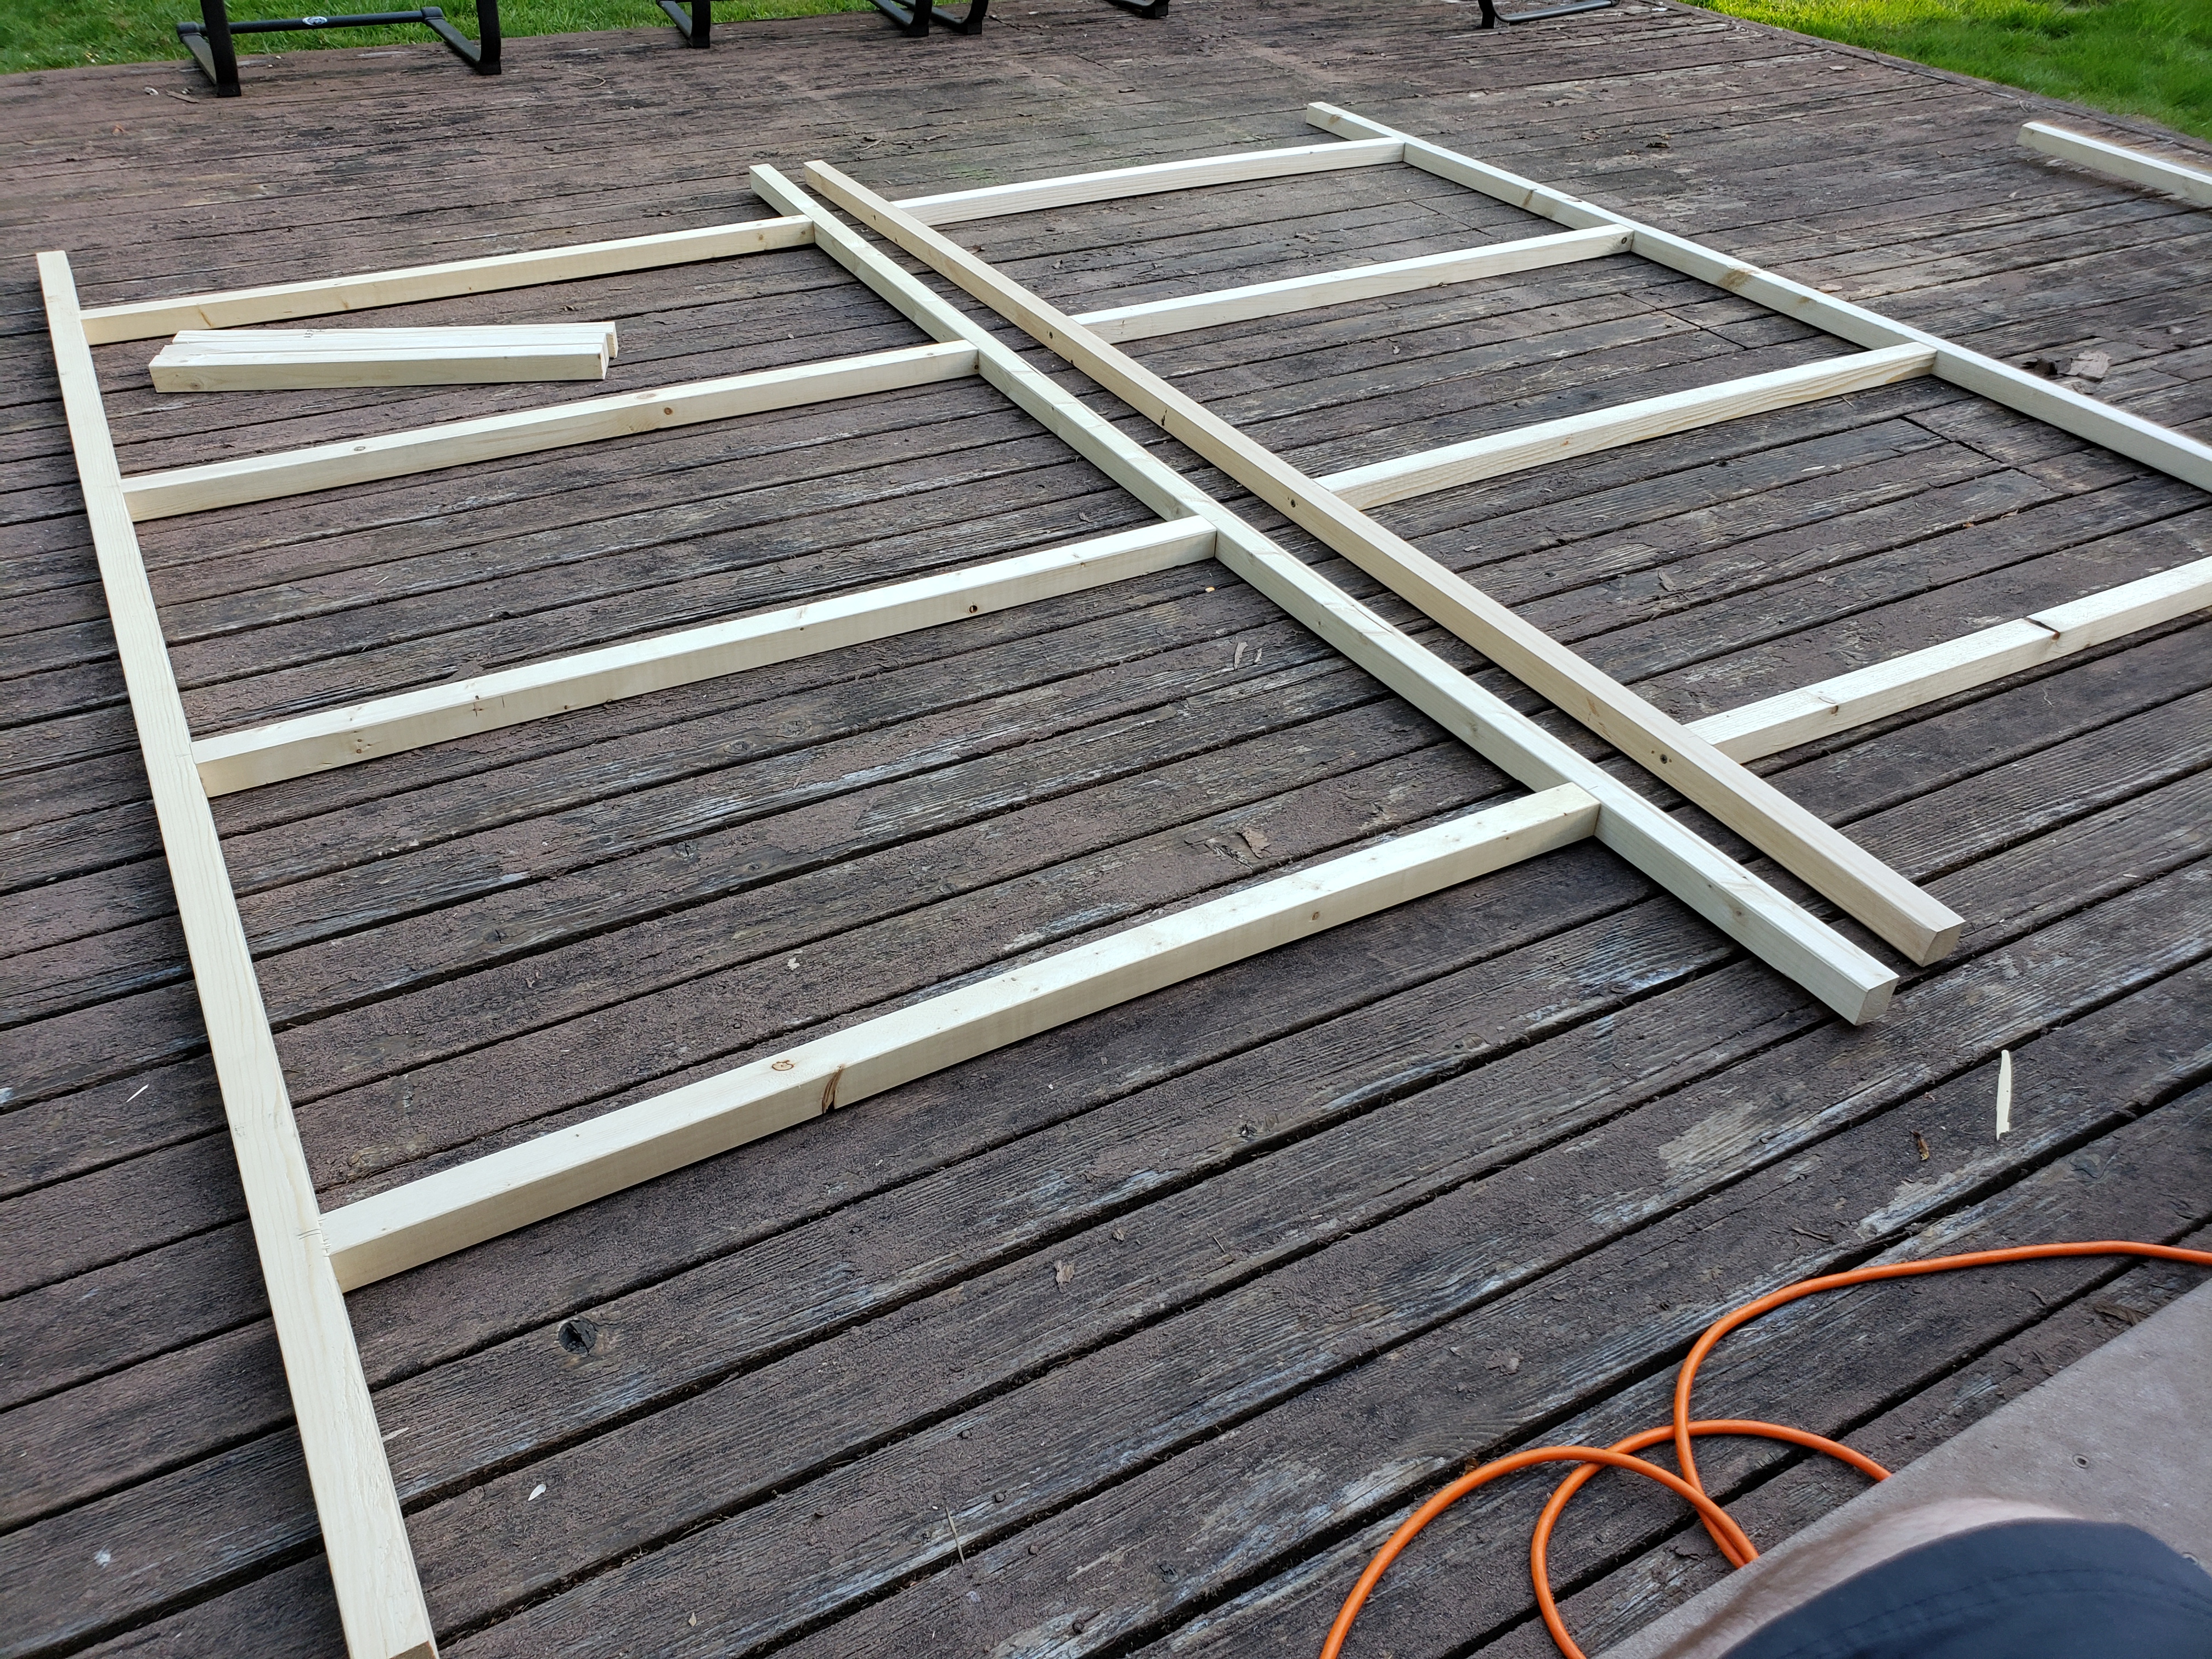
Here you can see one piece ready and another one in the making:
Important consideration: since we’re building aviary, it’s critical that the space is tightly enclosed so our birds are safe. This means that we need additional cross-beams in the roof framing, which will align with the walls the roof is resting on, and fill the gaps. To be sure where should those be positioned, I did a test fitting of a frame before attaching the polycarbonate panels, marked the spots, then measured distance and attached the additional pieces. Again, they can’t be staggered (just as we decided with the horizontal support pieces for walls, except over there it was for aesthetic reasons, and here it’s functional).

You can see on the above photo that despite using 8 ft long lumber and 4 of the polycarbonate panels, 2 ft each, the panels are protruding on the sides of the frame. This is because the H-connectors between panels introduce spacing. This is important, because while all frames will be same, the placement of panels will be offset between adjacent frames.
I used same approach with right-angle ties to mount the inside support beams for roof framing – see the tie visible to the left from middle of the photo):

It was time to attach the panels to frames.
There are 2 lengths of the screws used to attach polycarbonate panels: 1 inch and 2 inch.
I used 1 inch to screw the H-connectors to wooden frame (since the connectors are not very thick, and longer screws would show from underneath), and 2 inch to screw the panels to framing everywhere else. It’s important to pre-drill the holes in polycarbonate panels – they will slight expand and contract based on temperature changes, so this helps avoid any cracking. Also, the screws shouldn’t be put too tight – if you start that the panels are getting disfigured around the screw – it’s too tight.

There’s one improvement I thought of when I completed the panels – if I were to do it again, I’d try to align the H-connectors with the framing beams, for a cleaner look. This way from underneath we’d only see the wood framing, and not semi-transparent connectors. Just a detail, to slightly improve the aesthetics. It would require measuring each frame for roof separately, but that’s not a lot of extra work.
Here’s a close shot of how the panels will be attached to the existing roof – I added a 2×2 piece around the roof as a support for the panels (think: strain relief 🙂 ). This also helps in installation – you can rest the complete frame and screw it while it’s resting on this support (the framing is screwed onto the same end plank as this 2×2 pictured below).
To connect the roof to the walls, I used the A21 Simpson ties. Those are great – very practical. Note that they’re right-angle, so I had to slightly expand each one of them using pliers. Not a lot of work, but it takes some effort – further testament to their strength.
At the place where the panels meet, another cross beam was added – again, to fill the gap between aviary walls and polycarbonate panels – we don’t want any birdies escaping 😉
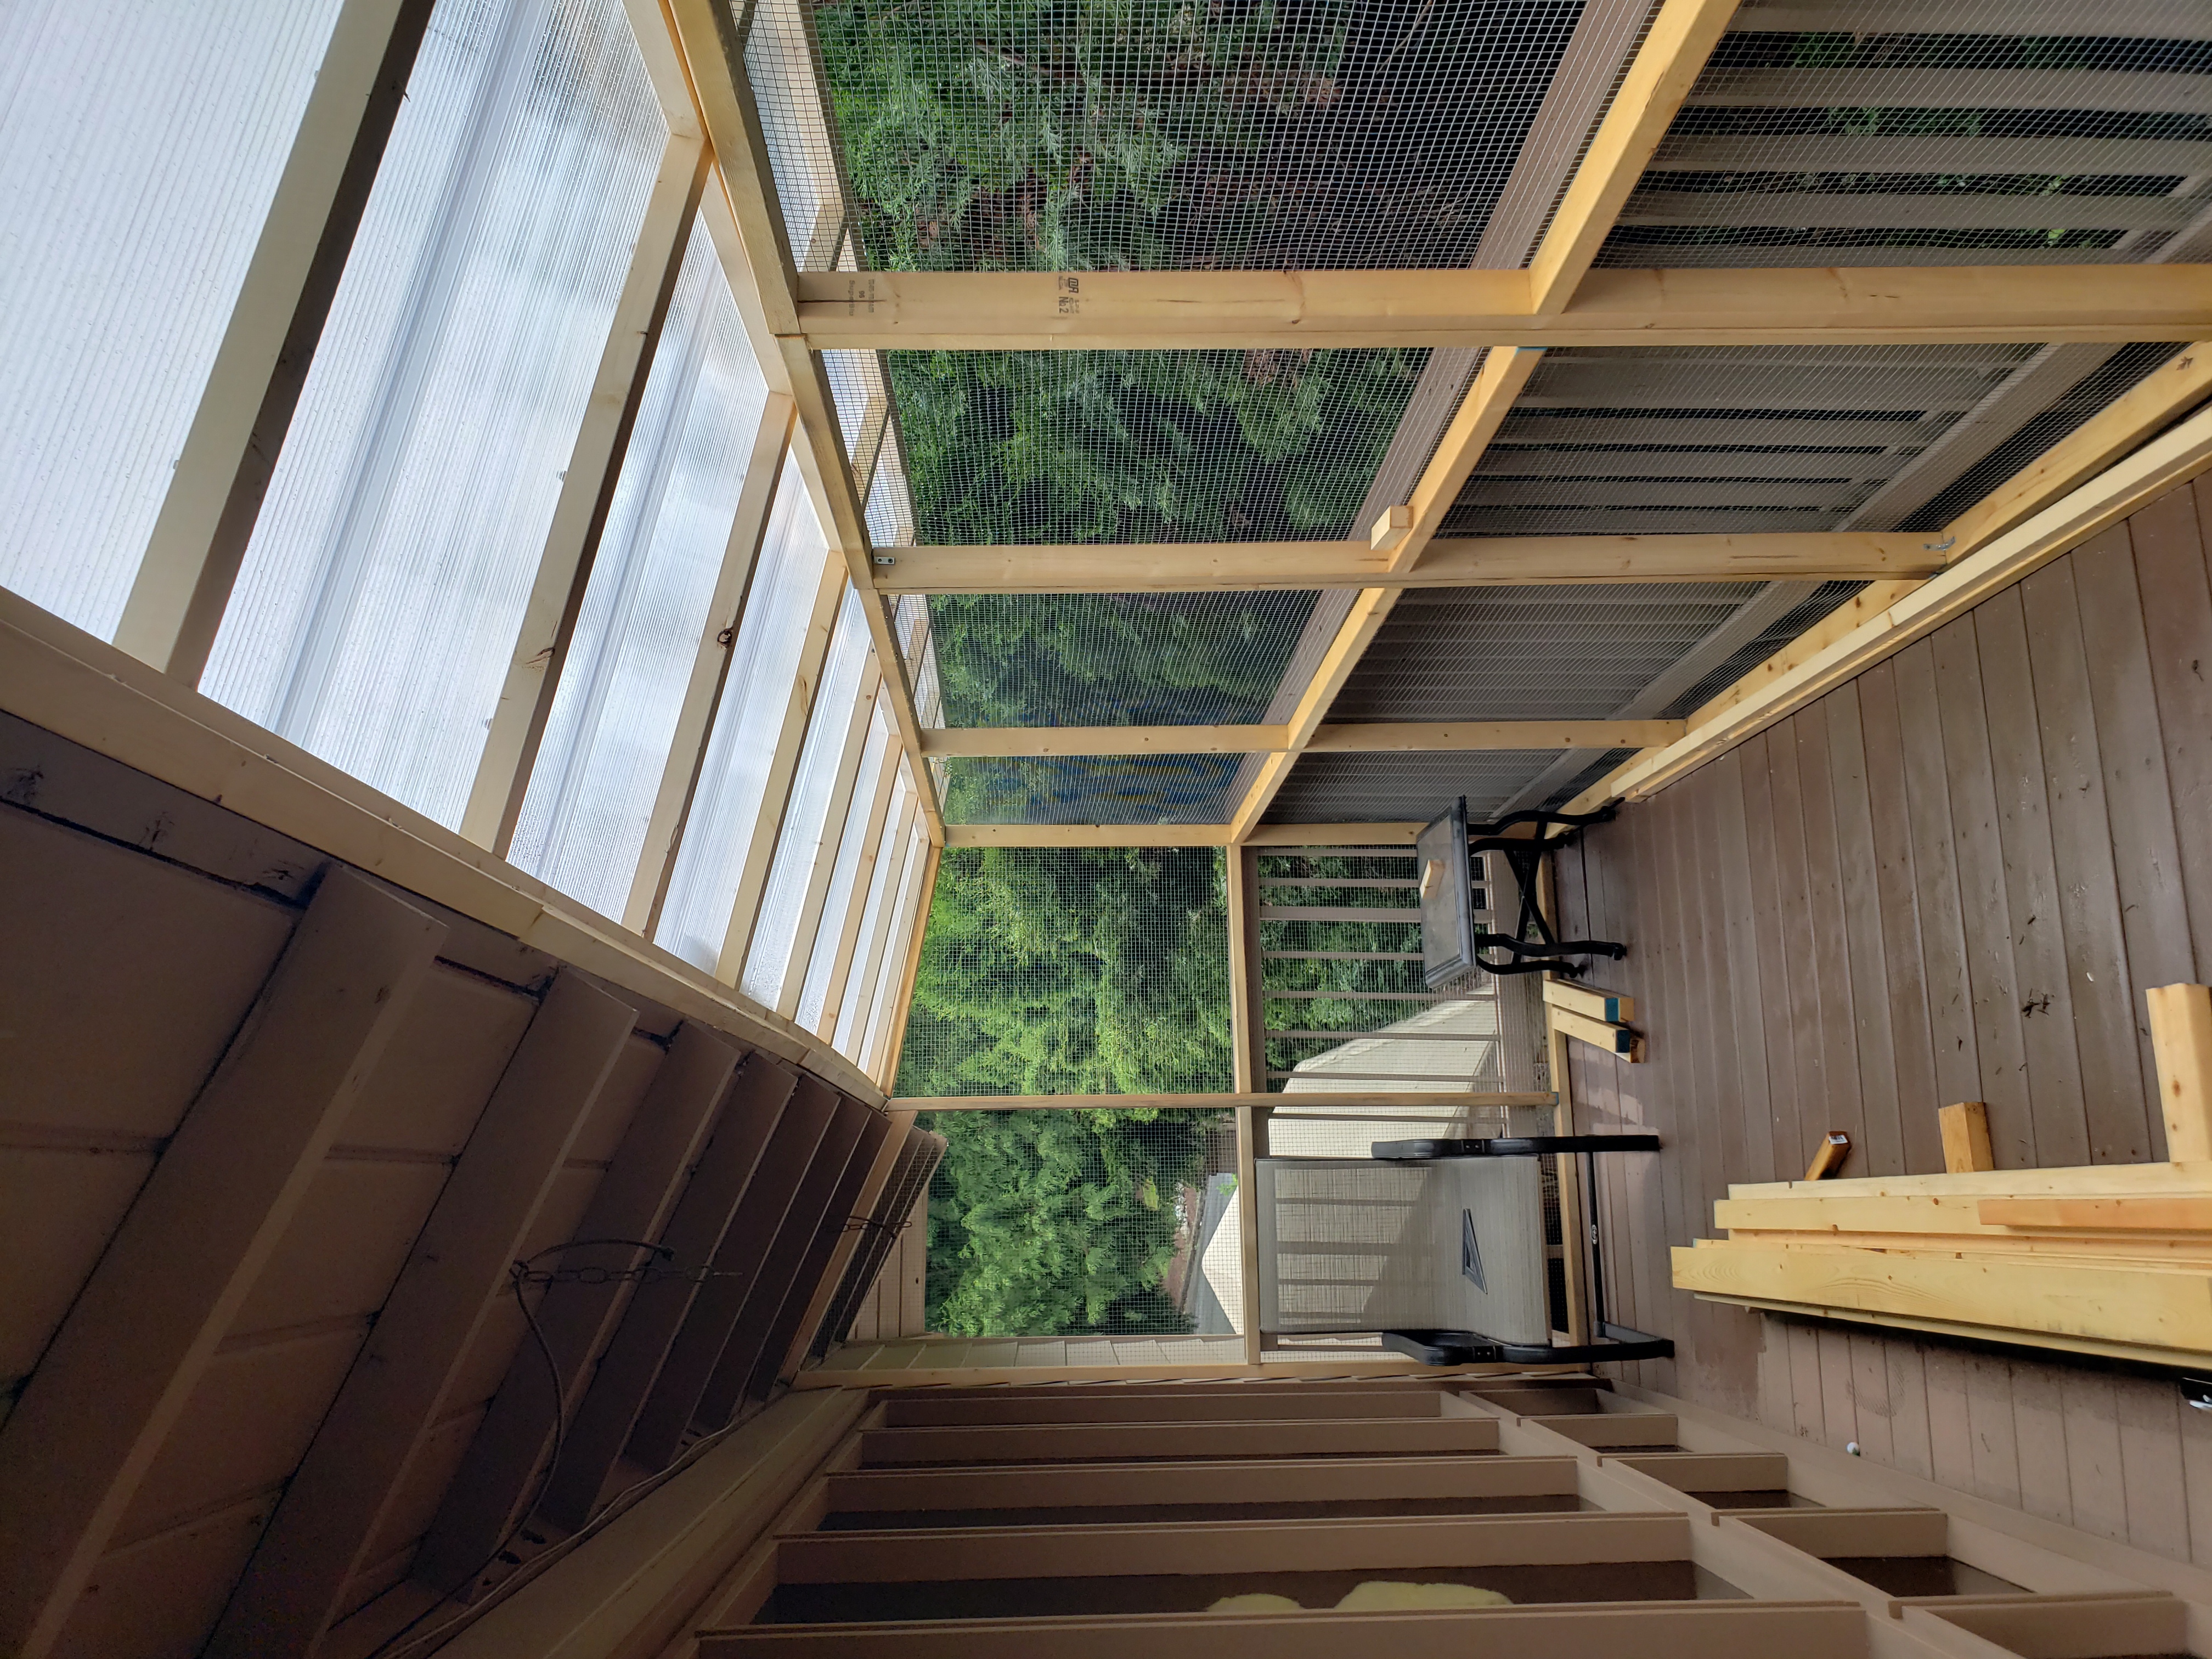
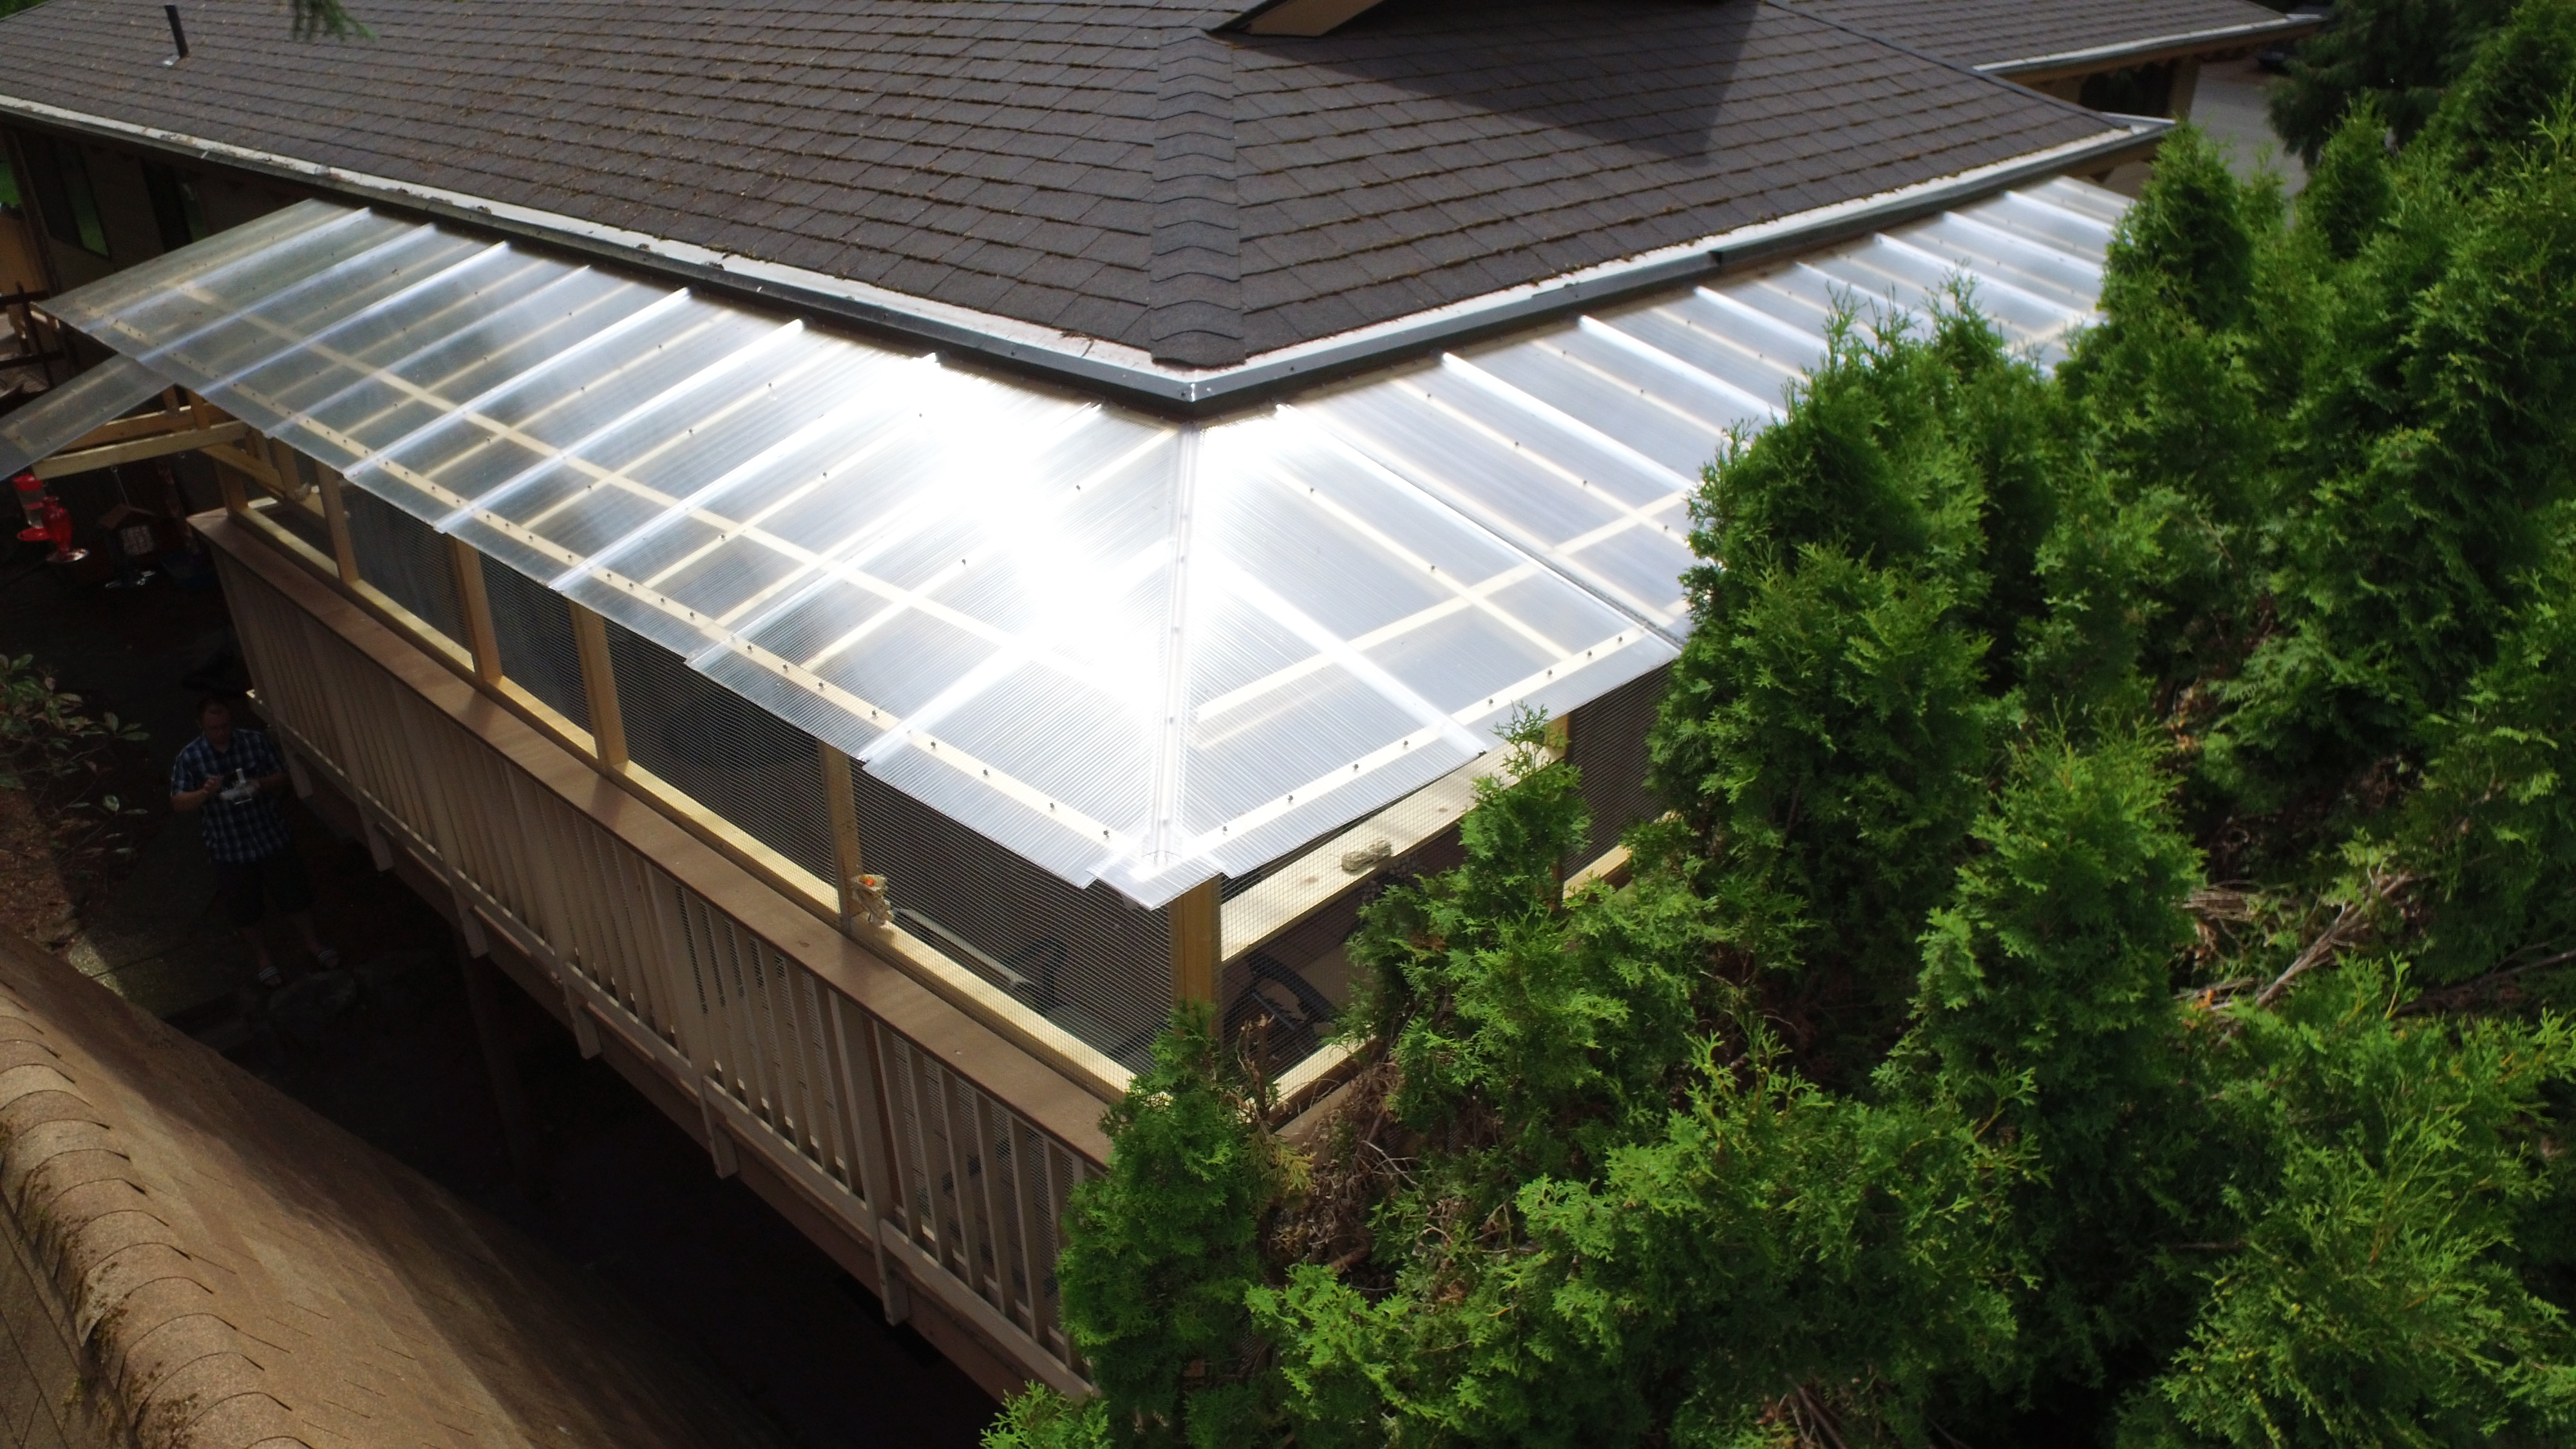
A this point one side of the roof was ready – it was a happy moment! Notice that it rained earlier that day – would that be the last rain on this part of the balcony? 🙂
And 2 more roofing panels ready to be installed on the other side.

Yet once again thanks to working for a longer I was rewarded by a nice sunset…
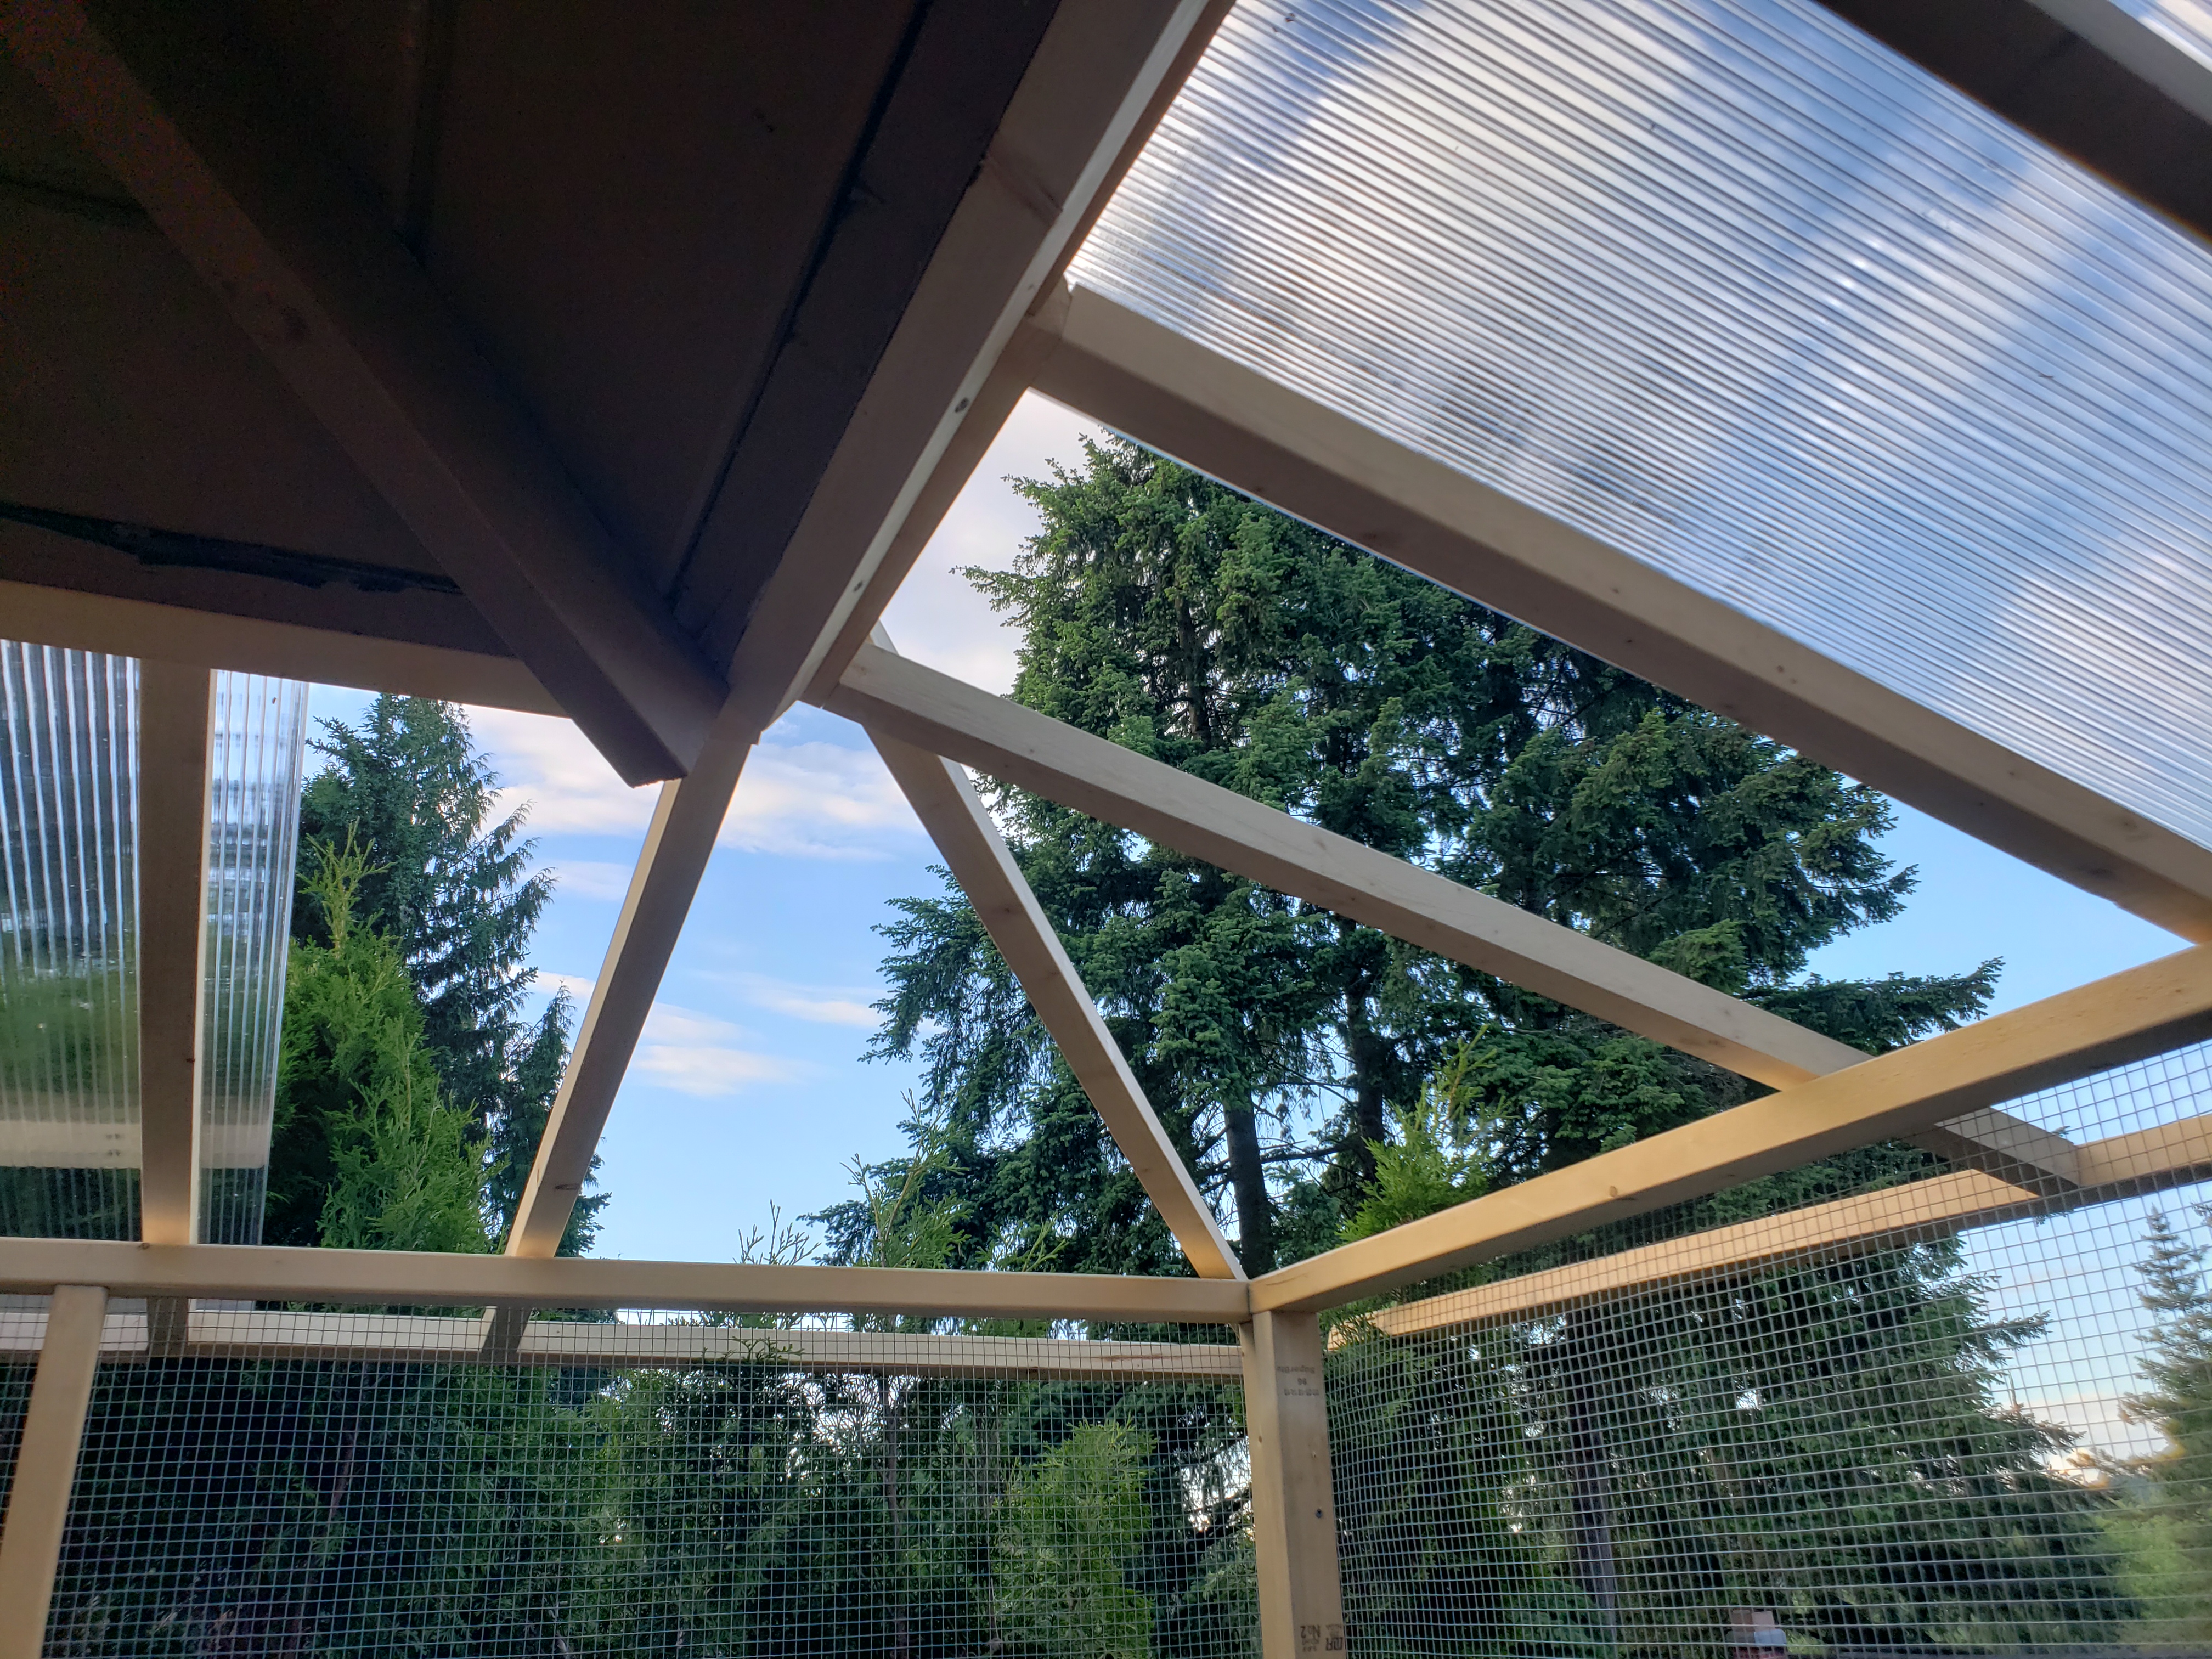
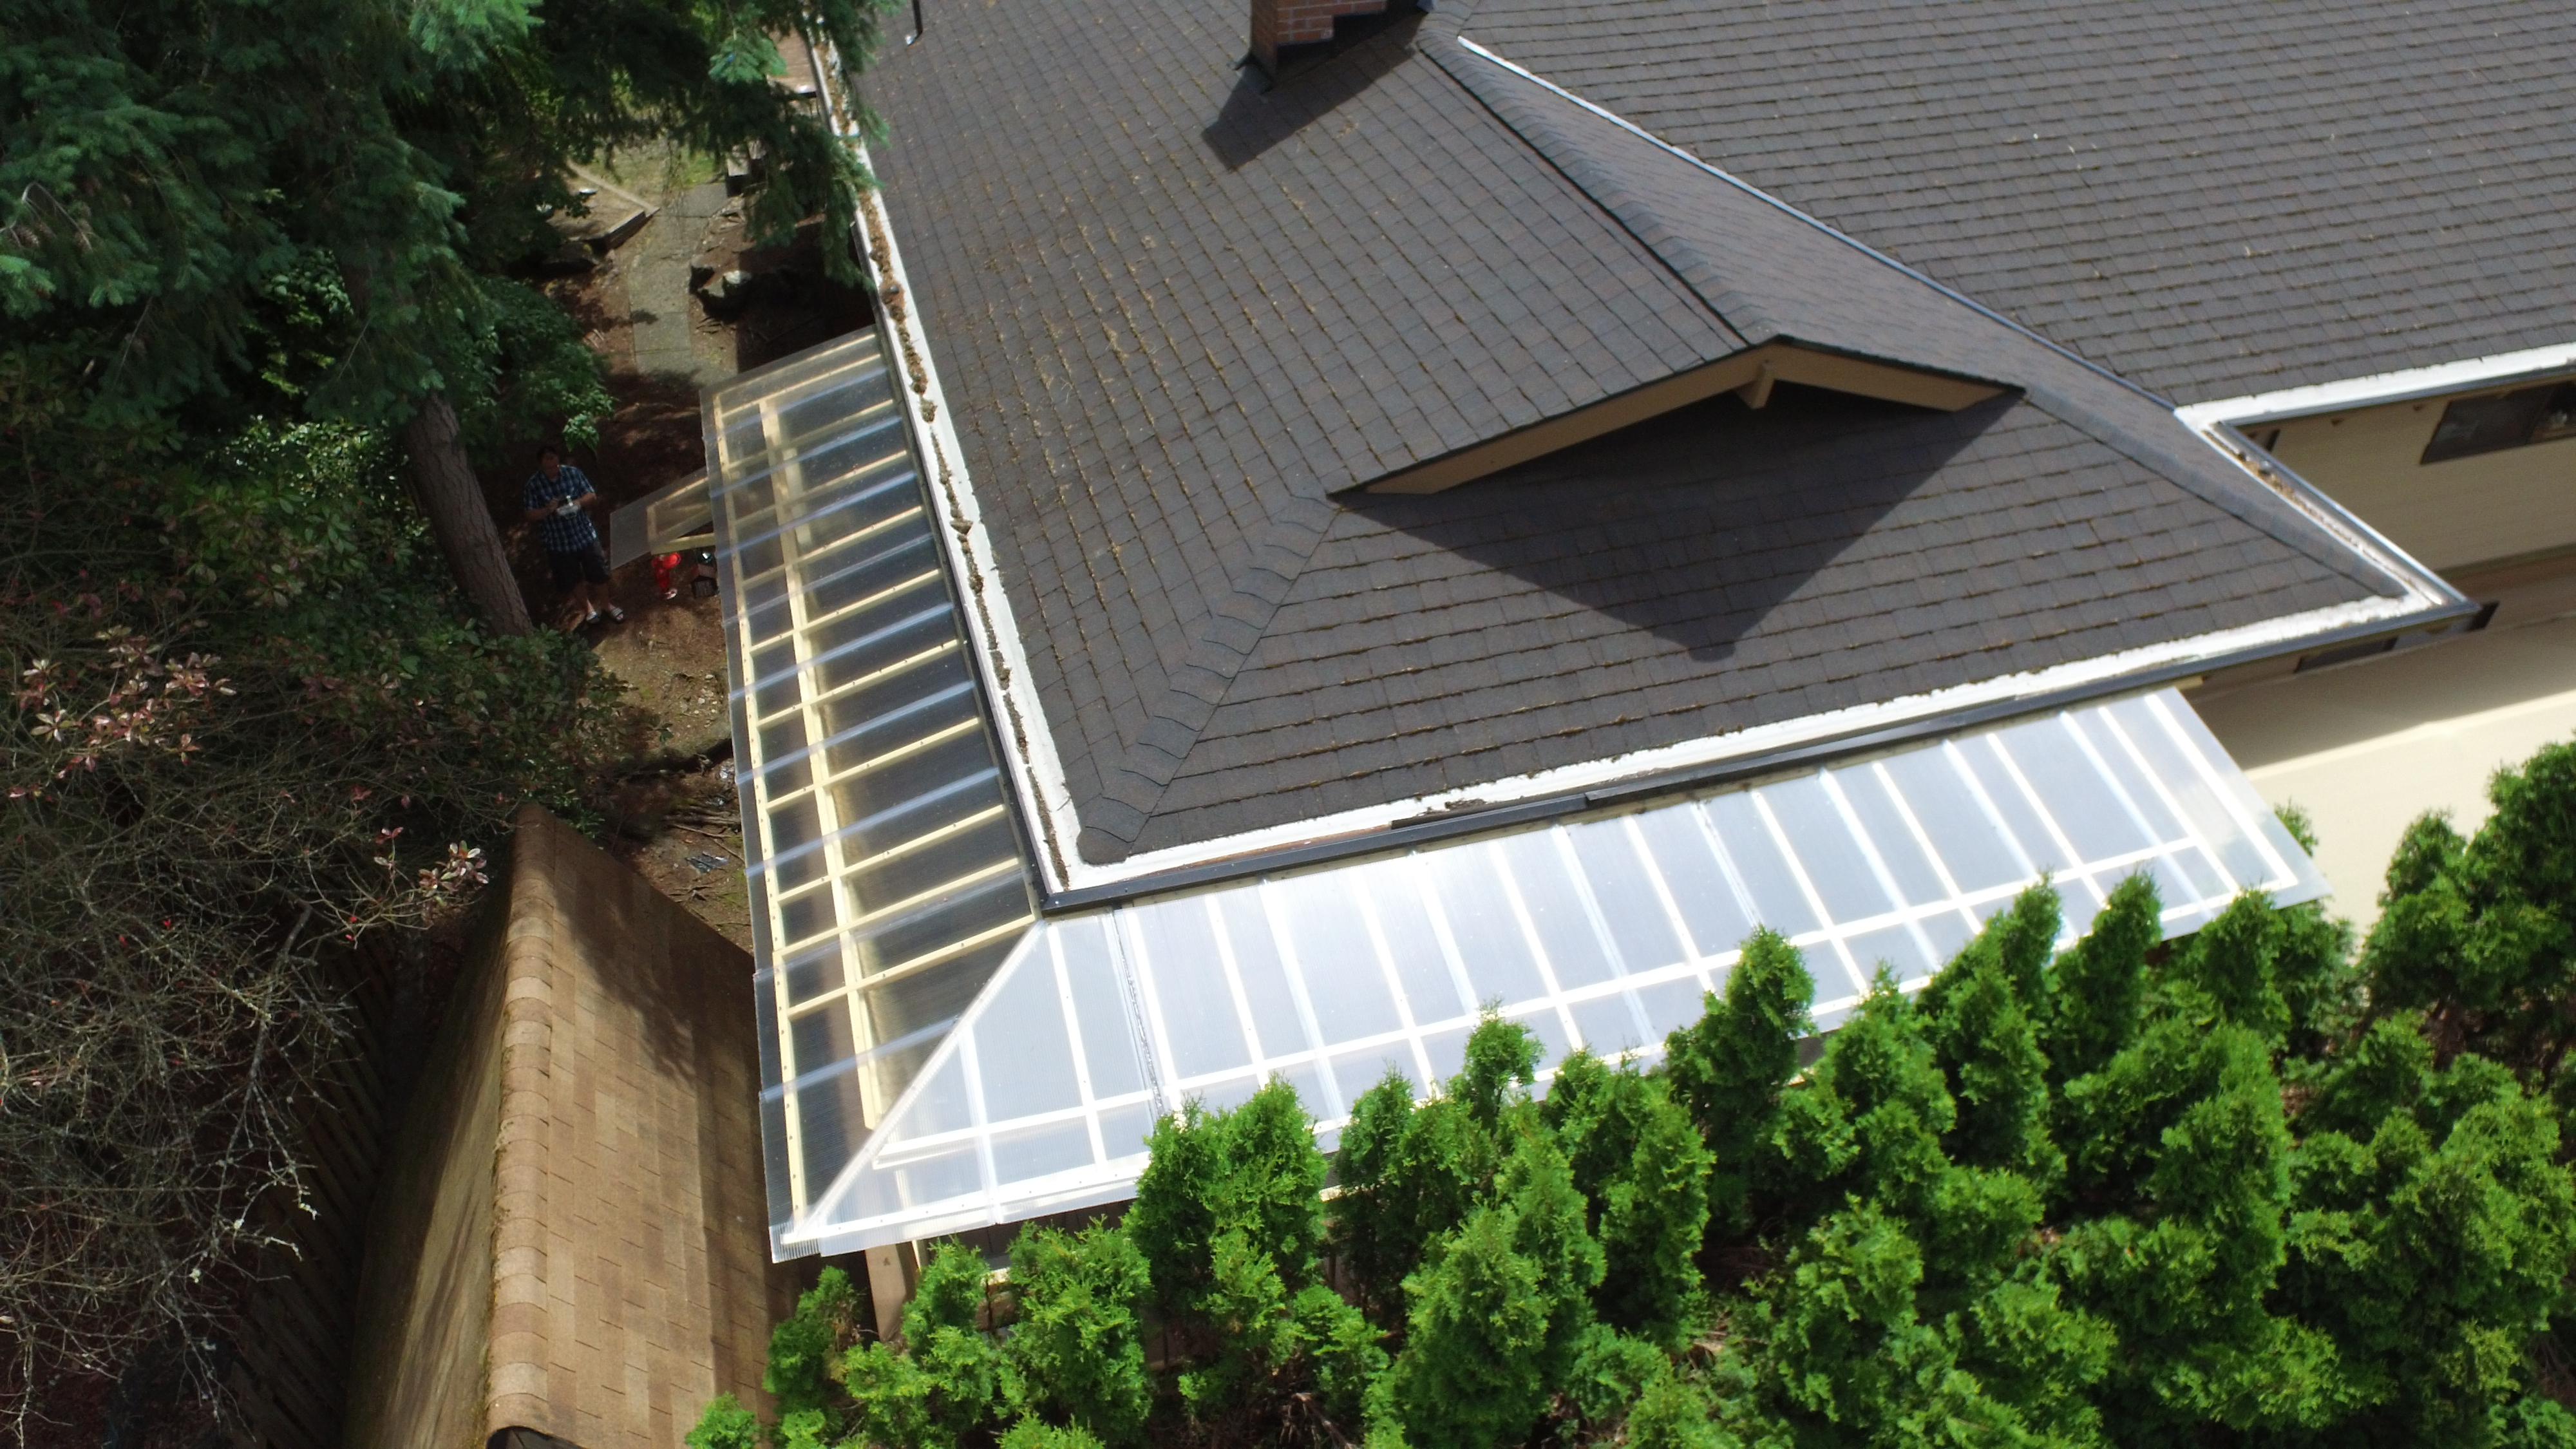
Now we reached the corner – trickiest part of the roof, since it needs to connect roofing panels from both sides of the aviary.
Important considerations:
- we need to measure where the previous panels will overlap with the new frame, and position the new H-connectors and further panels accordingly,
- the frame profile for corner is not flat, we need to consider the height difference between the existing roof line and height of the new aviary walls,
I measured each side, and cut all the required pieces. Then I did a quick test fit to make sure it’s filling in the space as expected.
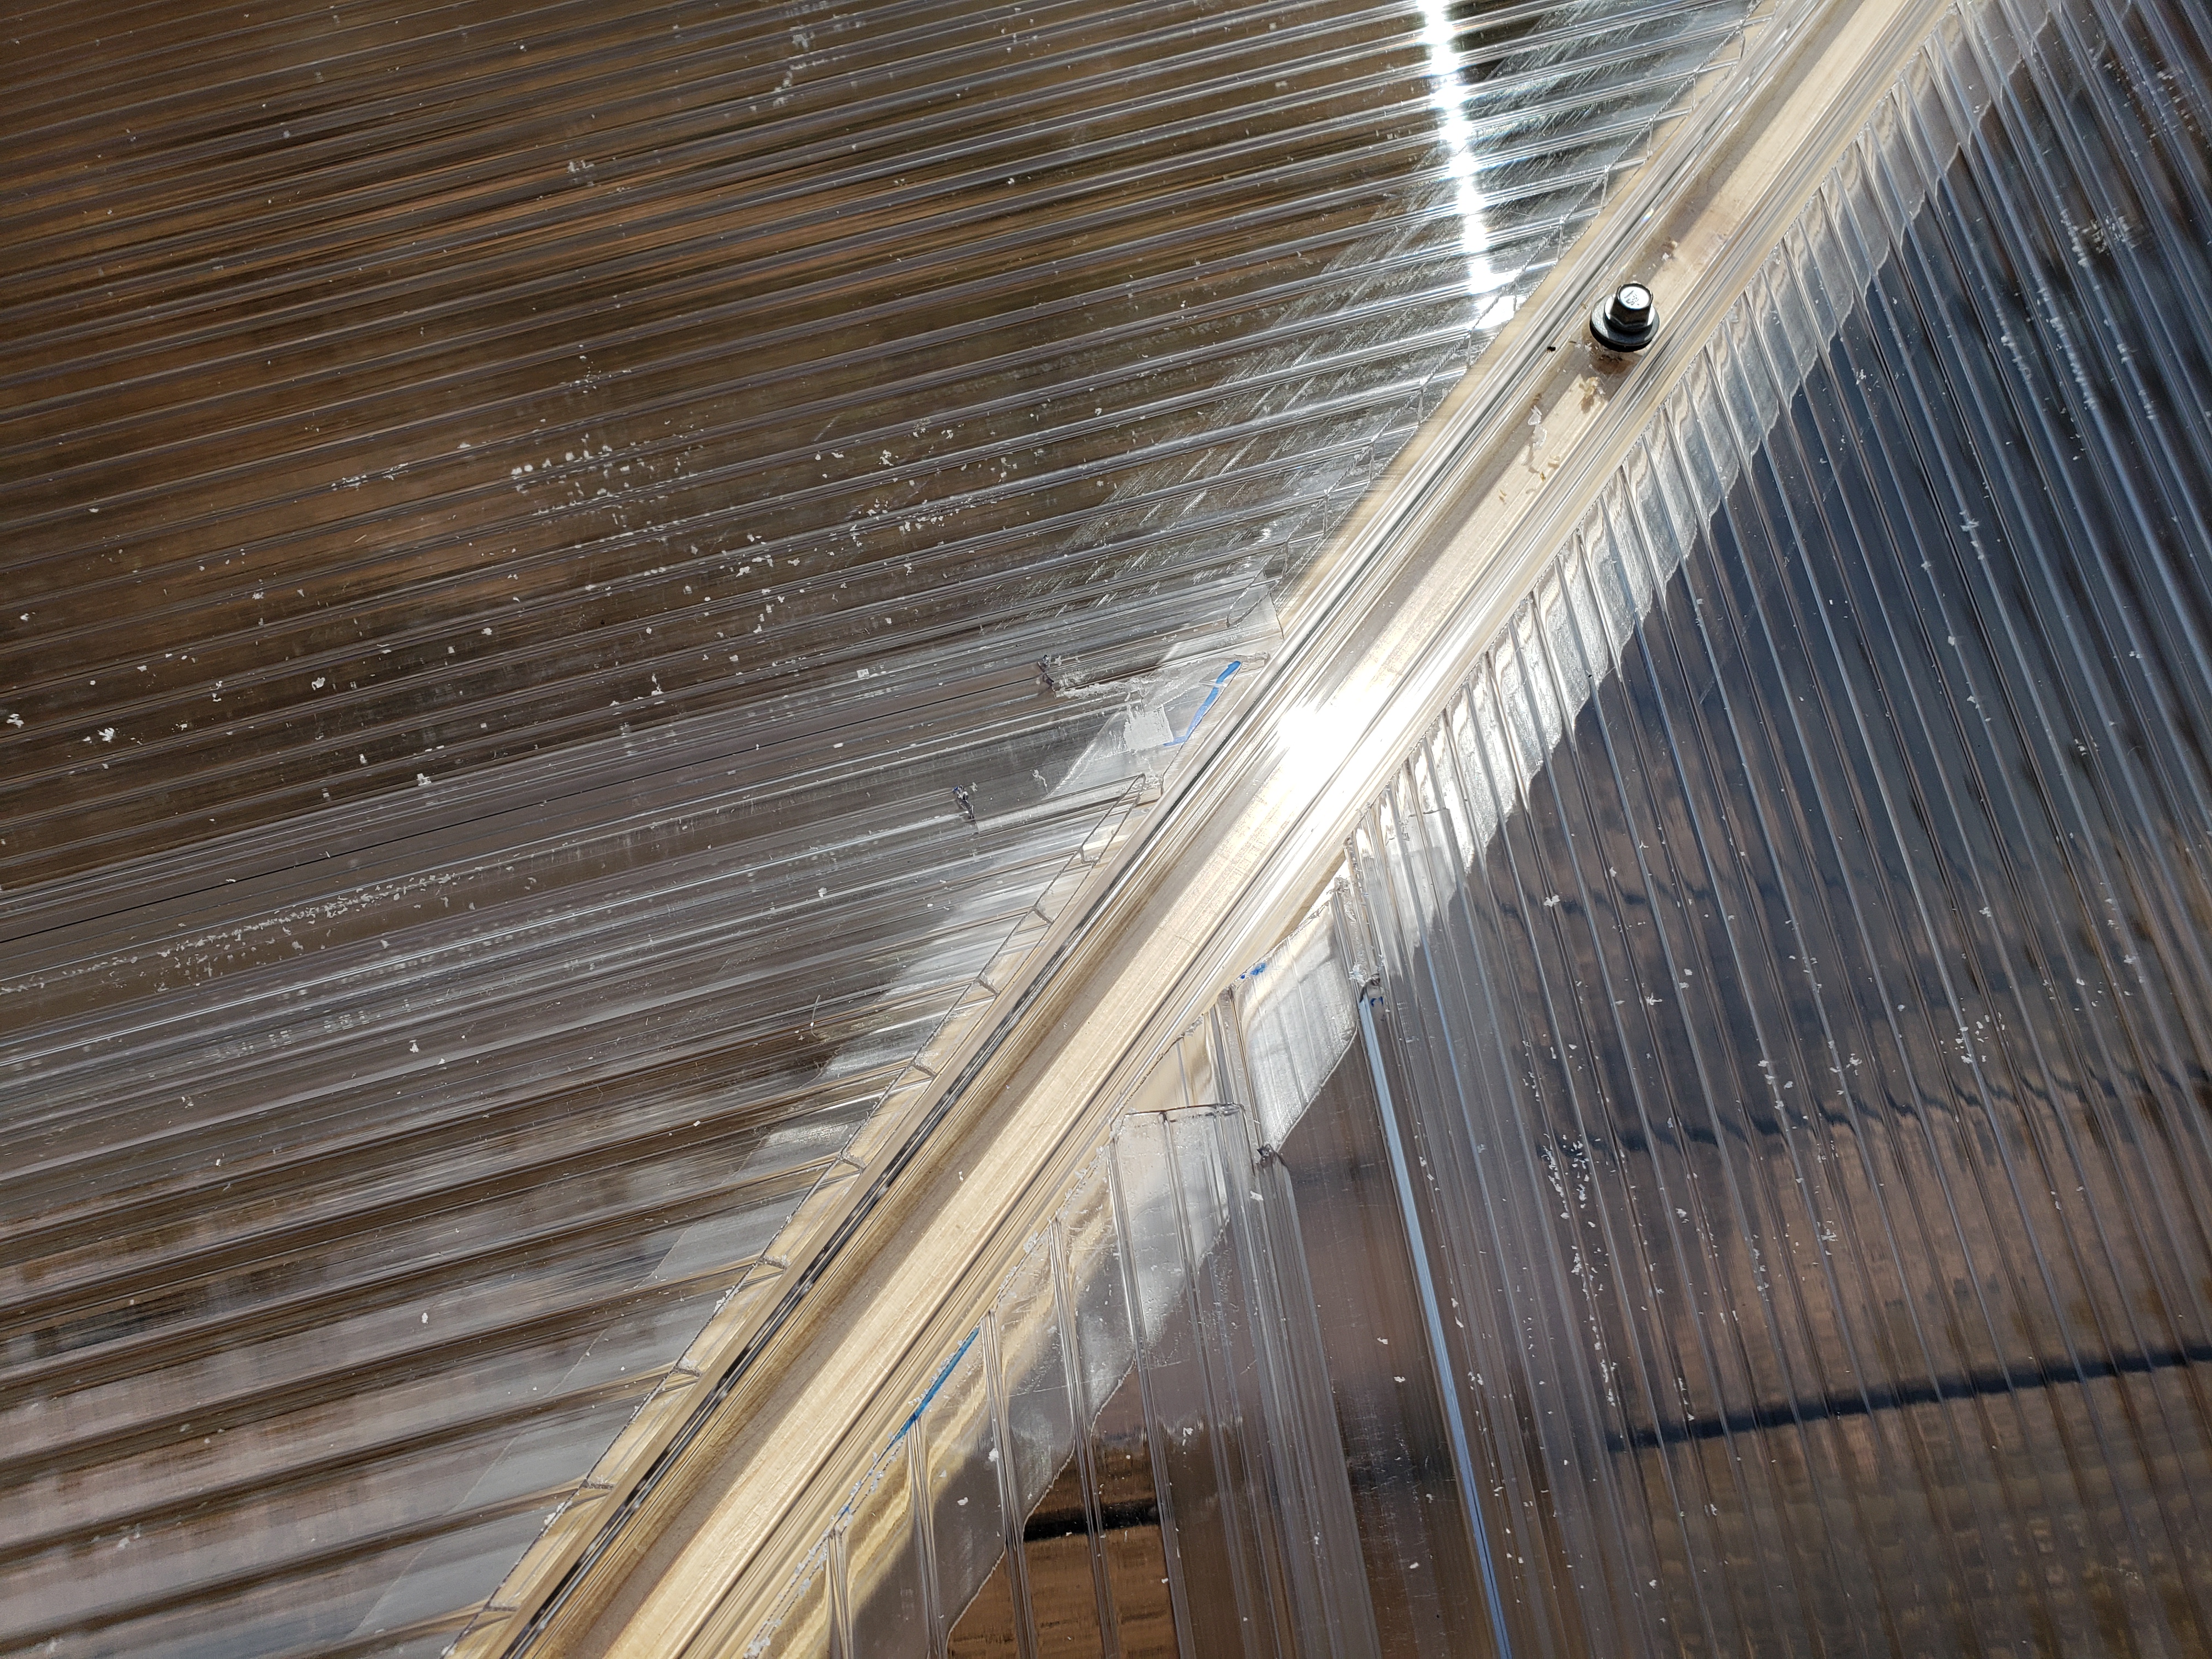
Then I replicated the setup on my deck. The height measured during the test fit from the top of the roof to the bottom of the overhang was 10 inches. The height from ground to the table of my table saw is 13 inches. By adding two 2x2s under each corner (note, they’re really 1.5 inch thick each), I was able to have the same angles as will be needed when installing it on the roof. It’s important to get that part right, since while the frame is somewhat flexible before the panels are screwed, adding the panels pretty much “locks in” the geometry and it won’t let for much adjustment after that.
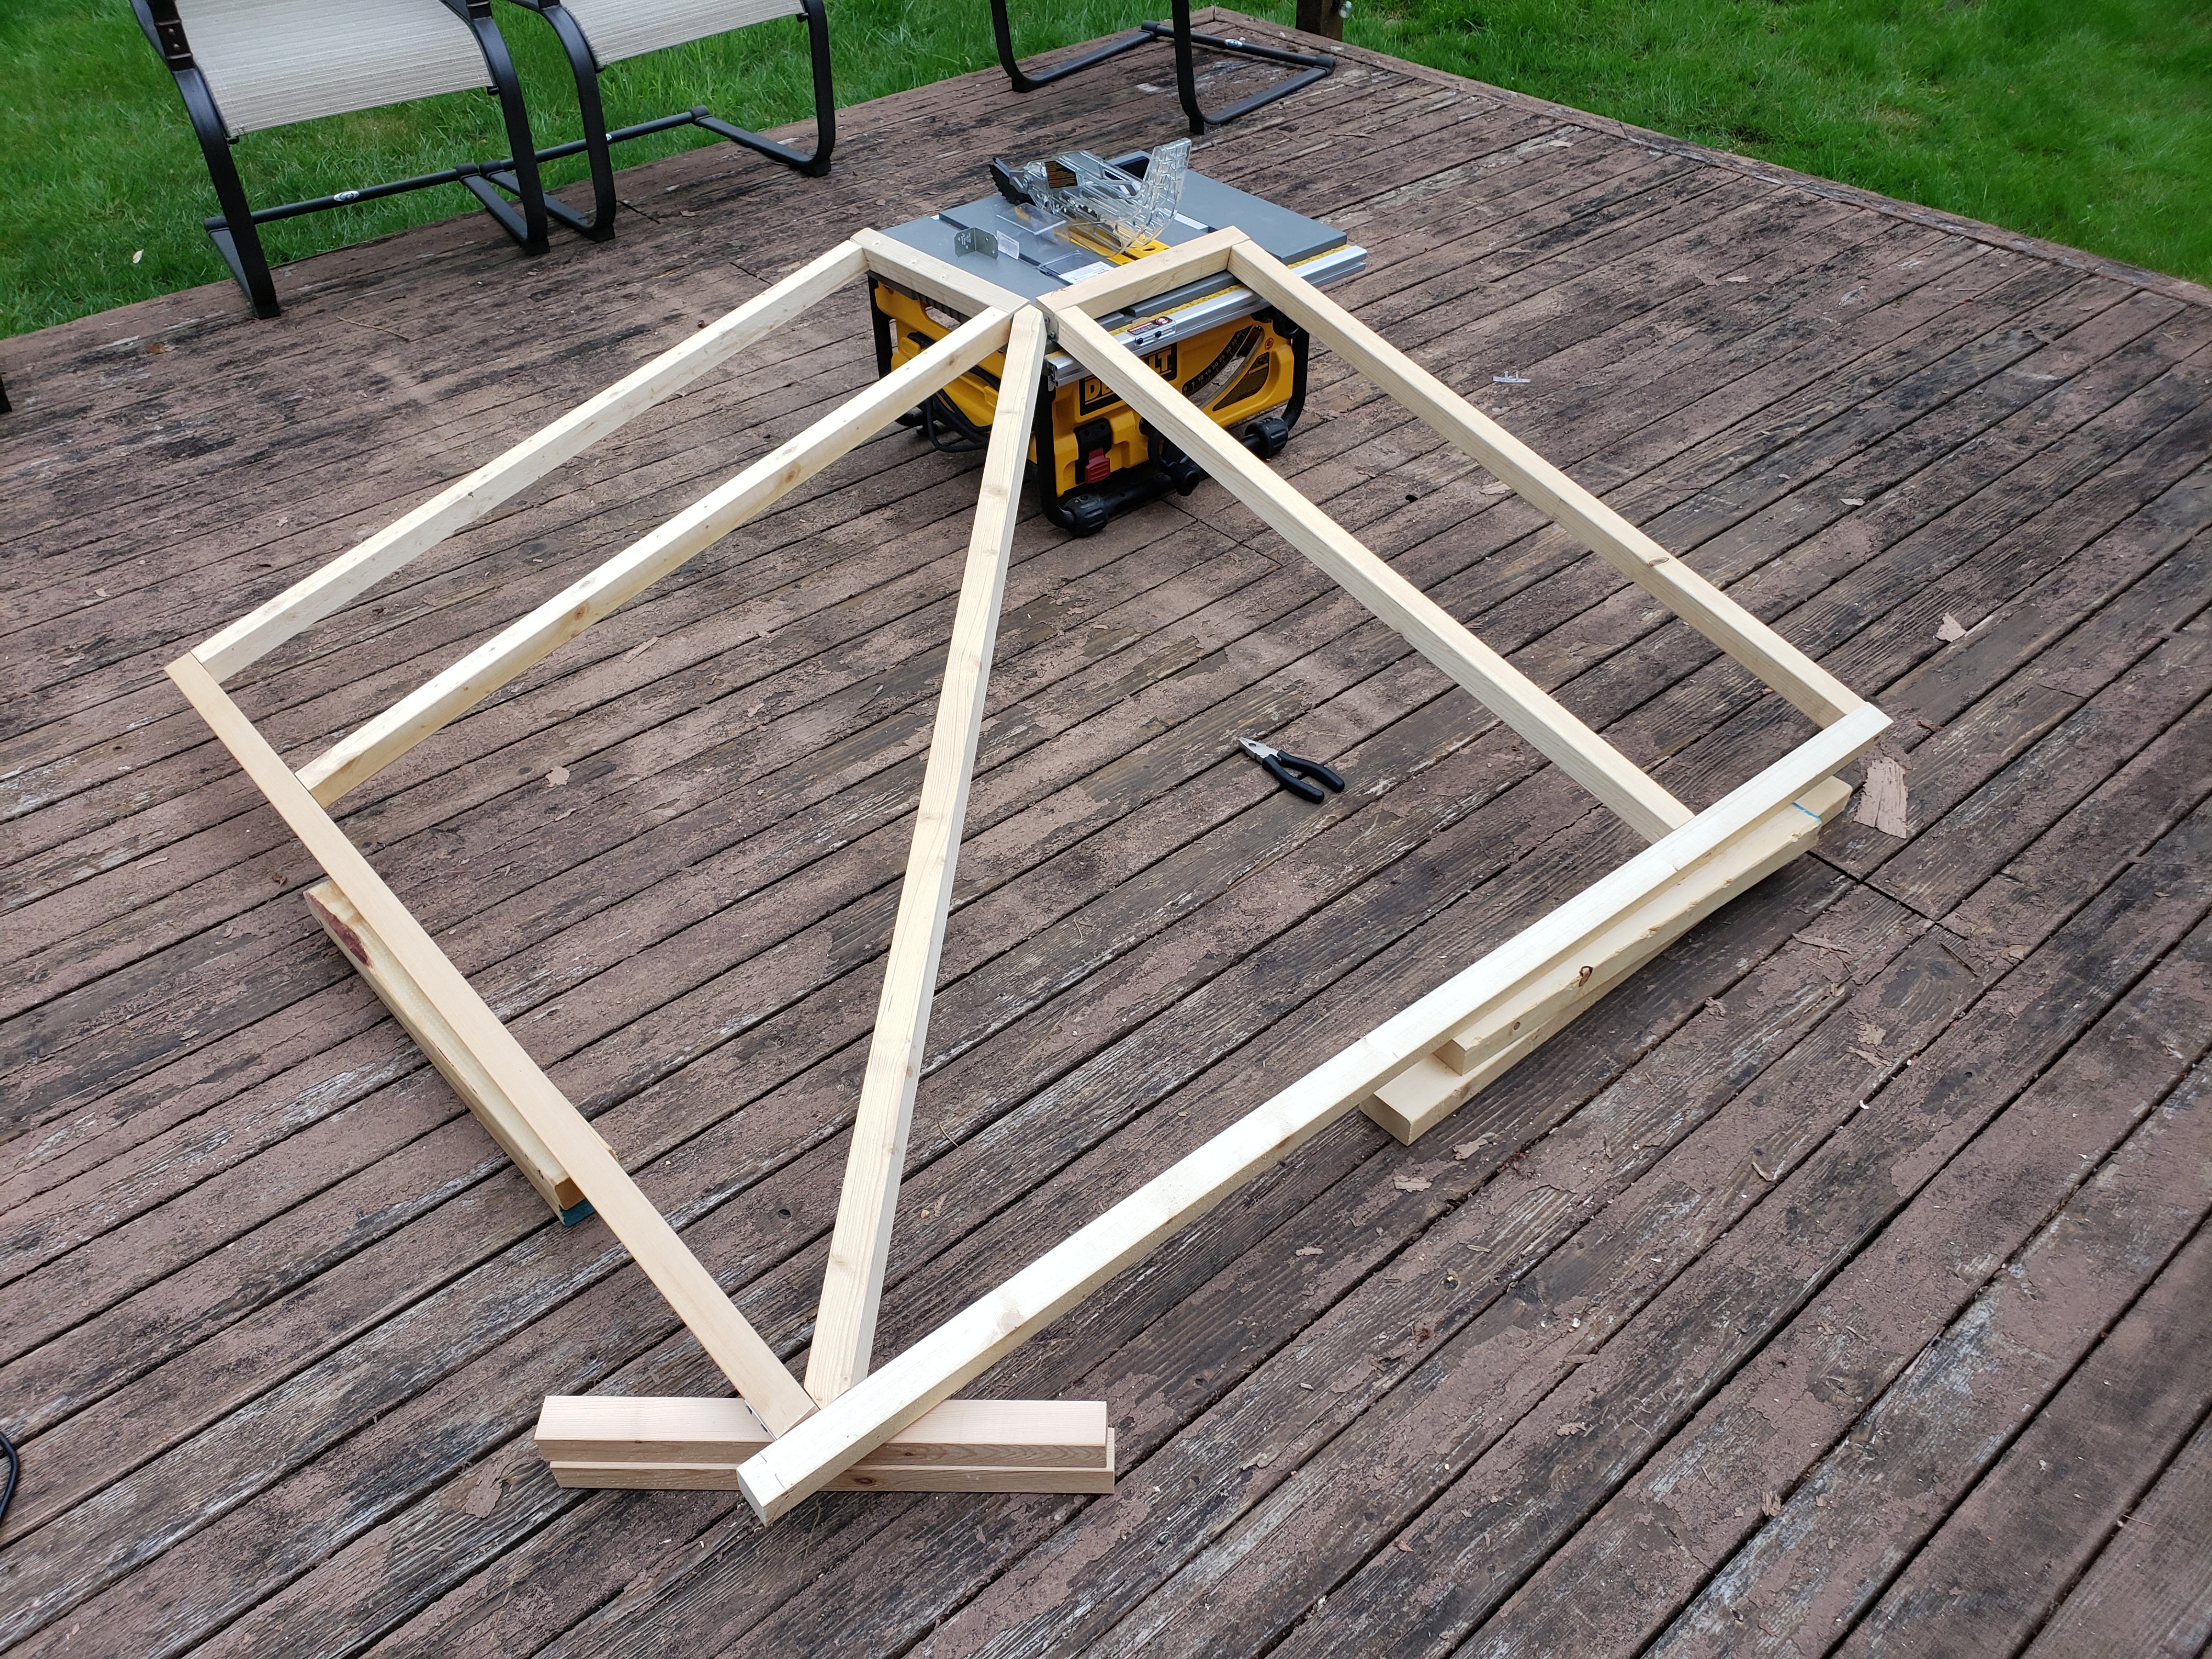
Notice that I also made markings during test fit to know where the existing polycarbonate panels will overlap with the corner frame, and started attaching panels from there.

There was a lot of precision cutting needed to align the corner panels and their connectors. Jigsaw and some quick thinking on my feet with scrap pieces of wood to make small jigs helped to speed it up 😉
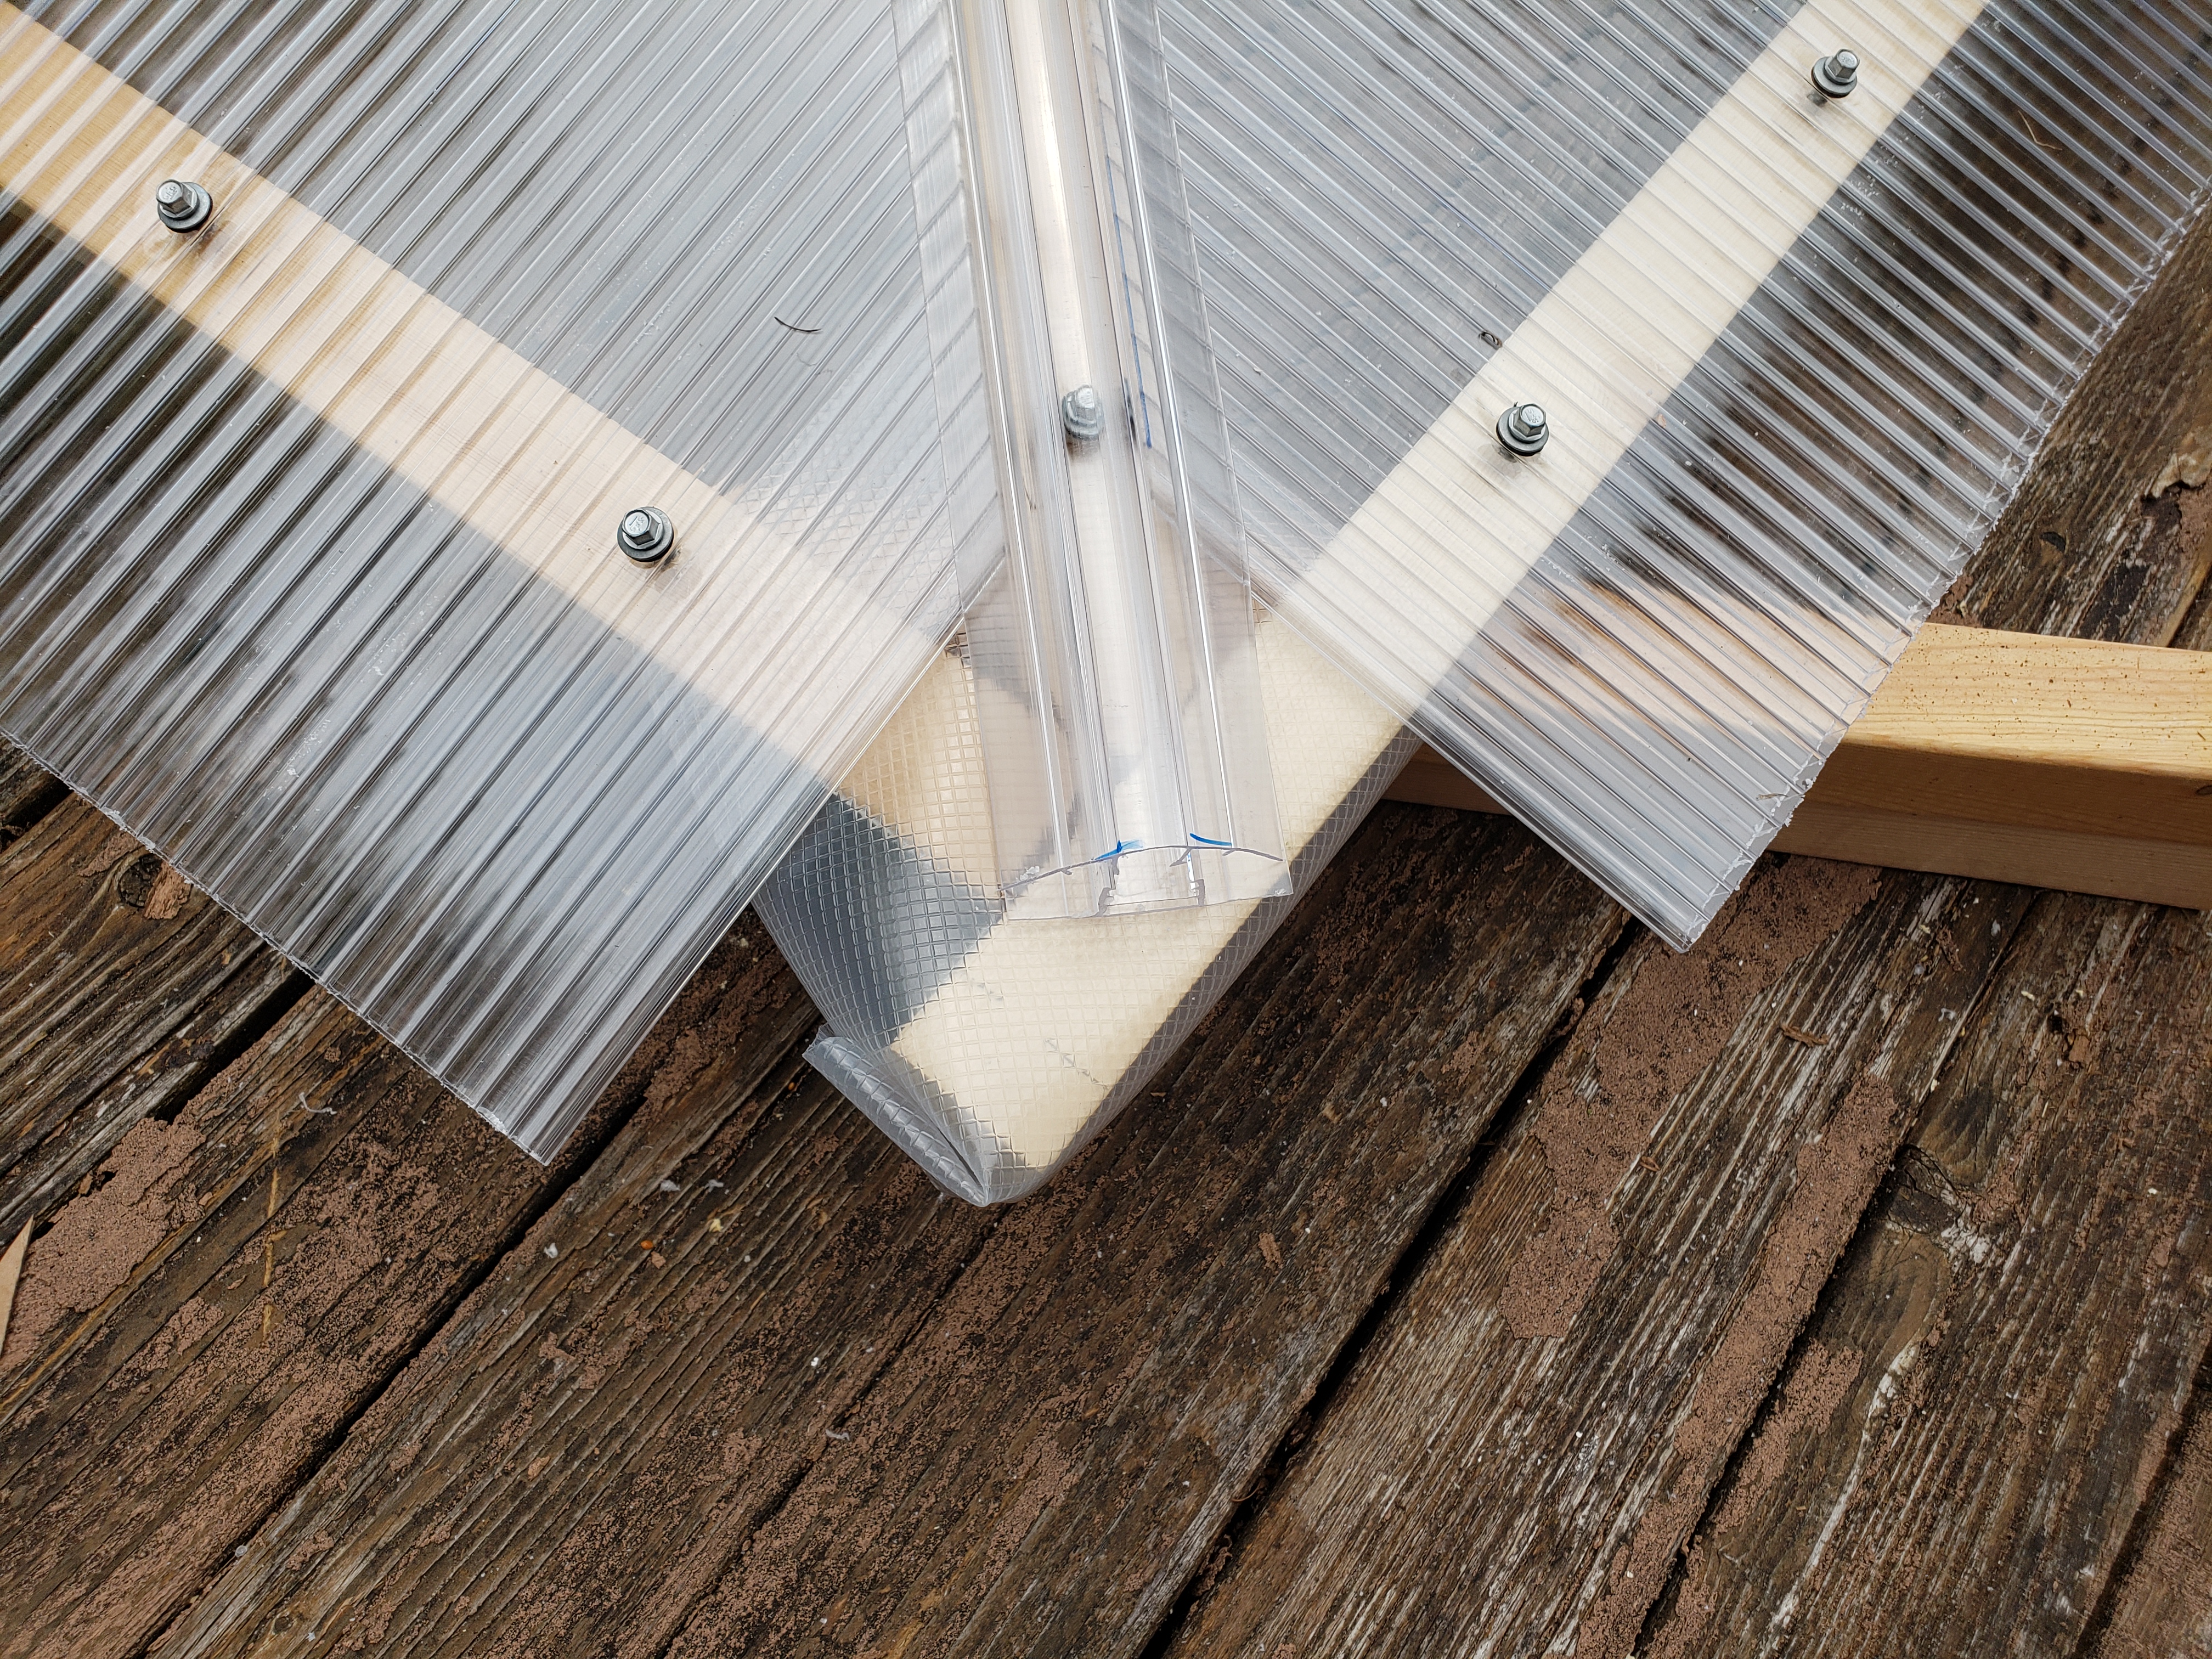
Those connectors are flexible enough to allow attaching panels at a slight angle (this was the only place where panels were not connected “flat” but instead at an angle).
Unfortunately, the panels were just few inches too short to cover the very tip of the corner. I didn’t want to leave it unfinished, so I hacked an acceptable solution: I used a piece of cardboard to cut out a template, then I cut out a piece of panel based on that shape.
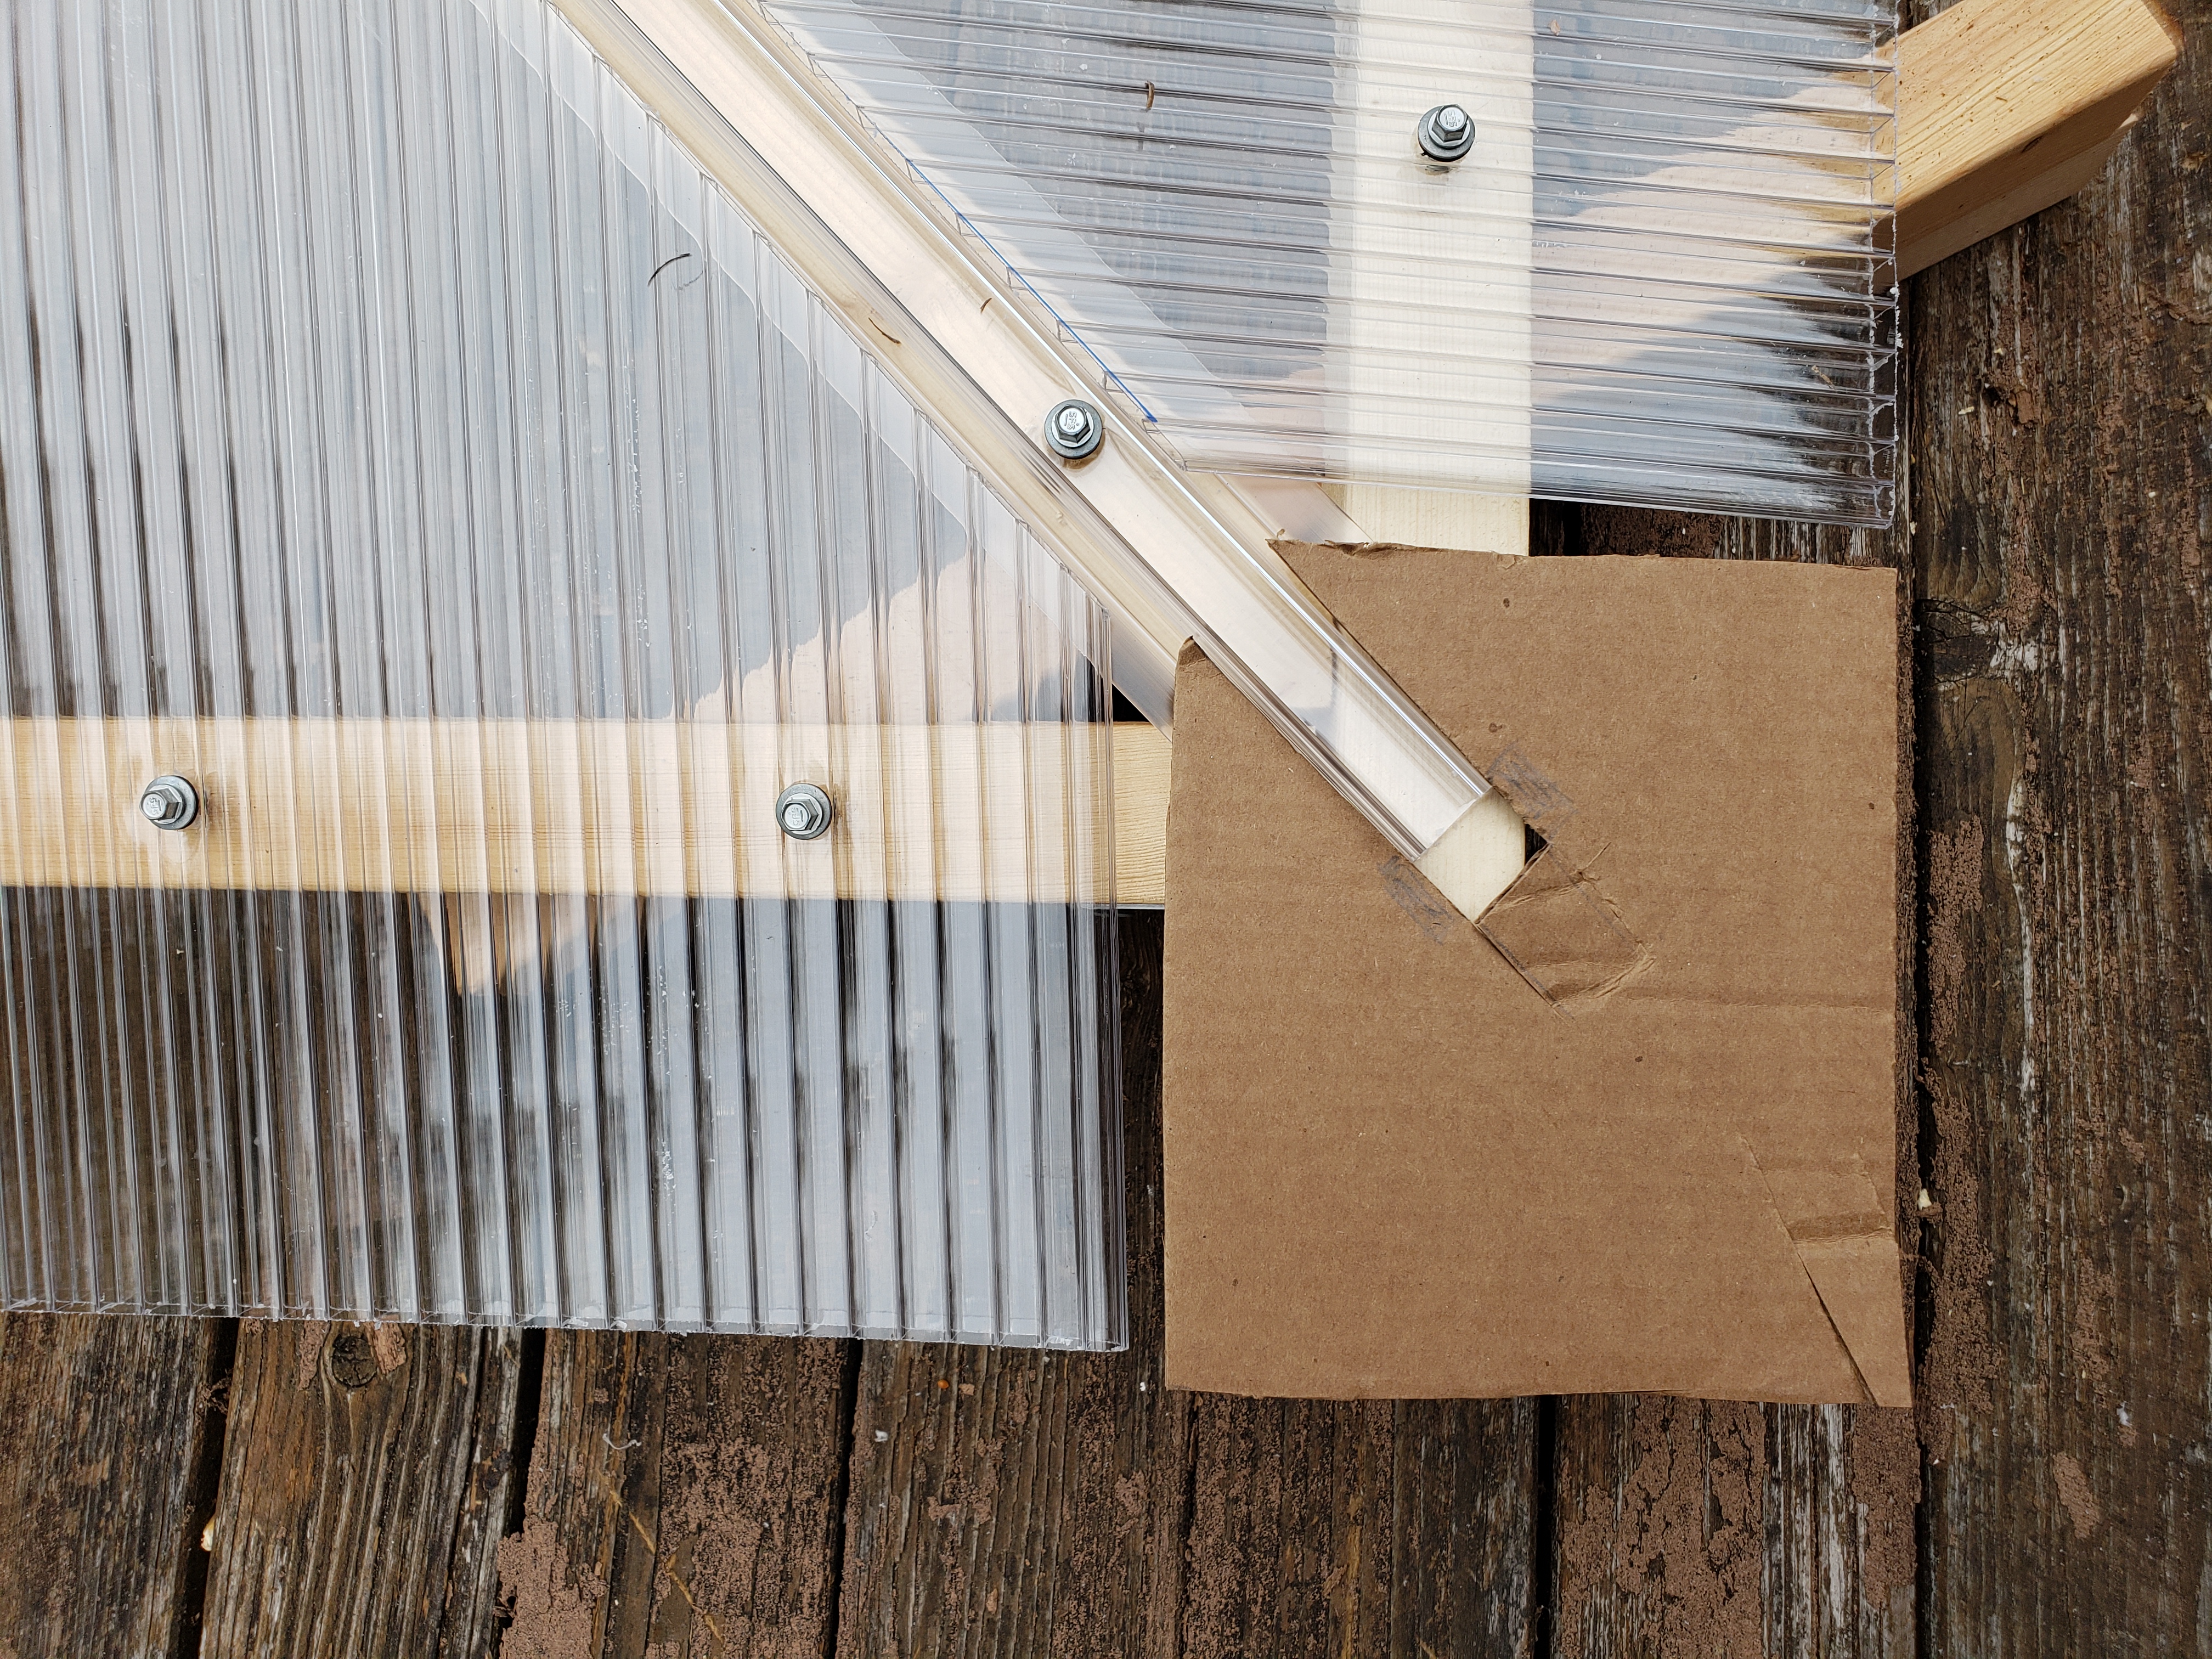
Since this wouldn’t be water tight (adding connectors in this place felt like an overkill), I protected the wood with a piece of thick foil, so it doesn’t rot when water gets to it, and then added the end piece. It’s kept in place thanks to still overlapping with the connector at the peak.
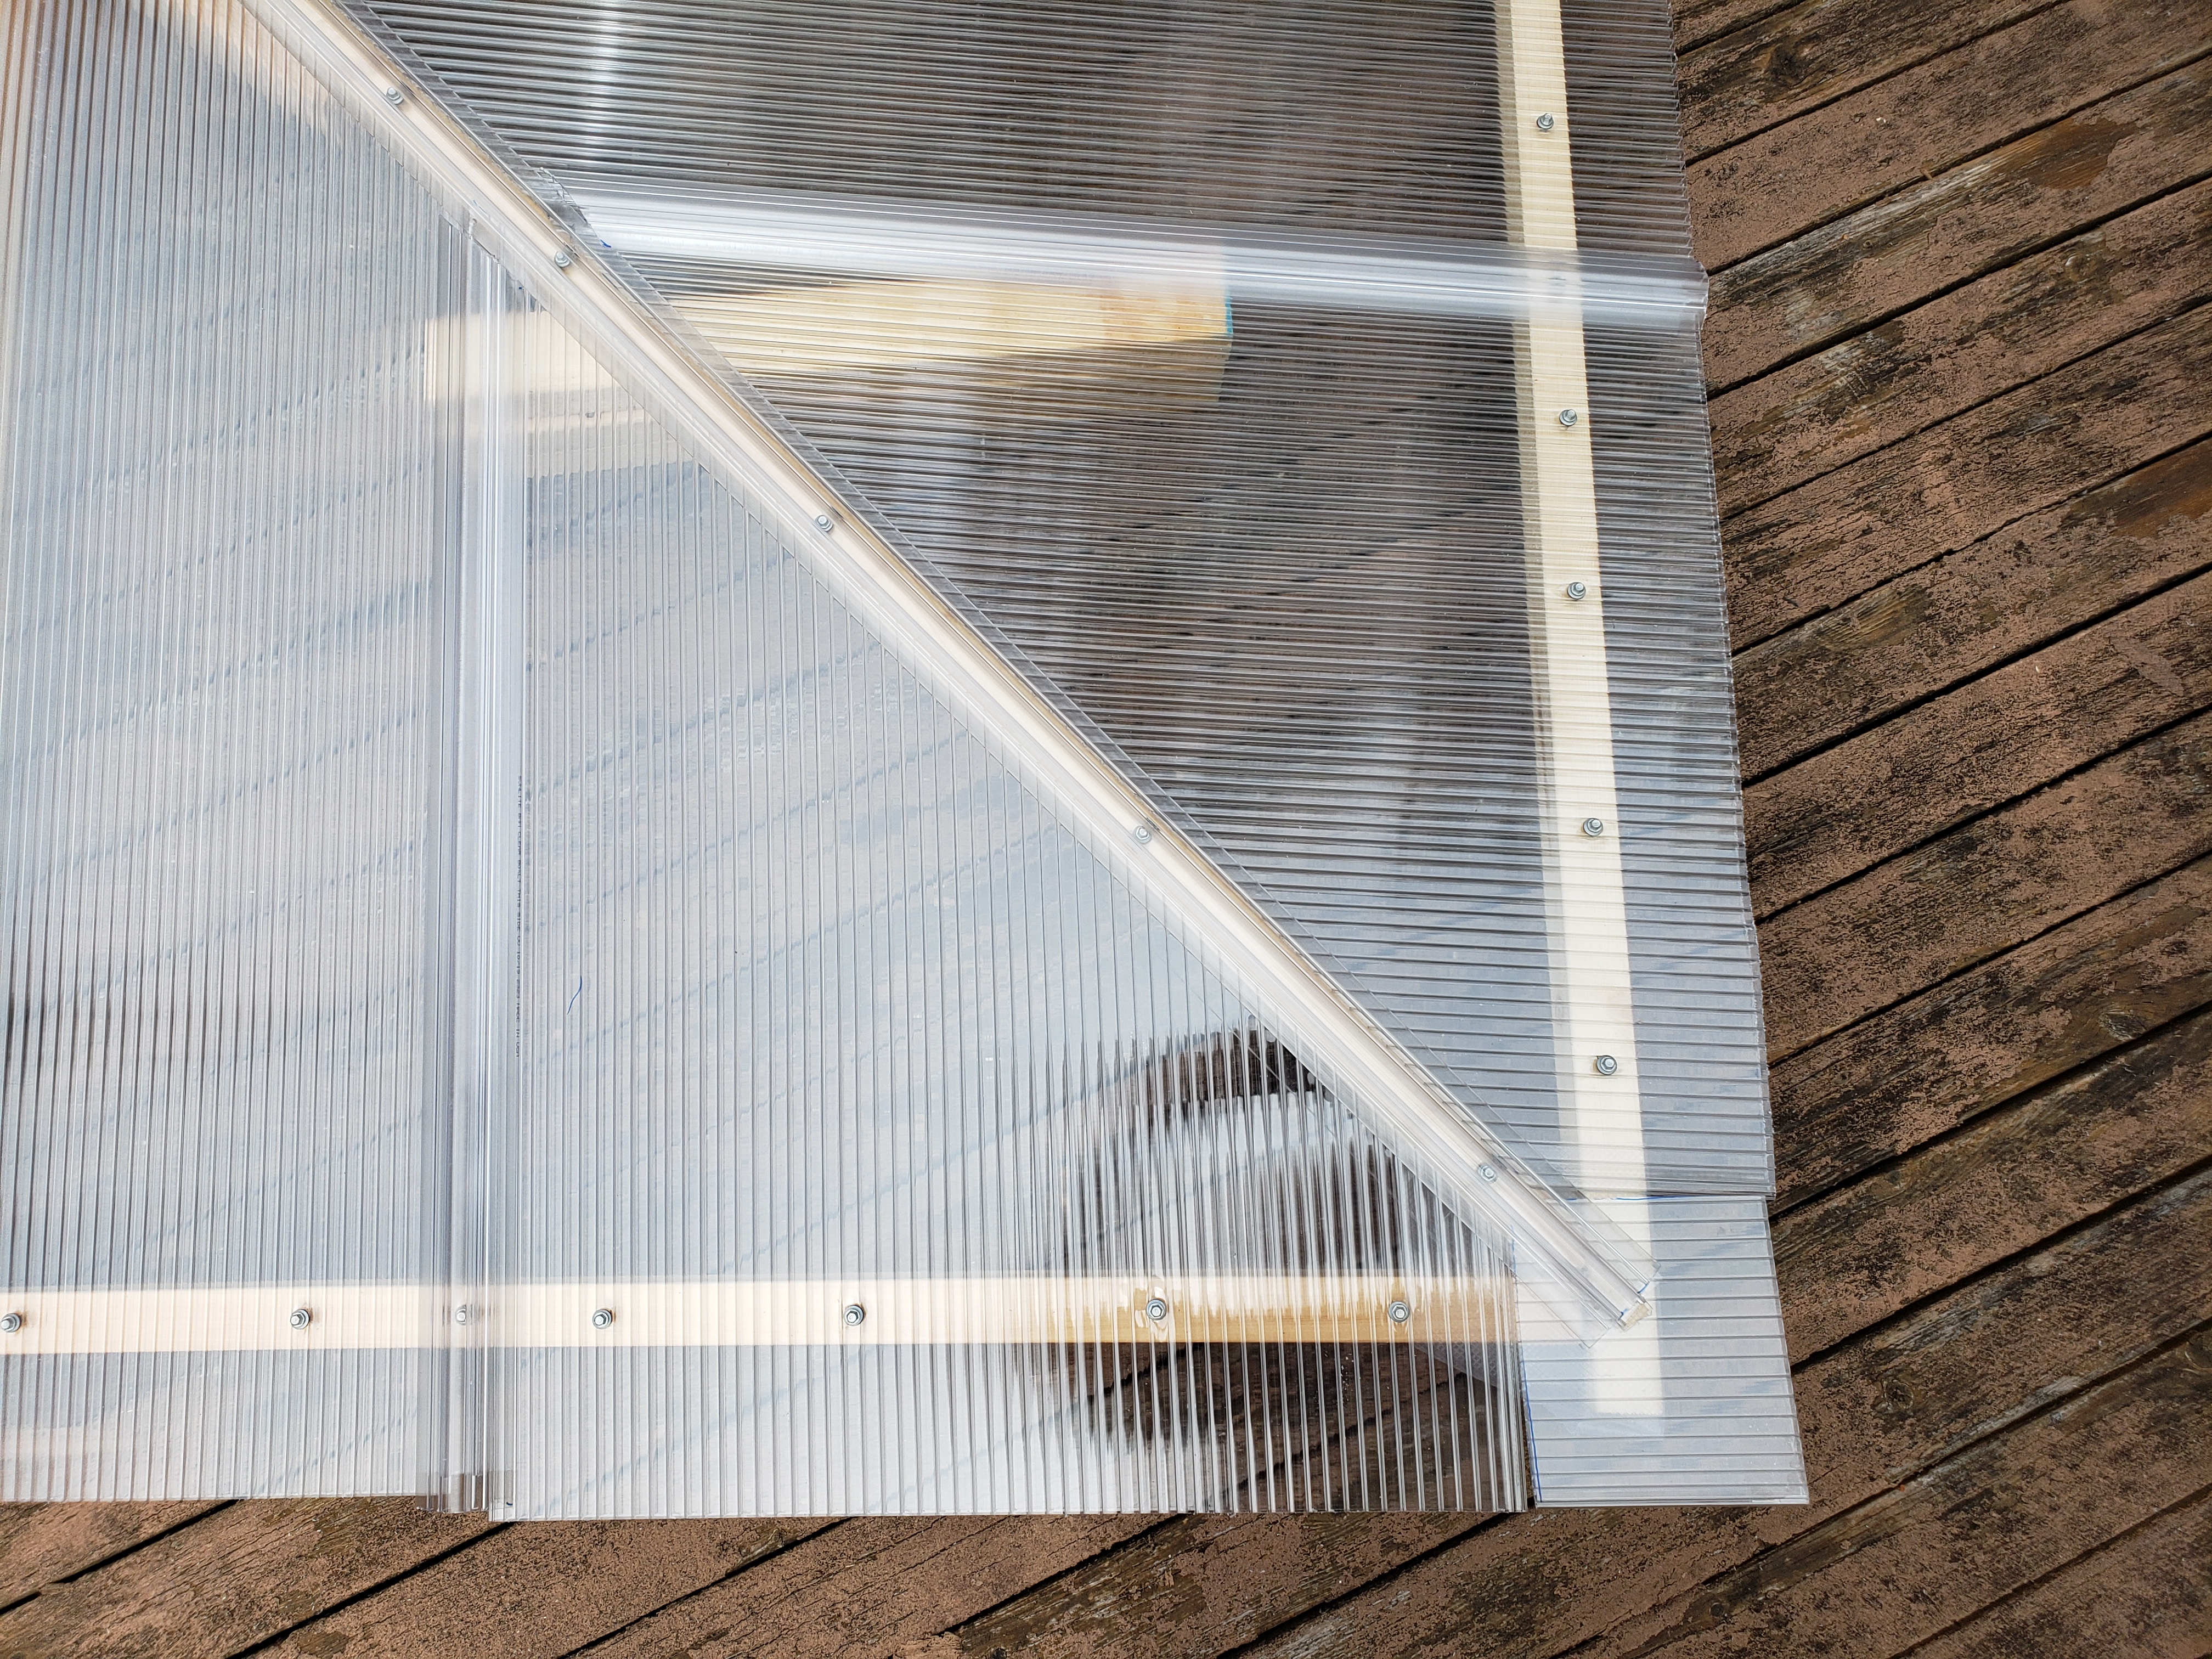
Once the corner was ready, it kind of looked like a piece of modern art… 😉
There was a surprise waiting for me at this moment – turns out the opening in the roof wasn’t large enough to allow for maneuvering of the corner piece and putting it in place. So I had to unscrew one adjacent roof panel from the side, slide it to make a larger opening, position the corner and put the side panel back into place. An alternative would be to position the corner from the outside, from a ladder, but there’s a very limited space underneath, so I preferred to proceed that way.
Not pictured is one more final step with roof – adding flashing. This was very simple, but make sure to be safe if you’re walking on the roof. This step required the removal of existing drip edge flashing on the home’s roof, and sliding additional piece of L-shaped flashing underneath – this piece is also resting on the new aviary roof, and provides way for water to flow without getting into the gap where new roof is attached to old one.
While I was trying to complete all the work myself without bothering the family, my wife came with help at the most critical time, when one person wasn’t enough to align the roof panels 🙂
On a side note, I thought of some alternatives – not necessarily clearly better choices, just different options, for roofing panels:
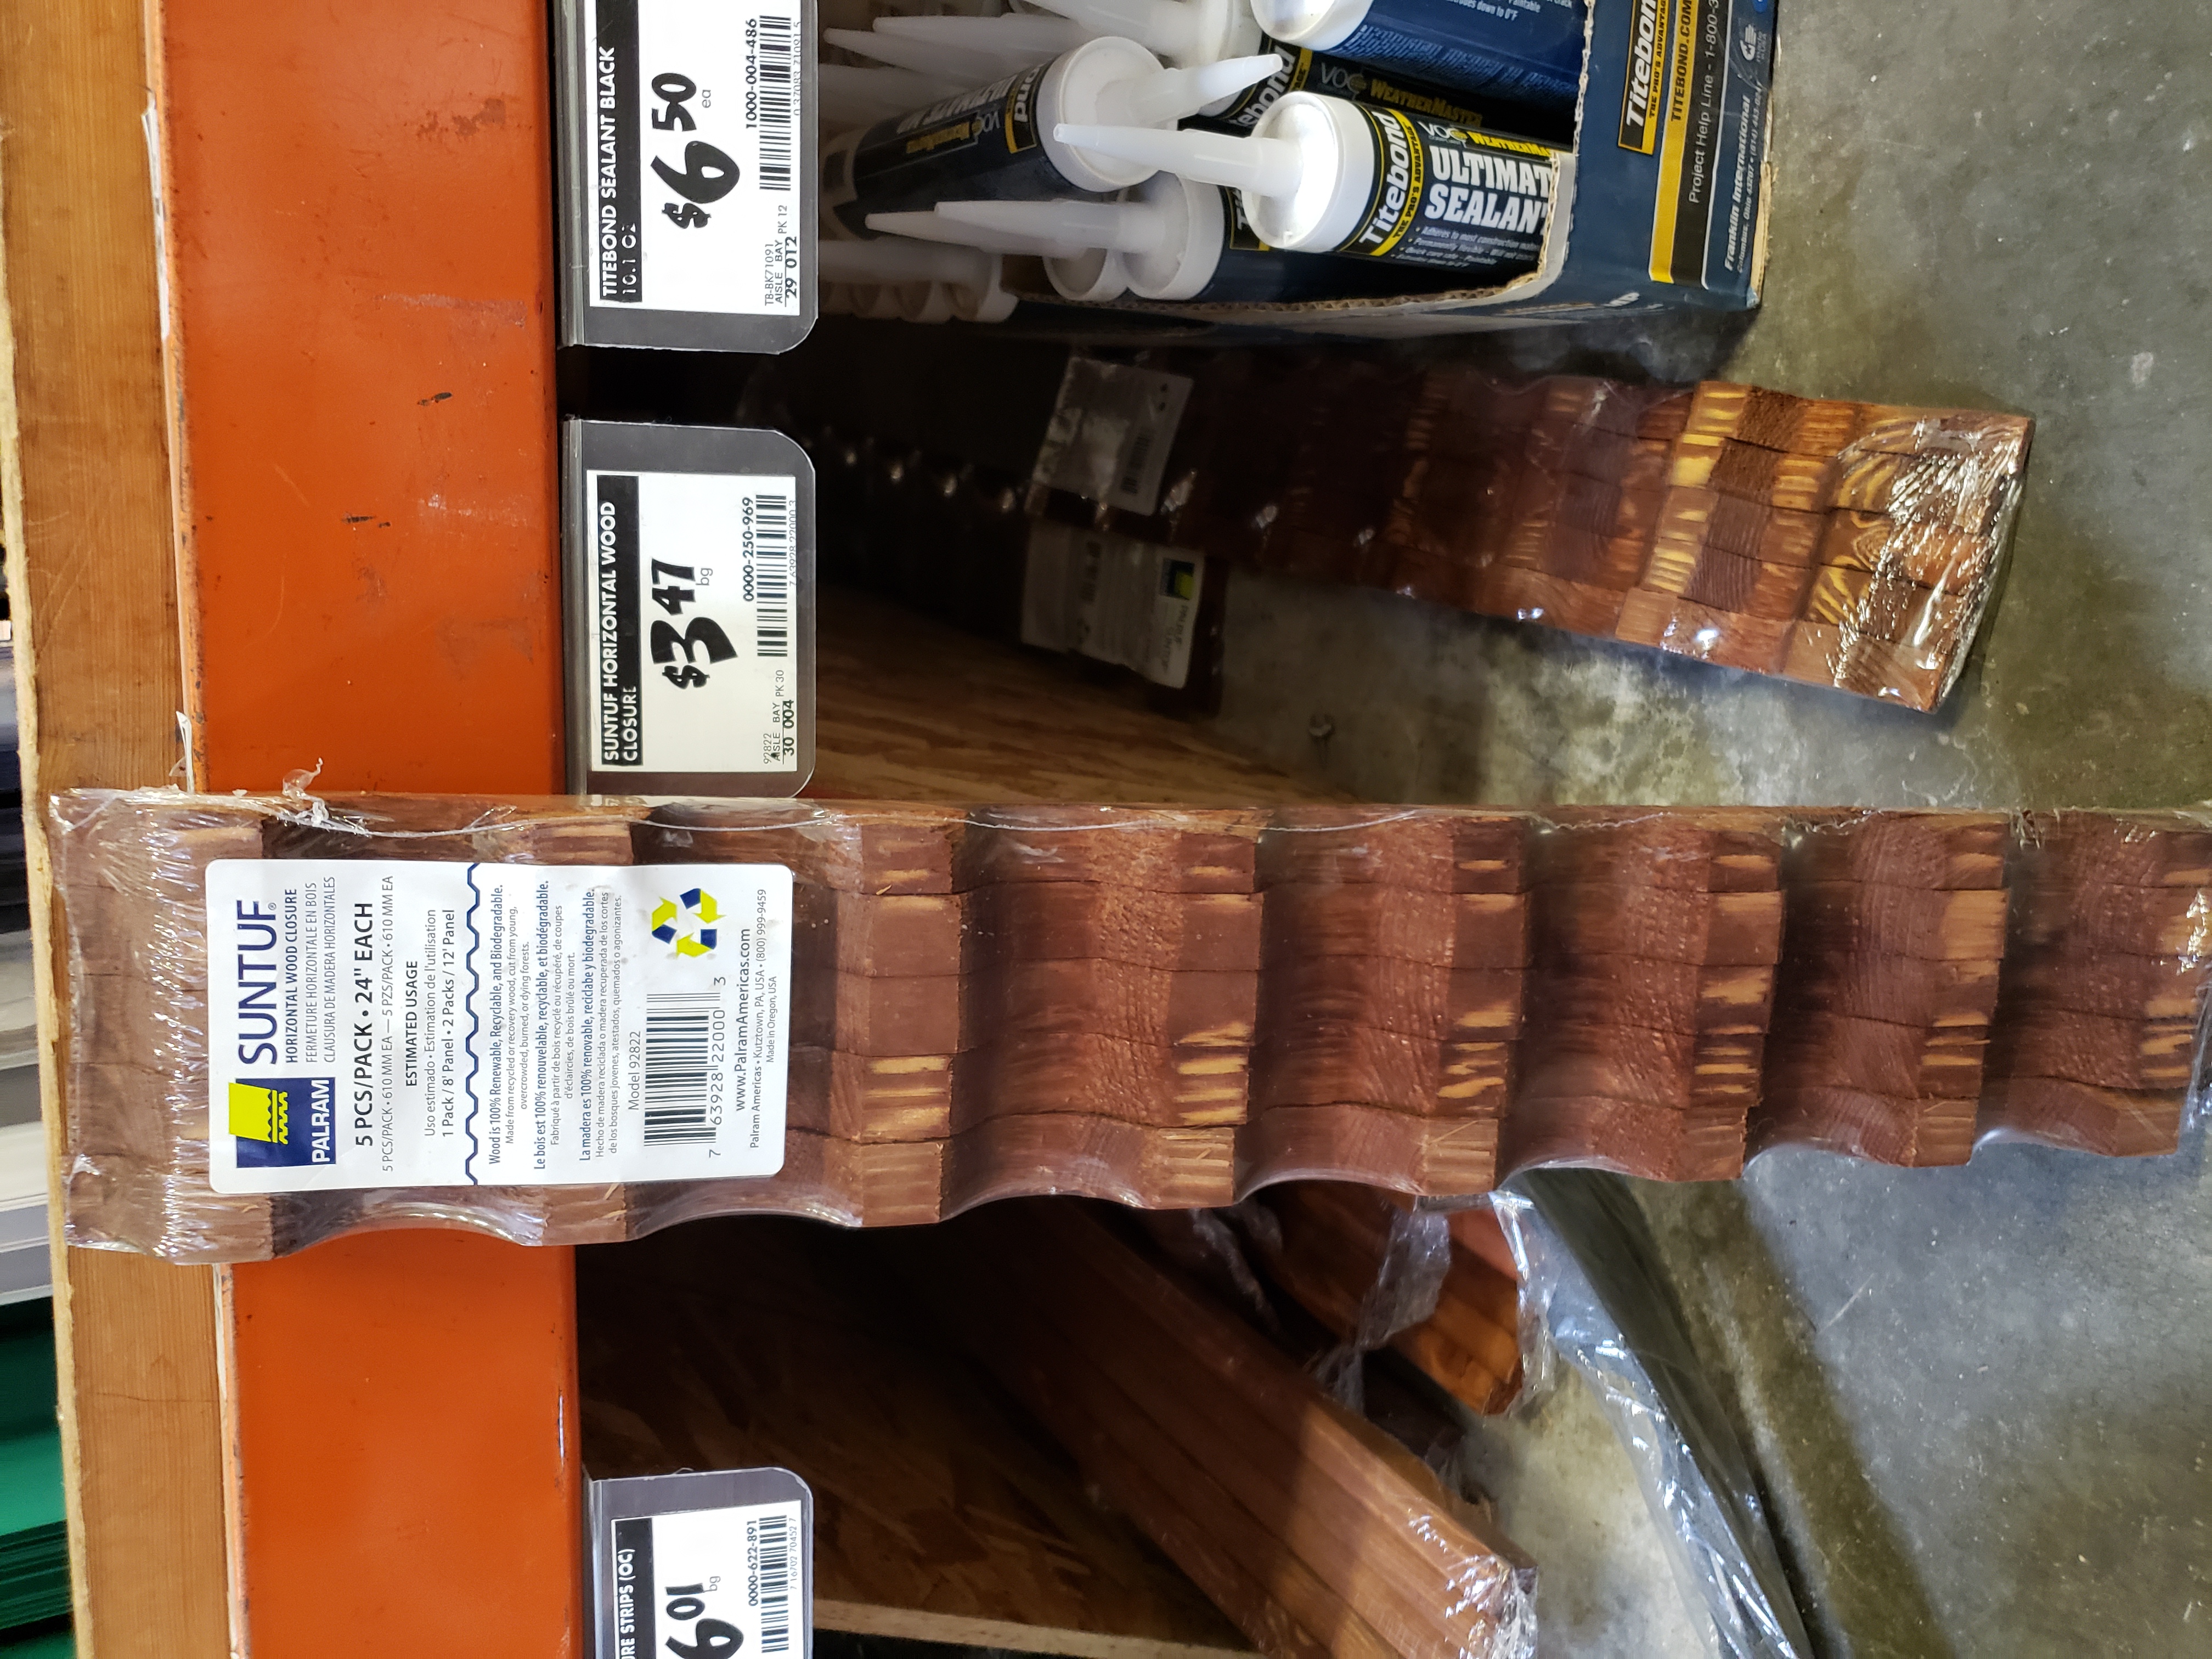


Price-wise that option would come to similar cost, but I liked that it had dedicated flashing piece (right-most photo). You could also avoid some cutting since it can be laid over another panel and no connectors are needed between panels. One place where they could prove difficult, would be the peak in the corner, where 2 sides of the roof meet… Be sure to solve that problem first, before choosing this option (maybe some of the roof peak flashing could come in handy?)
Finishing touches and customization
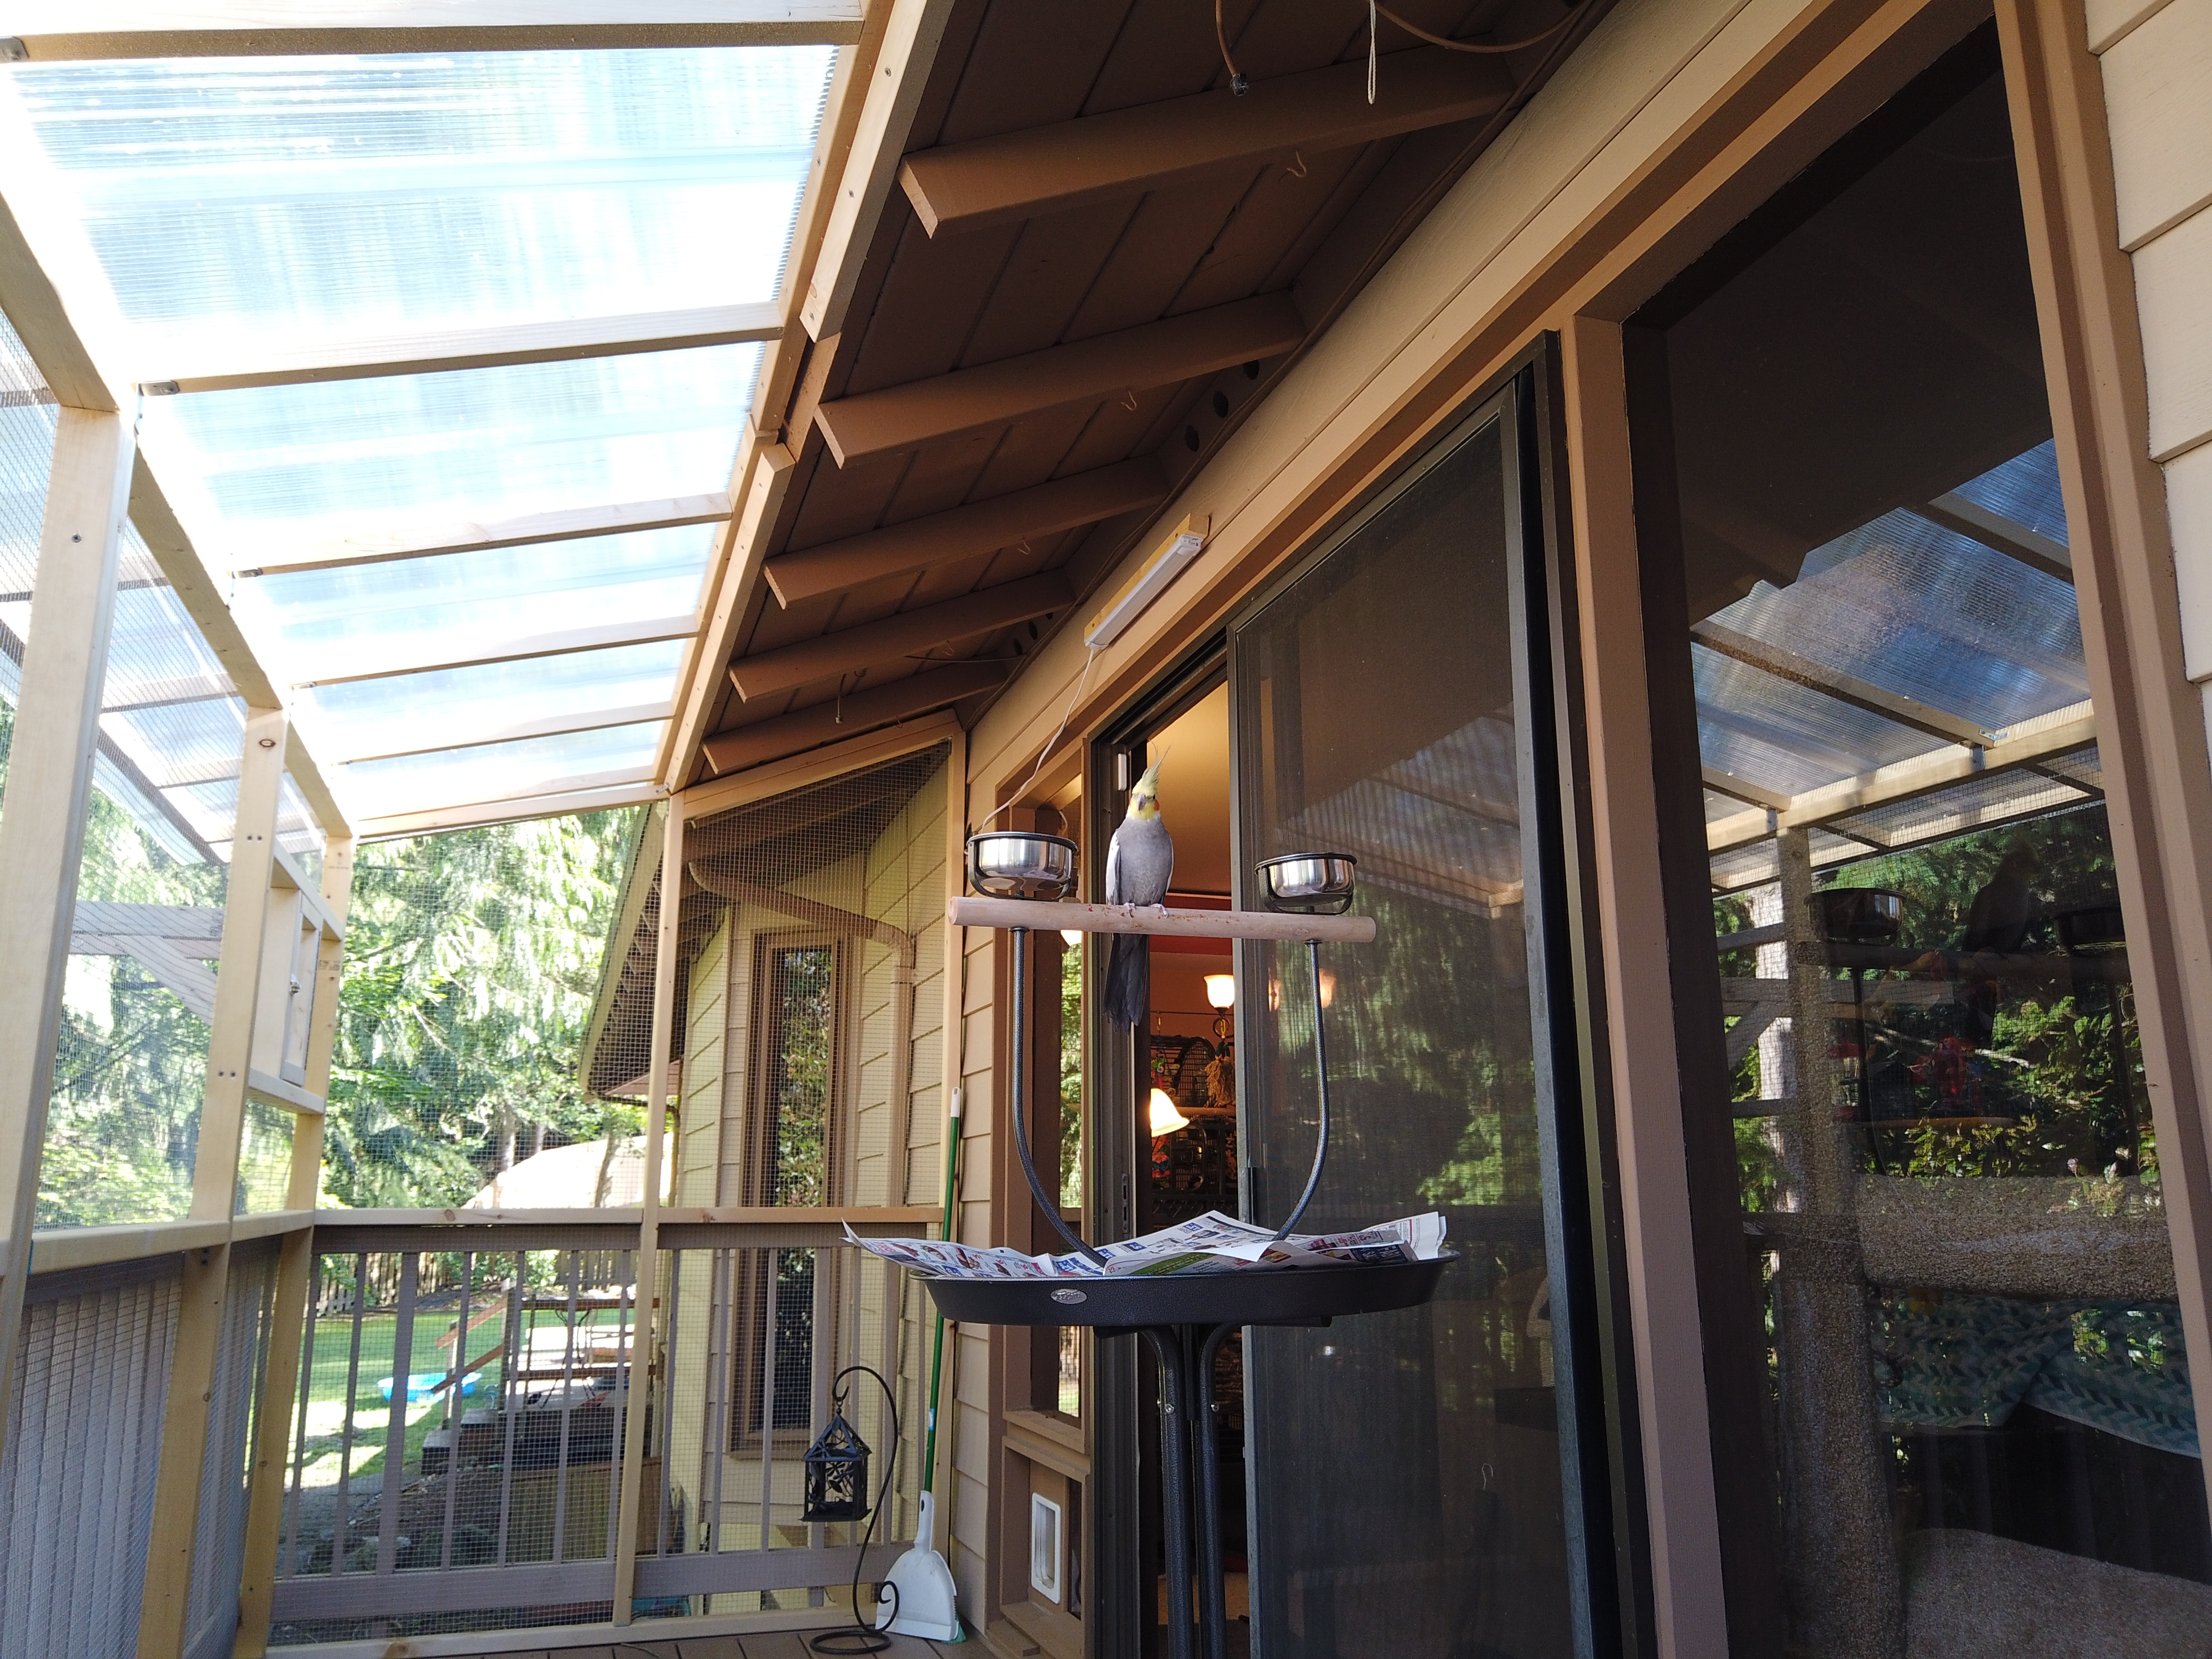
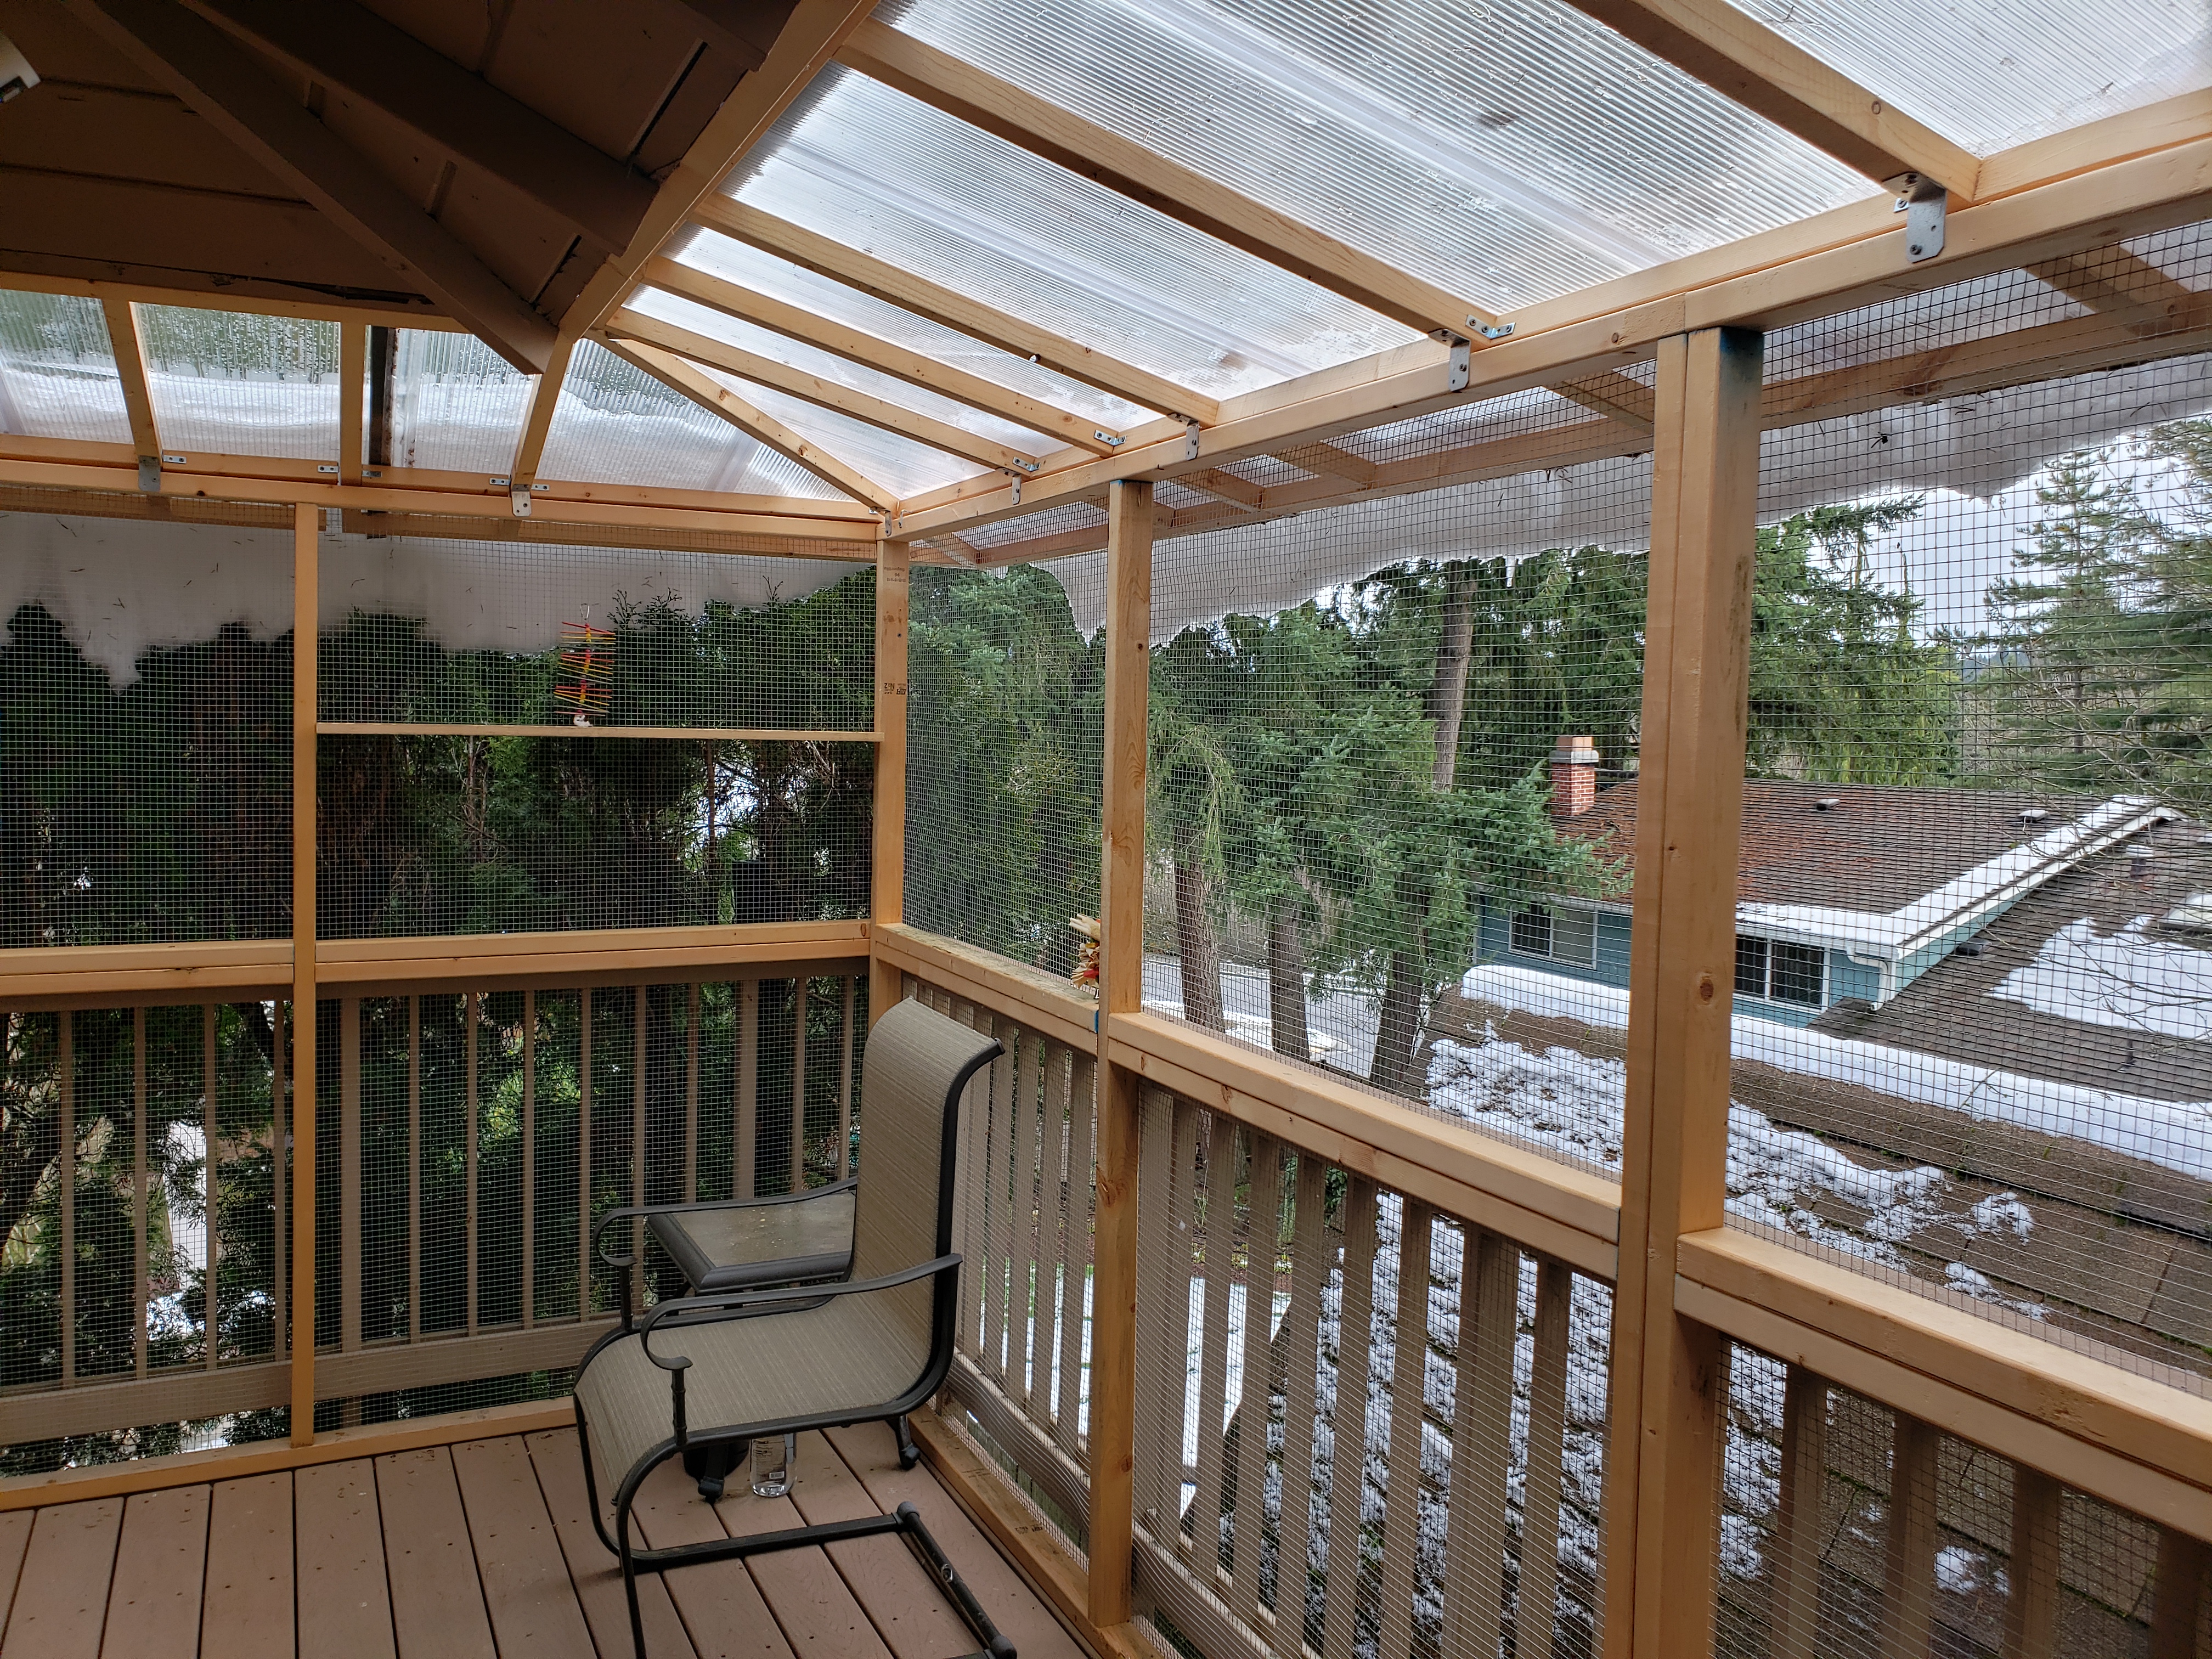
At this point, with all the walls and roof in place, the aviary is ready to use! But before that, I wanted to put some finishing touches. Here are few examples.
Perch with water and food bowls:
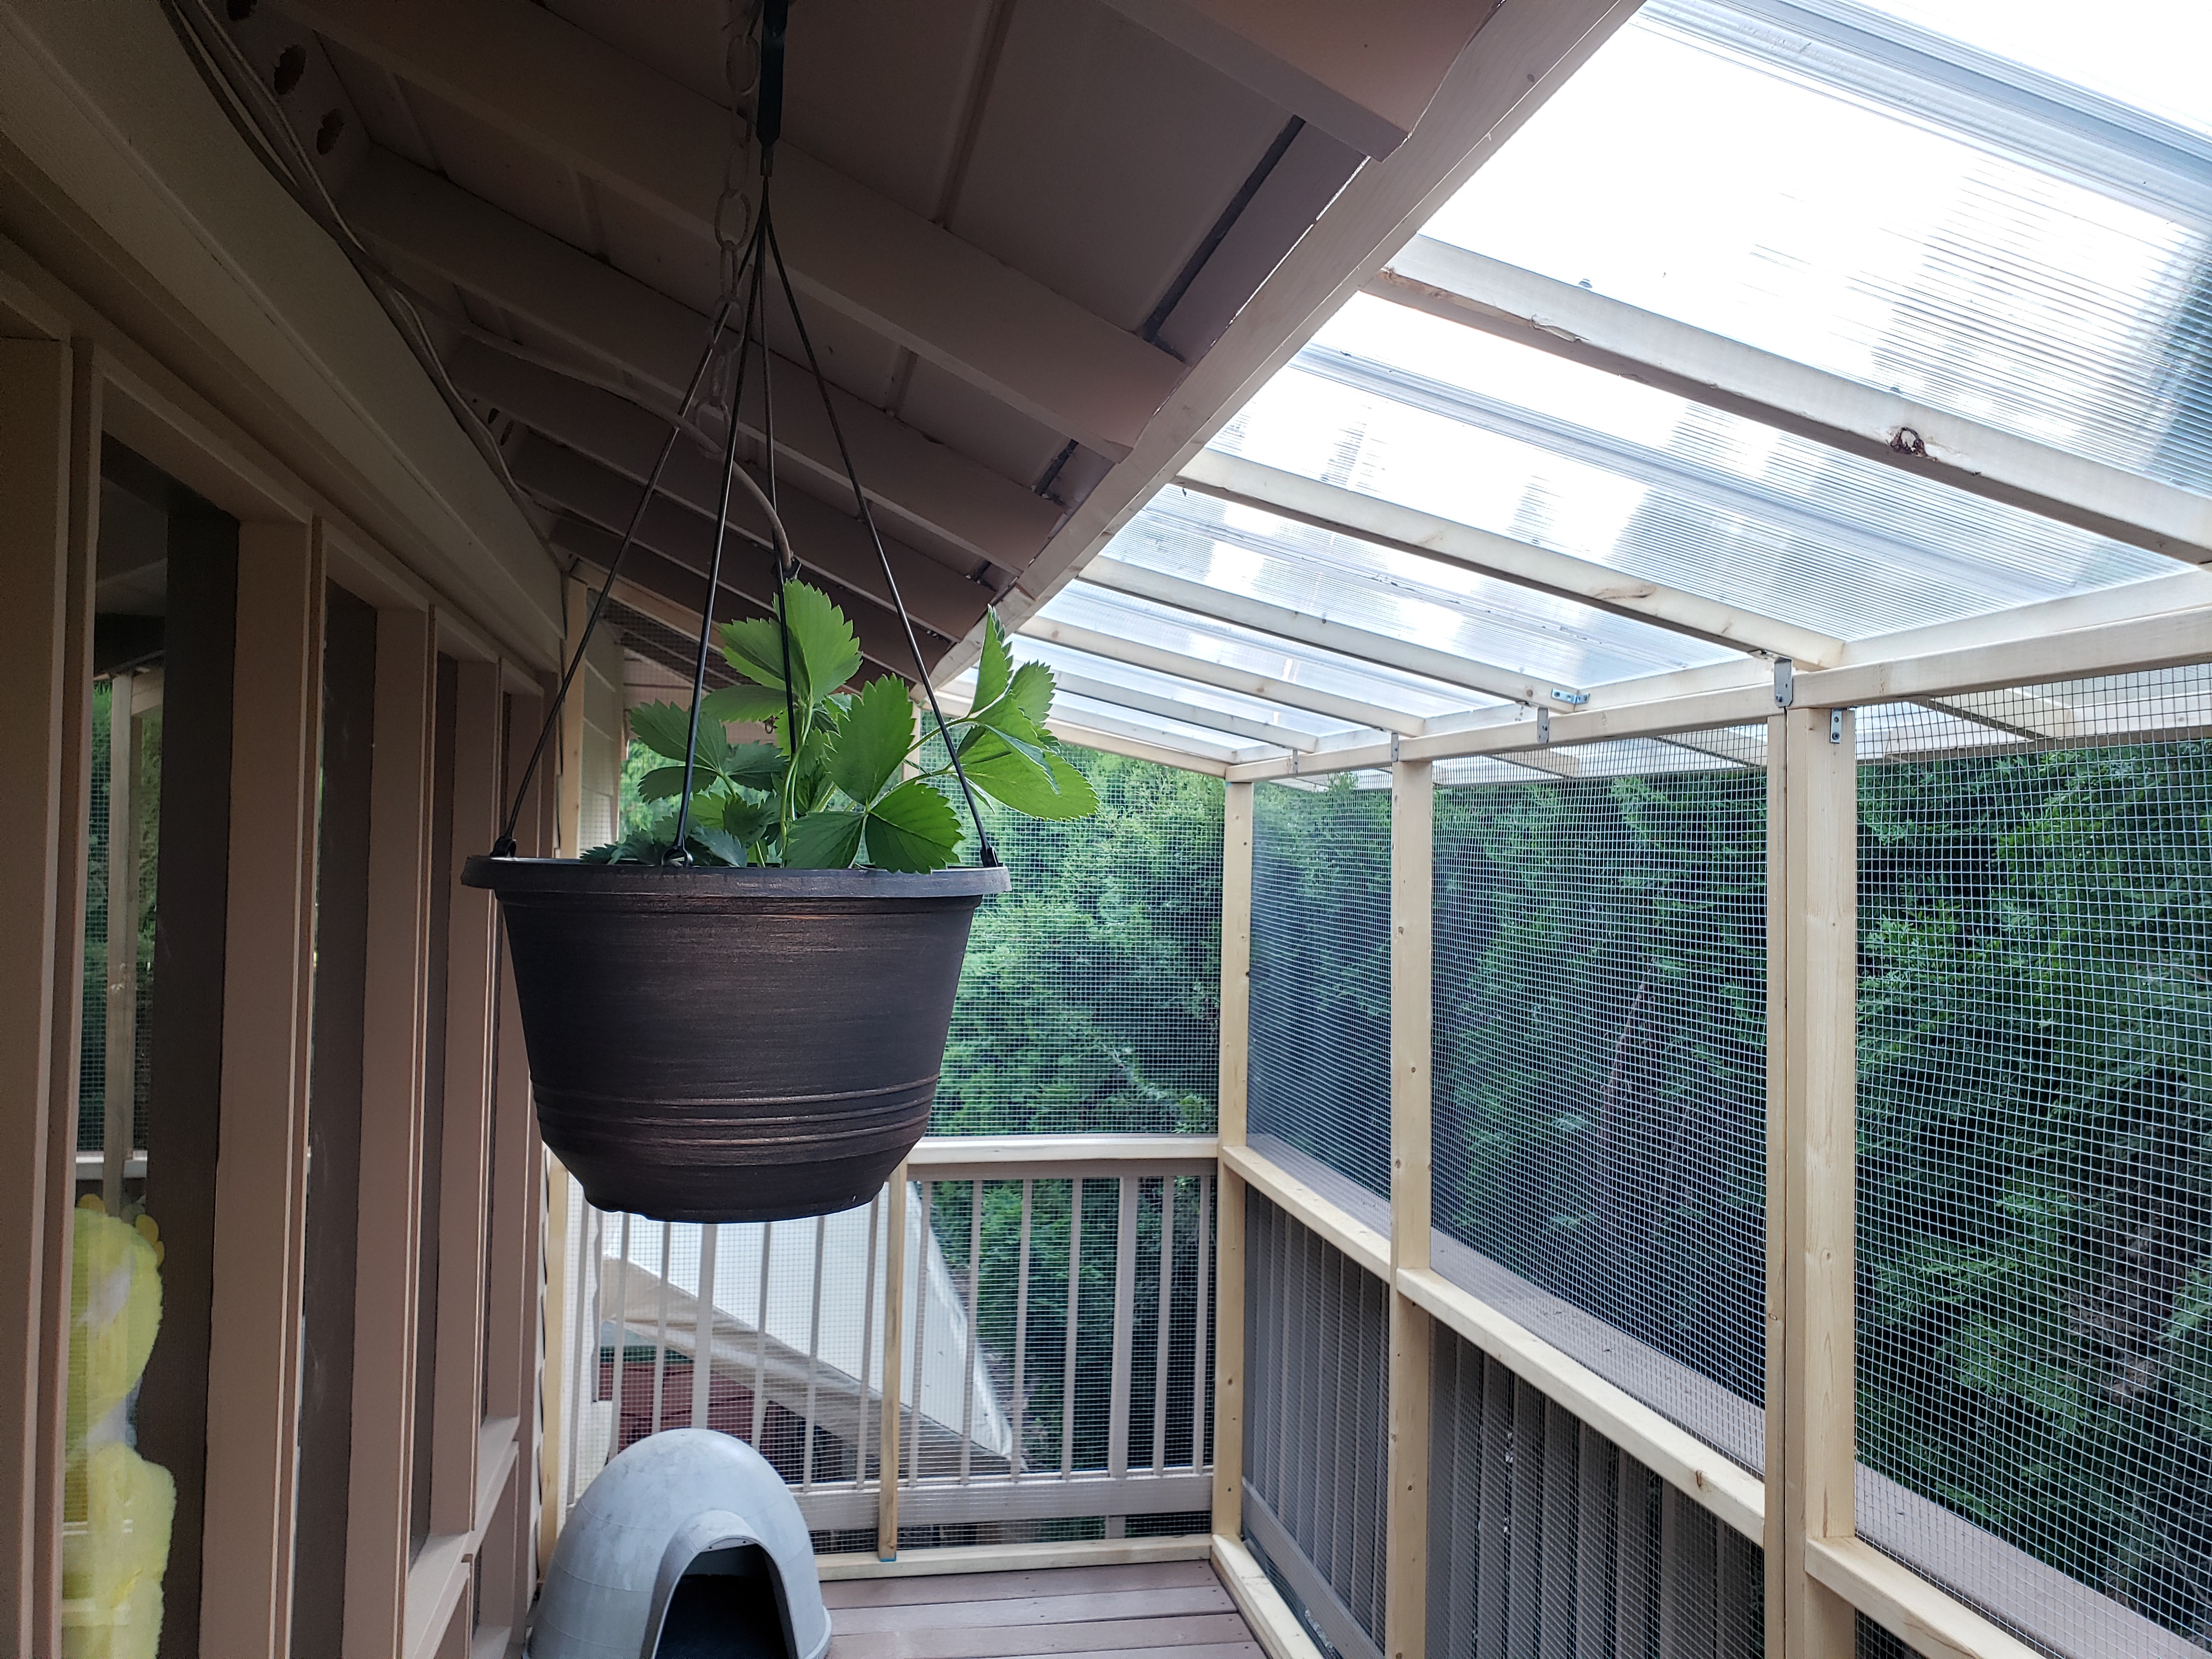
Plants (that’s actually strawberries):

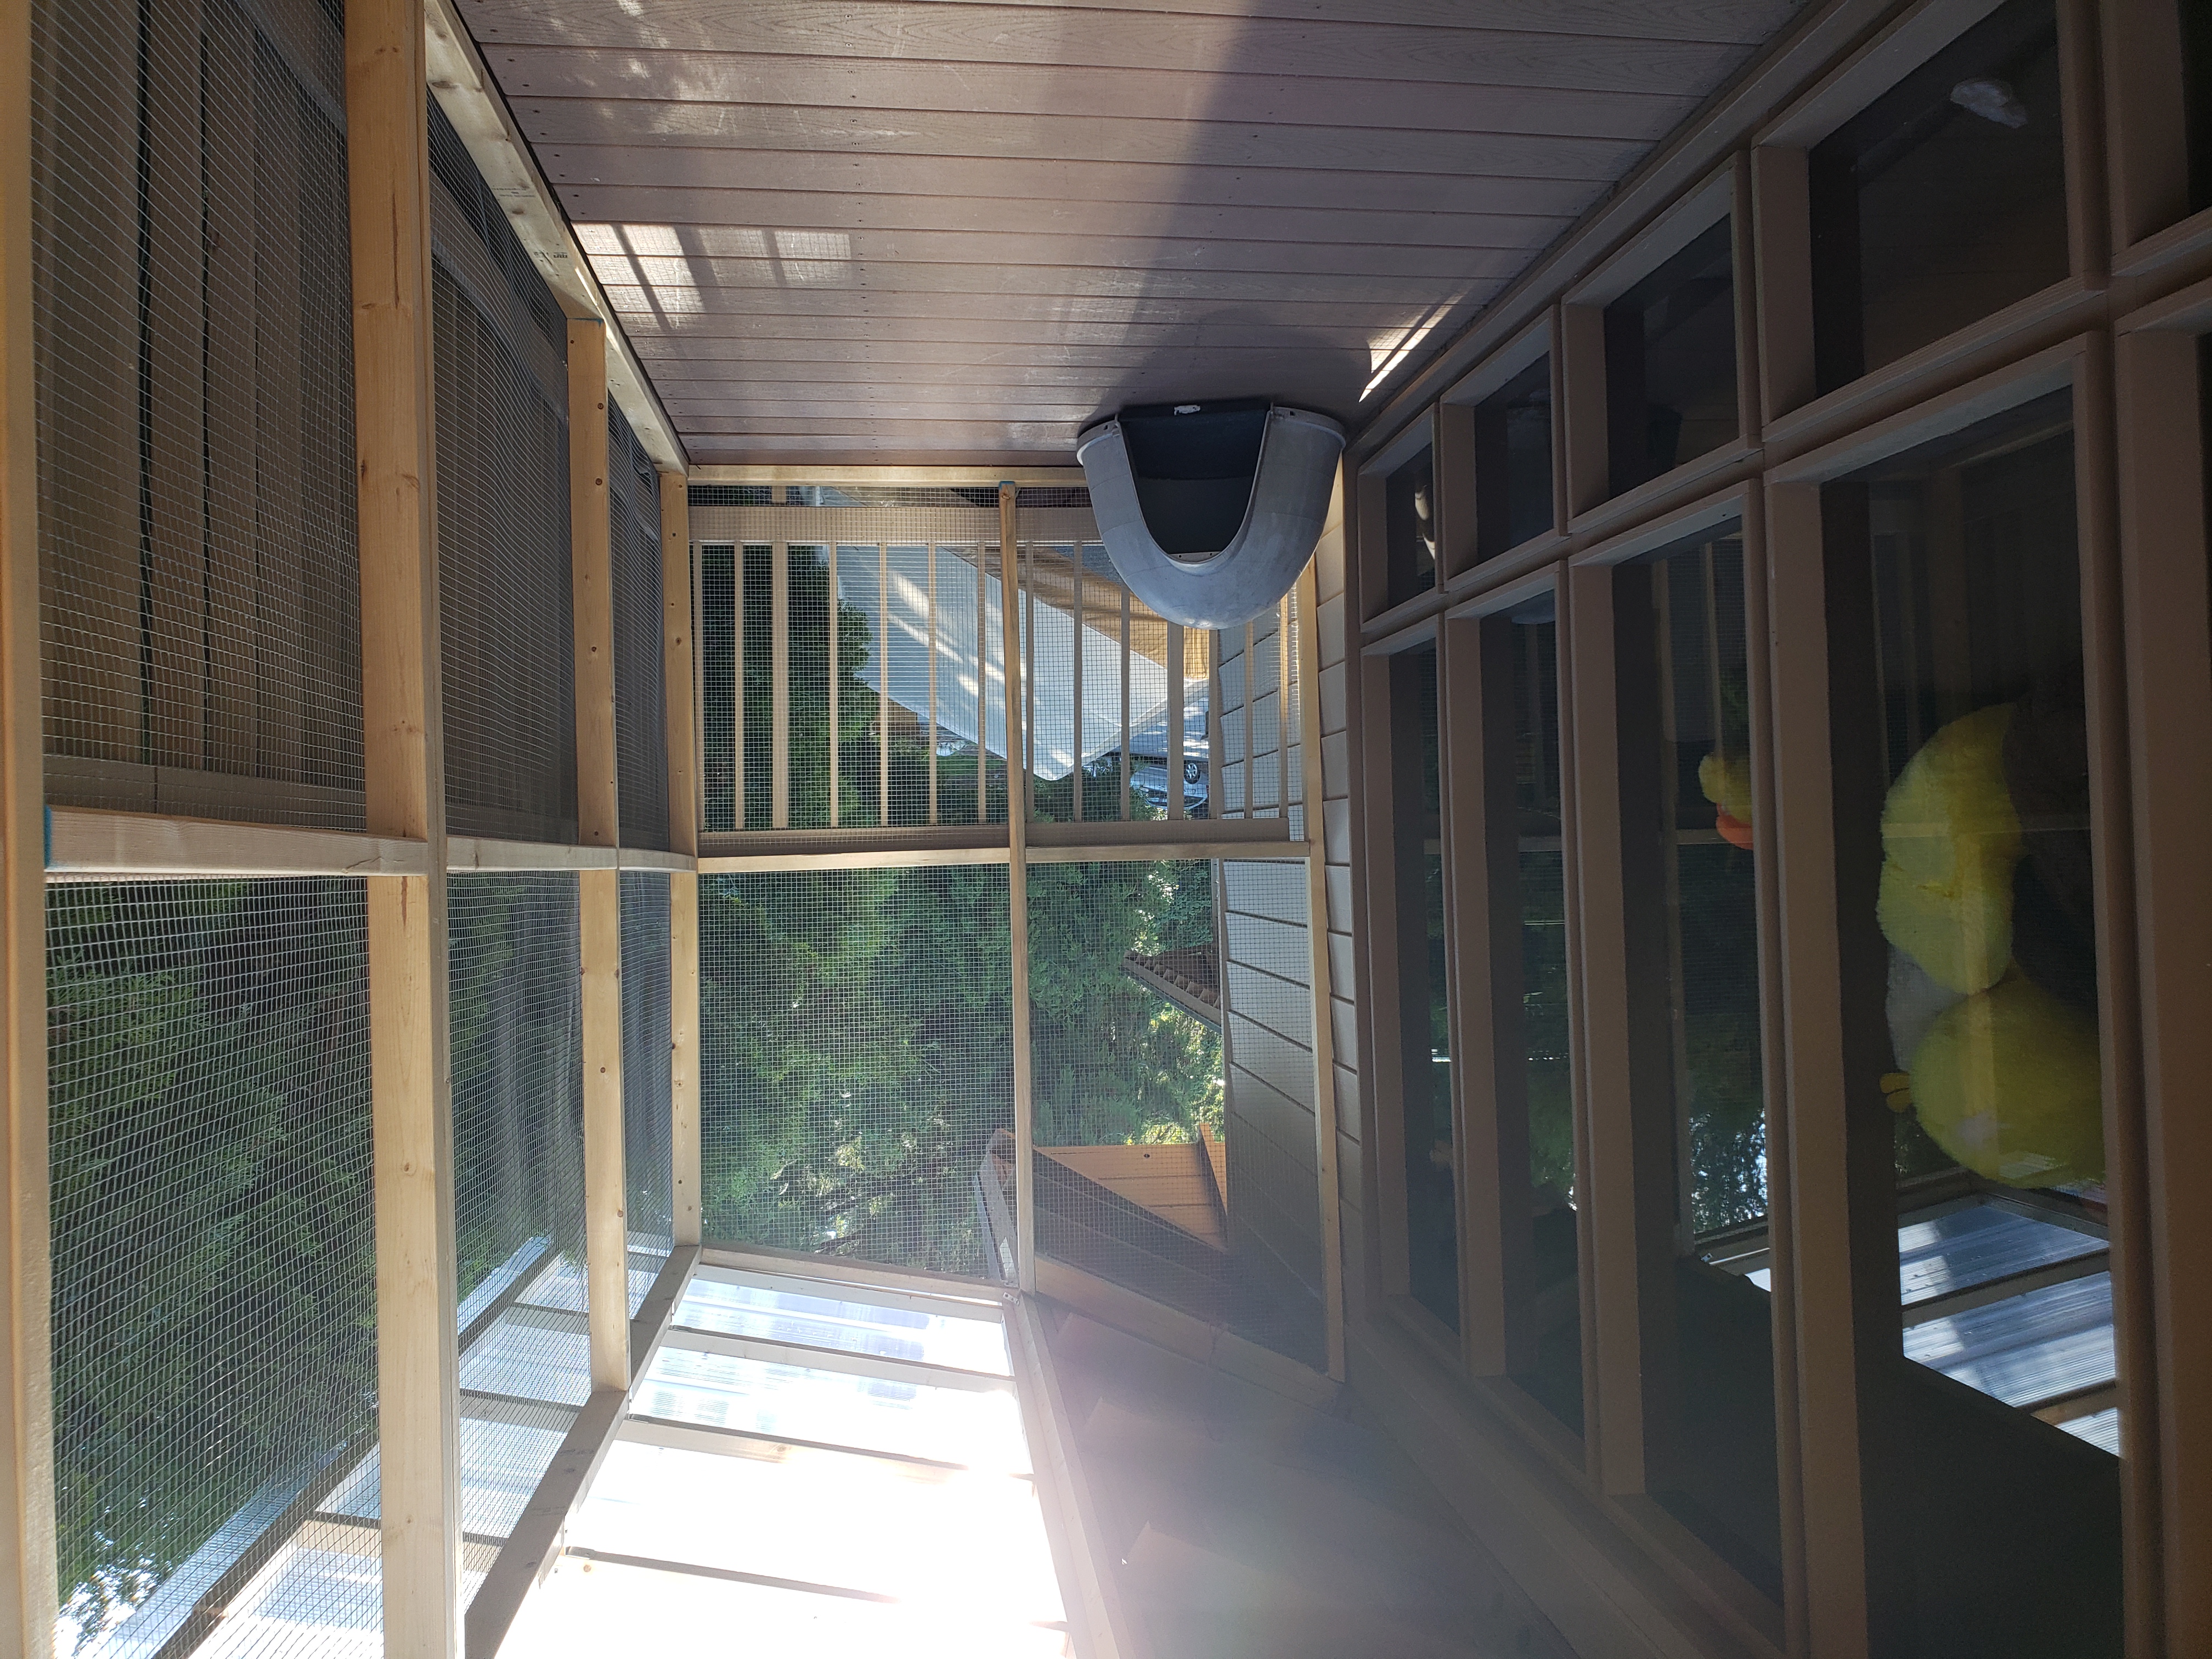
(there’s also a small igloo for a cat at the end)
Toys:

Shelves – so birdies can walk easily, we can keep additional bowls and toys for them:

Decorate, make it yours!
I also put in LED lighting – I used panels that can be put under kitchen cabinets, but they’re bright enough (800 lumens) to provide light in the whole space. Some of them even come with switch to choose between different brightness levels. This is the model I purchased: GE Premium Slim LED Light Bar, 24 Inch, 3000K Soft Warm White, High/Off /Low.I ended up hard-wiring them in the nearest electrical box.
I’m very happy with how the aviary turned out. And so is the whole family 🙂

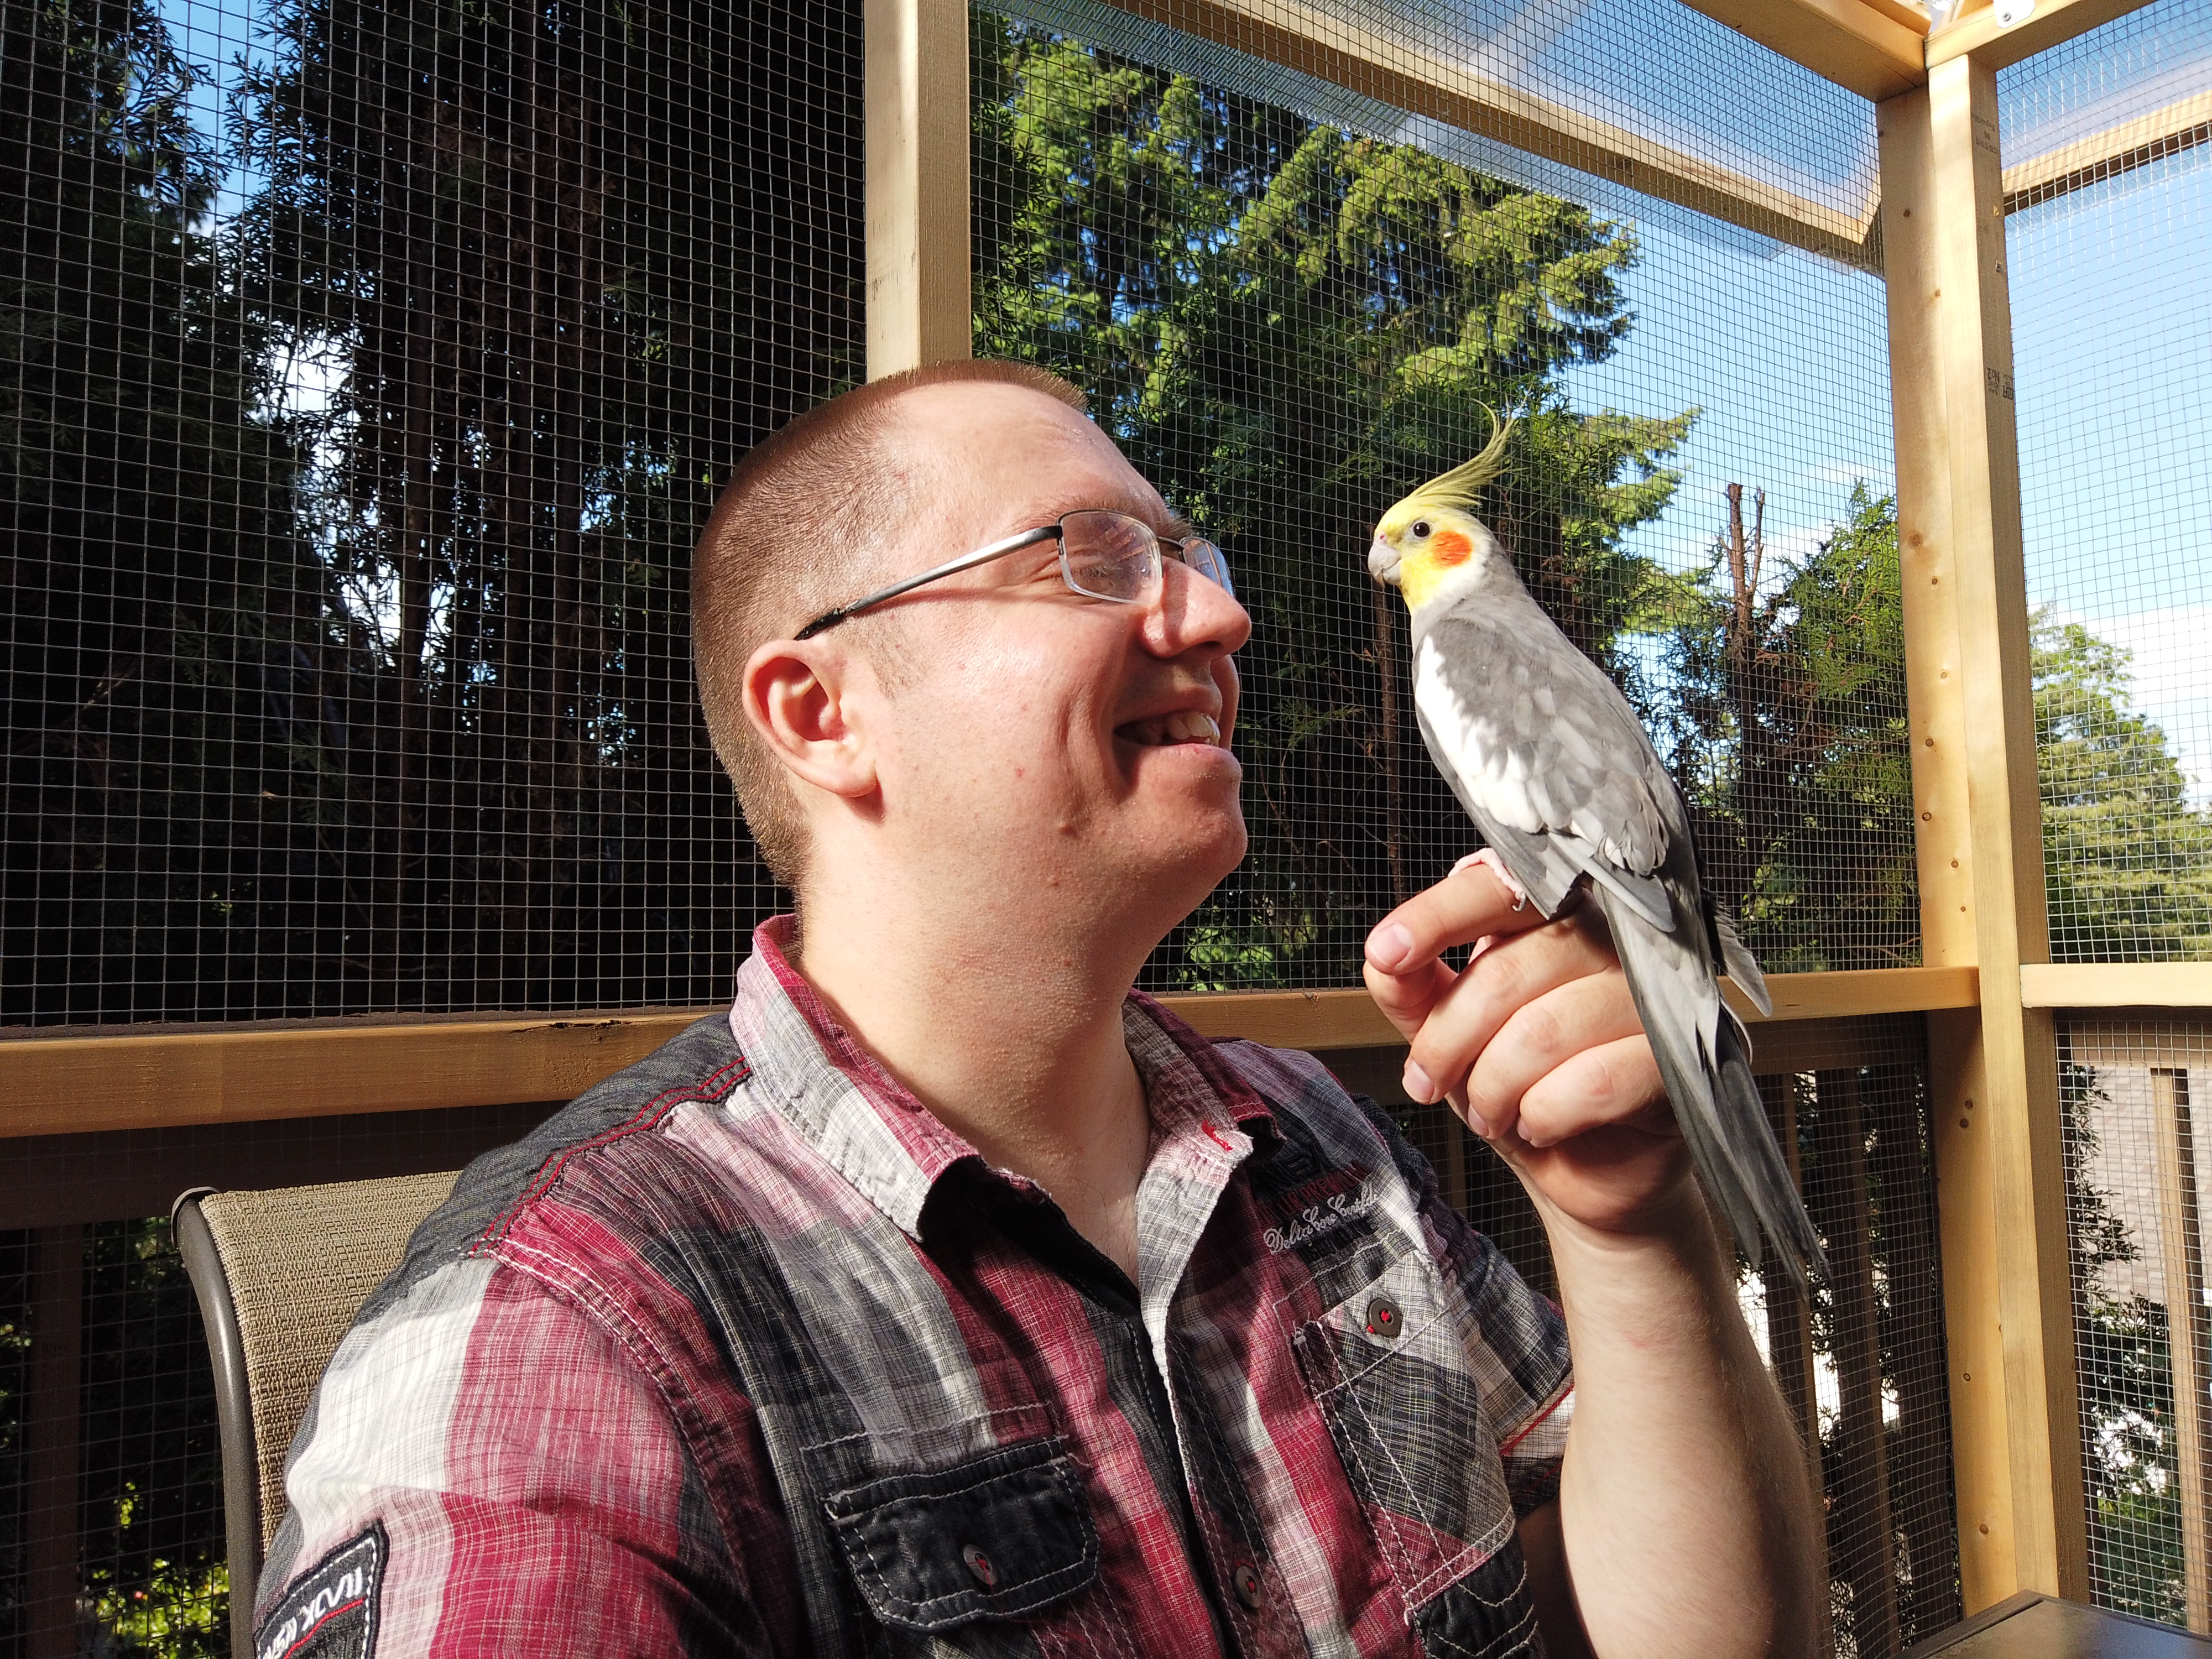


Let’s end with few more photos of the complete project:
Update – January 2020:
I’m happy to report that the aviary roof handled the snow well 🙂

BONUS PROJECT: squirrel feeder
First of all, thank you for reading that far! 🙂 I hope you found it interesting and maybe it inspired you to take on a project yourself?
Since all the tools were out and I had some scrap pieces of wood, in the end I quickly made holder for squirrel food 🙂
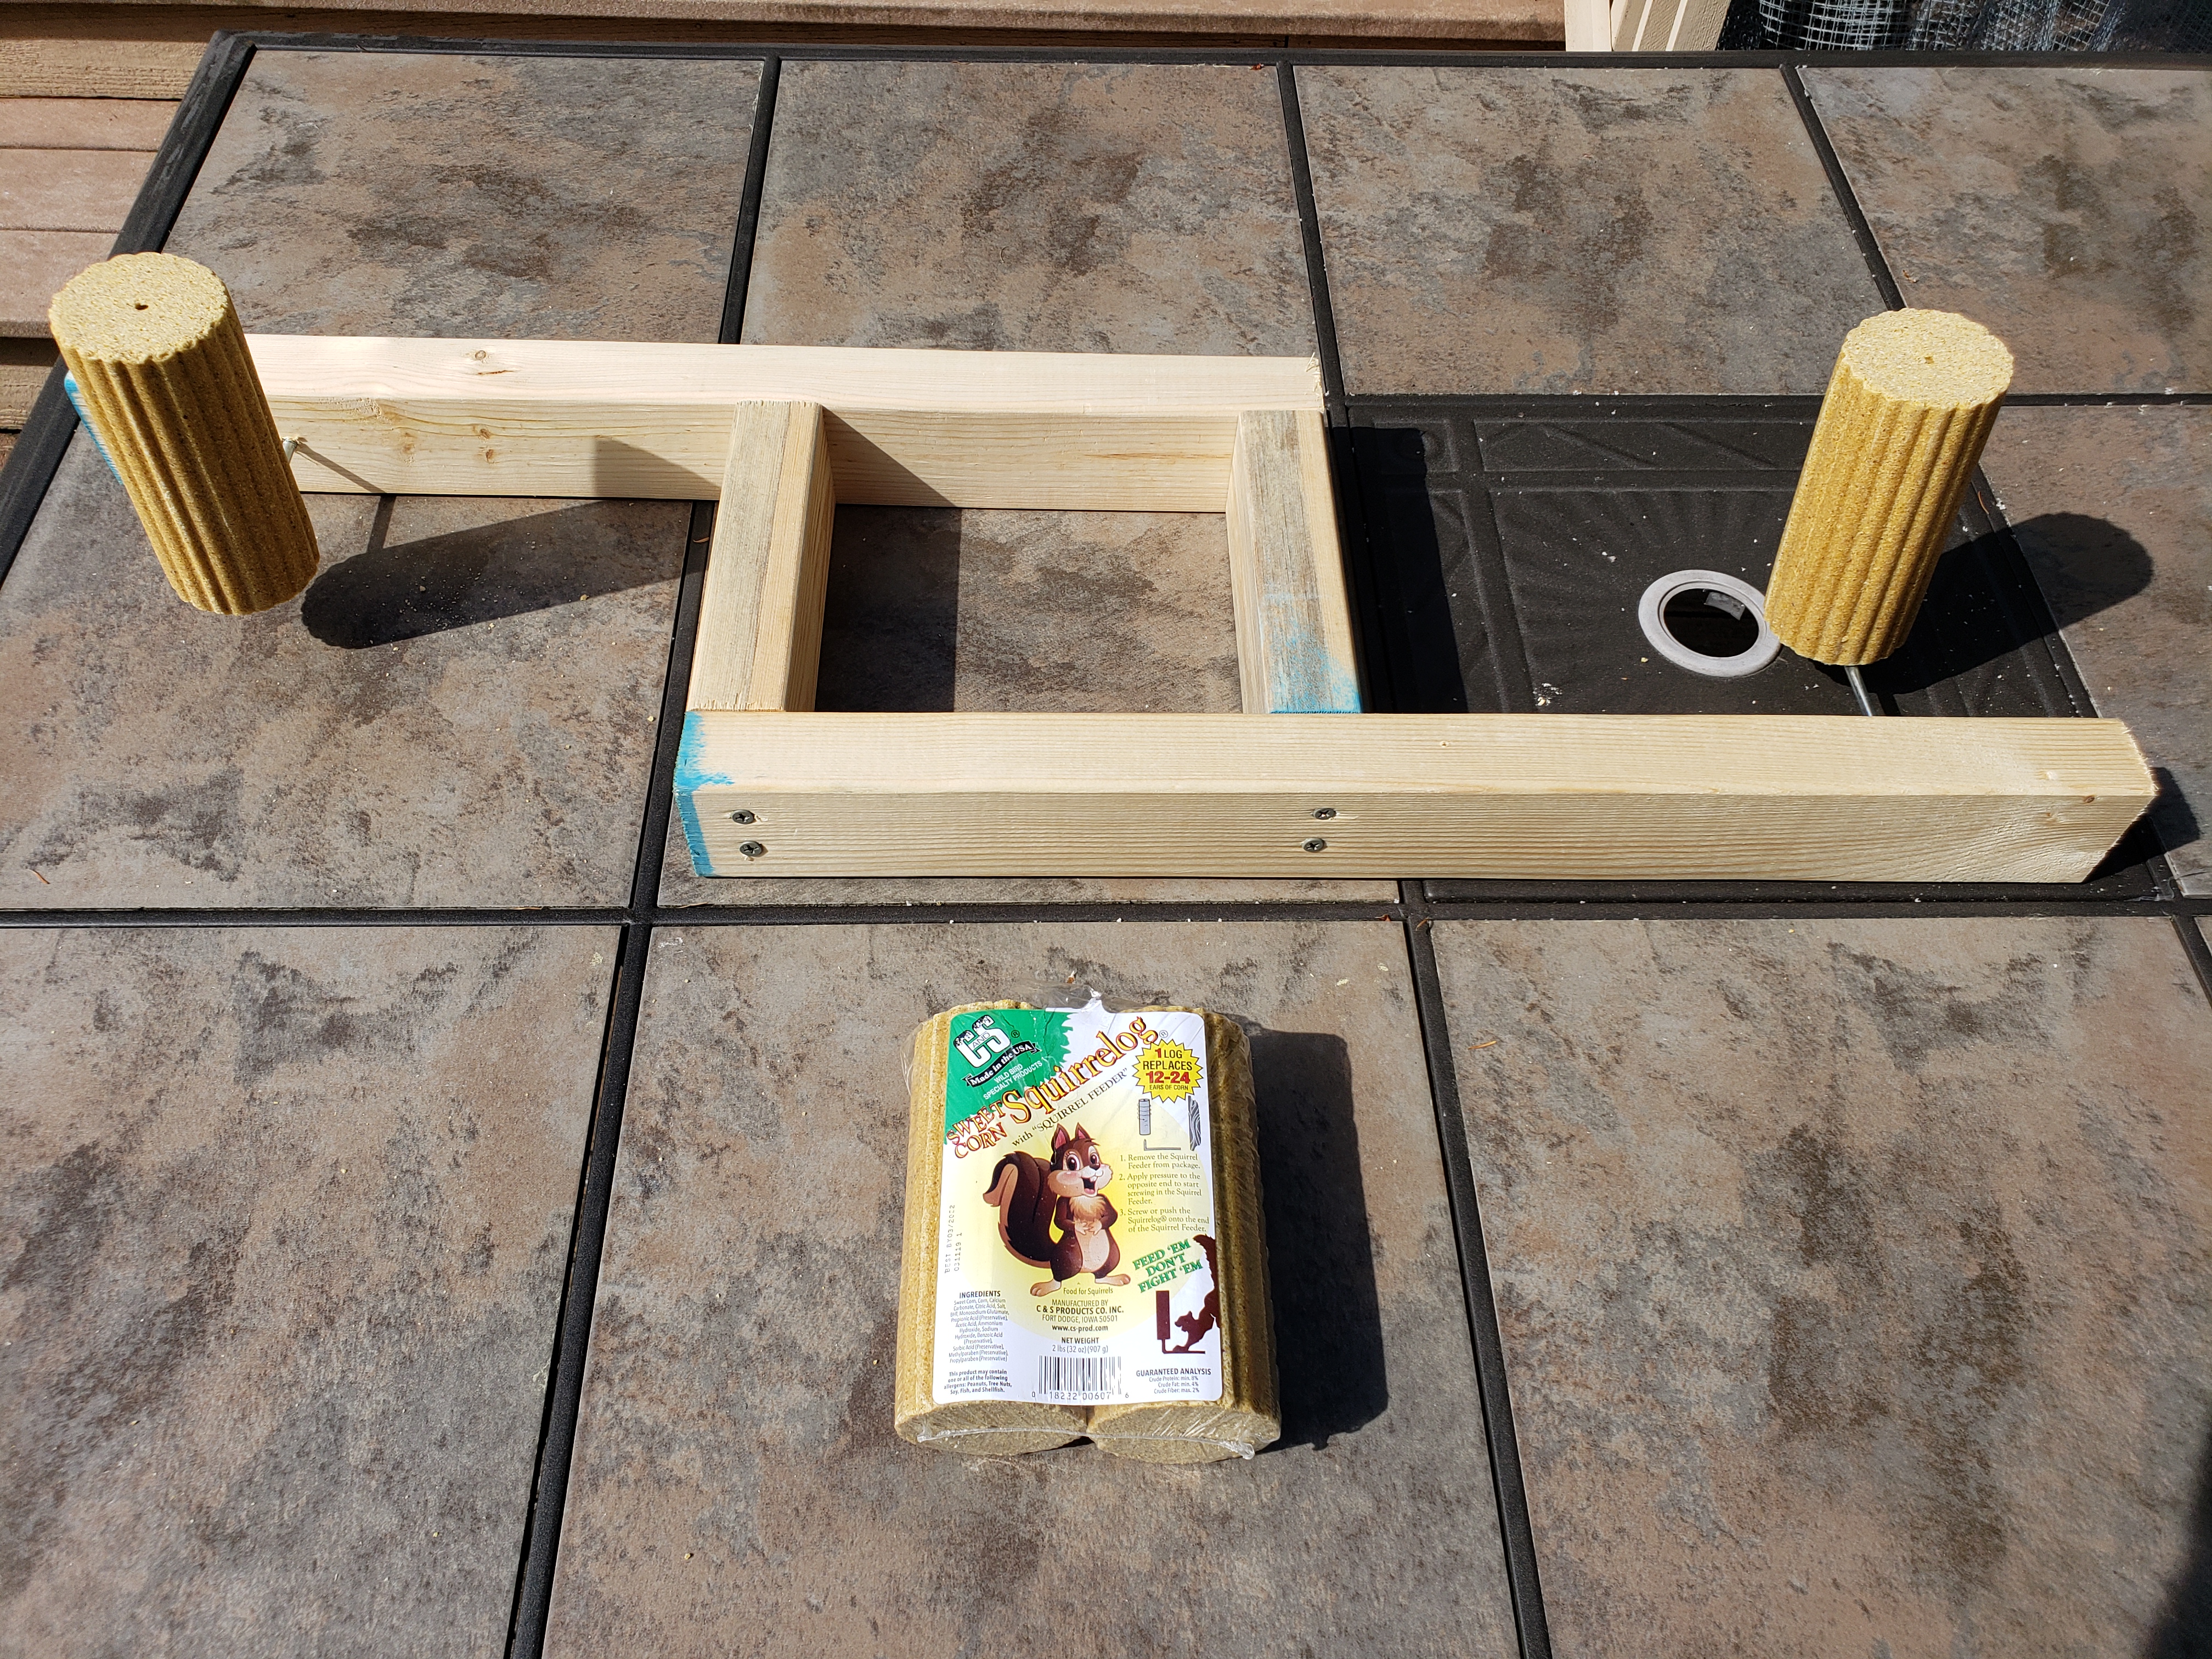
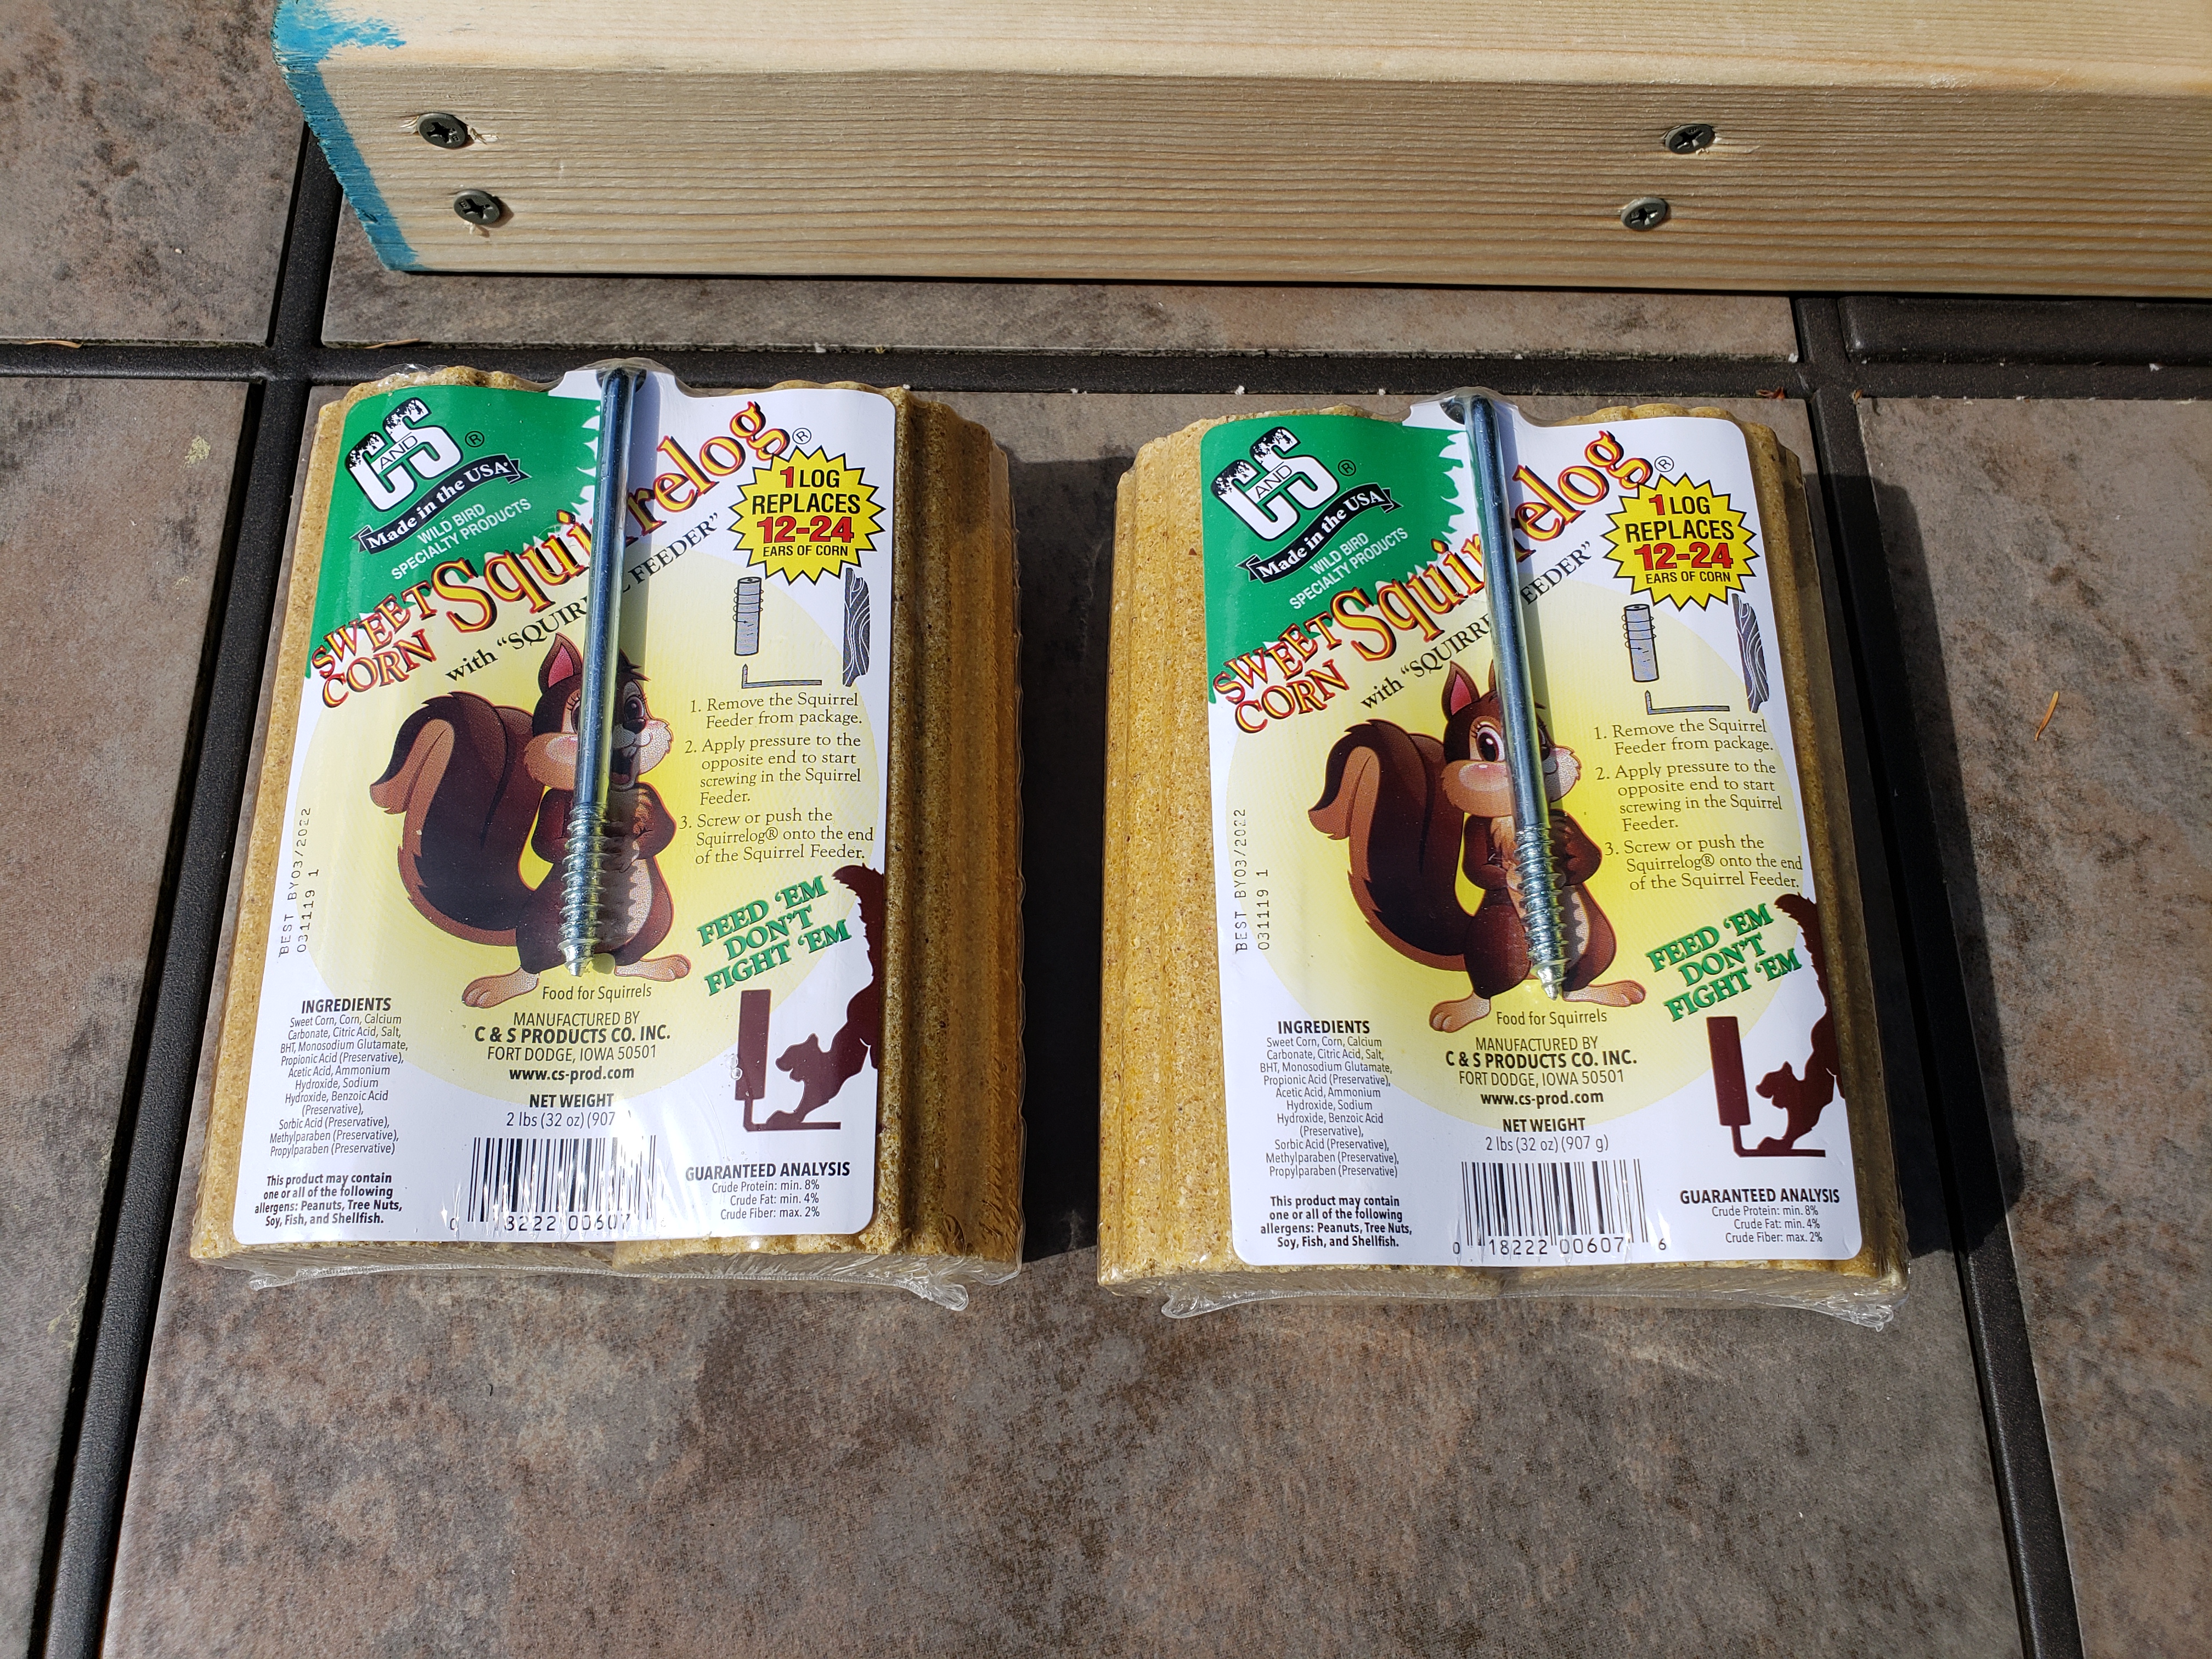
It was just few pieces of 2x3s screwed together to make a solid base, then I added the screws that came with squirrel food and finally put the food on.
Squirrels loved it 🙂
Did you like this project?
Are you planning to build an aviary as well? Do you have any questions or maybe you would do something differently? Let me know in the comments!


Leave a Reply