
The weather was nice, tools and lumber were still out (from another project – can you guess which one?) – might as well make a bench!
The idea actually came from my wife, since she watched a video with such project (check it out at the end of this article) recently and though of making one as well. And after hearing that, I was happy for the 2 of us to build a bench together and enjoy some time outside on a sunny day.
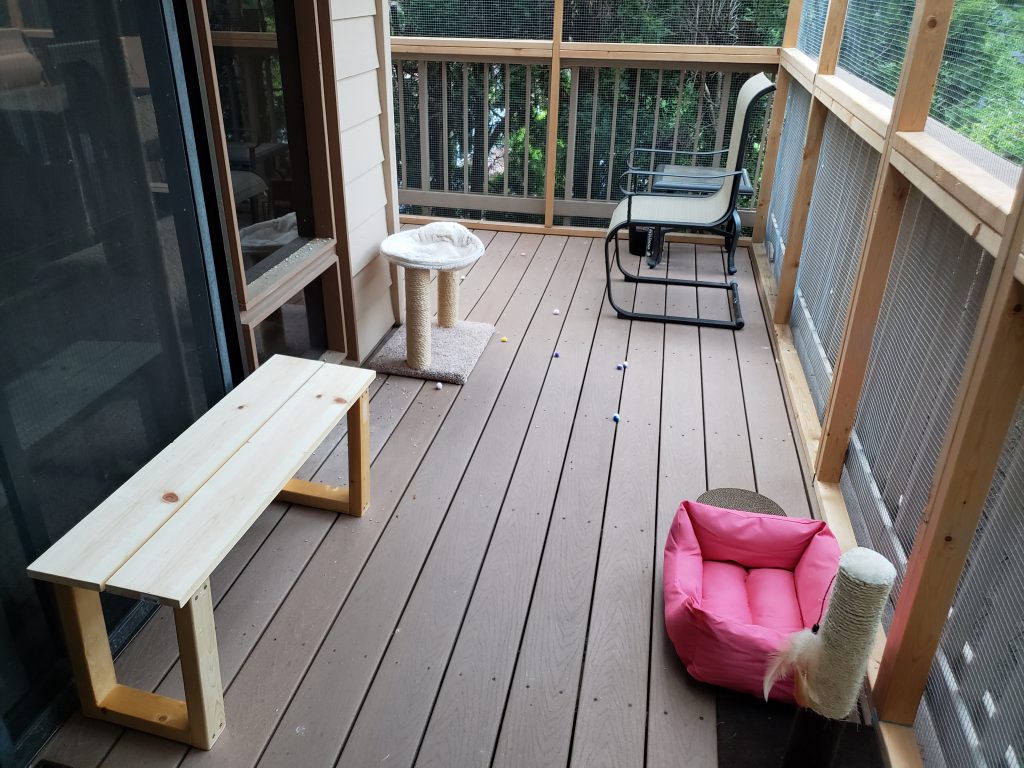
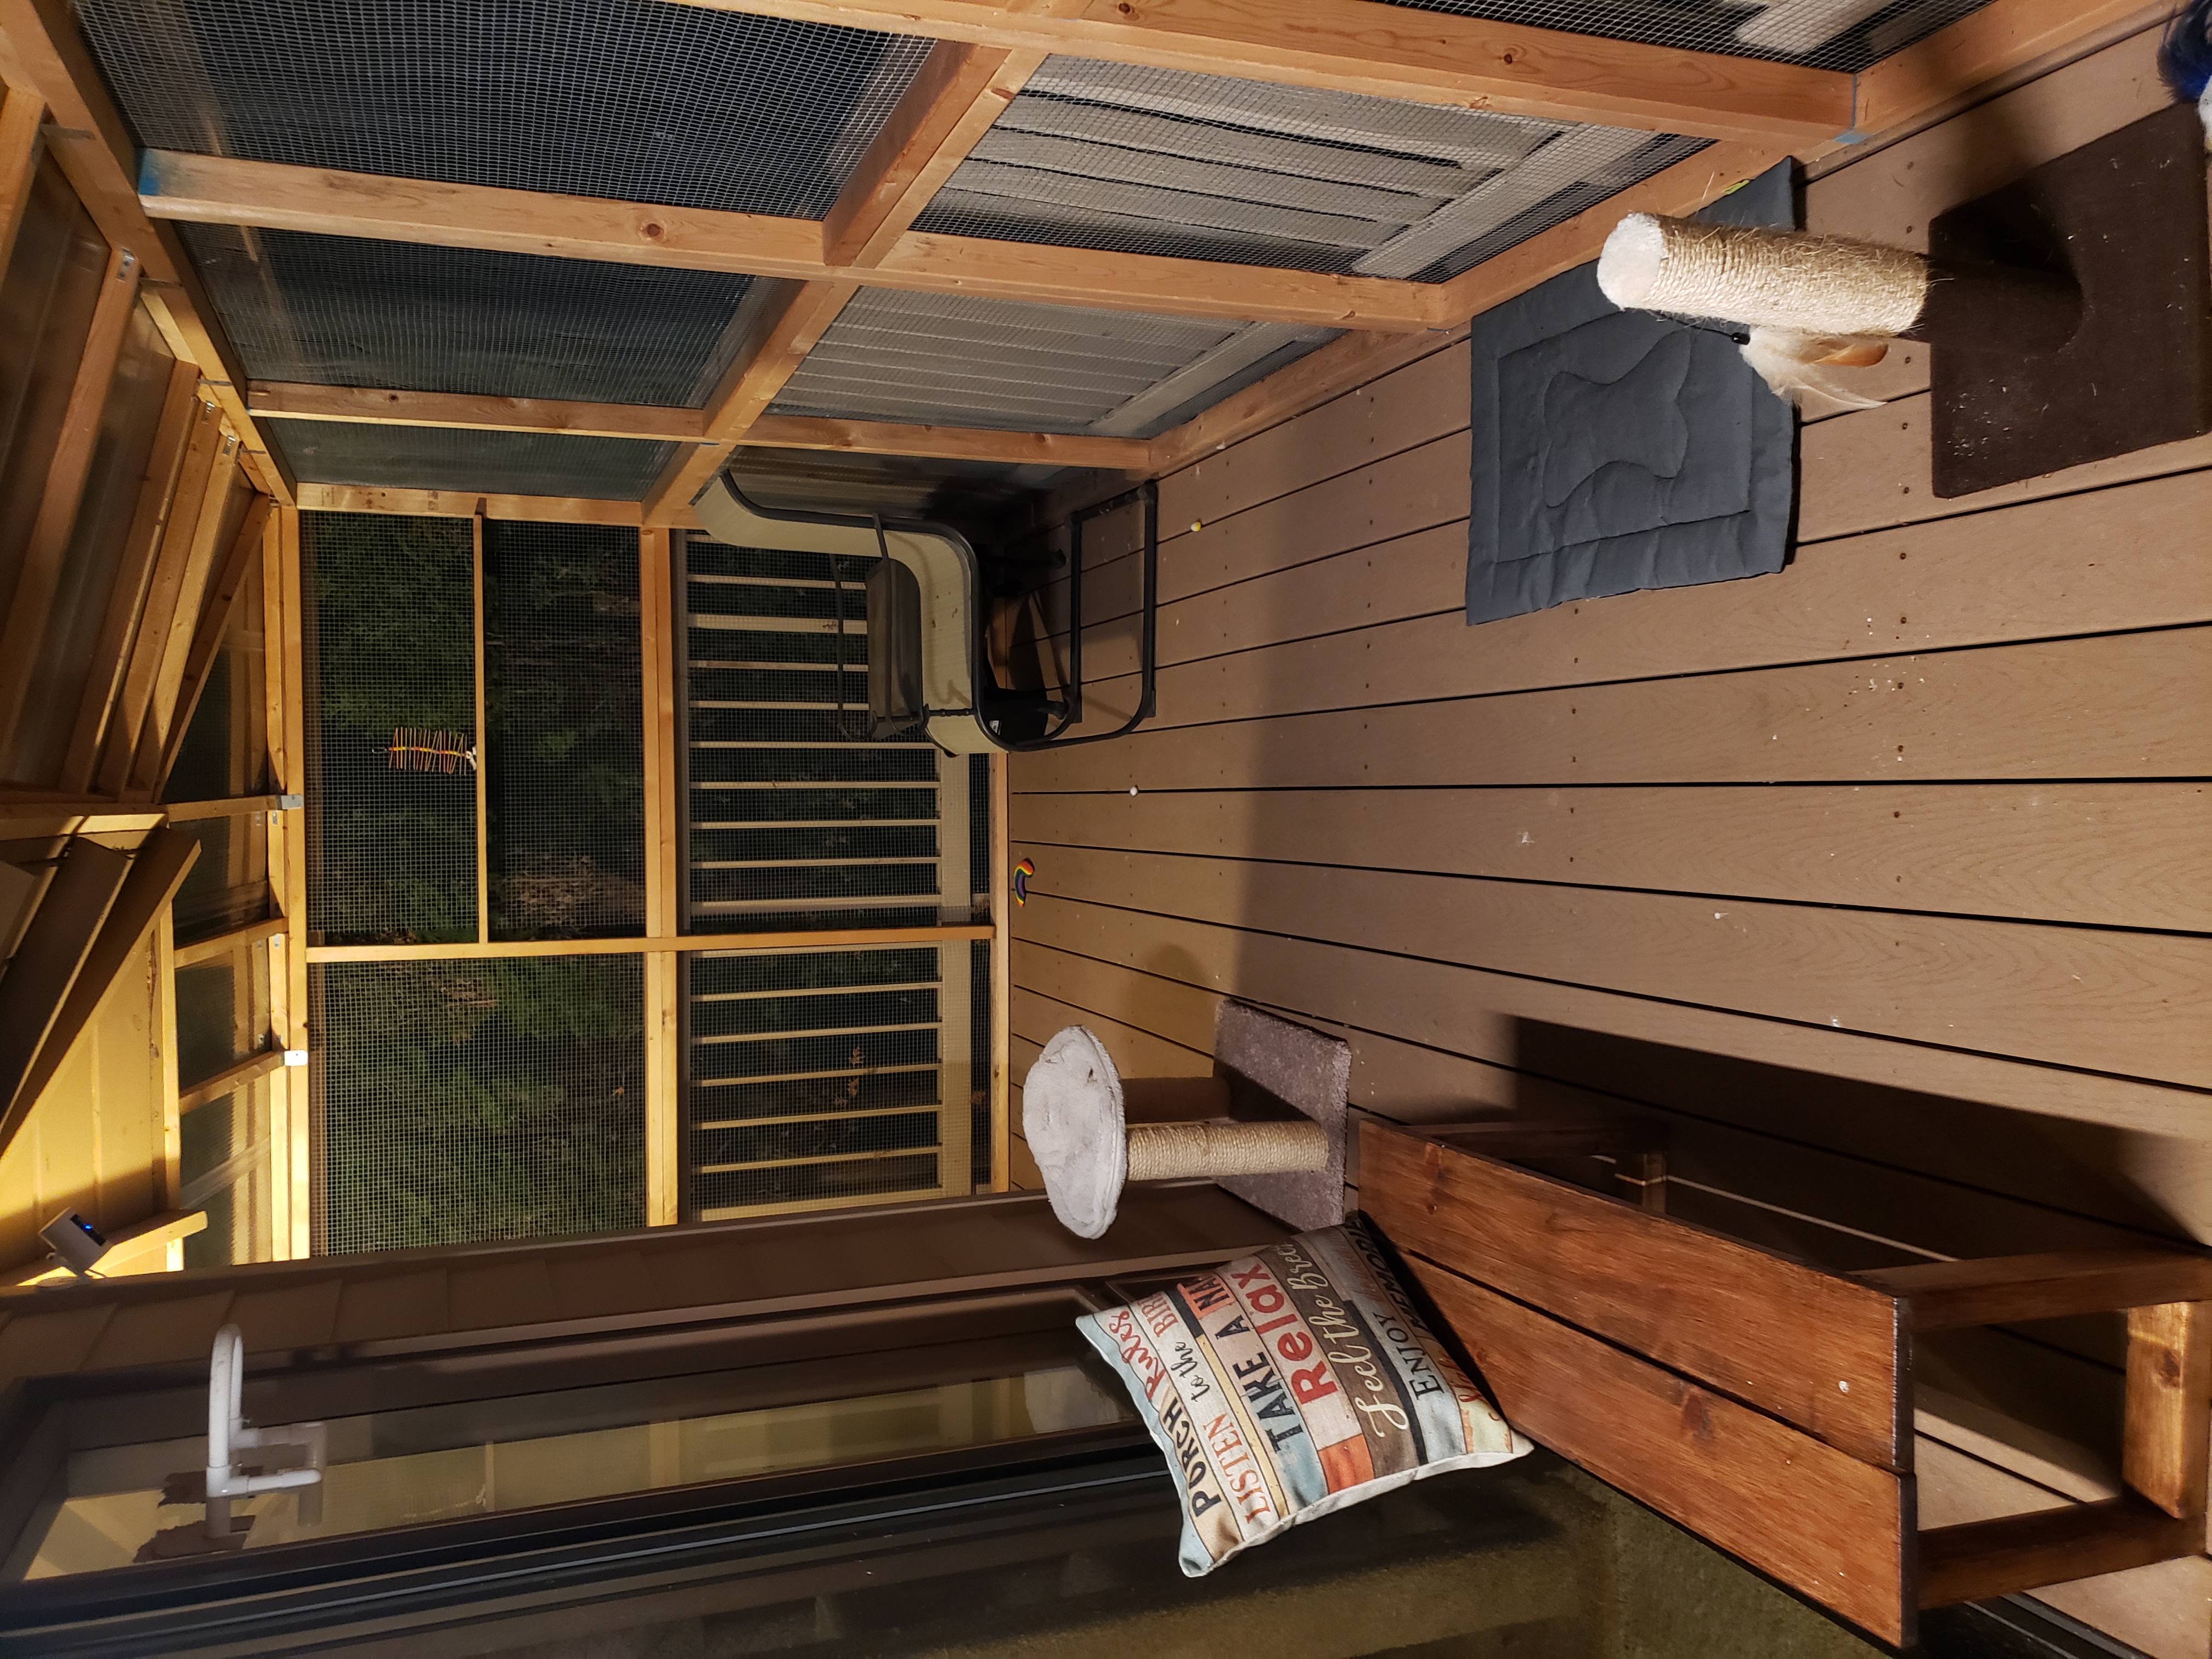
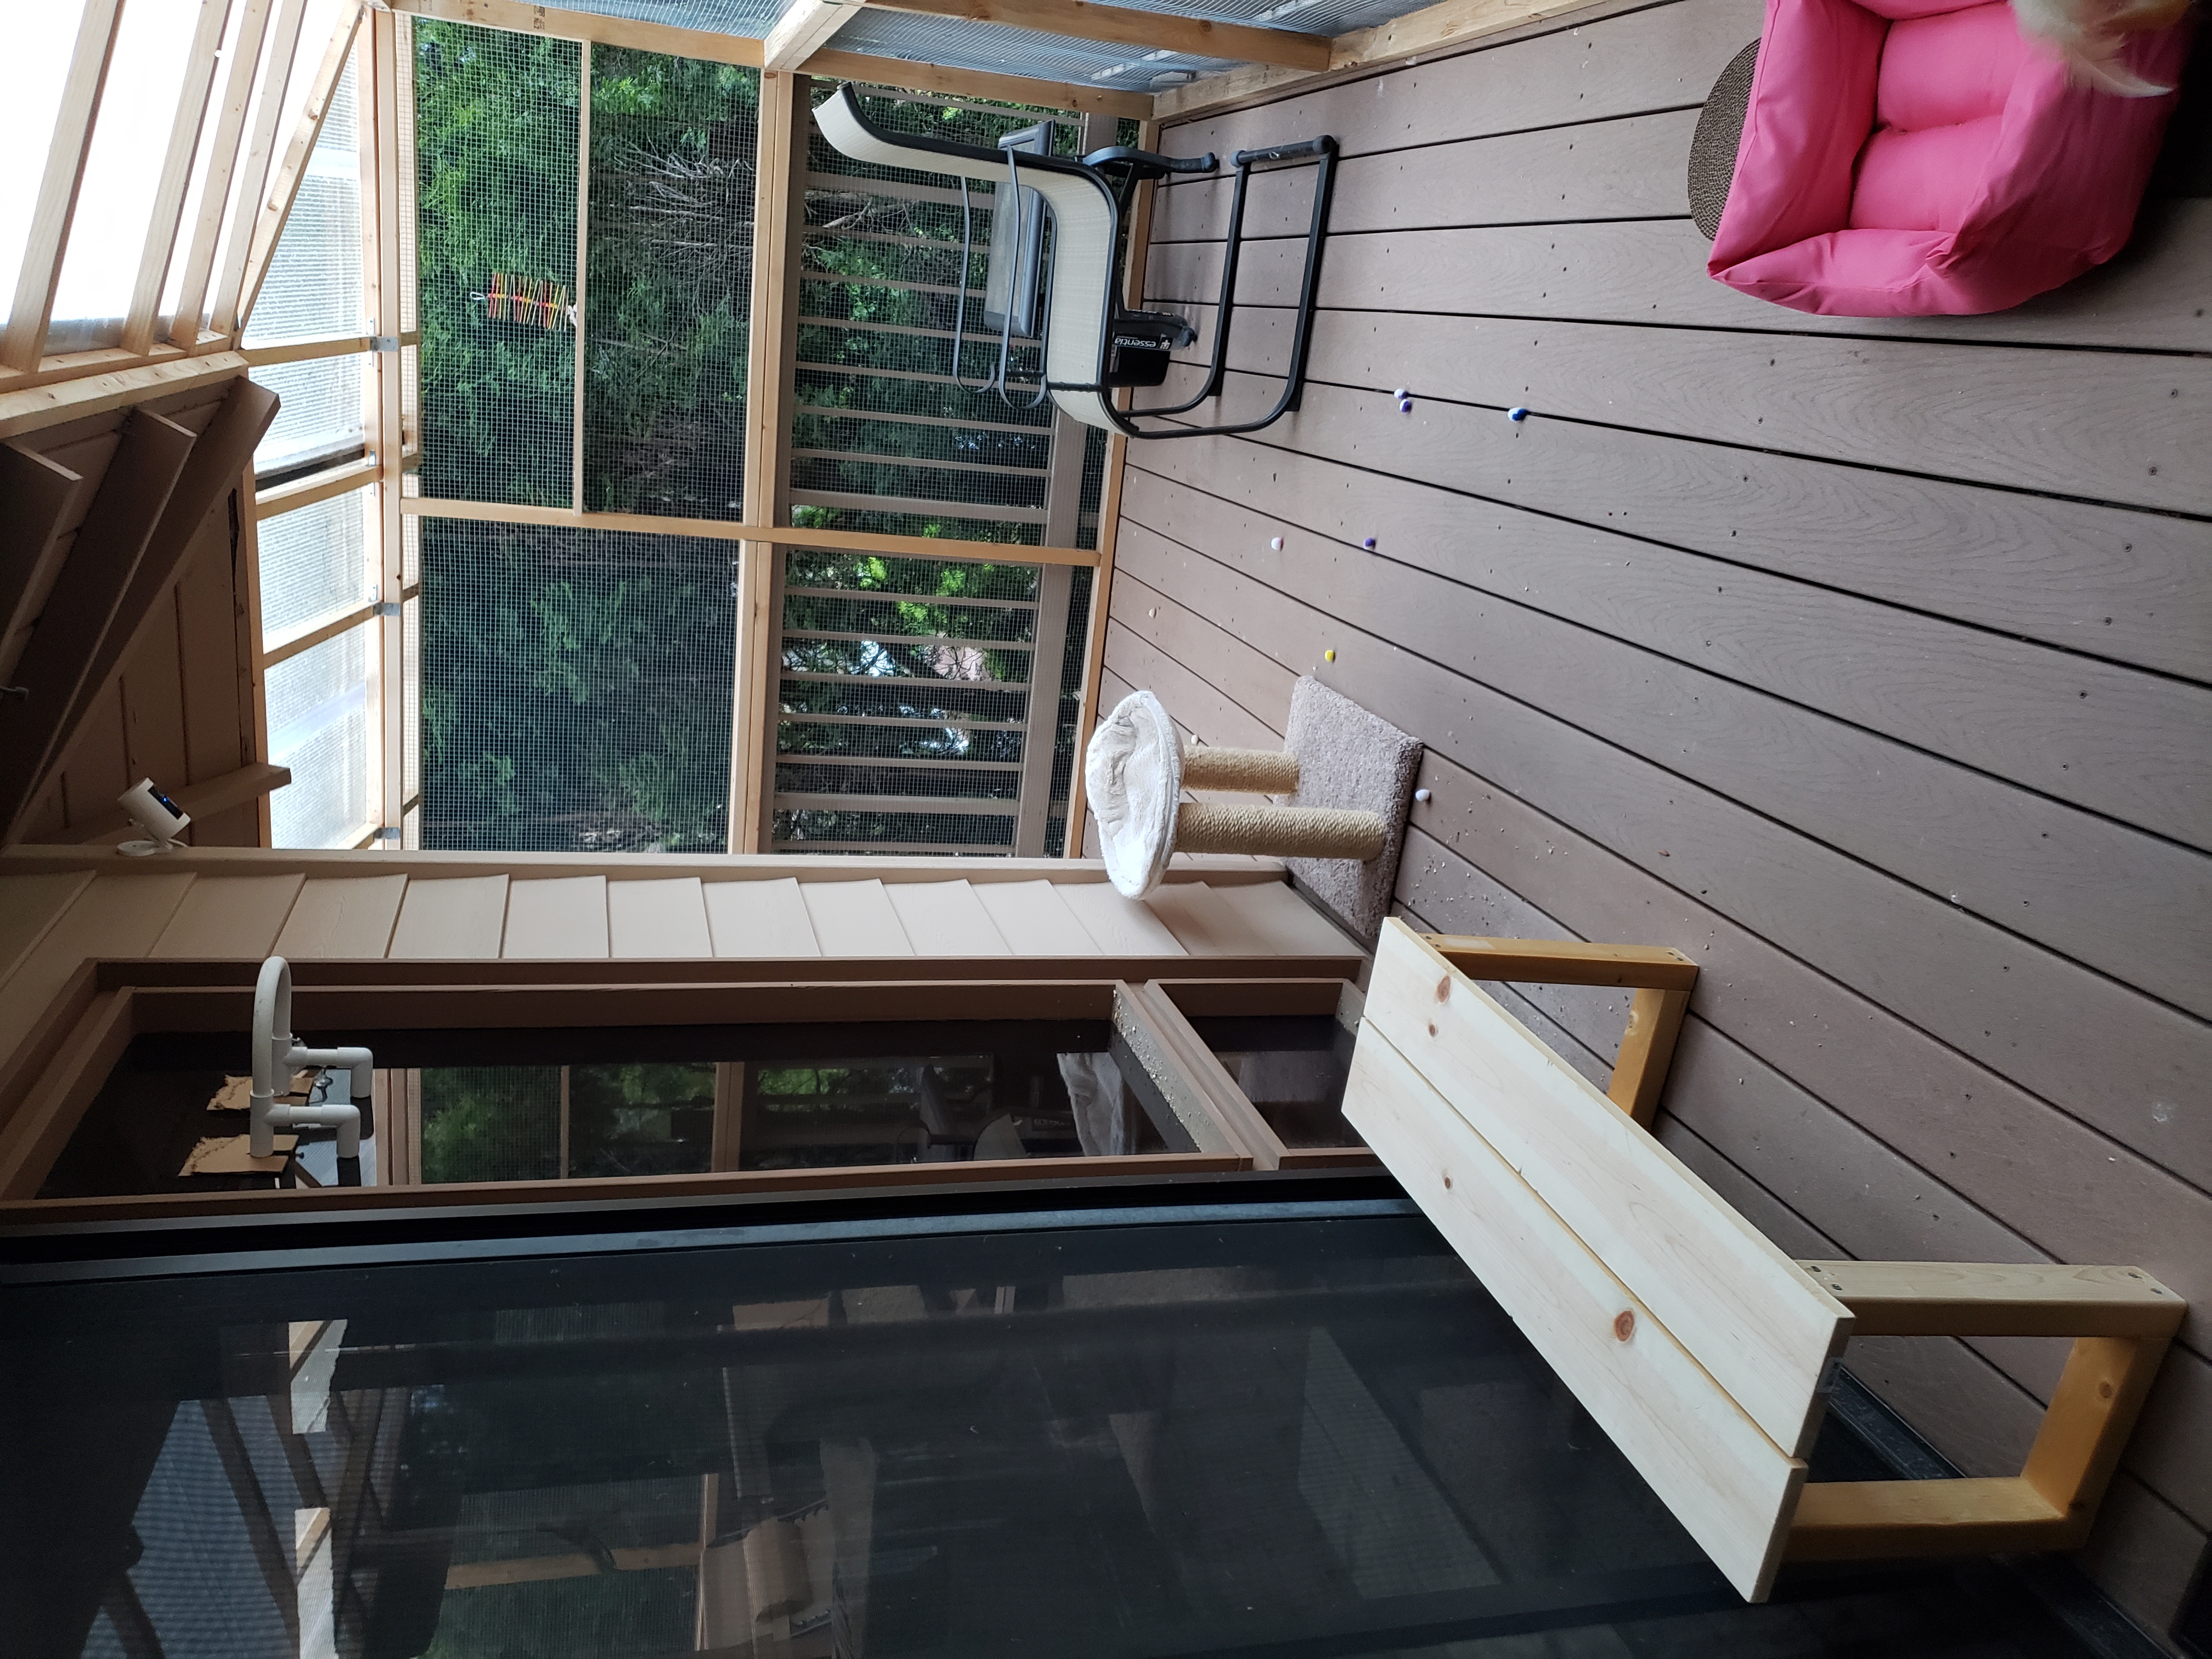
Here’s how the bench looks like:

What we’ll need to build one:
- saw – table saw or a miter saw will work great,
- lumber – 2x4s are great for the legs, and then some 2x8s or 2x12s for the top of the bench,
- stain – pick your favorite color,
- pneumatic nailer if you have one handy, or just some screws and an electric drill with phillips bit,
- about an hour if time, to have a good time building and then have a bench to show for it 😉
Let’s build it!
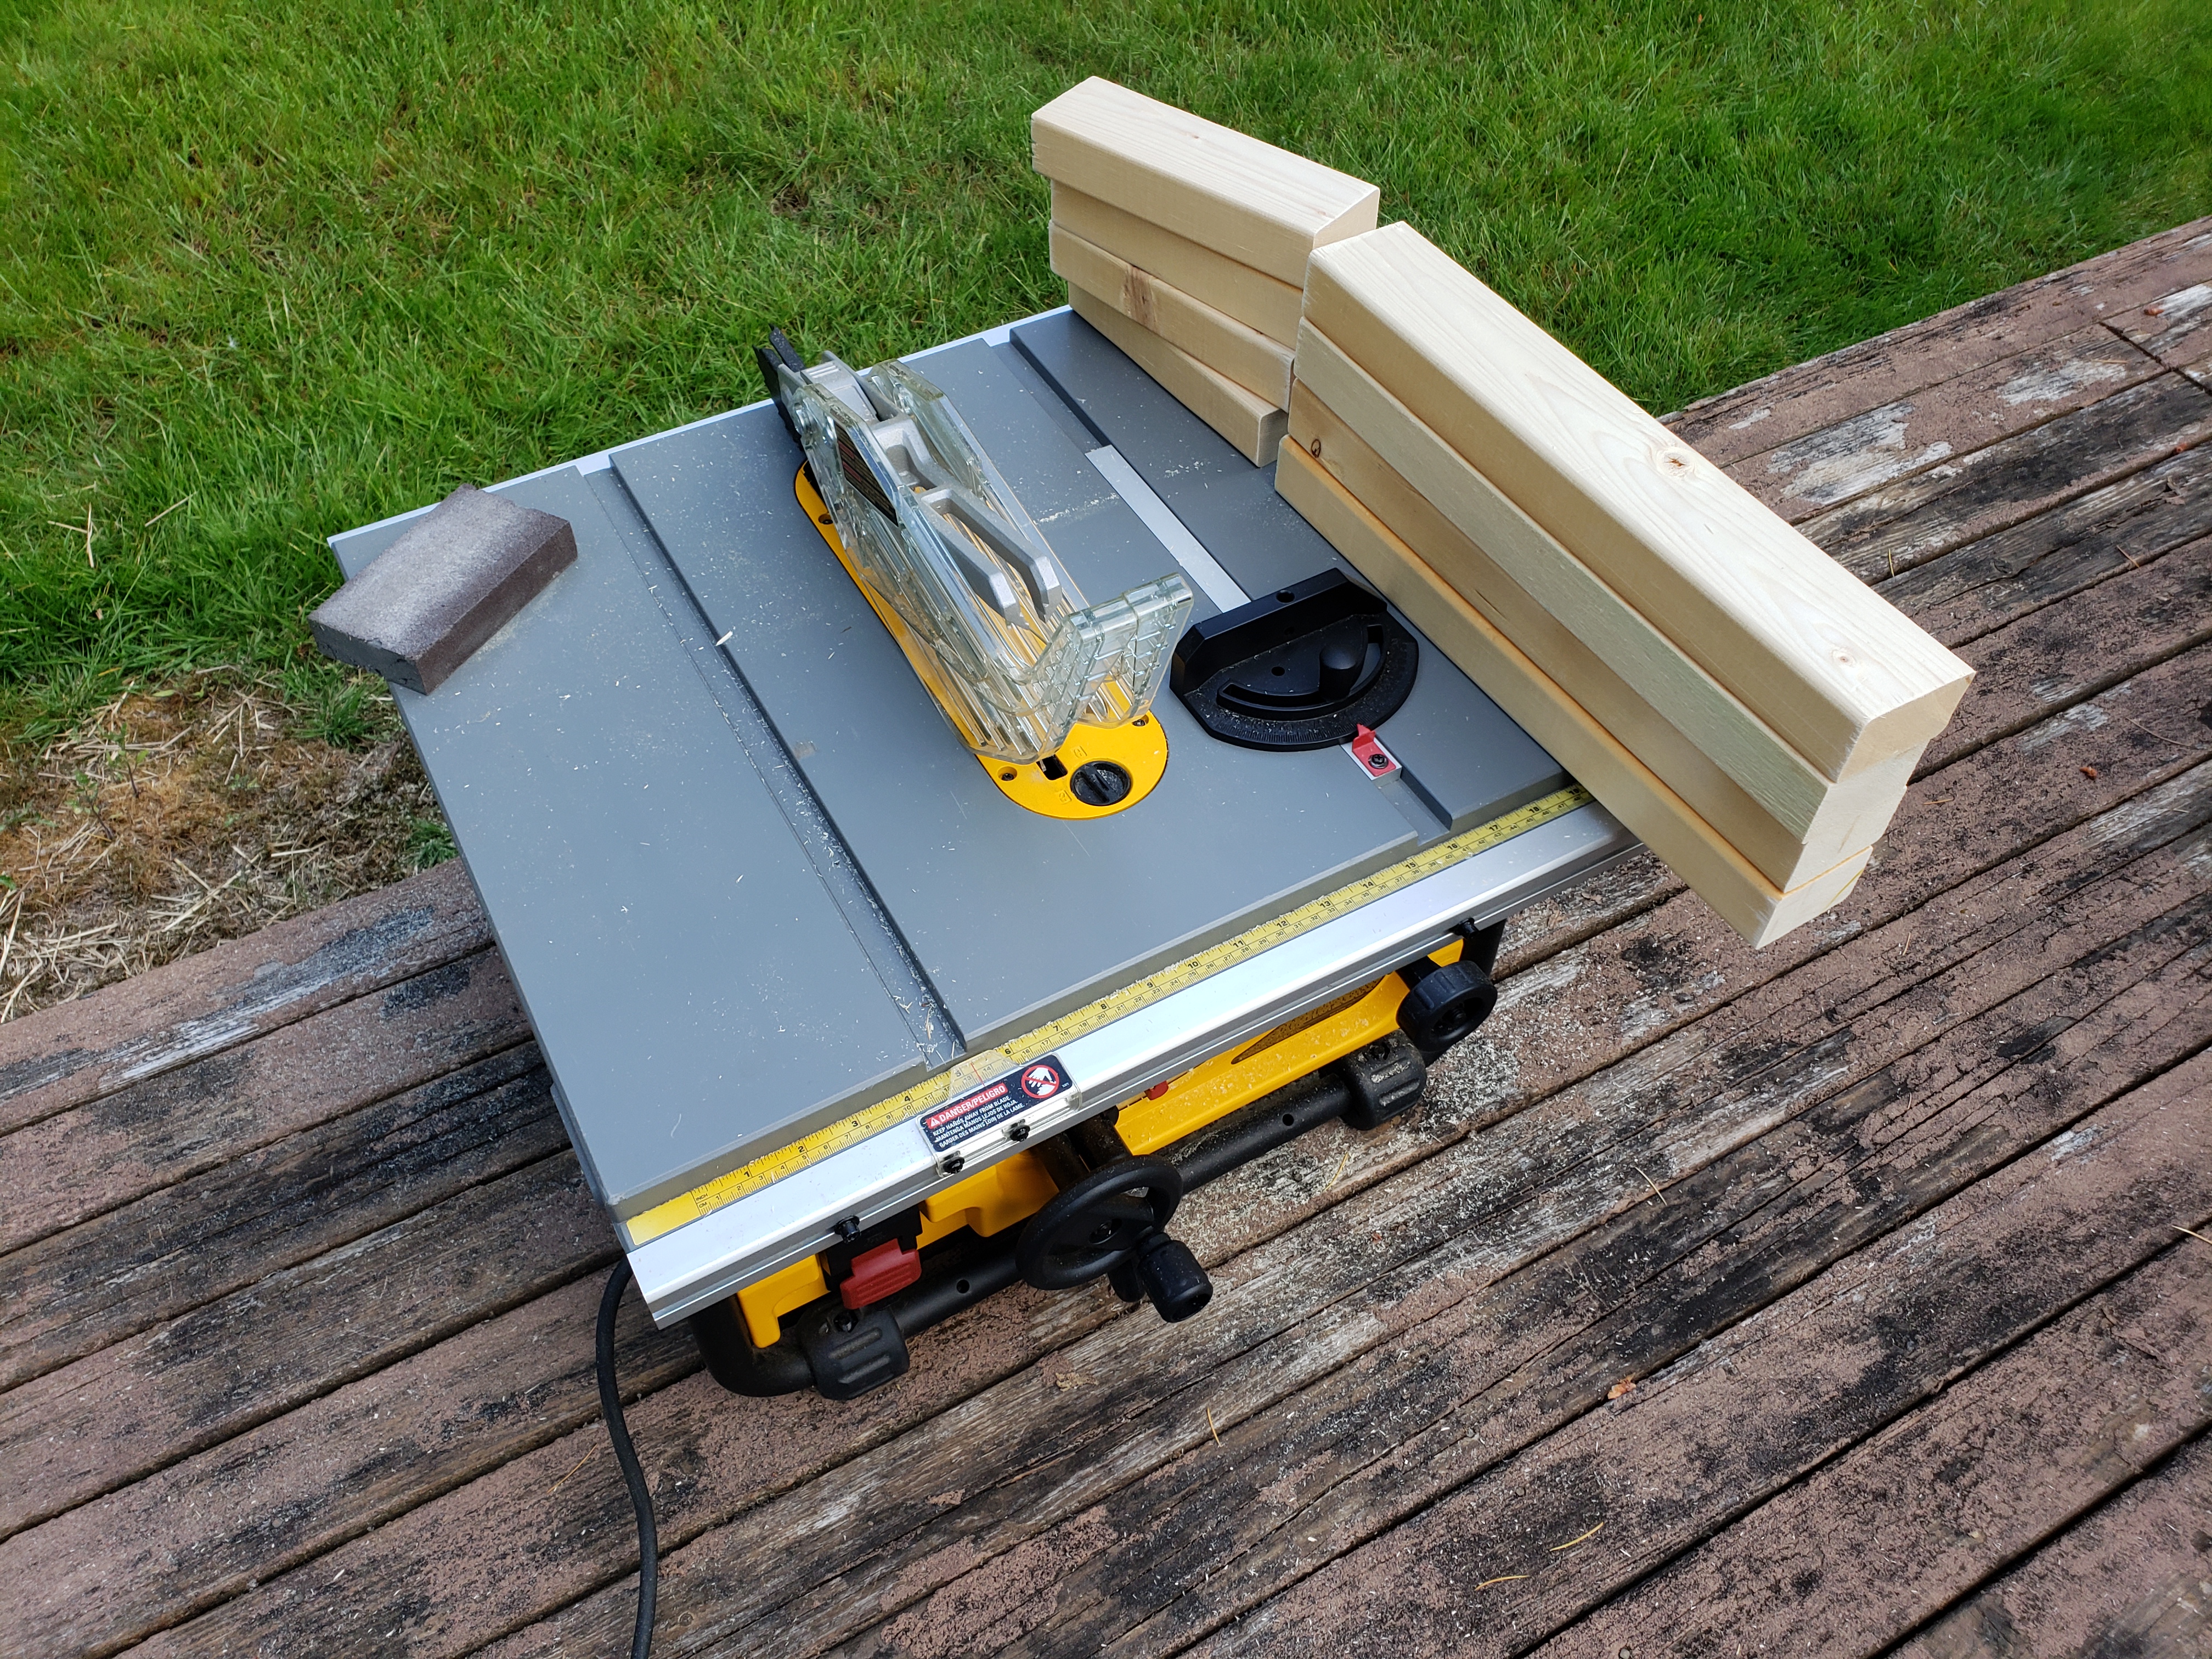
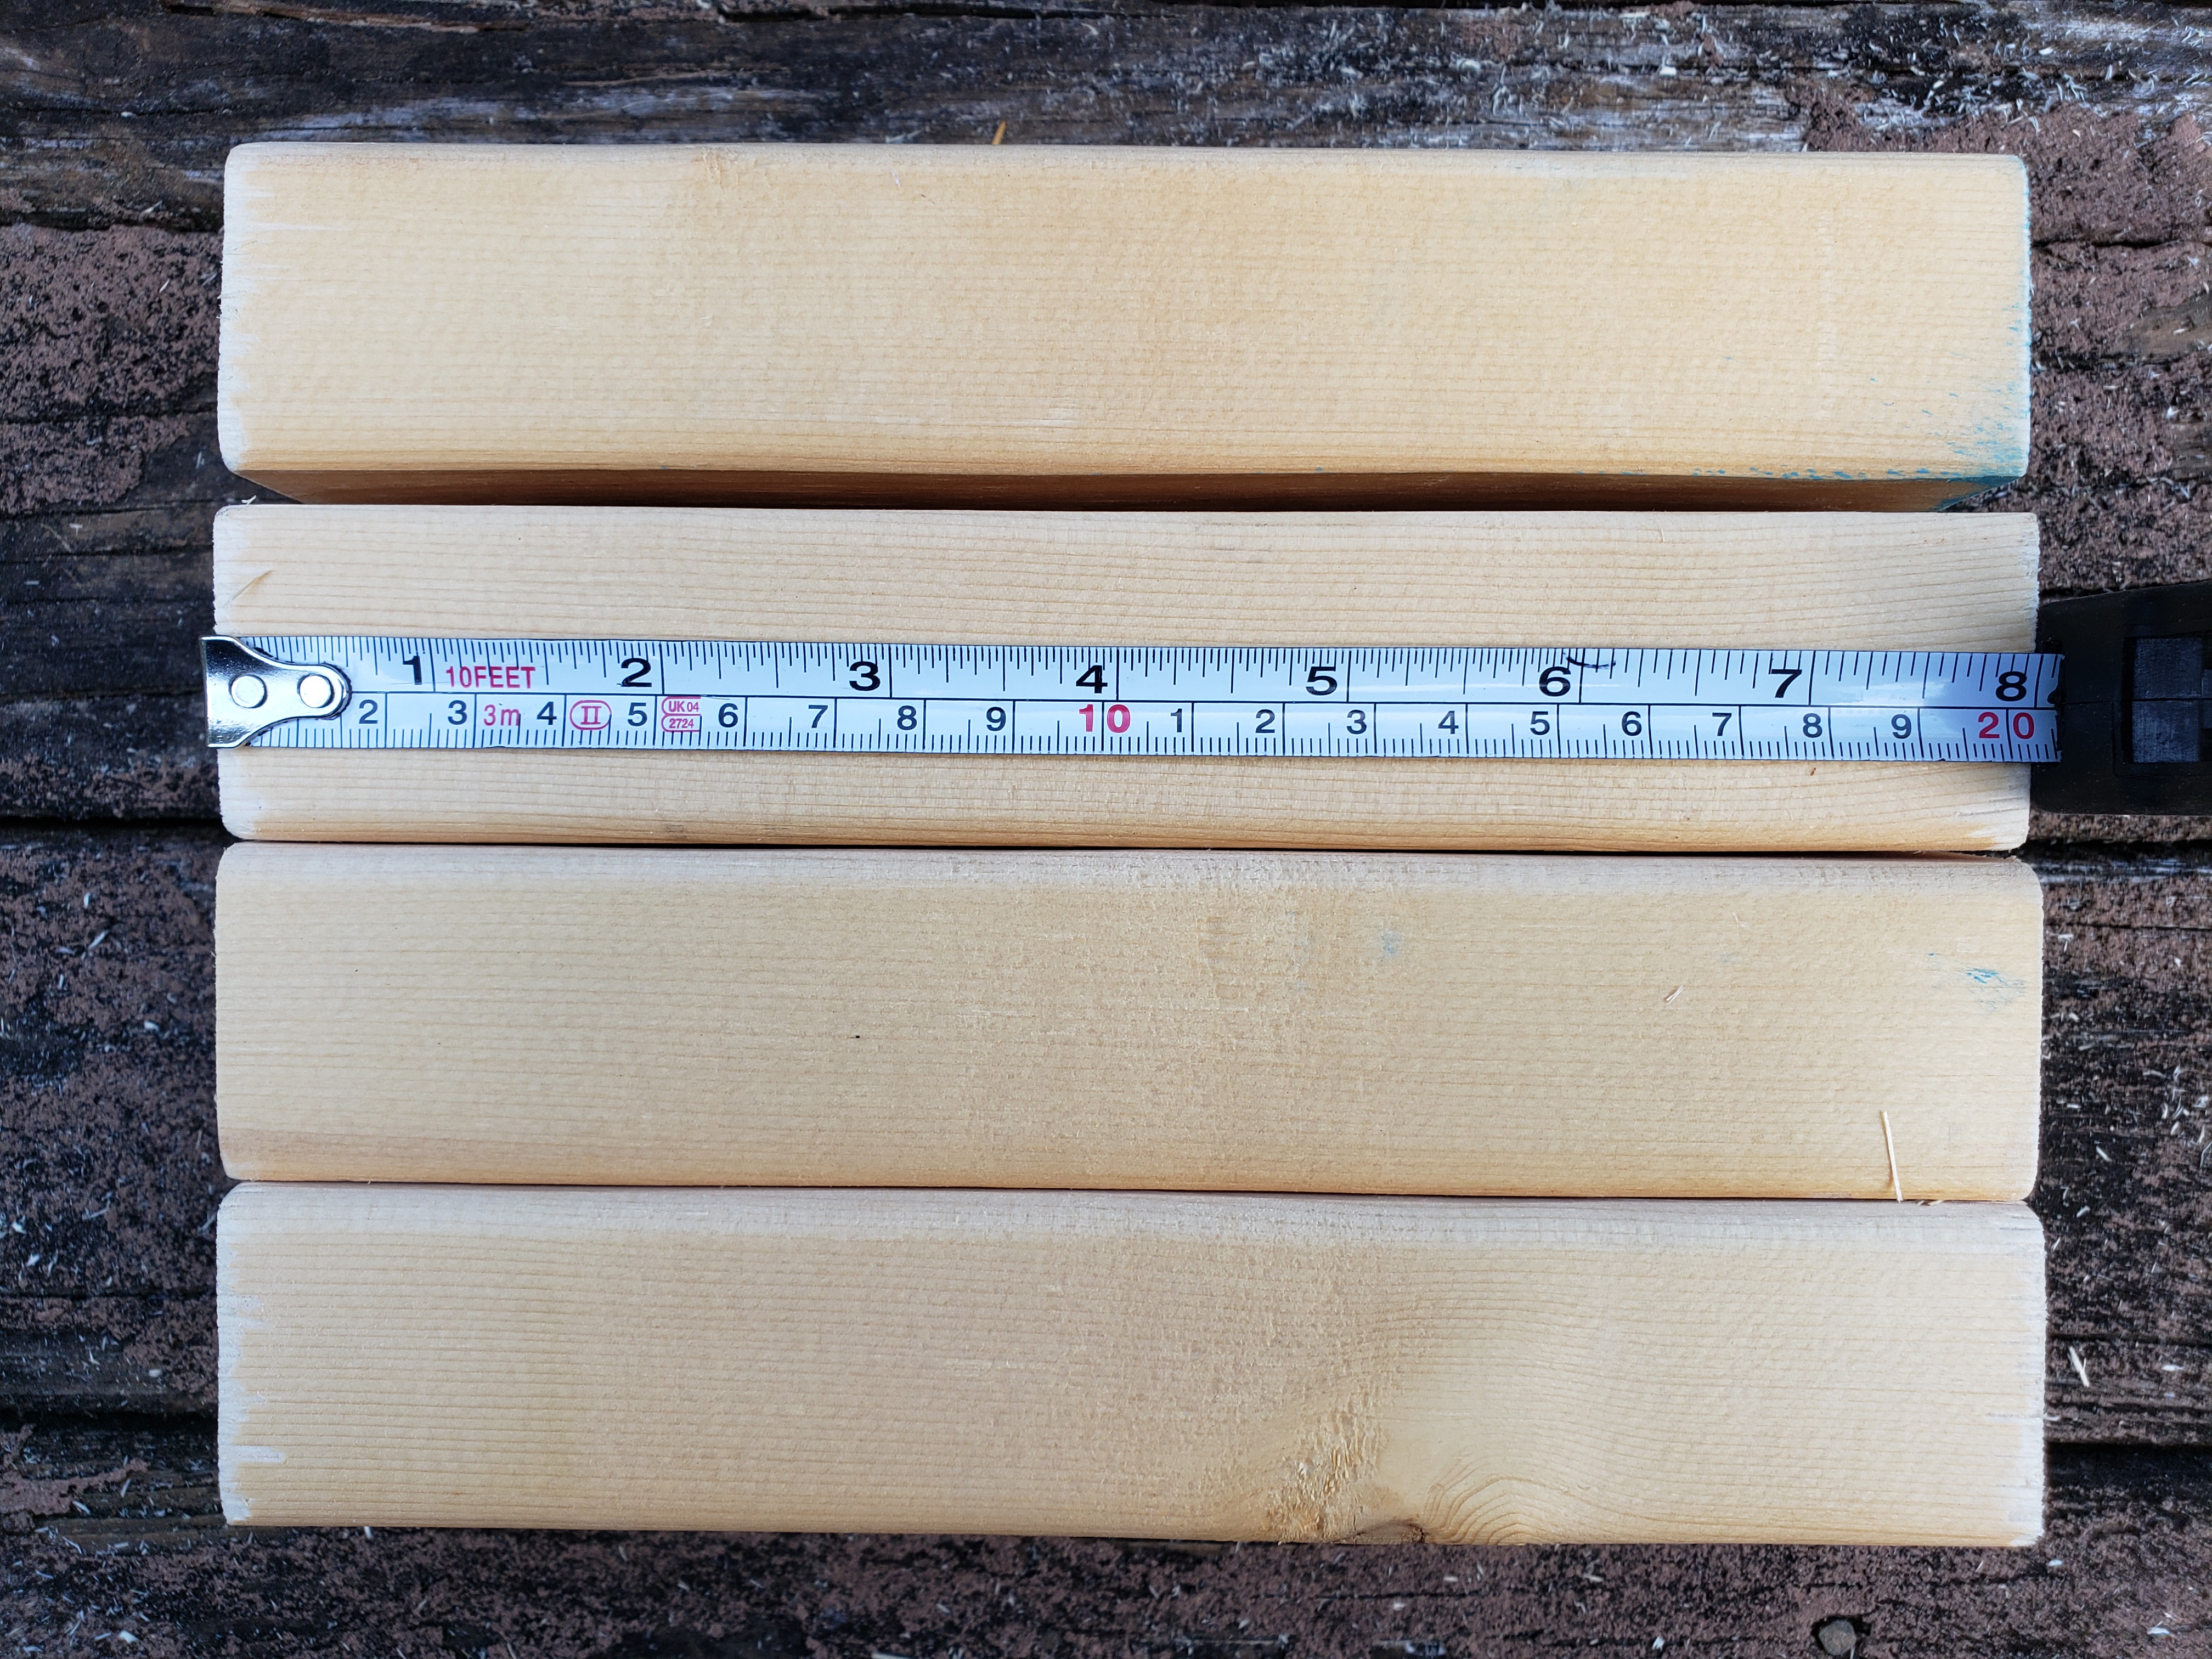
Cut the 2x4s to 4 pieces 15″ long:

and 4 pieces 8″ long:
Then cut the planks to desired length – this can be adjusted depending on the space you want to place the bench at. I wouldn’t recommend any less than 36″ to allow for 2 people to sit comfortably:


We need to make the “frames” for legs by combining the 2x4s as such:
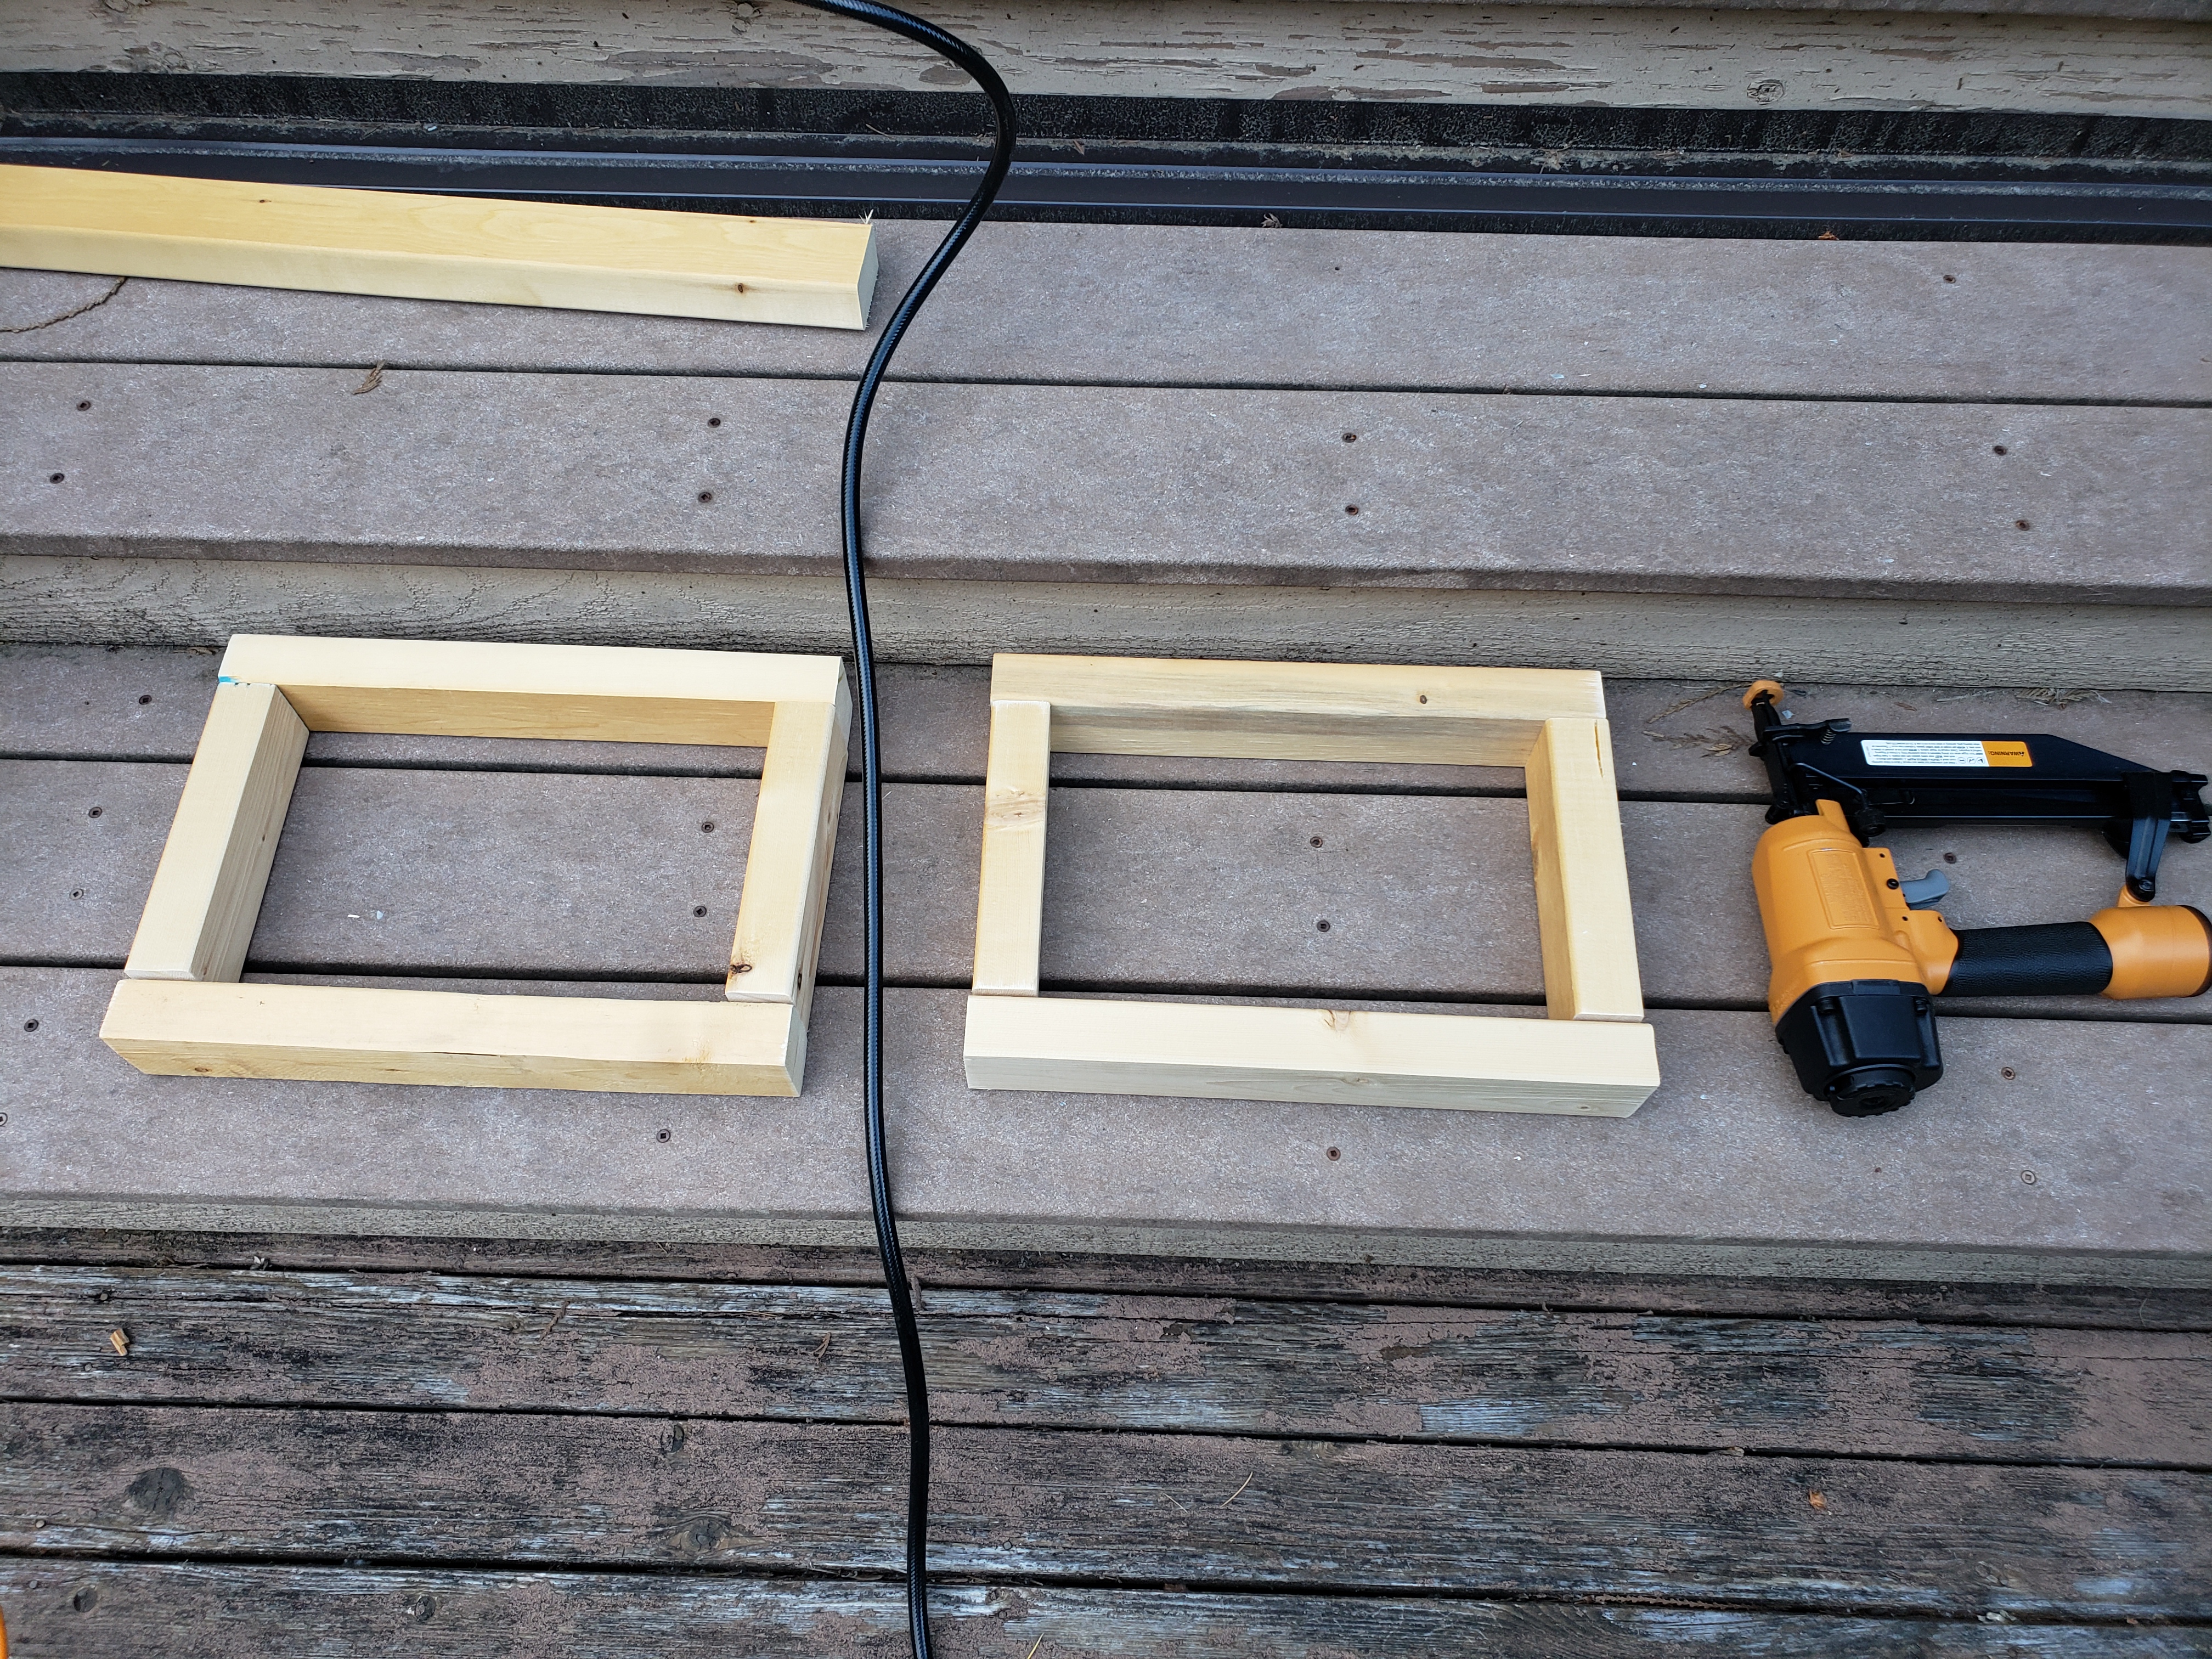
This is where pneumatic nailer helps speed things up, but we can just use wood screws instead. If doing so, I recommend predrilling the holes to avoid splitting the wood (and having 2 electric drills, one with a drill and one with Philips bit, makes the whole process a breeze).
Next, attach the legs to the planks, making sure the gap between planks is even:
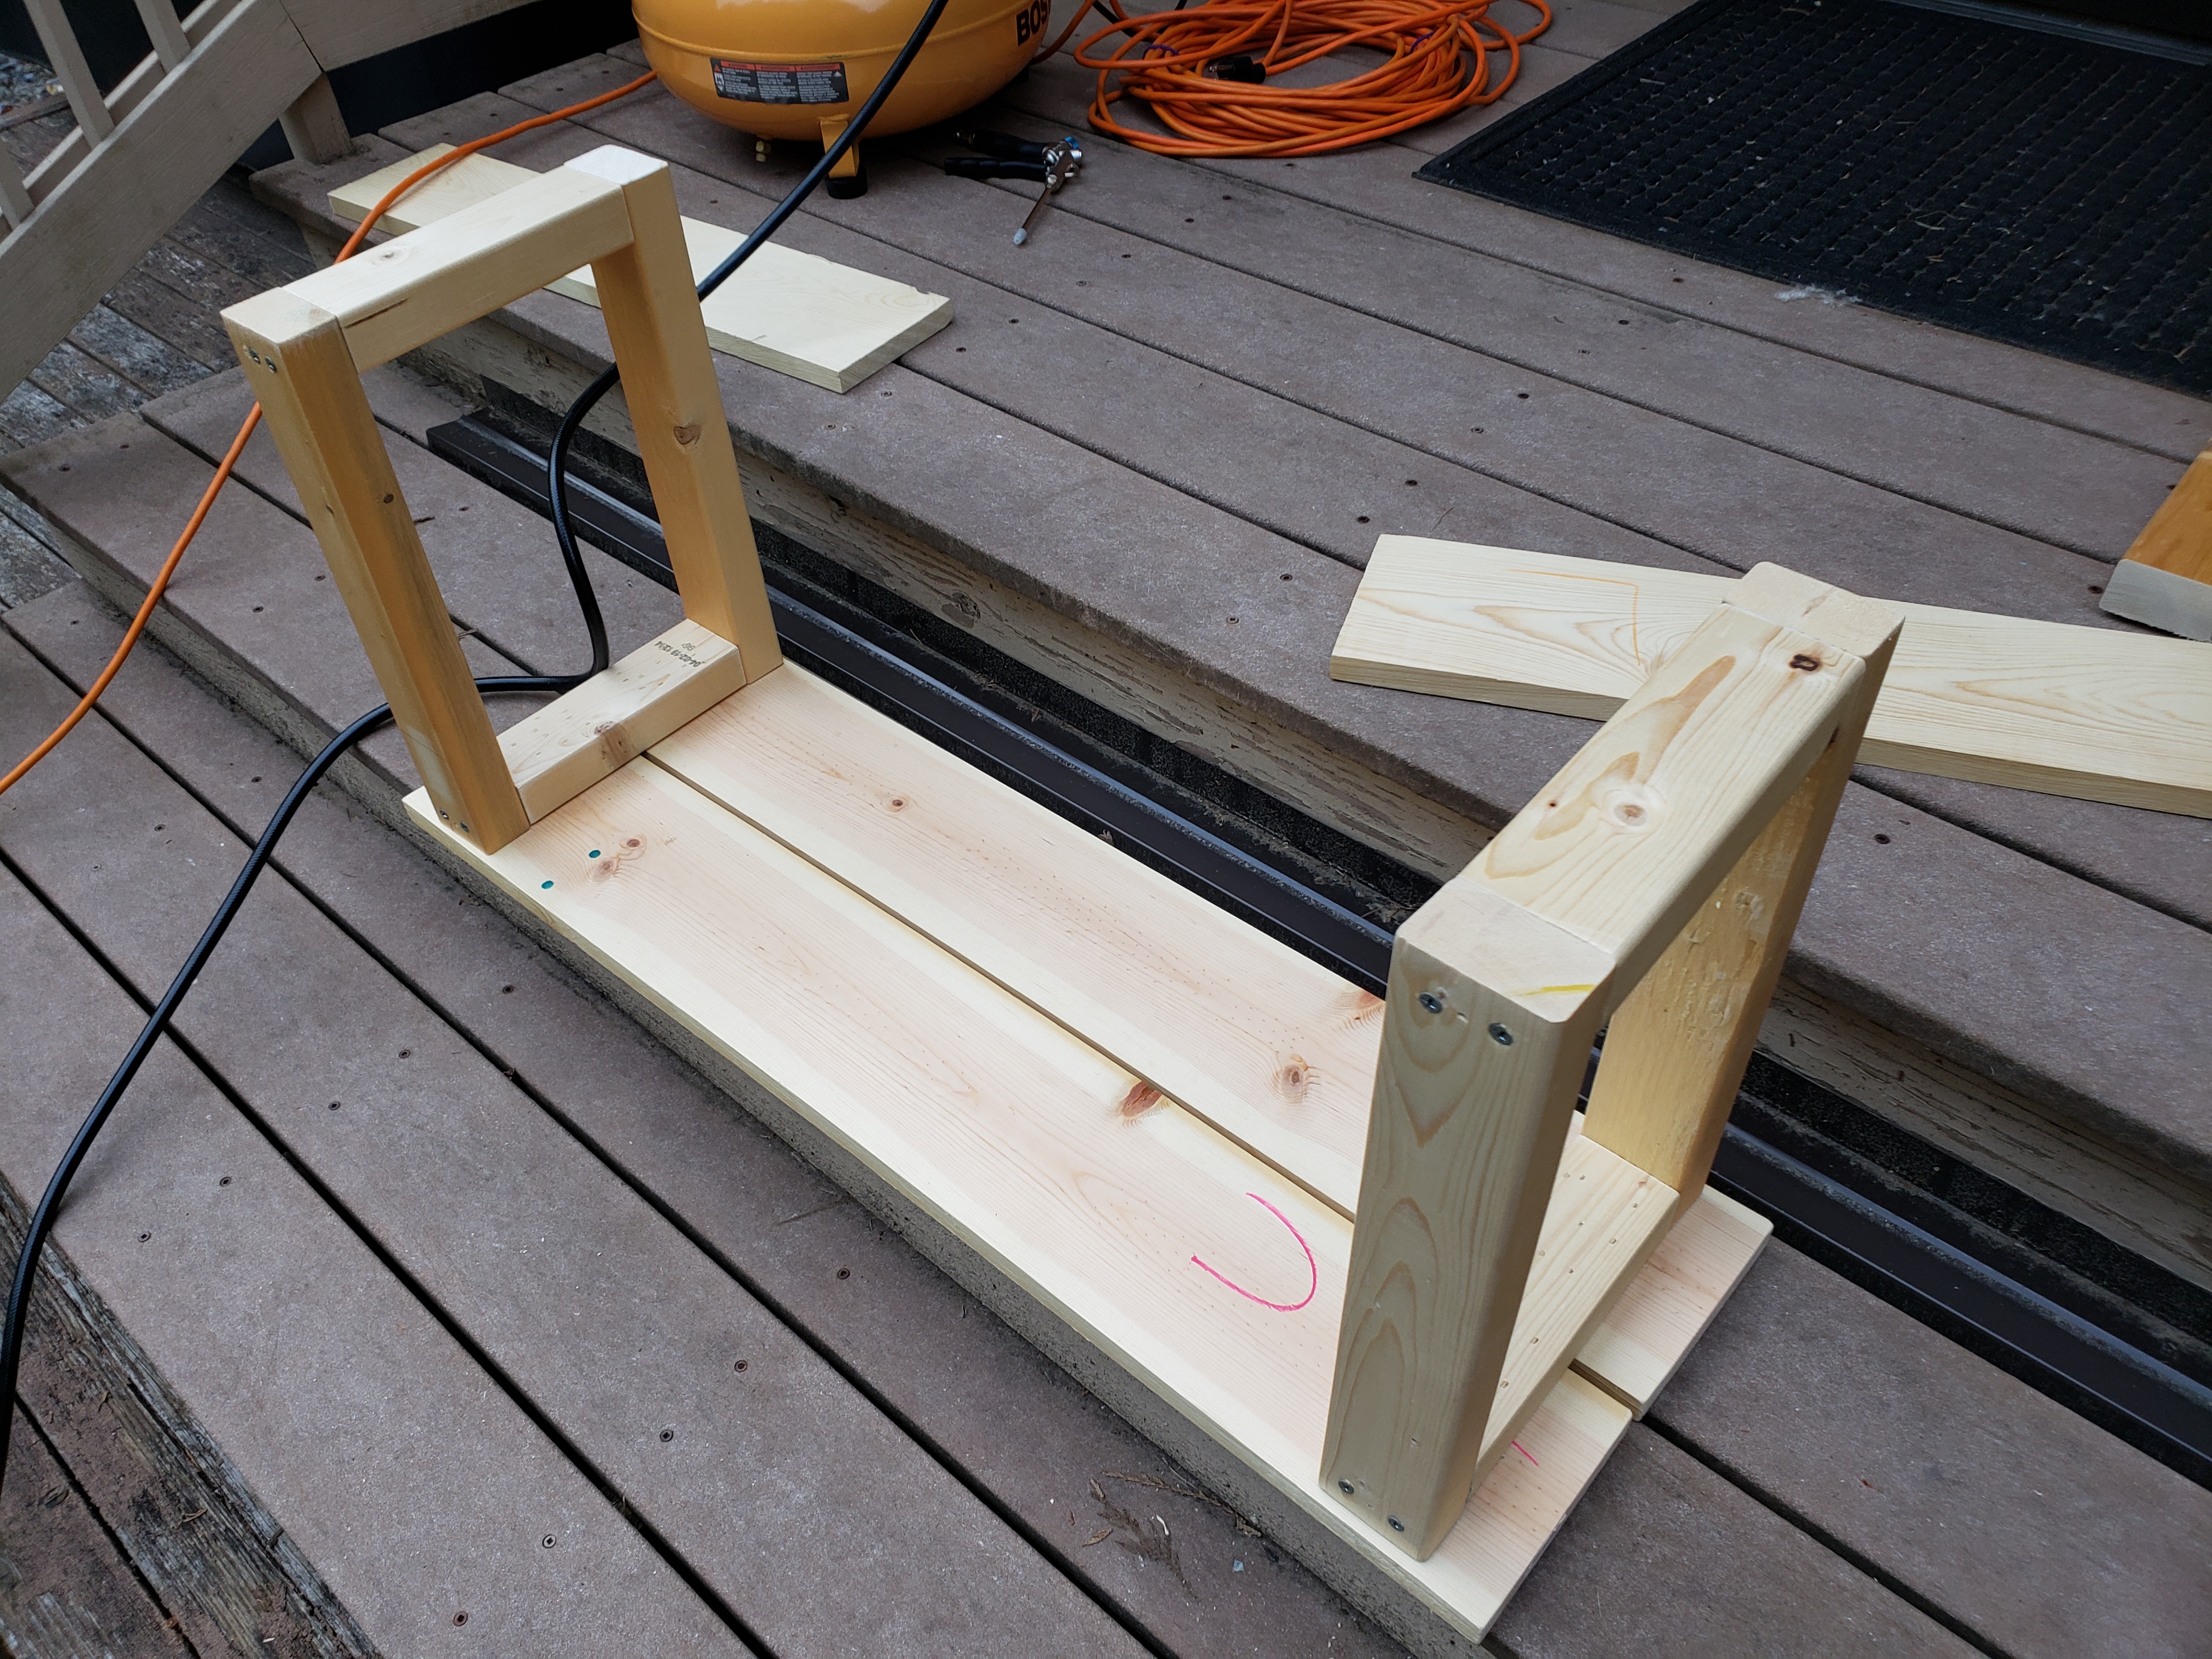
This is a good time to use bit more screws than you may originally think is needed, to ensure stability. And of course – make sure the screws are shorter than the thickness of two 2x4s stacked as we assemble them here. Since the real dimensions of a 2×4 are 1.5″ x 3.5″, make sure the screws you’re using are 2 1/2″ (getting closer to 3″ will pose risk of them coming out the other side, and that’s the side we sit on… 😉 ).
And just like that, we have a bench!
Before we call it done, let’s make it even prettier, and more resistant to elements, by applying the stain. I like to use a mix of stain and polyurethane, maybe with a gentle sanding after first coat to remove any raised grain and imperfections, for a total of 2 coats. Any more and the wood gets much darker.

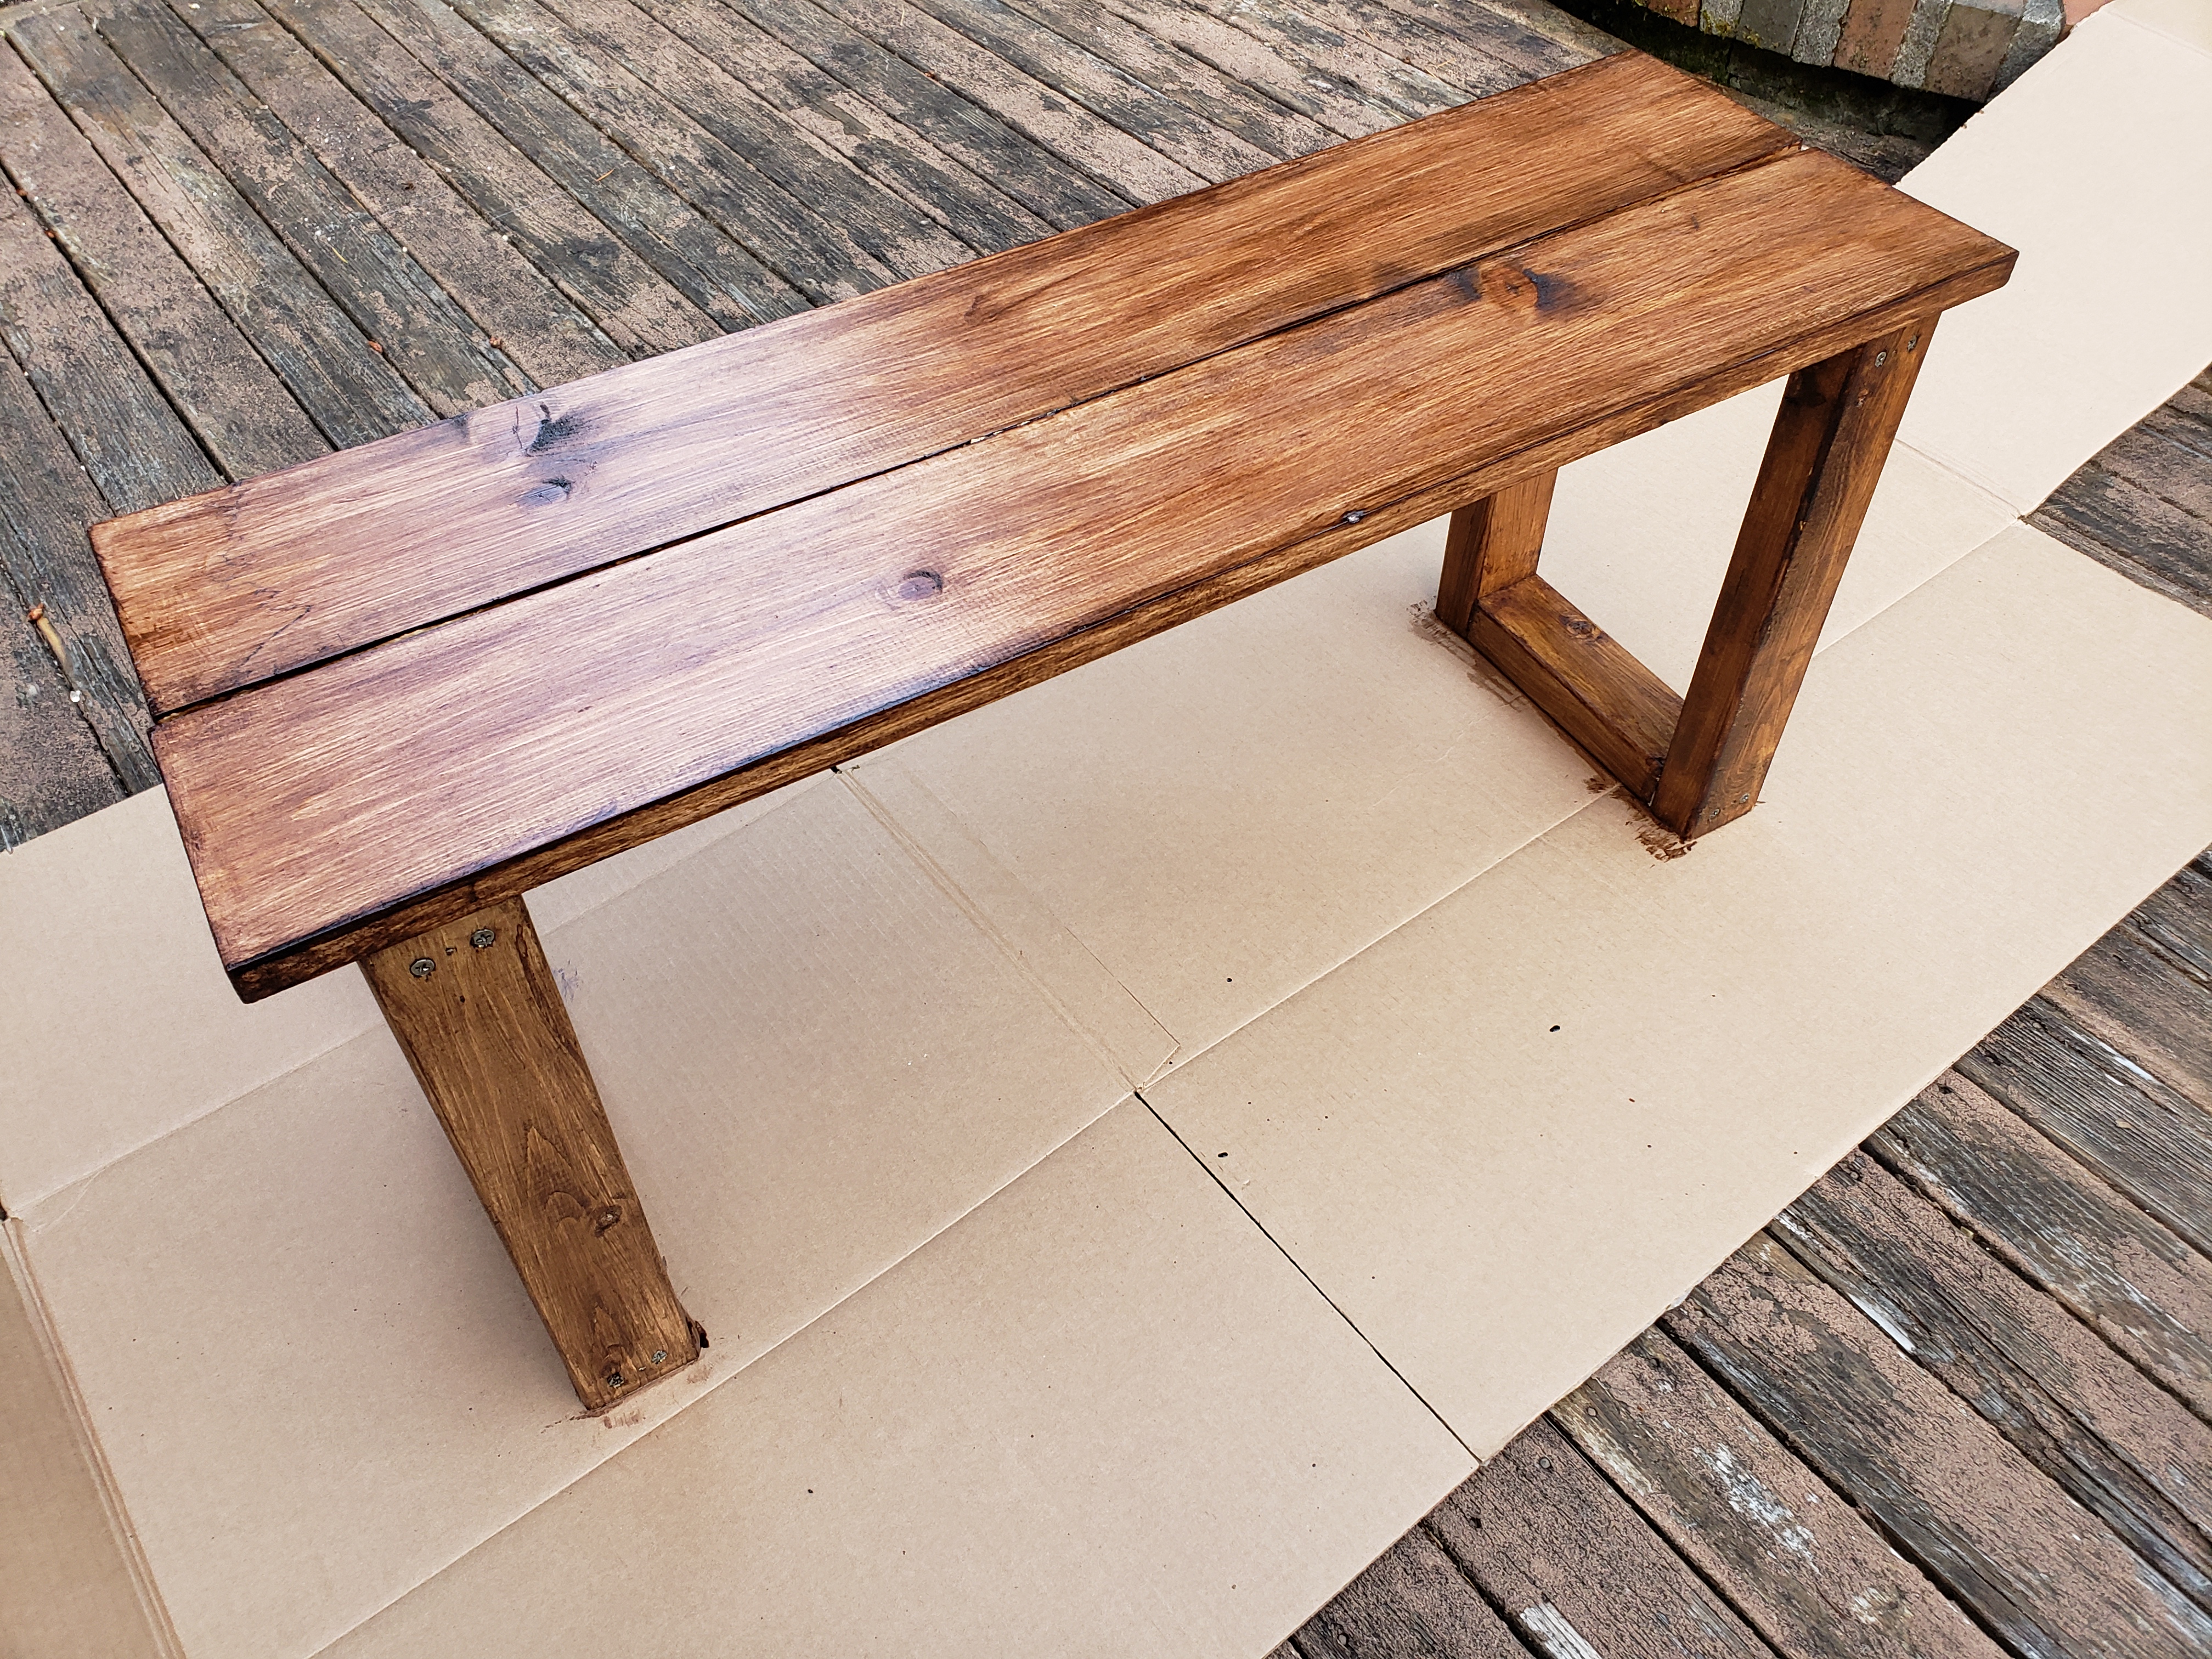
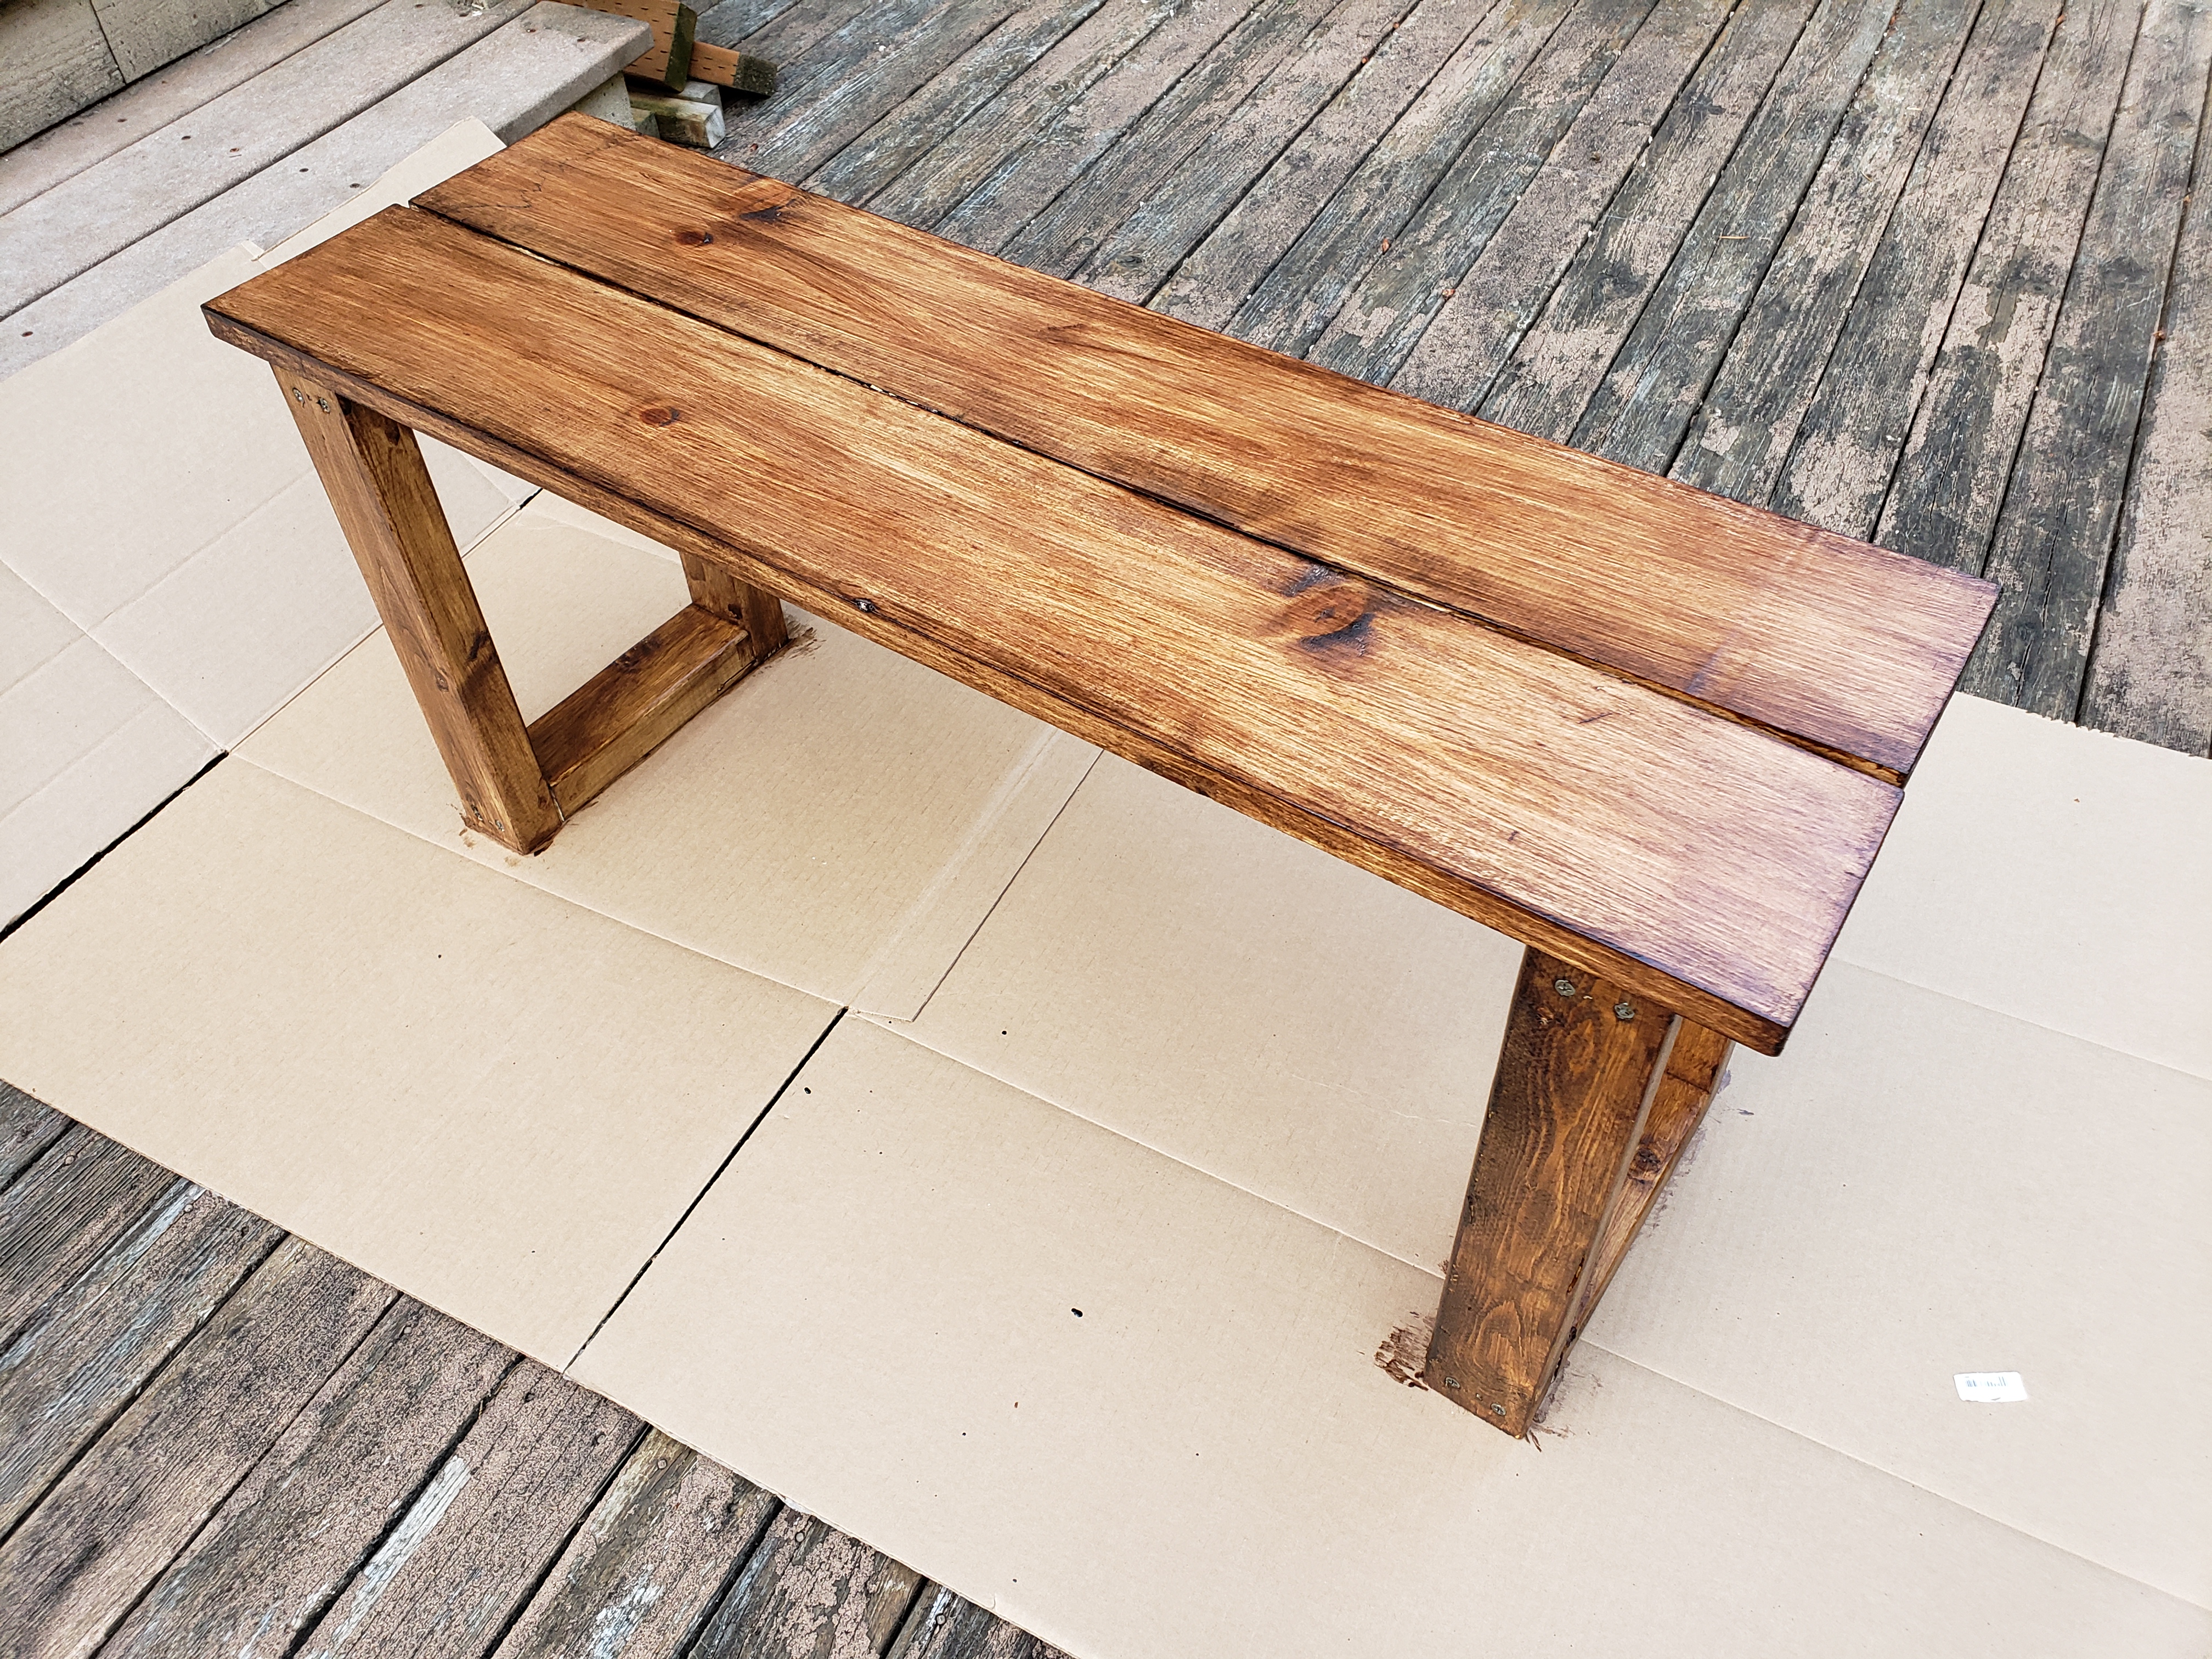
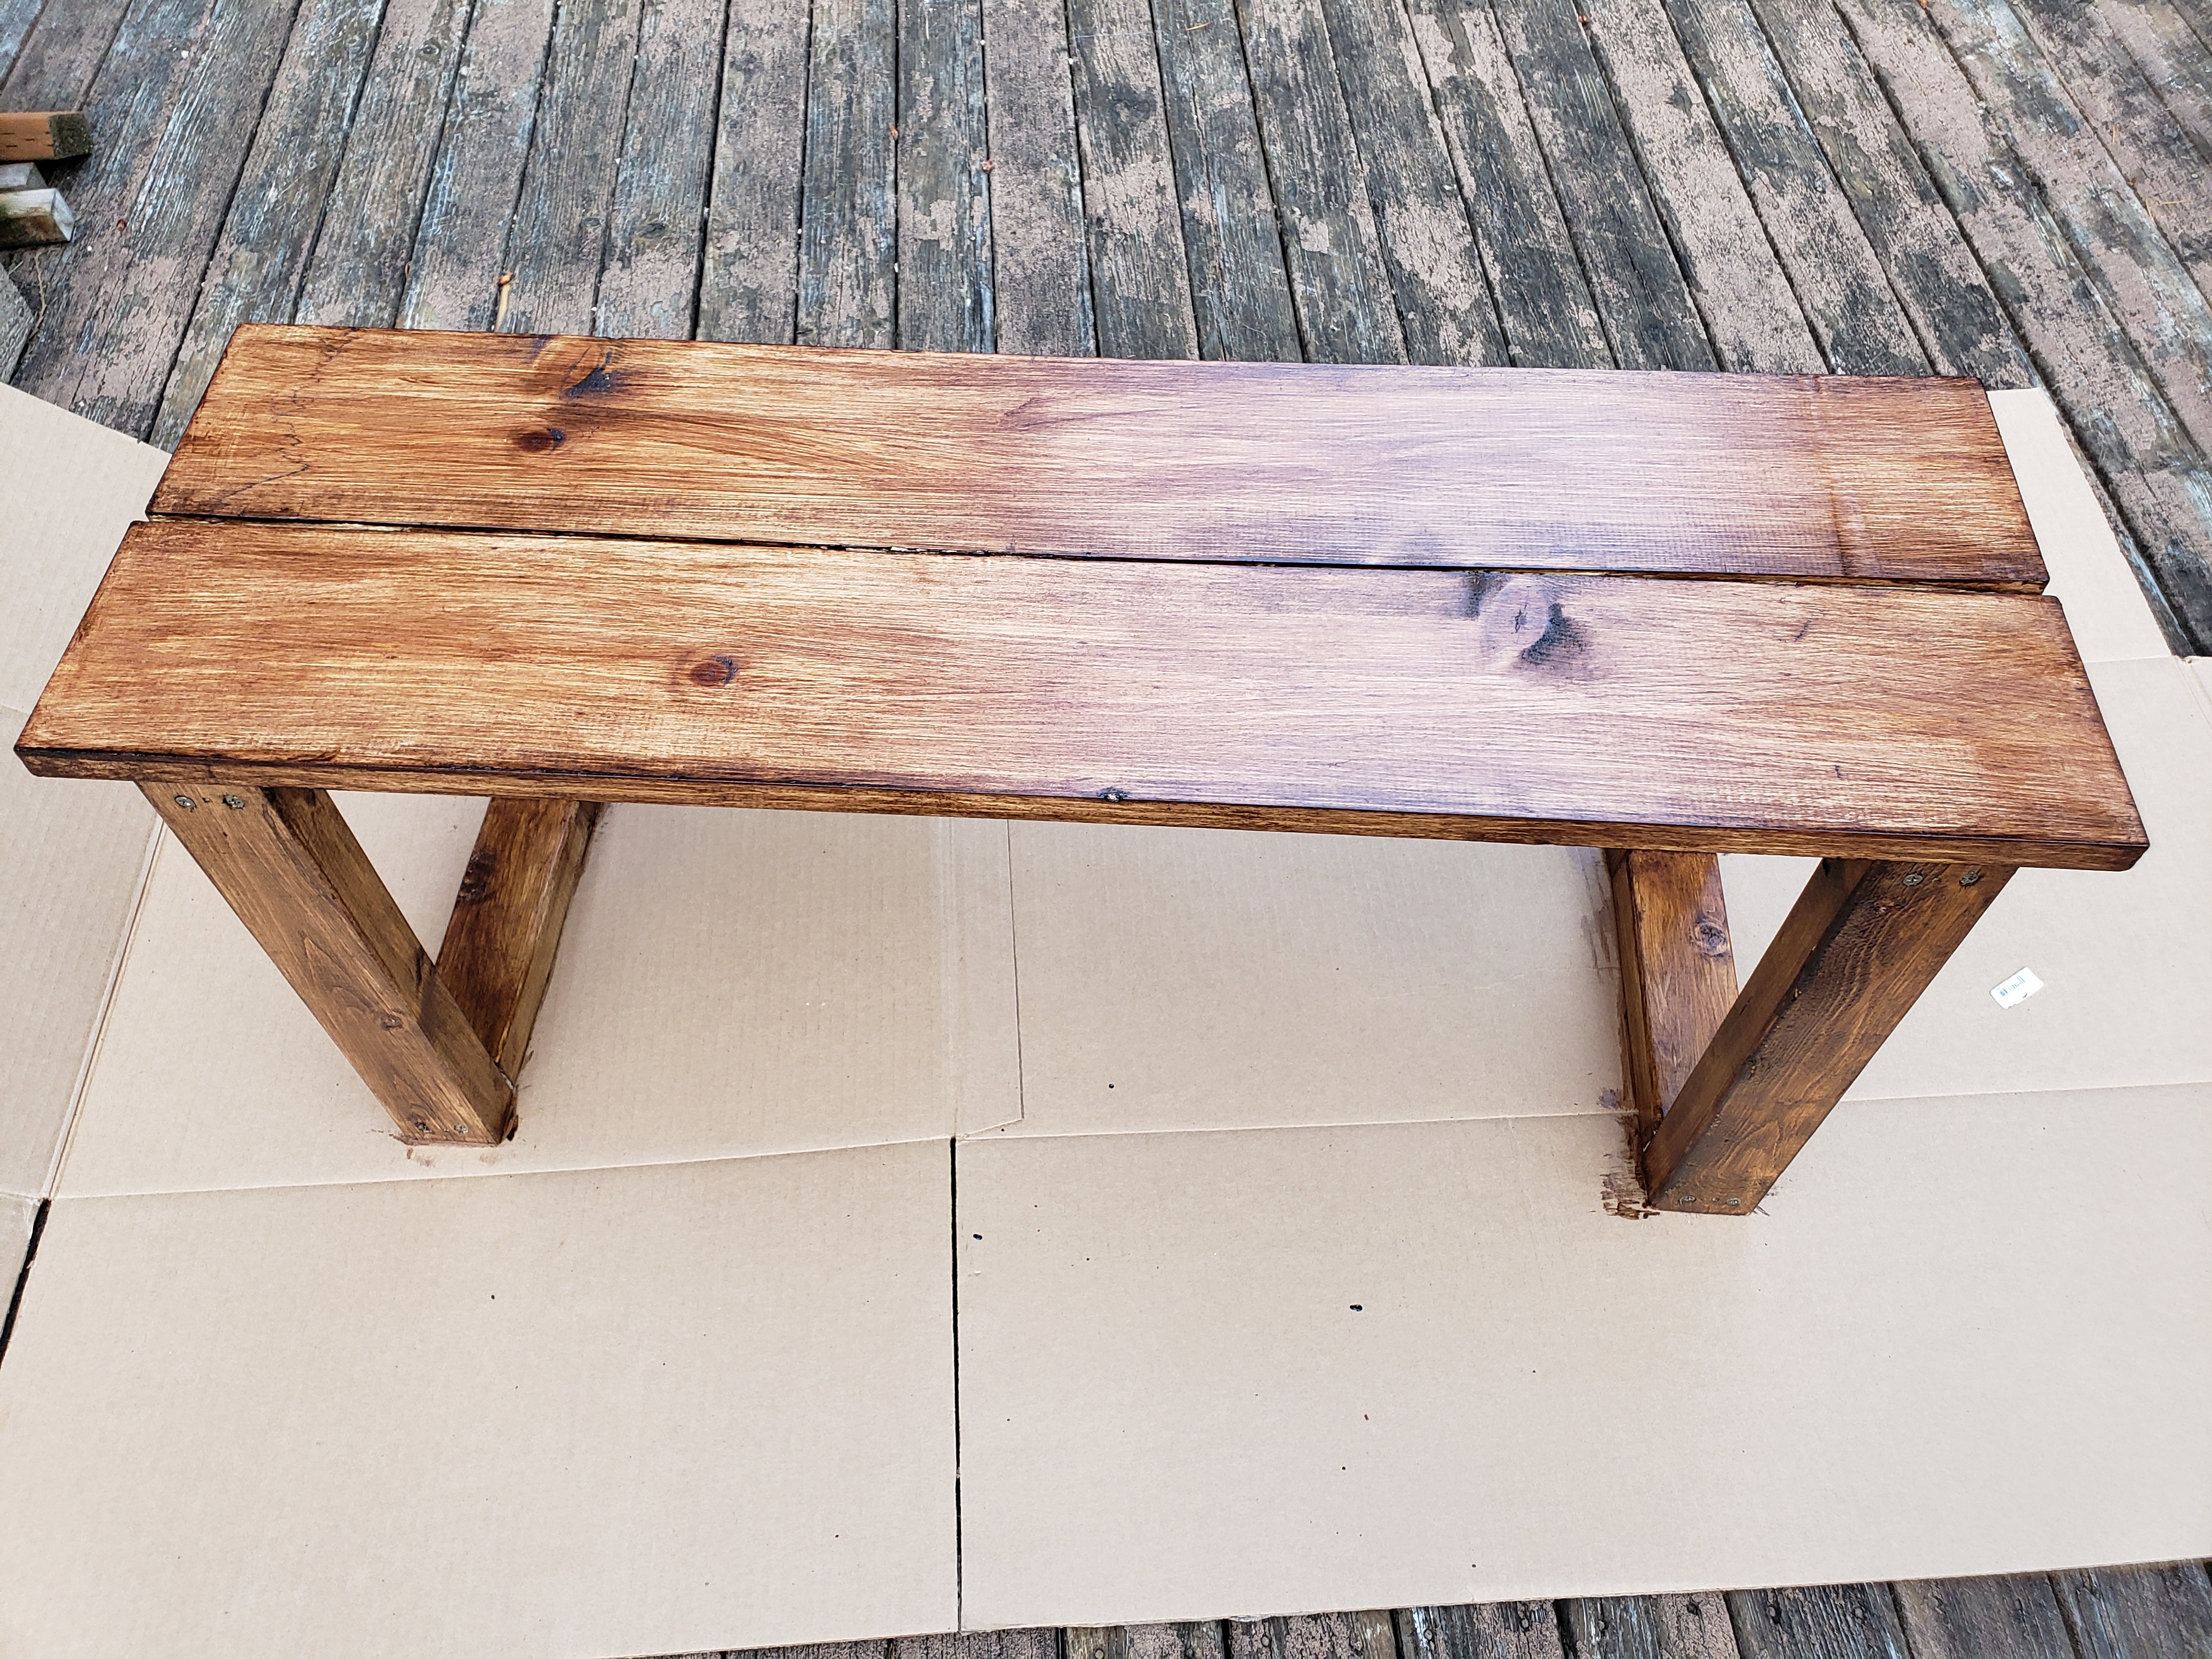
Let it dry and… Enjoy!
Just like that, we built a bench. Quick and fun project to do with family, and then enjoy it for years to come.
And here’s a YouTube video that inspired the build 🙂


Leave a Reply